Radiator Hose Replacement 2.2L, RWD Pickup
Removal Procedure
Caution: As long as there is pressure in the cooling system, the temperature can be considerably higher than the boiling temperature of the solution in the radiator without causing the solution to boil. Removal of the pressure cap while the engine is hot and pressure is high will cause the solution to boil instantaneously -- possibly with explosive force -- spewing the solution over the engine, fenders and the person removing the cap.
- Remove the coolant from the radiator so that the level is below the hoses being removed. Refer to Cooling System Draining and Filling .
- Remove the air inlet duct. Refer to Air Cleaner Inlet Duct Replacement in Engine Controls 2.2L.
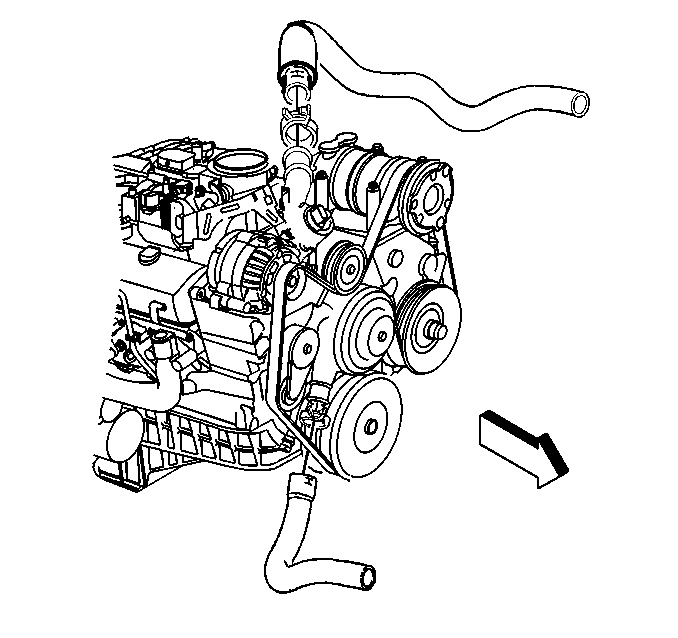
- Loosen the radiator hose clamps.
- Disconnect the radiator hoses from the radiator.
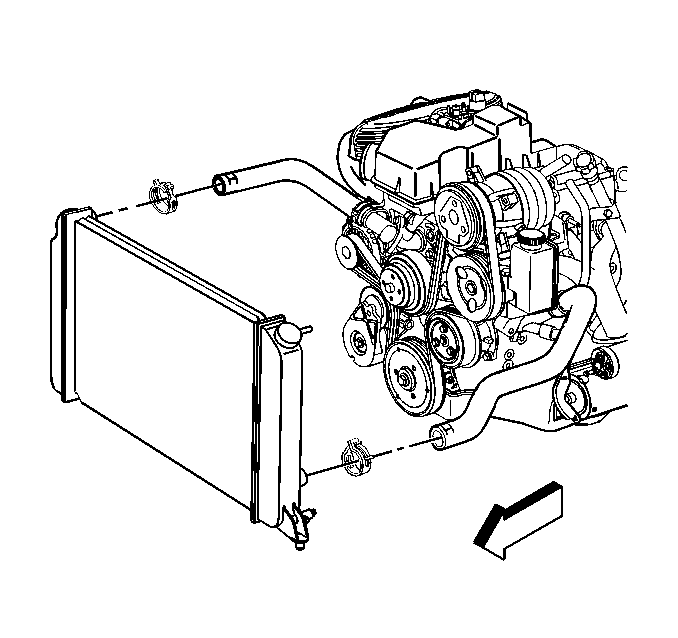
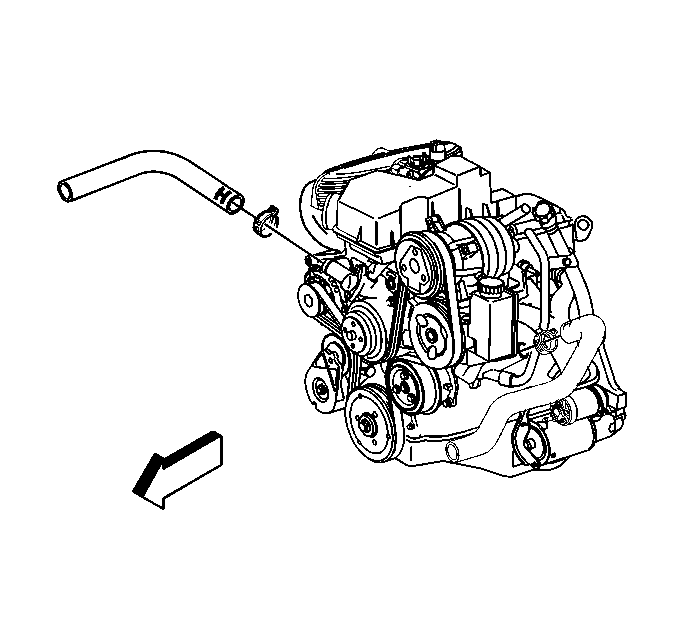
- Disconnect the upper radiator inlet hose from the coolant outlet.
- Disconnect the lower radiator outlet hose from water pump.
Installation Procedure
- Place the radiator hose clamps loosely, on the ends of the hoses.
- Connect the radiator hoses to the radiator.
- Connect the radiator outlet hose to the water pump.
- If service type radiator hose clamps are used:
- Refill the cooling system to the proper level. Refer to Cooling System Draining and Filling .
- Install the air inlet duct. Refer to Air Cleaner Inlet Duct Replacement in Engine Controls-2.2L.
- Inspect the cooling system for leaks. Refer to Cooling System Leak Testing .
Important: The 2.2L engine uses a spring-type (constant tension) clamp at the radiator hose connections. Install hoses on dry, unpainted surfaces in order to ensure proper sealing.
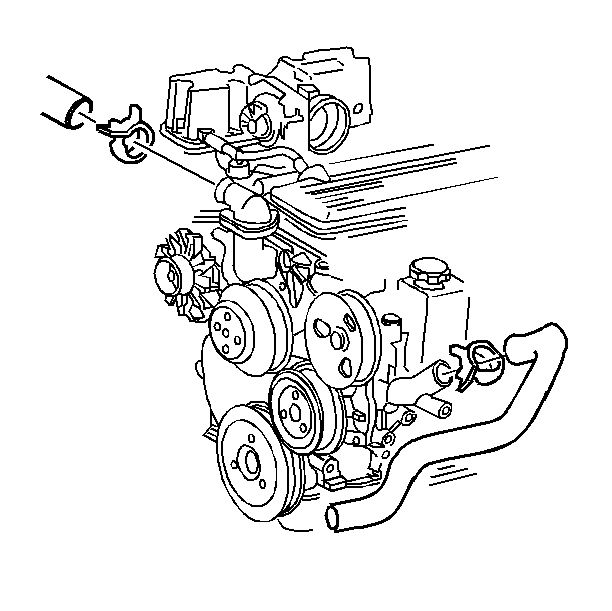
Connect the radiator inlet hose to the coolant outlet.
Notice: Use the correct fastener in the correct location. Replacement fasteners must be the correct part number for that application. Fasteners requiring replacement or fasteners requiring the use of thread locking compound or sealant are identified in the service procedure. Do not use paints, lubricants, or corrosion inhibitors on fasteners or fastener joint surfaces unless specified. These coatings affect fastener torque and joint clamping force and may damage the fastener. Use the correct tightening sequence and specifications when installing fasteners in order to avoid damage to parts and systems.
Tighten
Tighten the radiator hose clamps to 2.5 N·m (22 lb in).
Radiator Hose Replacement 4.3L
Removal Procedure
- Remove the coolant from the radiator until the level is below the hoses being removed. Refer to Cooling System Draining and Filling .
- Remove the radiator hose clamps.
- Remove the air inlet duct.
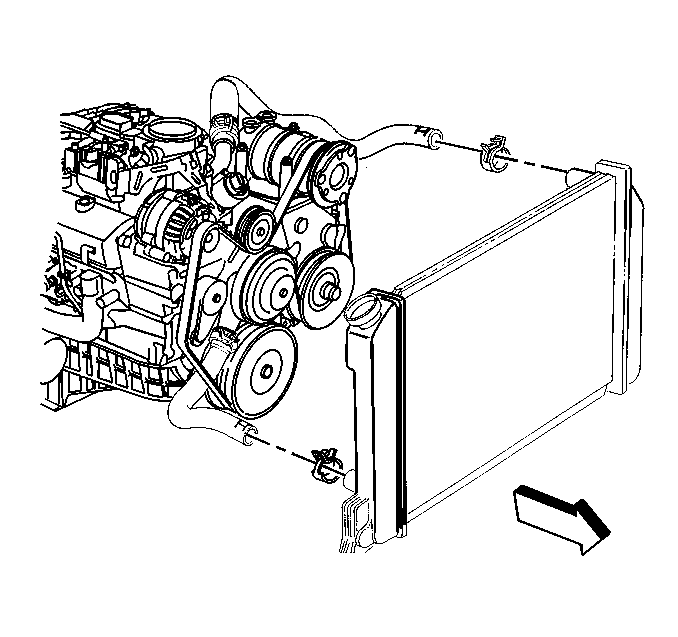
- Disconnect the radiator hoses from the radiator.
- Disconnect the upper radiator inlet hose from the coolant outlet.
- Disconnect the lower radiator outlet hose from the water pump.
Caution: As long as there is pressure in the cooling system, the temperature can be considerably higher than the boiling temperature of the solution in the radiator without causing the solution to boil. Removal of the pressure cap while the engine is hot and pressure is high will cause the solution to boil instantaneously -- possibly with explosive force -- spewing the solution over the engine, fenders and the person removing the cap.
Installation Procedure
- Place the hose clamps loosely on the ends of the hoses.
- Connect the hoses to the radiator.
- Connect the lower radiator outlet hose to the water pump.
- Connect the upper radiator inlet hose to the coolant outlet.
- Tighten the service type radiator hose clamps, if used.
- Refill the system with coolant to the proper level. Refer to Cooling System Draining and Filling .
- Inspect the cooling system for leaks. Refer to Cooling System Leak Testing .
Important: The 4.3L uses a spring-type (constant tension) clamp at the radiator hose connections. Install the hoses on dry, unpainted surfaces for proper sealing.
Position the upper radiator hose around the generator (as shown).
Notice: Use the correct fastener in the correct location. Replacement fasteners must be the correct part number for that application. Fasteners requiring replacement or fasteners requiring the use of thread locking compound or sealant are identified in the service procedure. Do not use paints, lubricants, or corrosion inhibitors on fasteners or fastener joint surfaces unless specified. These coatings affect fastener torque and joint clamping force and may damage the fastener. Use the correct tightening sequence and specifications when installing fasteners in order to avoid damage to parts and systems.
Tighten
Tighten the radiator hose clamps to 3.0 N·m (22 lb in).
