Removal Procedure
- Use the following procedure
in order to determine the location of the mirror support:
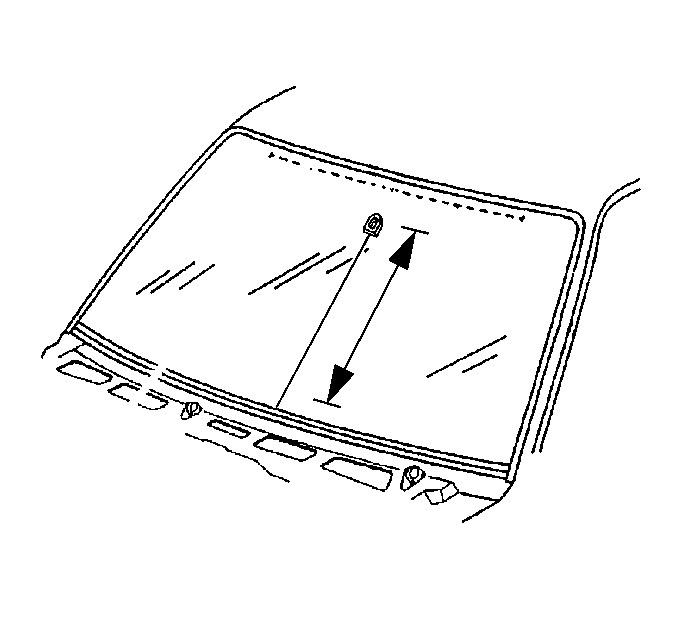
| 1.1. | Draw a centerline on the outside of the glass from the roof panel
to the windshield base with a wax pencil. |
| 1.2. | Draw a line intersecting the centerline 53.4 cm (21 in)
from the top of the bottom black-out strip of the glass. Locate the base of
the support at the intersection of these lines. |
| 1.3. | Use a razor blade in order to remove old adhesive from the windshield
and the support. |
- Use the following procedure in order to clean the inside glass
surface within 75 mm (3 in) of the intersecting lines:
| 2.1. | Rub the area with a paper towel and glass cleaning solution until
the glass is completely clean and dry. |
| 2.2. | Remove all the traces of the cleaning solution from the glass
with an alcohol saturated paper towel. |
Installation Procedure
- Sand the bonding surface
of the rear view mirror support with 320 or 360 fine grit emery cloth
or sandpaper. If the you reuse the original rear view mirror support, remove
all traces of the factory installed adhesive.
- Wipe the sanded mirror support with a clean alcohol saturated
paper towel. Allow the alcohol to dry.
- Apply Loctite Minute-Bond Adhesive 312 or the equivalent
to the mirror support. Follow the manufacturer's instructions.
- Position the bottom of the support at the marked line. The rounded
edge of the support should face upward.
- Press the support against the glass for 30-60 seconds with
a steady pressure. Allow the adhesive 5 minutes to dry before cleaning.
- Clean the excess adhesive from around the mirror support using
an alcohol moistened paper towel.
- Clean the wax marks from the windshield using an alcohol moistened
paper towel.
