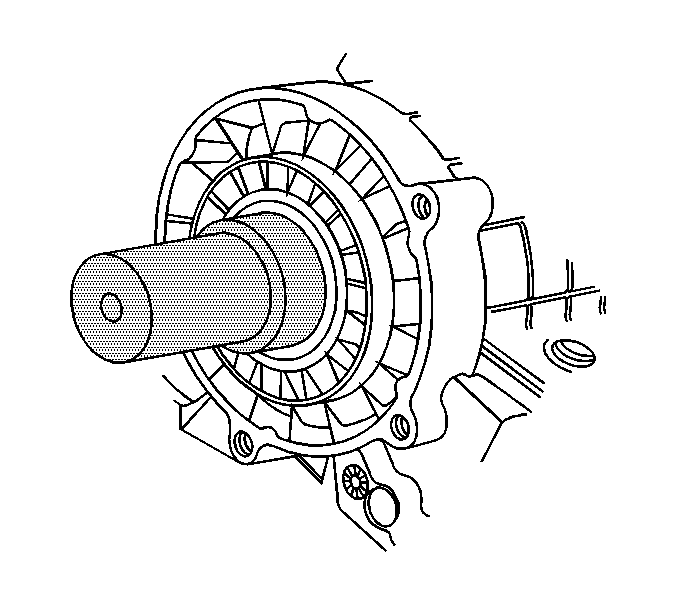
Tools Required
| • | J 3289-20 Holding Fixture |
| • | J 8092 Universal Handle |
| • | J 22873 Mainshaft Bushing Installer |
| • | J 36370 Drive Sprocket Needle Bearing Installer |
| • | J 36850 Transjel Lubricant |
| • | J 37668-A Seal Installer |
| • | J 42737 Sector Bearing Installer |
| • | J 42738 Seal Installer |
| • | J 43484 Seal Installer |
| • | J 44636-1 Front Output Shaft Seal Protector |
| • | J 44636-2 Front Output Shaft Seal Installer |
| • | J 45380 Transfer Case Rear Bushing Remover and Installer |
| • | J 45383 Input Gear Pilot Bearing Installer |
| • | J 45759 Assembly Fixture |
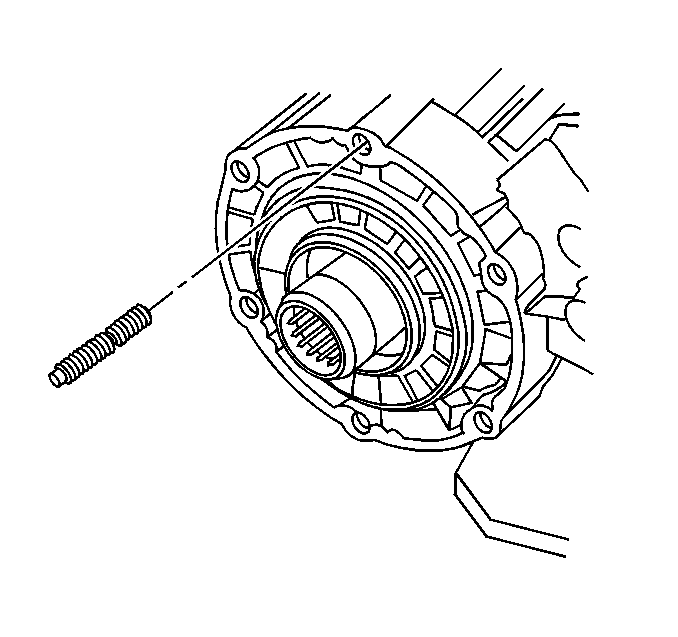
- If removed, install the transfer case mounting studs to the height of 29.5 mm-30.5 mm (1.16-1.20 in).
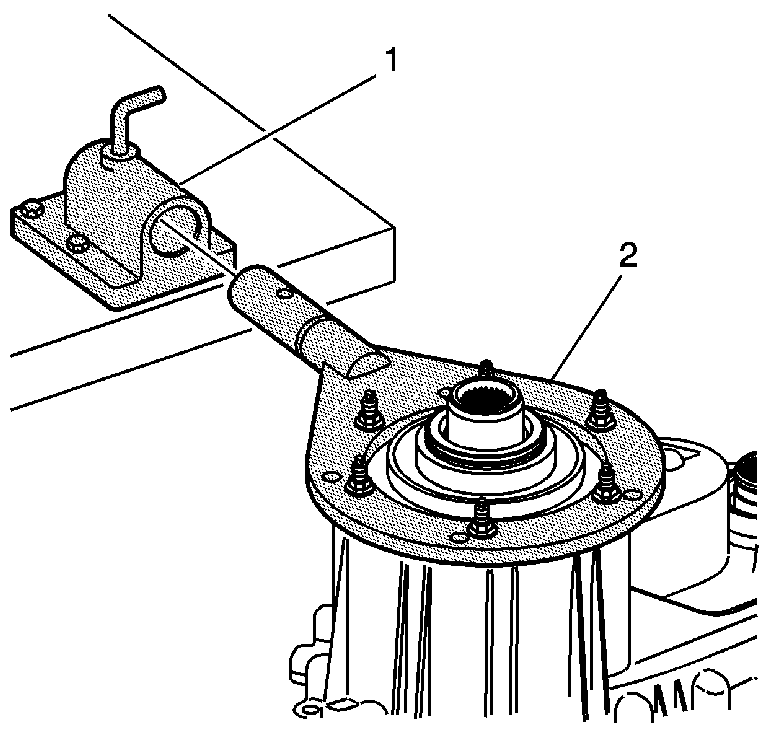
- Attach the J 45759 to the front transfer case using the adapter studs. All of the assembly procedures can be performed with the case mounted to the J 45759 .
- Install the J 45759 (2) into the J 3289-20 (1) and secure with the pivot pin.
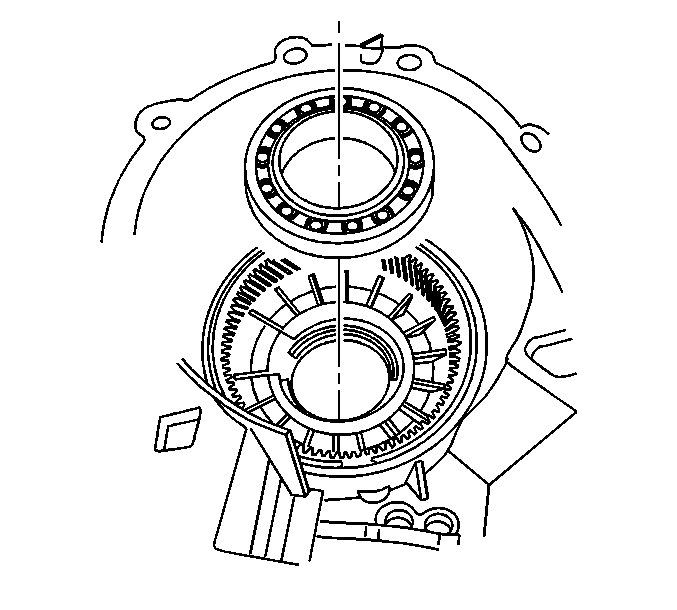
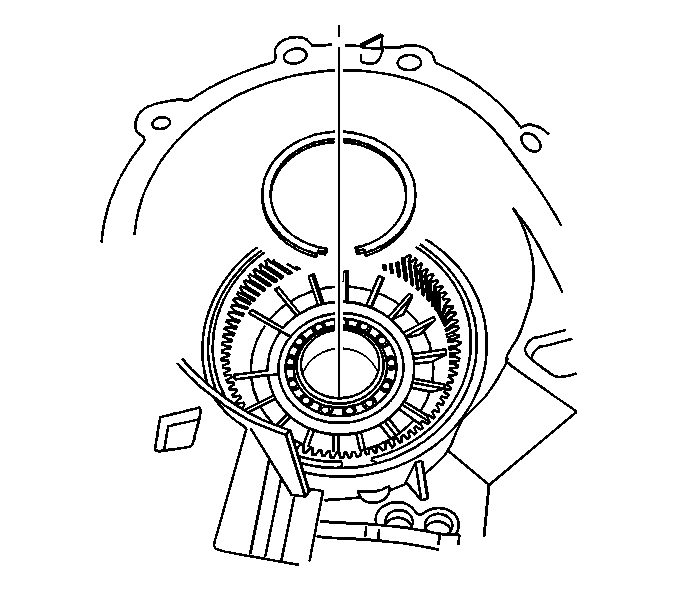
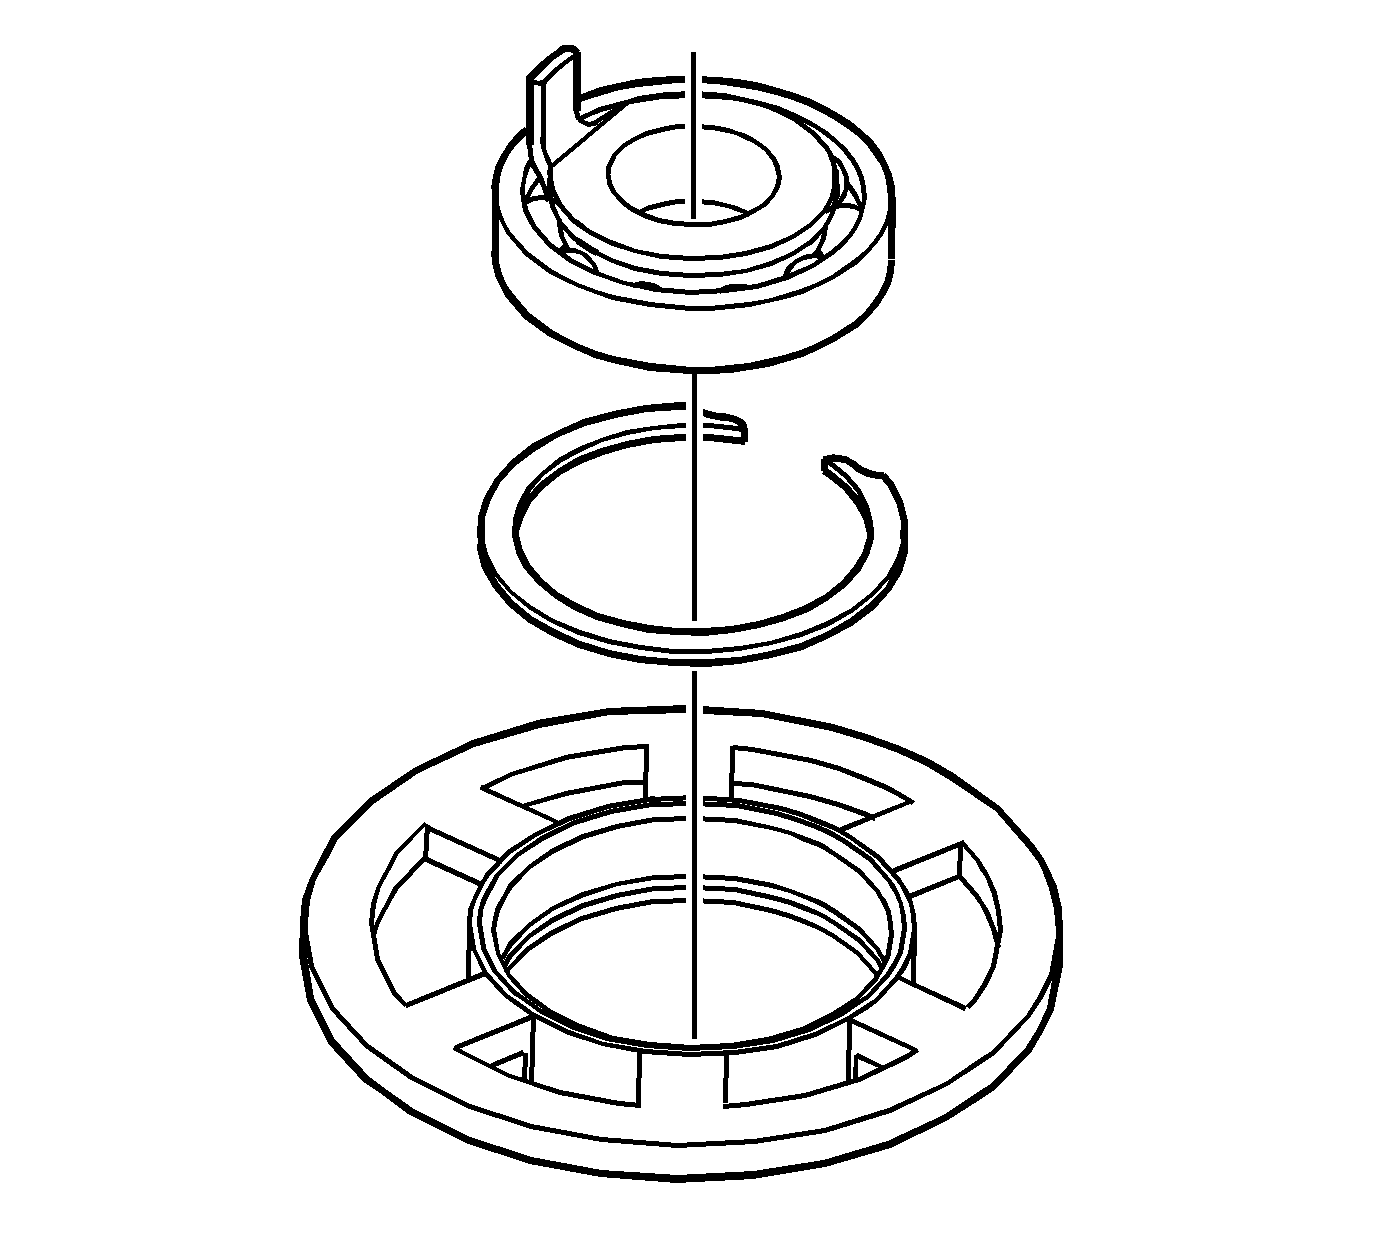
- Install the input bearing. The cage side of the bearing faces to the case front.
- Install the input bearing retaining ring.
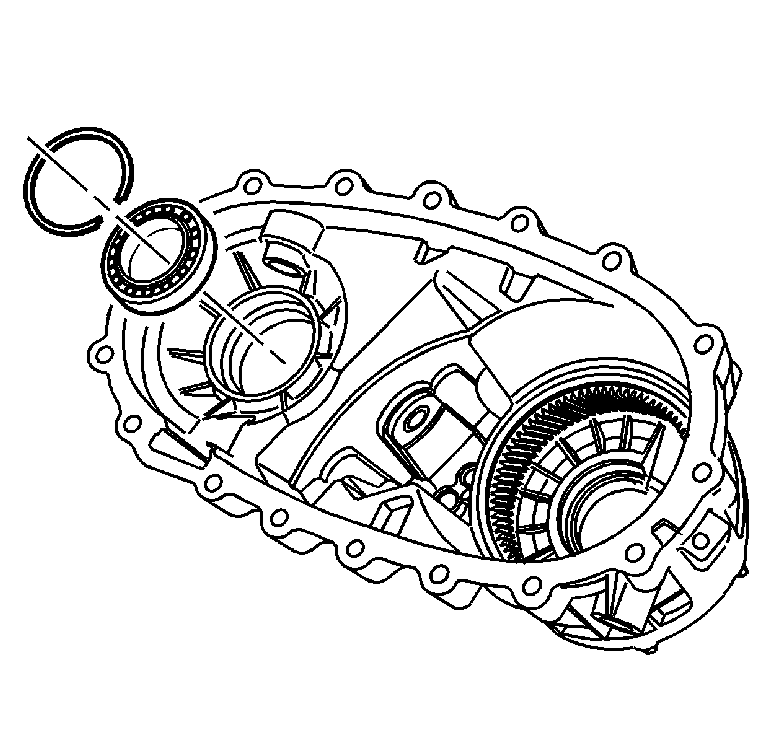
- Install the front output shaft front bearing. The cage side of the bearing faces to the front of the case.
- Install the front output shaft front bearing retaining ring.
- Using the J 8092 (1) and the J 36370 (2), install the front output shaft rear bearing.
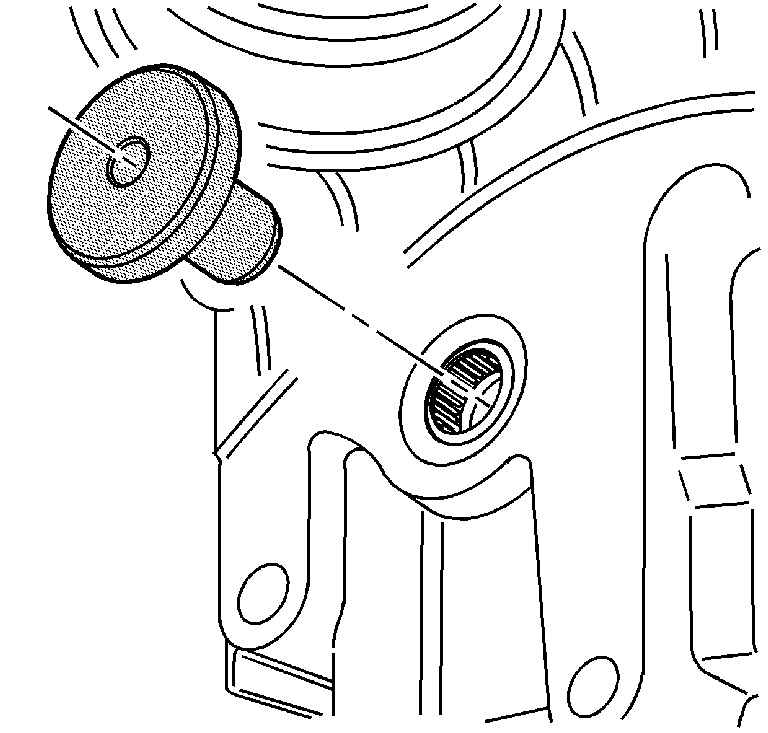
- Using the J 42737 , install the control actuator lever shaft bearing.
- Lubricate the control actuator lever shaft bearing.
- Install the control actuator lever shaft.
- Install the NEW retaining ring for the control actuator lever shaft. Ensure the retaining ring is fully seated.
- For the NVG 246, if it is a new shaft, or if the cup plug was removed, install the cup plug in the front output shaft using a suitable driver.
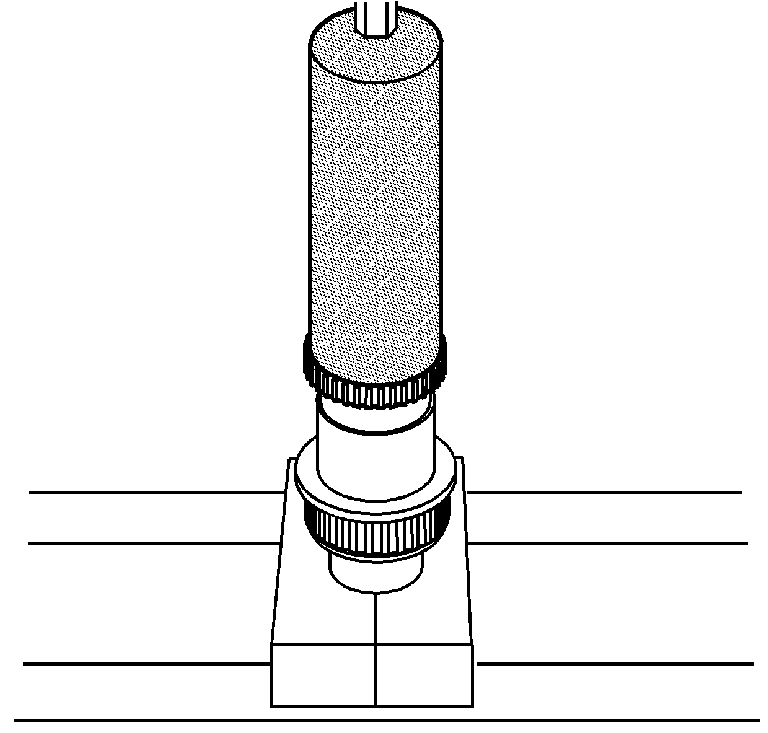
- Using the J 22873 and a hydraulic press, install the tone wheel on the front output shaft.
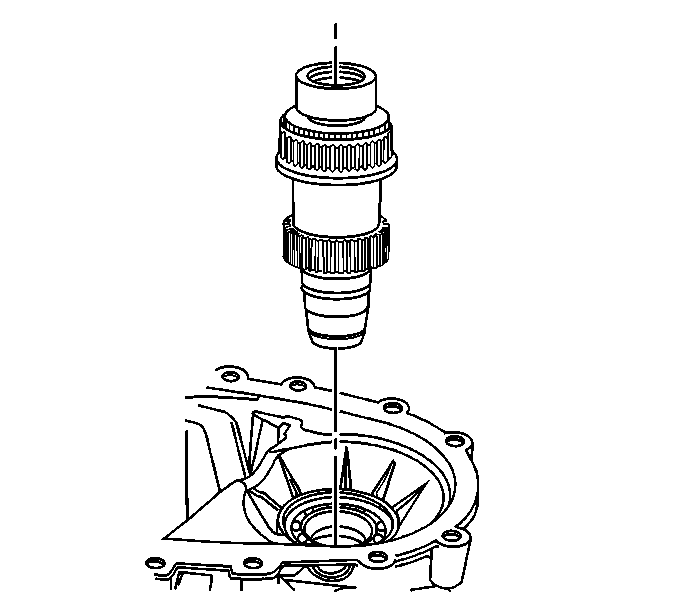
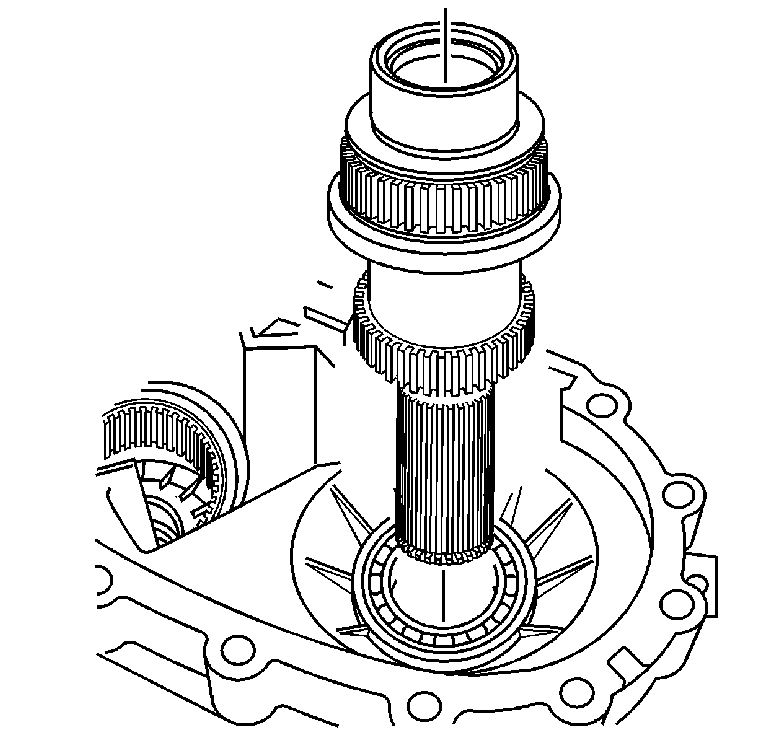
- For the NVG 246, install the front output shaft assembly.
- For the NVG 236, install the front output shaft assembly.
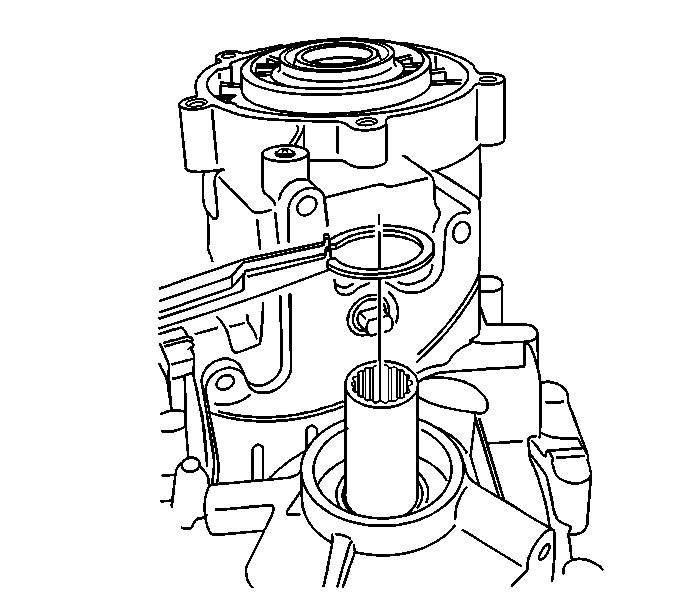
- For the NVG 246, install the front output shaft retaining ring.
- For the NVG 236, install the front output shaft retaining ring.
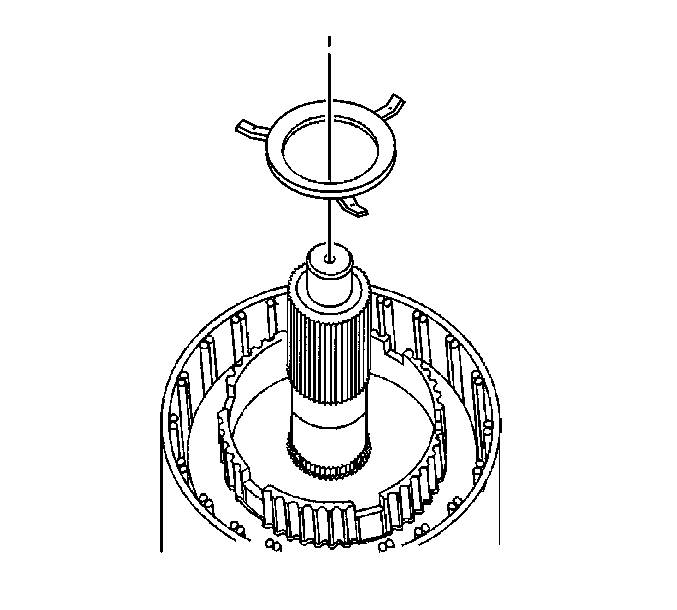
- Lubricate the thrust washer for the input shaft with J 36850 or equivalent.
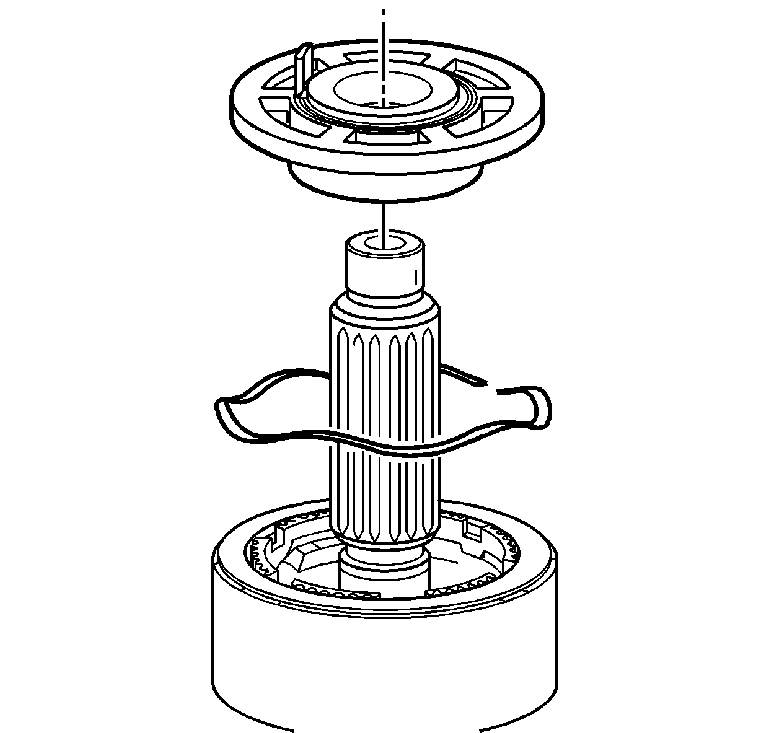
- Install the input shaft thrust washer. Align the tabs on the thrust washer with the slots in the planetary carrier.
- Using the J 8092 (1) and the J 45383 (2), install the pilot bearing in the input shaft.
- Install the input shaft assembly.
- Lubricate the input shaft thrust bearing with J 36850 or equivalent.
- Install the input shaft thrust bearing.
- Lubricate the input gear thrust bearing washer with J 36850 or equivalent.
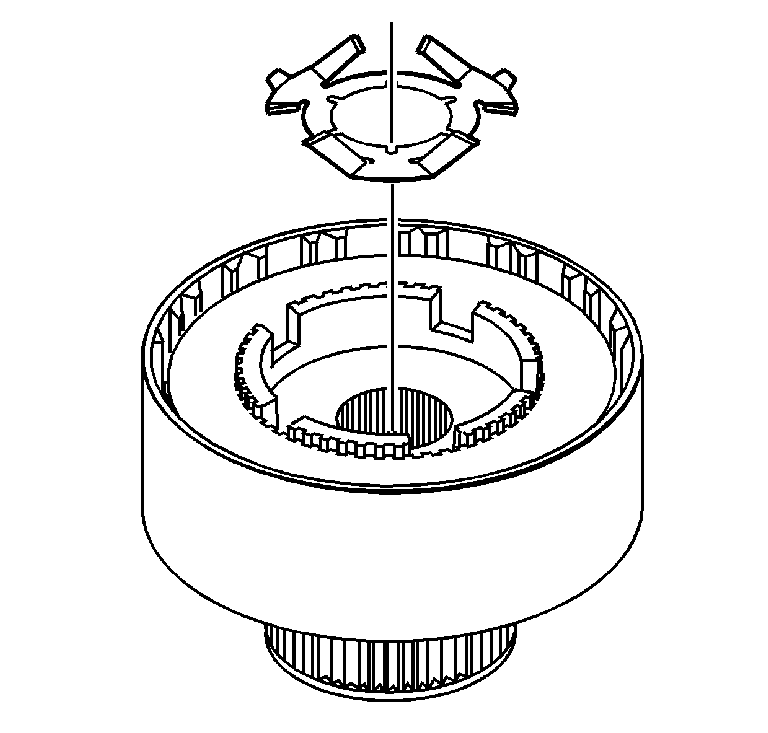
- Install the planetary carrier lock plate.
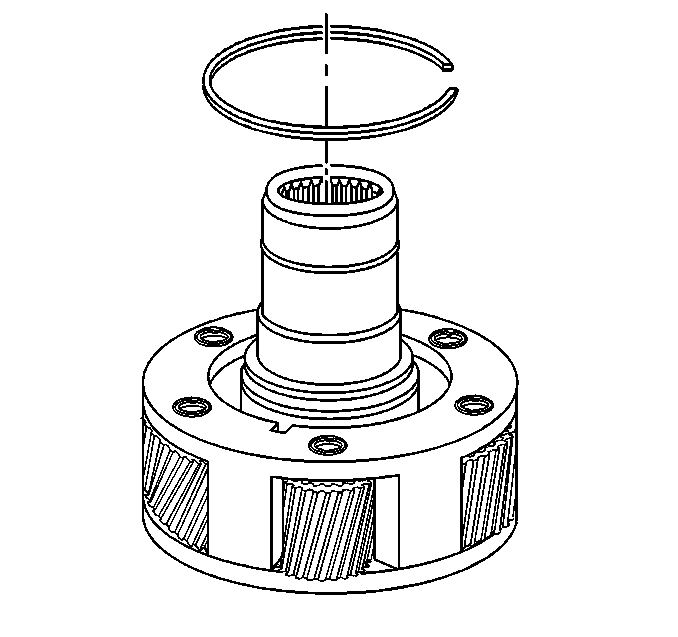
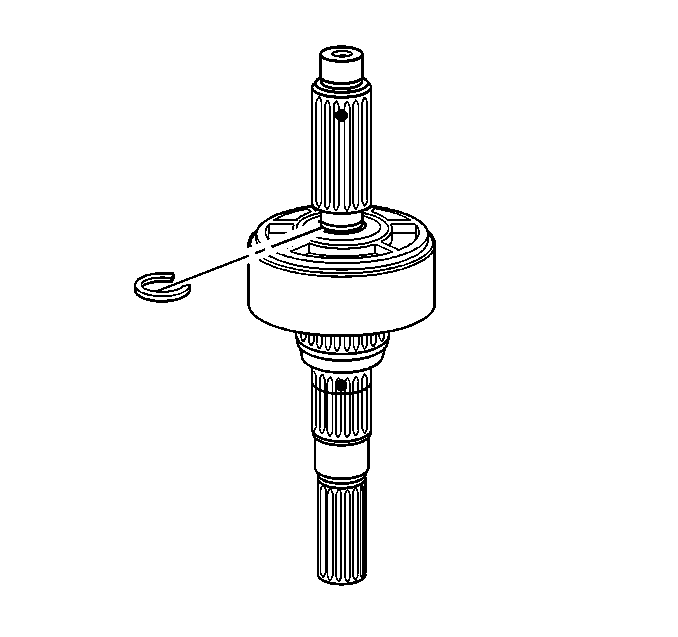
- Install the retaining ring for the planetary gear shaft.
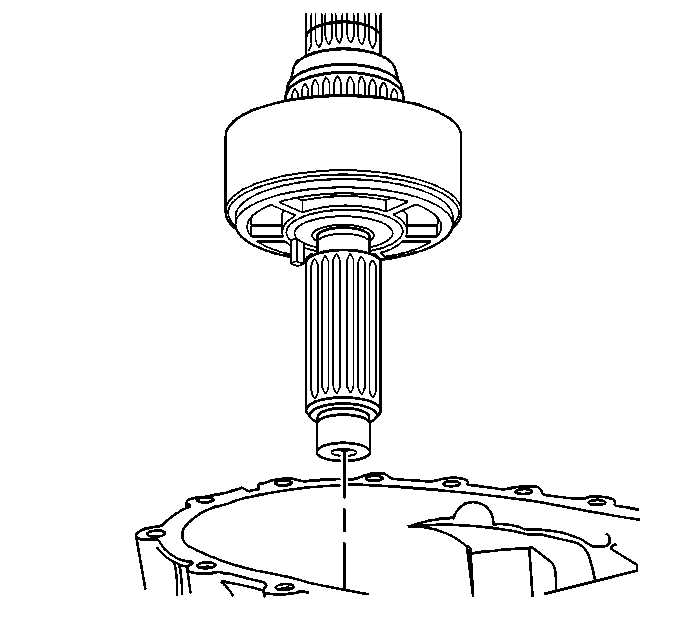
- Install the planetary gear carrier.
- Install the outer retaining ring for the input gear bearing.
- Install new shift fork pads, if removed.
- Install the range shift sleeve in the range fork.
- Align the range shift sleeve on the planetary carrier.
- Align the roller on the range fork in the control actuator lever slot.
- Install the range shift fork.
- Install the shift fork shaft.
- Install the clutch lever.
- Install new O-ring seals on the clutch lever pivot pins.
- Lubricate the O-ring seals with transfer case fluid.
- Apply threadlock GM P/N 12345493 (Canadian P/N 10953488), or equivalent, to the clutch lever pivot pin threads.
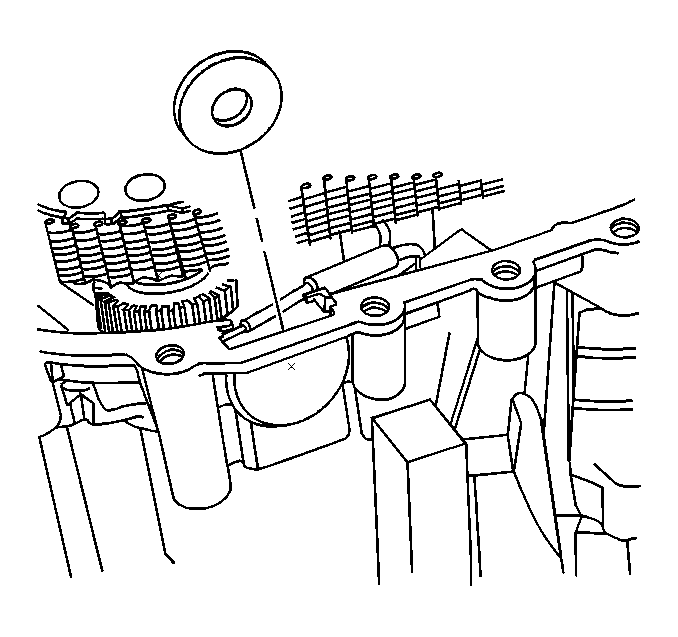
- Install the clutch lever pivot pins with the aluminum washers and O-ring seals in the front case half.
- Install the shift detent plunger.
- Install the shift detent spring.
- Lightly lubricate a NEW shift detent plunger O-ring seal with transfer case fluid.
- Install the O-ring seal on the shift detent spring bolt.
- Install the shift detent spring bolt in the front transfer case.
- Install the rear output shaft oil restrictor flush with the end of the shaft.
- Using the J 8092 (1) and the J 36370 (2), install the clutch housing bearing.
- Install the clutch housing on the rear output shaft.
- Install the clutch hub.
- Inspect to ensure that the correct clutch components are being installed.
- If preload clutch, install the clutch oil restrictor plate.
- If non-preload clutch, install the clutch spring.
- For the NVG 246, install the clutch backing plate in the clutch housing with the notch in the plate facing down.
- For the NVG 236, install the backing plate with the step shoulder facing down.
- Install a friction clutch pressure plate.
- Install a steel clutch pressure plate.
- Continue to install the friction and the steel clutch plates until the correct amount is installed.
- Install the clutch hub retaining ring.
- Securely install the base plate (3) of the J 44295 in a vise with the machined surface of the locating tabs facing up.
- Install the assembled rear output shaft with the clutch housing, the inner clutch plates, and the outer clutch plates on the base plate (3) of the J 44295 .
- Install the weight (1) of the J 44295 on top of the assembled clutch plates.
- Place the gage block (2) of the J 44295 on 1 of the locating tabs of the base plate (3) of the J 44295 .
- Using a feeler gage, measure between the gage block (2) and the weight (1) of the J 44295 .
- Measure with the gage block (2) and the feeler gage on the remaining 2 locating tabs of the base plate (3).
- The average of the 3 measurements is the required shim thickness.
- Select from the clutch plate shim package the correct shim or shims plus or minus 0.10 mm (0.004 in). You may use a combination of 2 shims to obtain the correct thickness.
- Remove the weight (1) of the J 44295 .
- Install the shim or shims.
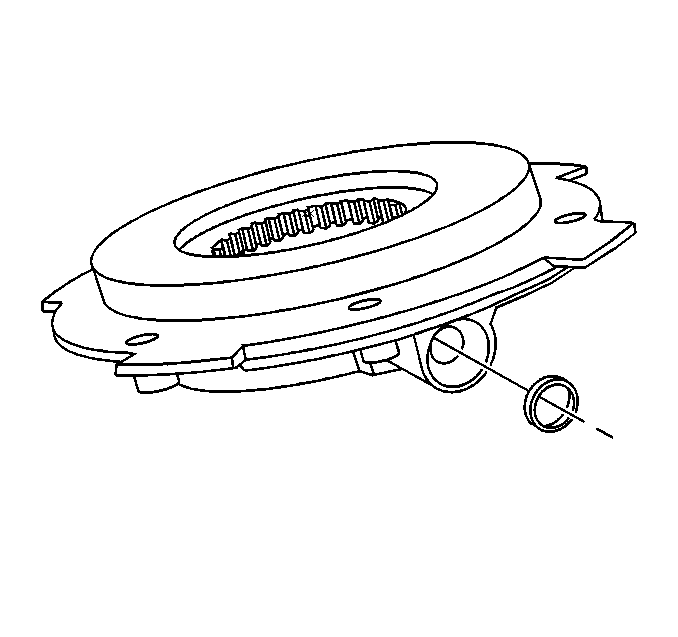
- Using a suitable press plate and a hydraulic press, press the clutch pressure plate bearing hub in the clutch pressure plate bearing. Ensure the bearing inner bearing race is supported.
- Install the clutch pressure plate bearing and hub in the clutch pressure plate.
- If preload clutch, install the clutch pressure plate spring.
- Align the tabs on the clutch pressure plate with the grooves in the clutch hub and install the clutch pressure plate assembly. If preload clutch, ensure the spring is installed in the groove of the pressure plate.
- Install the clutch pressure plate retaining ring. Push down on the pressure plate to access the retaining ring groove.
- Align the tab on the clutch pressure plate bearing hub with the clutch lever.
- Align the rear output shaft teeth to the planetary carrier and range sleeve teeth.
- Install the rear output shaft assembly.
- Install the drive chain and sprockets. The blue chain links must face up or toward the rear of the vehicle.
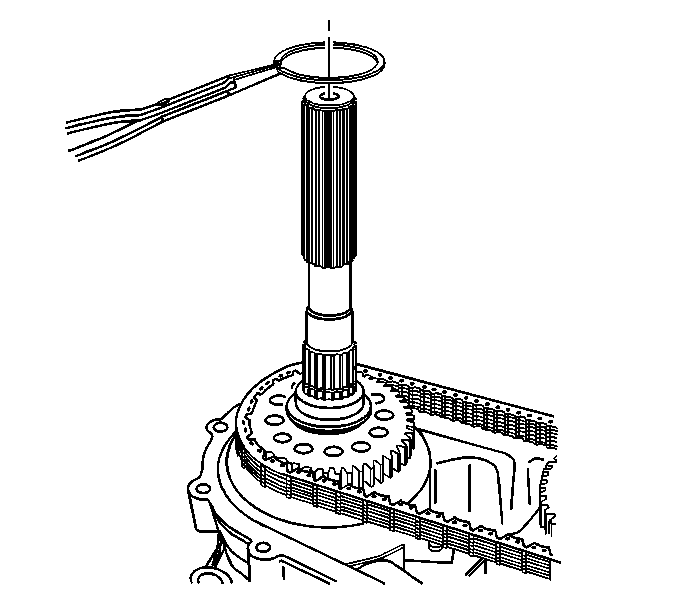
- Install the drive sprocket retaining ring.
- Inspect the rear output shaft to identify as an original design (2) or the replacement design (1).
- If an original design rear output shaft, install the oil pump retaining ring onto the rear output shaft. Ensure the retaining ring is not positioned over the oil hole on the rear output shaft.
- Install a new oil pump suction pipe O-ring in the oil pump.
- Install the oil pump assembly.
- If an original design rear output shaft, install the oil pump wave washer.
- Install the driven sprocket retaining ring.
- Install the oil pump screen.
- Install the connector on the oil pump screen.
- Install the oil pump suction pipe to the oil pump.
- Connect the oil pump suction pipe to the connector.
- Instal the transfer case magnet.
- Install the rear output shaft speed sensor reluctor wheel.
- Install the rear output shaft bearing.
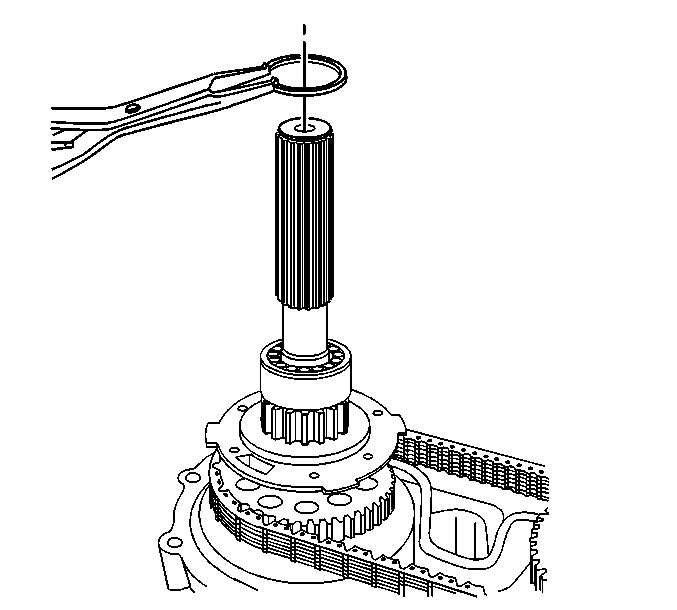
- Install the rear output shaft bearing retaining ring.
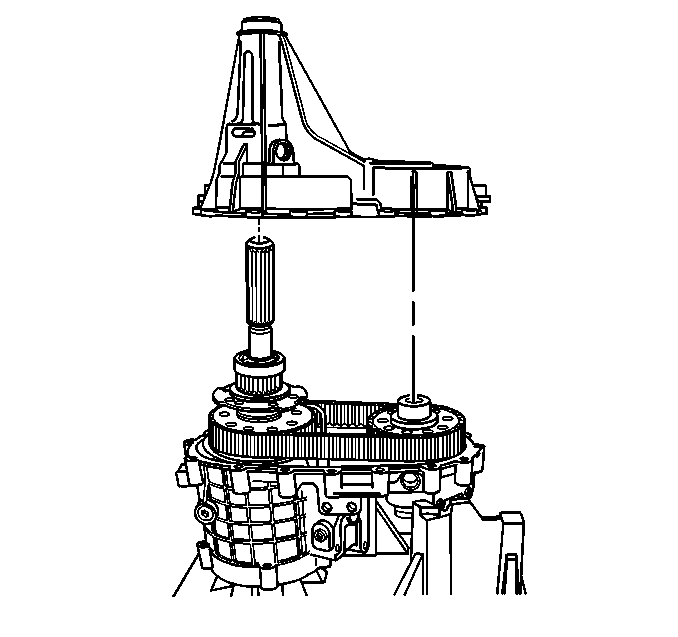
- Align the outside retaining ring for the rear output shaft bearing so that it is easily accessed through the opening in the rear case half.
- Remove the 1st design oil pump wear sleeve from the rear case half.
- Install the 2nd design oil pump wear sleeve (1) to the oil pump (2).
- Install the locating pins in the front case, if necessary.
- Apply a 3 mm (1/8 in) bead of RTV sealant GM P/N 12345739 (Canadian P/N 10953541) or equivalent to the mating surfaces of the front case half.
- Lower the rear case half into place.
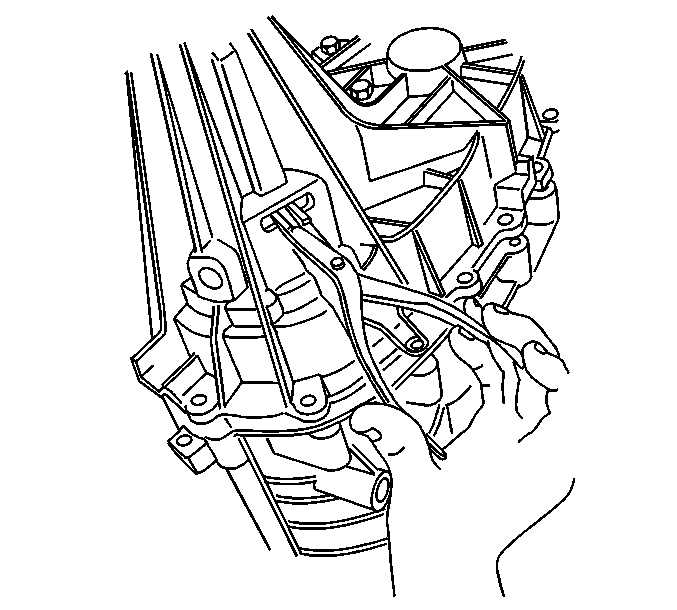
- Using a pair of snap ring pliers, open the retaining ring for the rear output shaft bearing.
- Insert a rubber coated screwdriver into 1 of the speed sensor holes and lift up on the speed reluctor wheel, then seat the retaining ring.
- Install the new case bolts, washers, and brackets.
- Install the access hole plug.
- Install new O-ring seals on the vehicle speed sensors.
- Lubricate the vehicle speed sensor O-ring seals with transfer case fluid.
- Install the rear vehicle speed sensors.
- Install the front vehicle speed sensor.
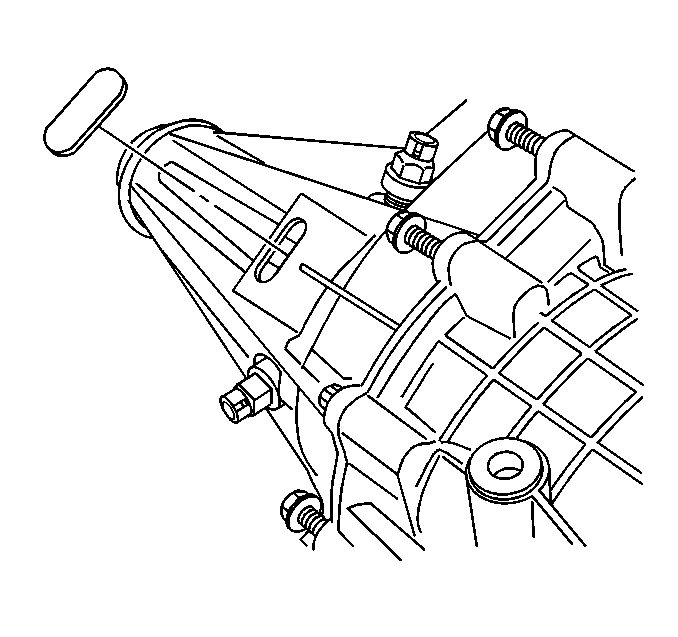
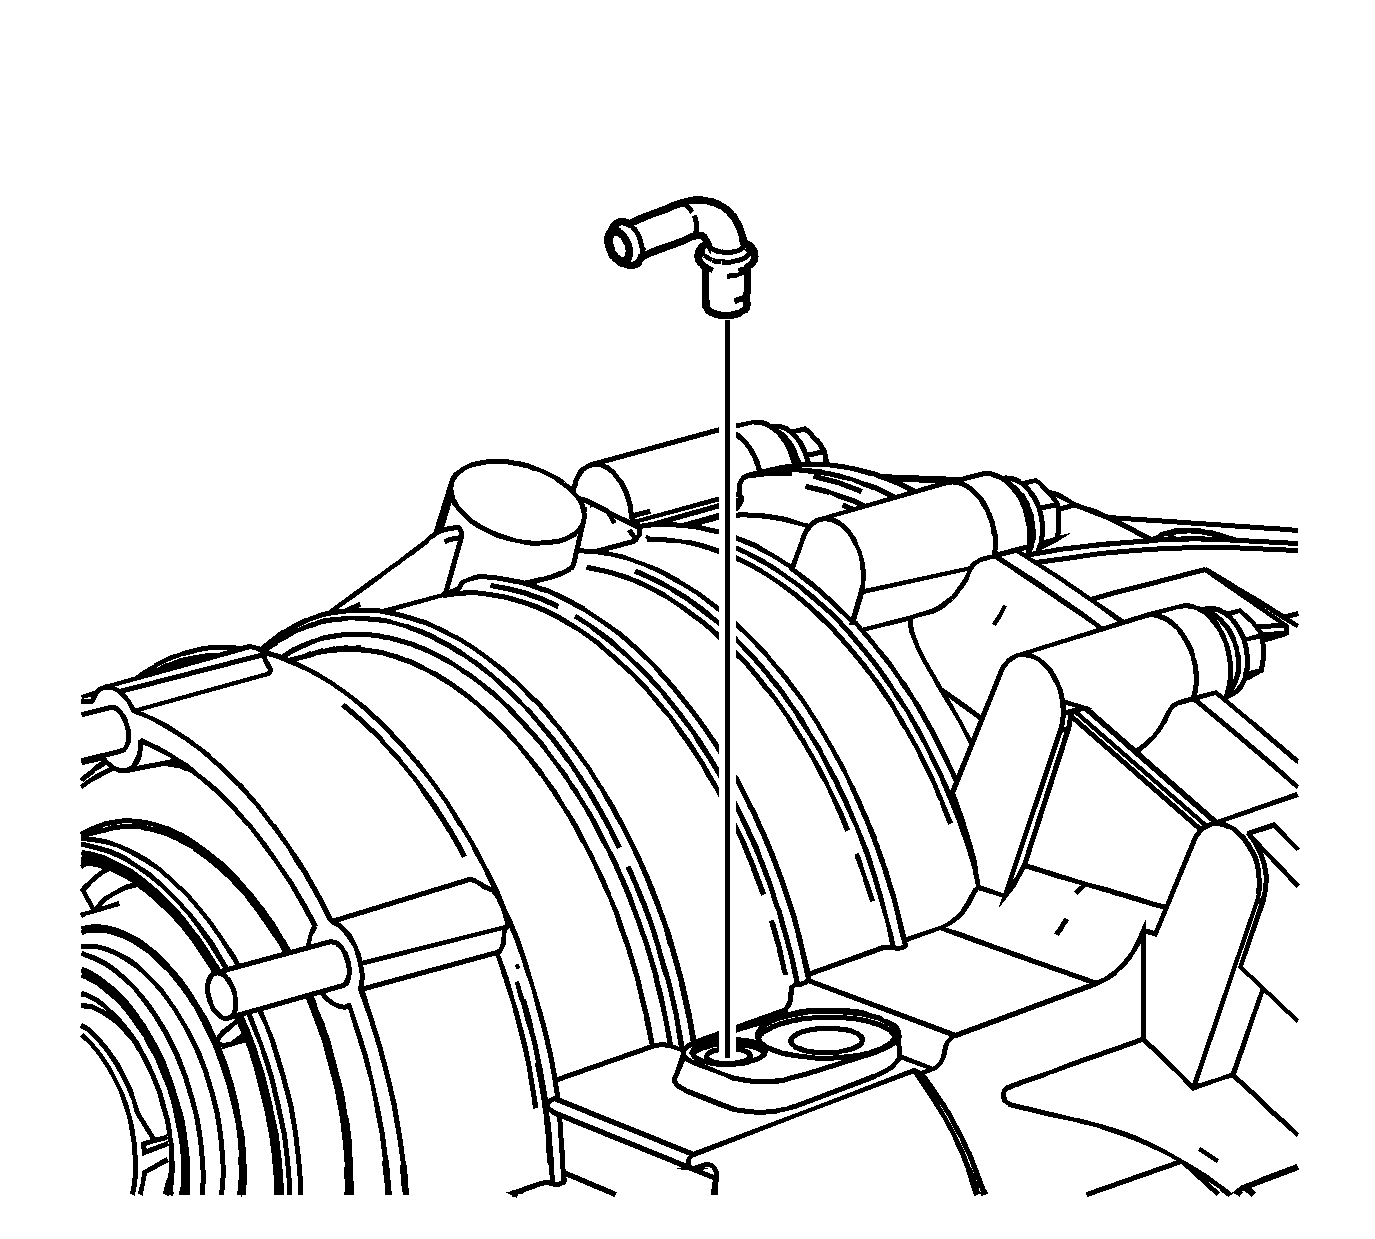
- Apply a thin layer of retaining compound GM P/N 12377901, Canadian P/N 10953504, or equivalent, to the NEW aluminum vent pipe.
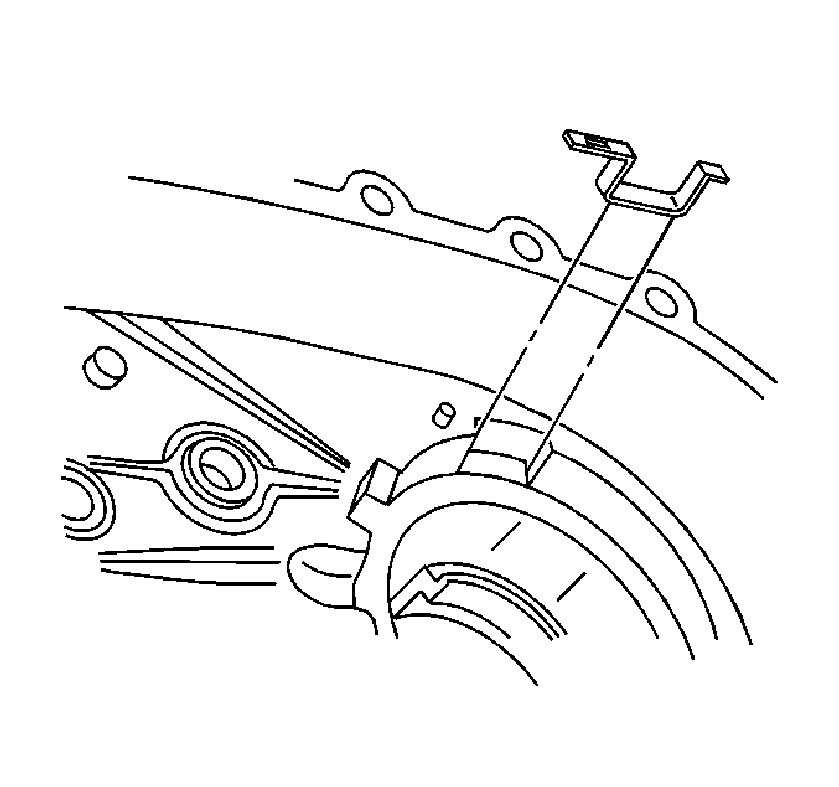
- Tap the NEW aluminum vent pipe into the case; ensure the vent pipe is aligned in the direction shown.
- Install the actuator insulator to the transfer case.
- Install the encoder motor to the transfer case. Rotate the control actuator lever shaft to align to the encoder motor.
- Install the mounting bolts for the encoder motor.
- Install a new rear output shaft bushing, using the J 45380 .
- Align the rear output shaft seal to the rear case, with the square tab up and the drain hole down.
- Using the J 37668-A , install the rear output shaft seal.
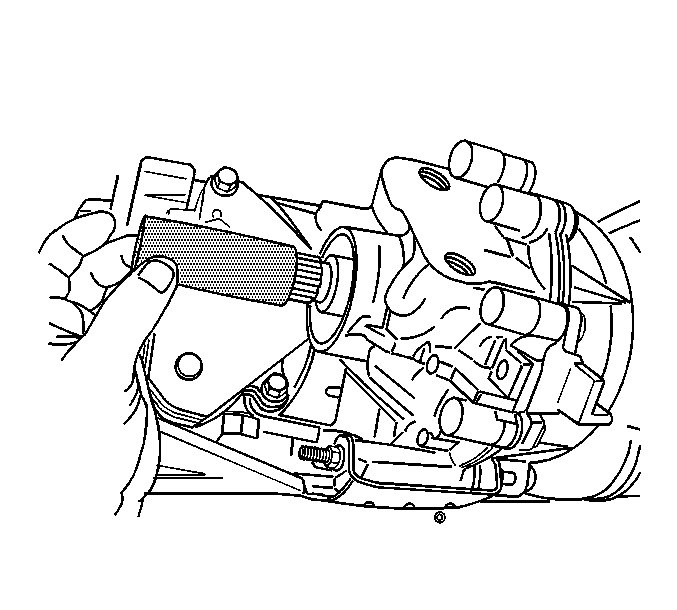
- For the NVG 246, using the J 43484 (2) and the J 8092 (1), install the front output shaft seal.
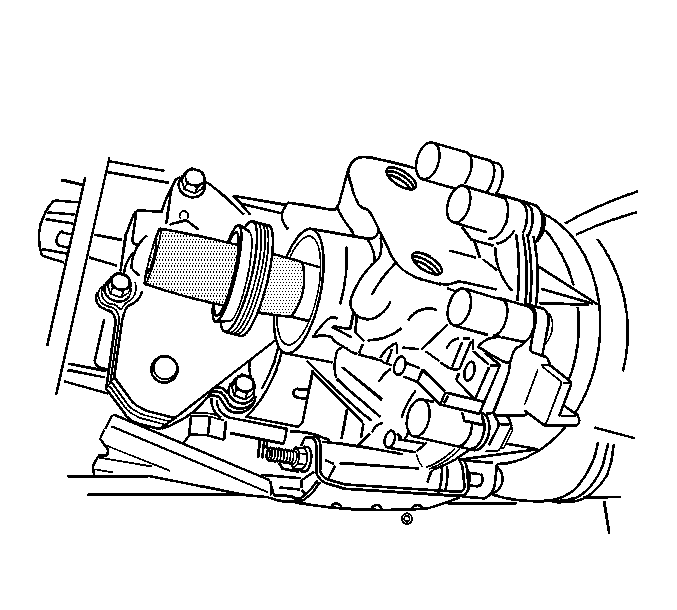
- For the NVG 236, install the J 44636-2 on the transfer case front output shaft.
- For the NVG 236, install the transfer case front output shaft seal on the J 44636-2 .
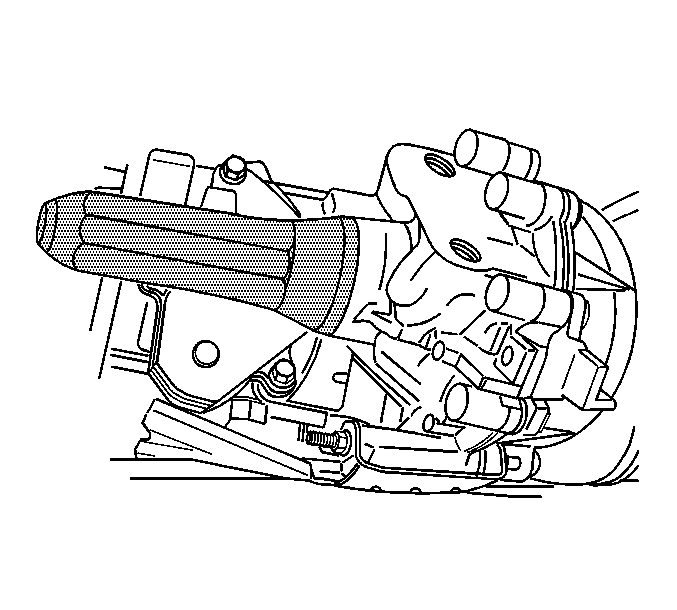
- For the NVG 236, using the J 44636-1 , install the transfer case front output shaft seal.
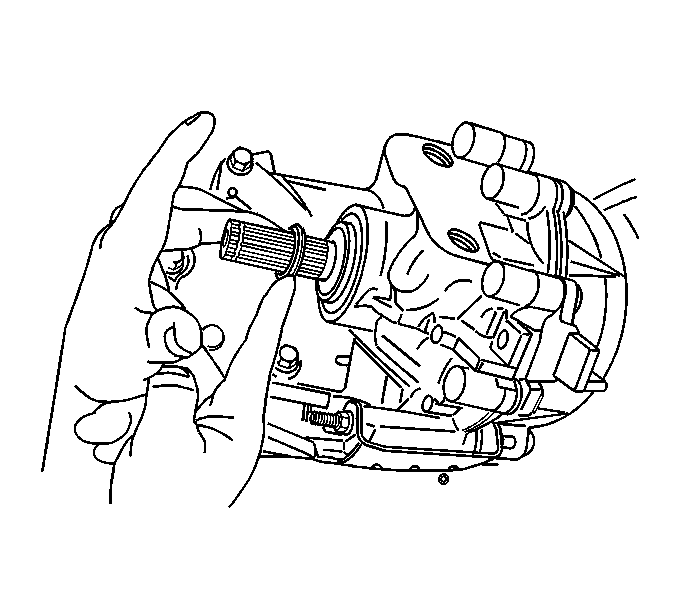
- For the NVG 236, install the dust seal.
- Using the J 42738 , install the front input shaft seal.
Notice: Refer to Fastener Notice in the Preface section.
Important: The service information is for the following transfer cases. When a specific service procedure affects servicing a different component it will be mentioned.
• The NVG 236 used in the T Pickup and Utility, which has a preload clutch • The NVG 246 use in K Pickup carryover model, which has a non-preload clutch • The NVG 246 used in the K Utility vehicles, which has a non-preload clutch • The NVG 246 used in the K Pickup new model style, which has a preload clutch
Important: When installing the new retaining rings in any of the following service procedures, ensure that the retaining rings are properly seated before proceeding to the next service procedure. Always use NEW retaining rings.
Important: Use only new retaining rings.
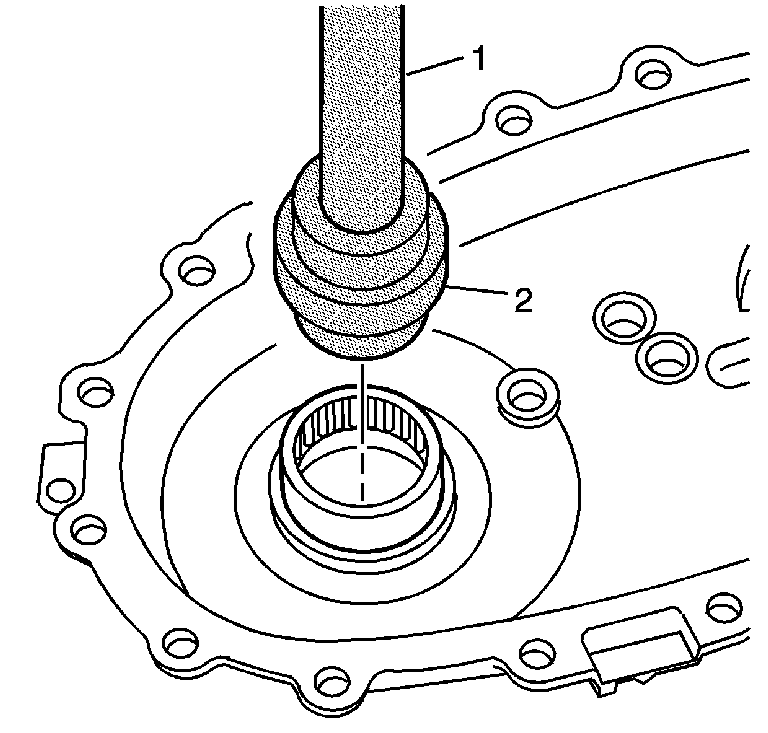
| • | The lettering on the bearing faces toward the tool. |
| • | Use the double shoulder side of the J 36370 to install the bearing recessed in the bore. |
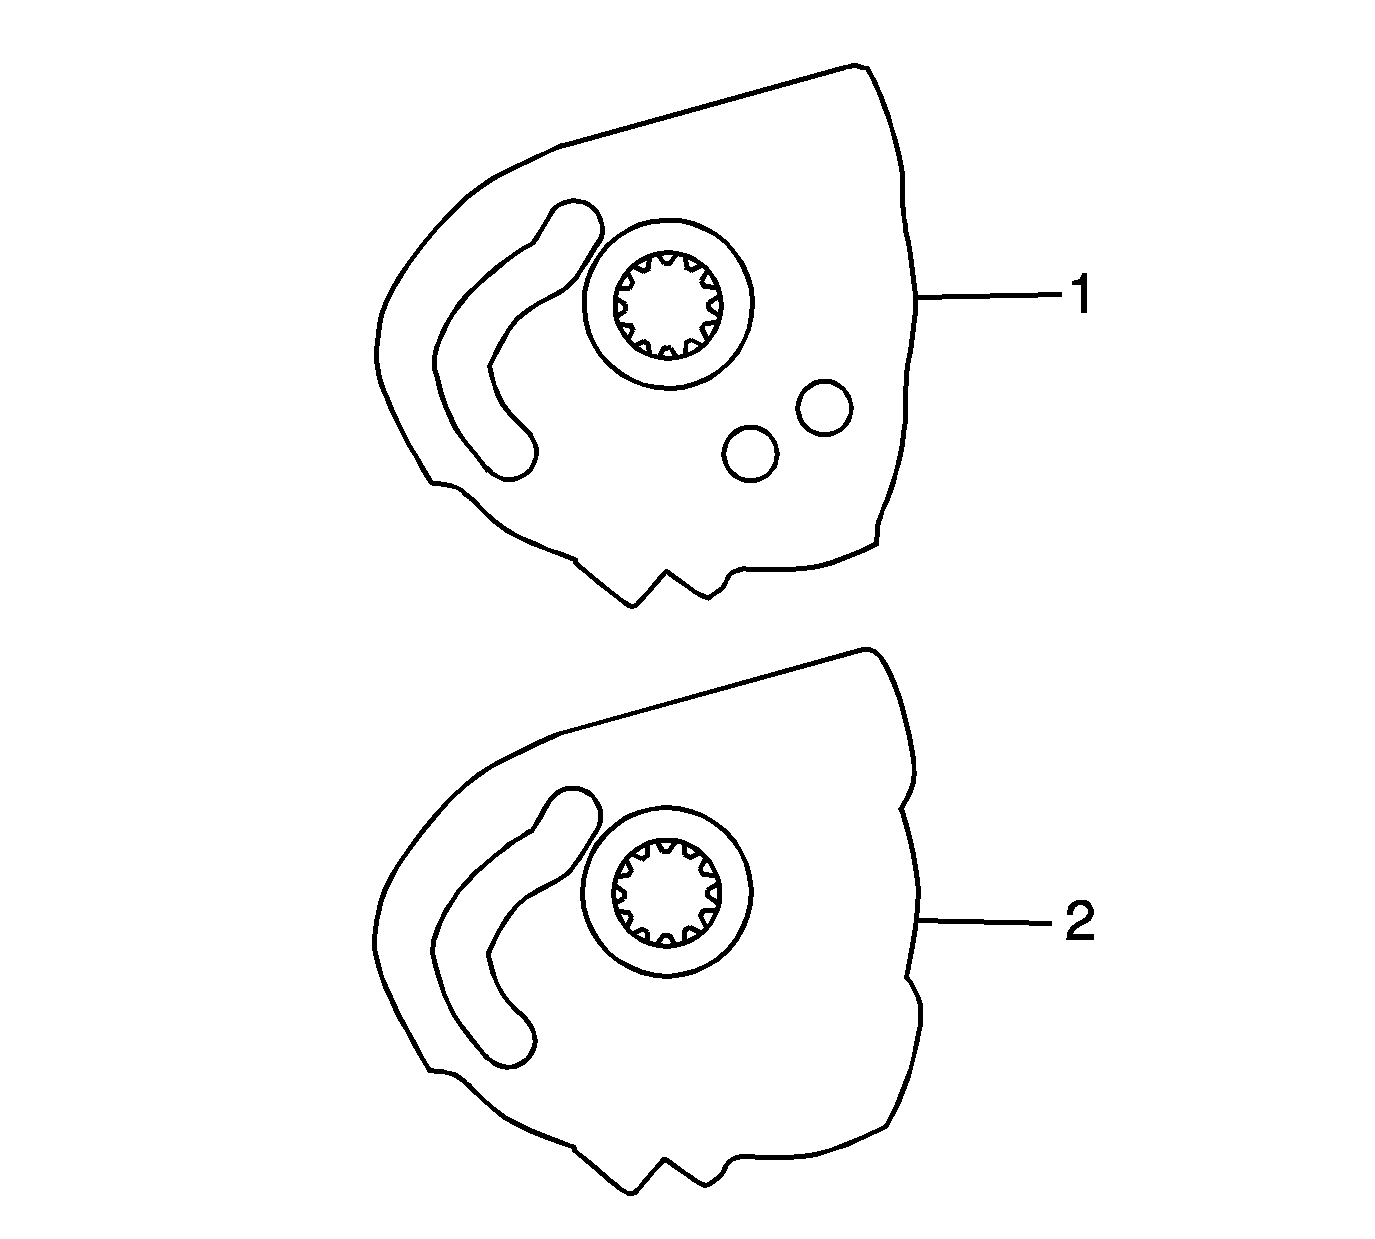
Important: The NVG 246 non-preload clutch uses a different control actuator lever than the NVG 246 preload clutch. The correct control actuator lever must be used to prevent drivability concerns. The control actuator lever (2) for the non-preload clutch does not have any holes. The control actuator lever (1) for the preload clutch has 2 holes.
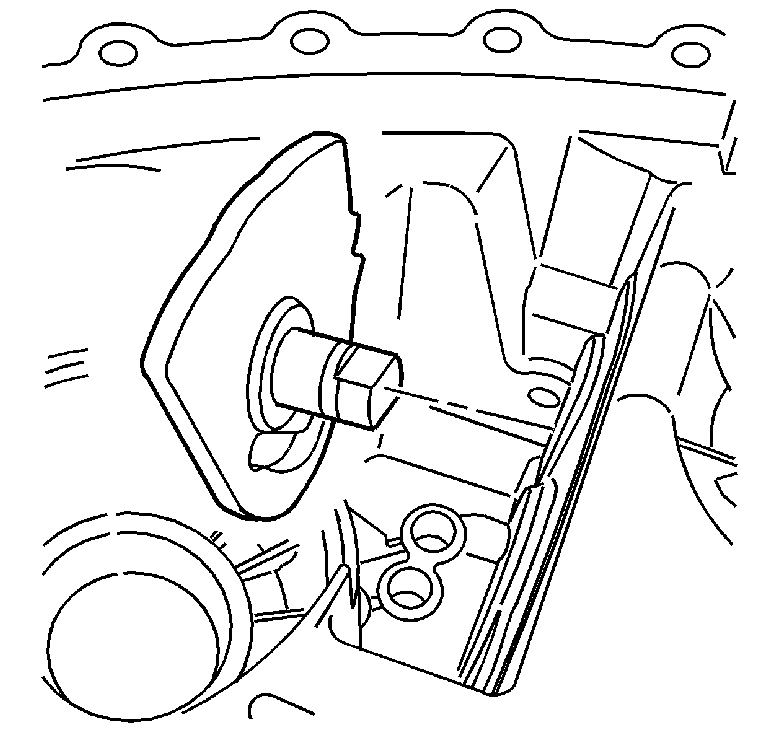
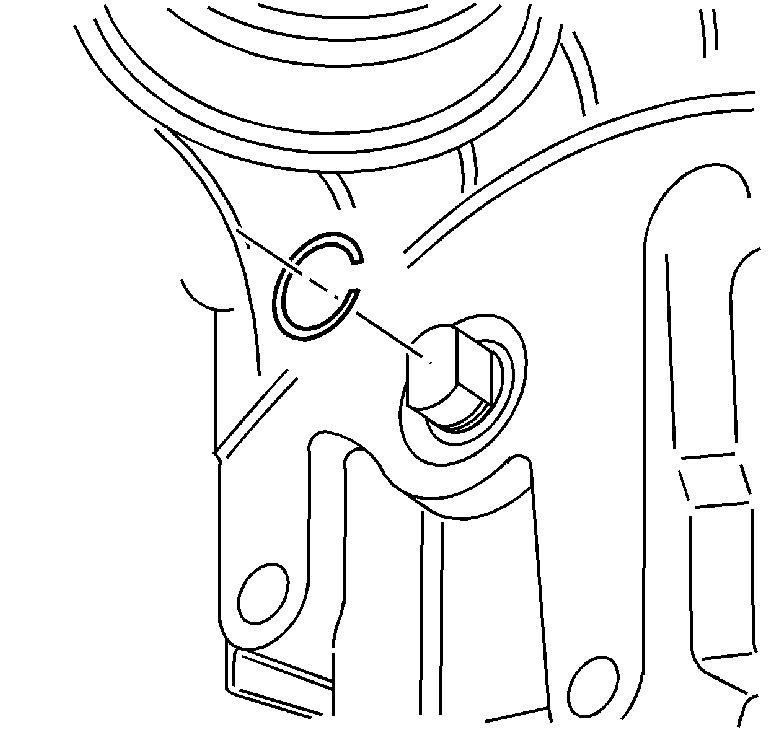
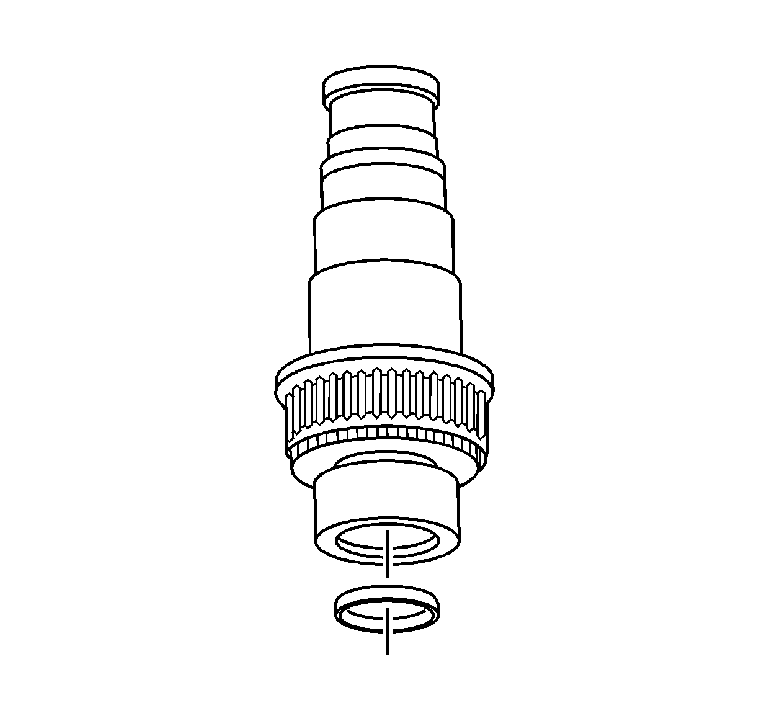
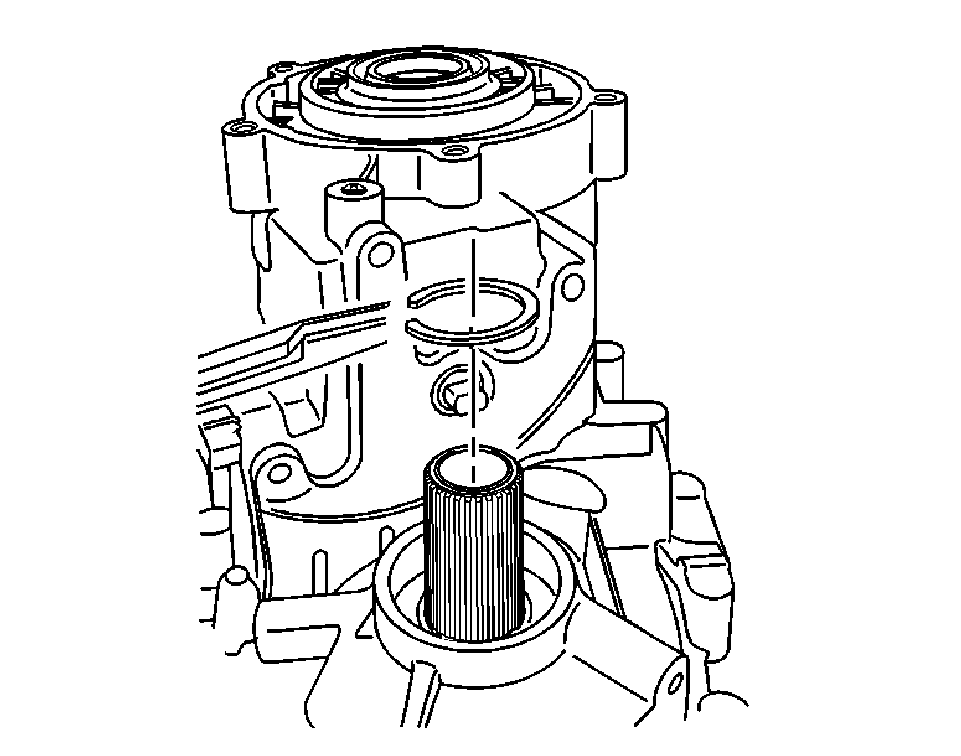
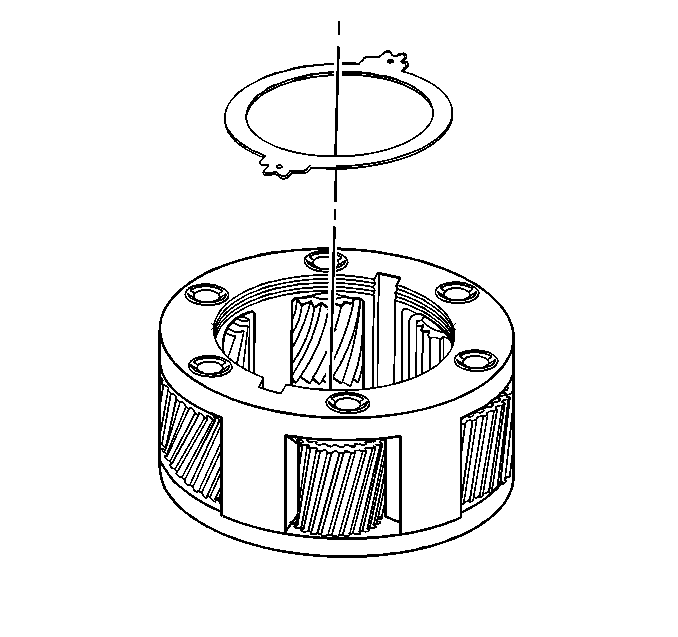
Important: Depending on the version of the NVG 246 transfer case, it may have either a 4 pinion gear or 6 pinion gear planetary carrier assembly. The 4 pinion gear planetary carrier is used with transmission RPO M30 and the input gear splines are 27 teeth. The 6 pinion gear planetary carrier is used with transmission RPO MT1 and MN8 and the input gear splines are 32 teeth. The NVG 236 transfer case uses a 3 pinion planetary carrier. The repair procedures are the same for all planetary carriers.
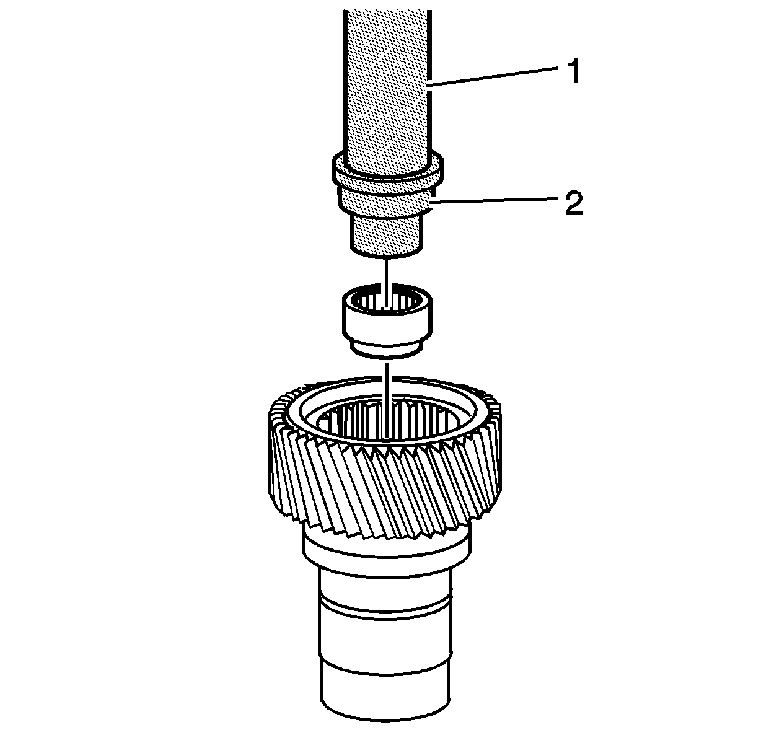
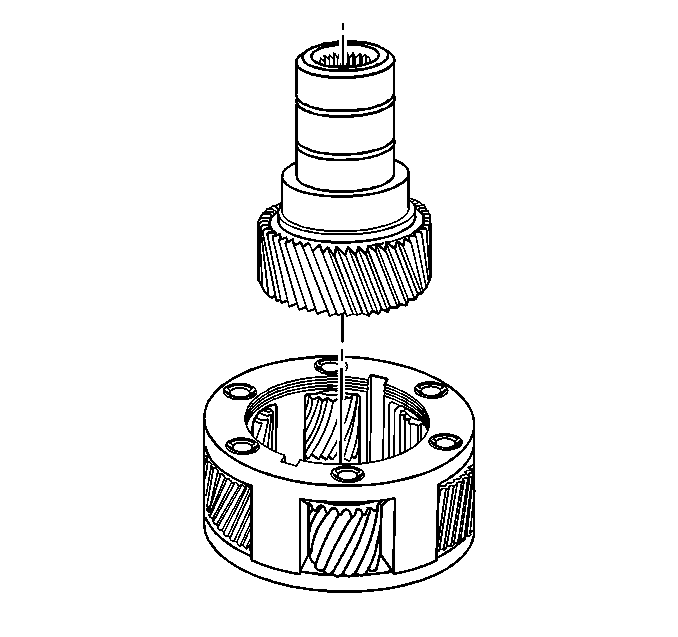
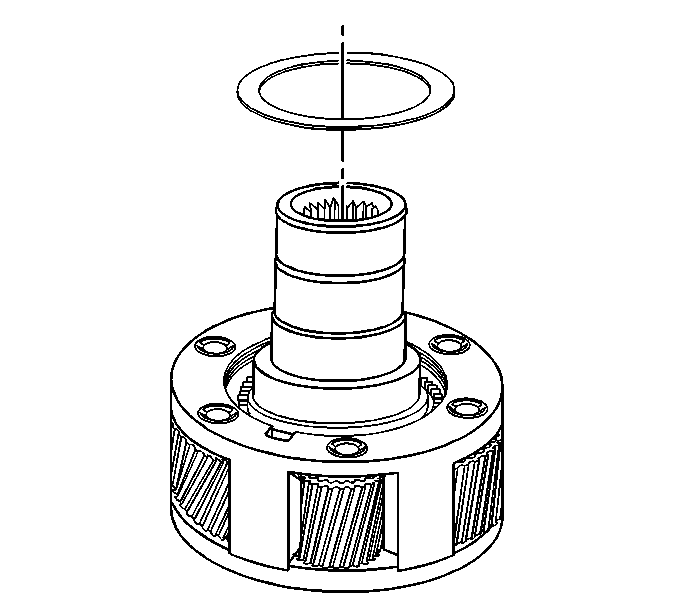
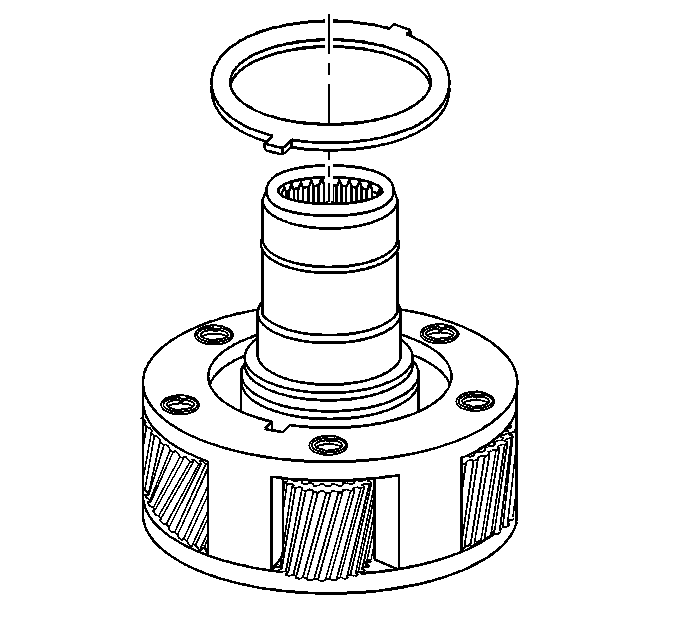
Important: When installing, if there are letters on the planetary carrier lock plate, ensure that the lettering is facing up.
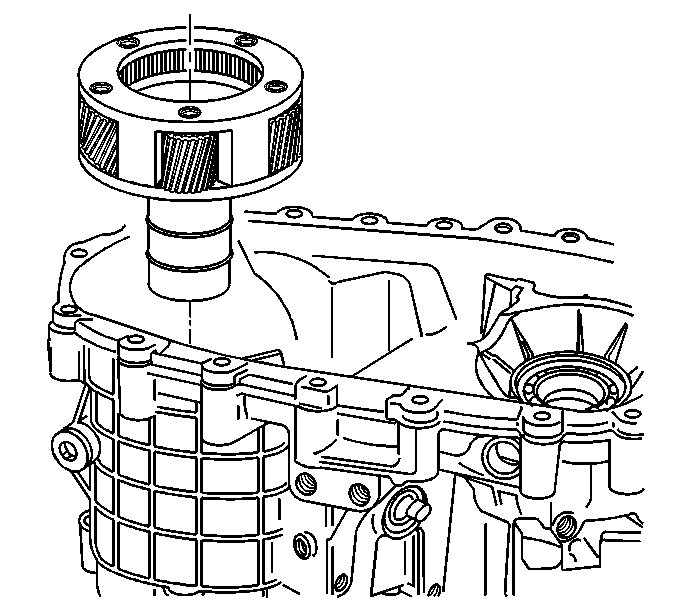
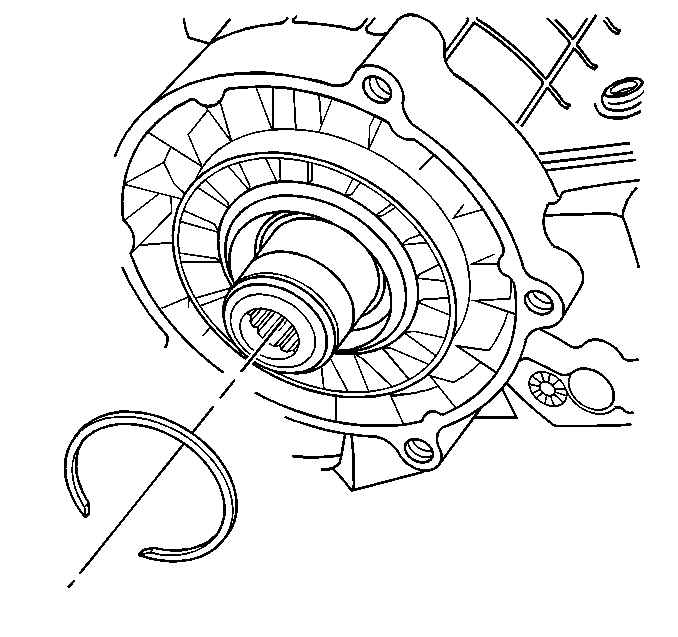
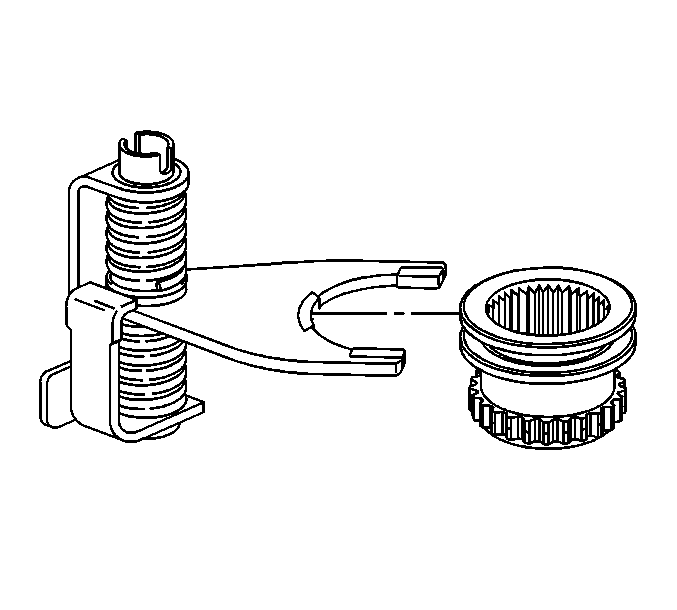
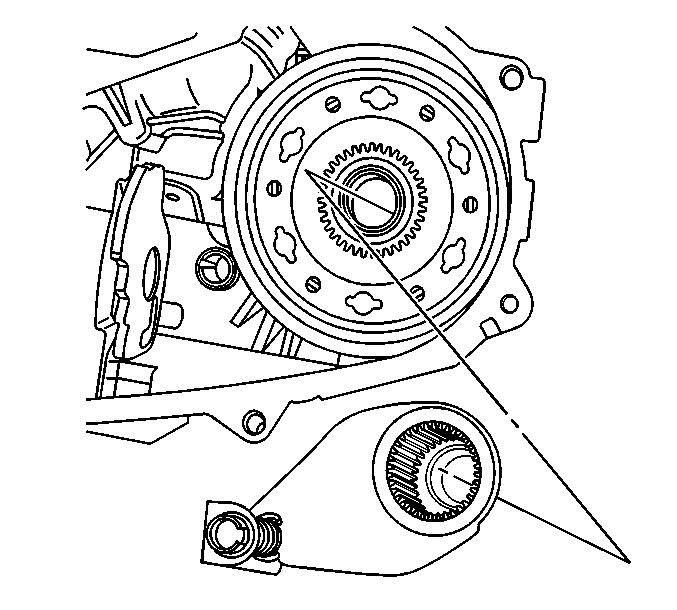
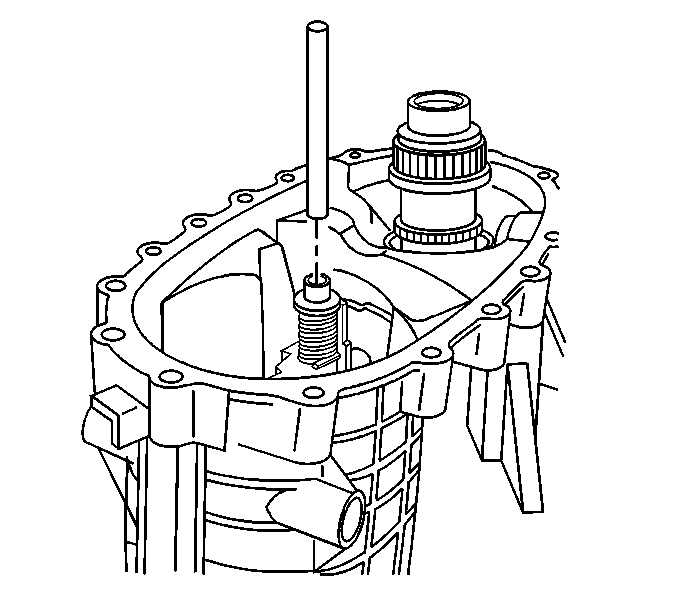
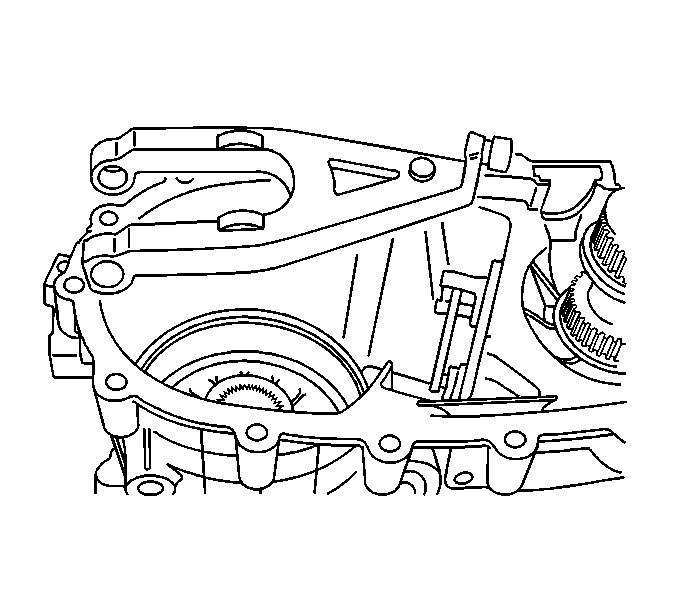
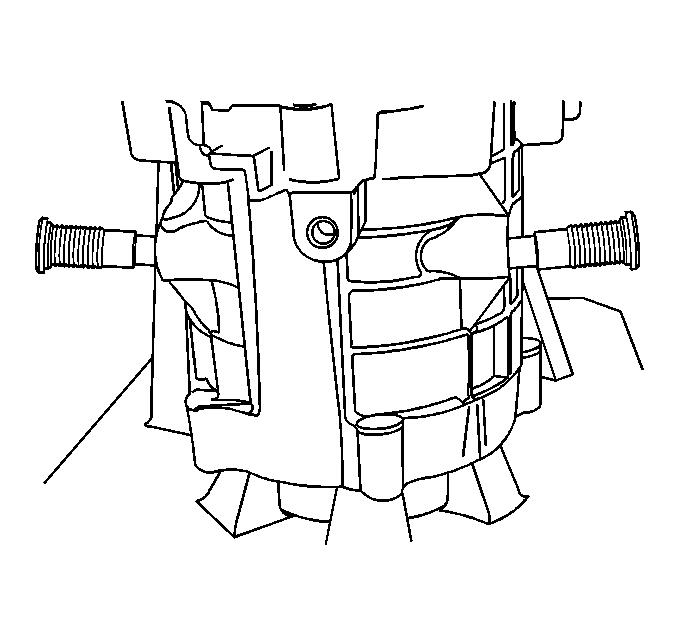
Important: When performing the following service procedure, ensure that the clutch lever pivot pins are tightened evenly. Ensure that the clutch lever moves freely after the pivot pins are tightened and engaging the lever.
Tighten
Tighten the clutch lever pivot pins to 61 N·m (45 lb ft).
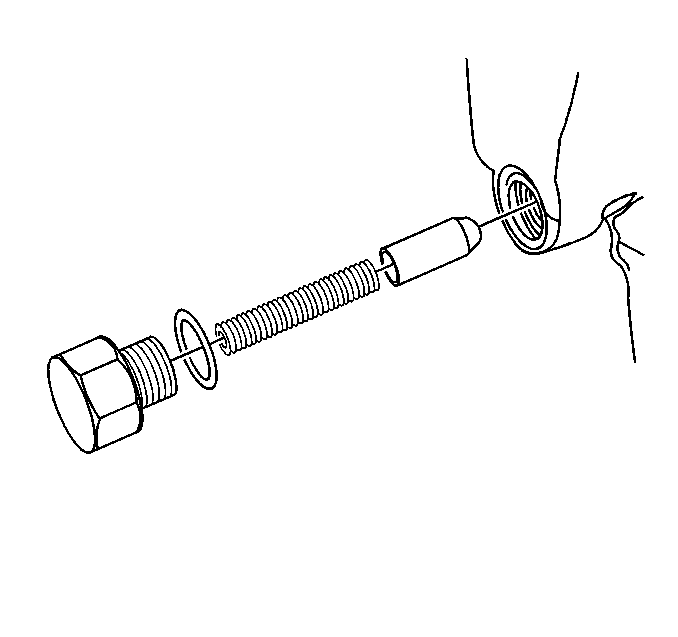
Important: Ensure that the shift detent plunger is seated correctly on the control actuator lever.
Tighten
Tighten the shift detent spring bolt to 17 N·m (13 lb ft).
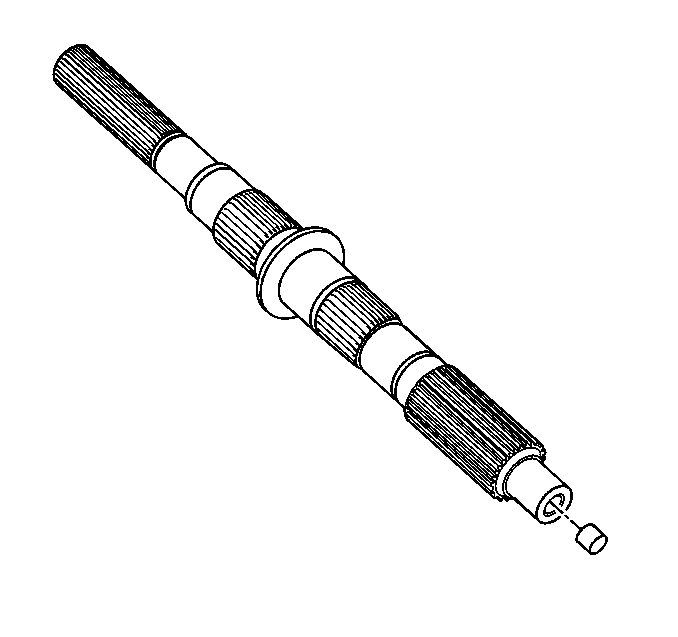
Important: The following service procedure is to be performed only if the rear output shaft is new.
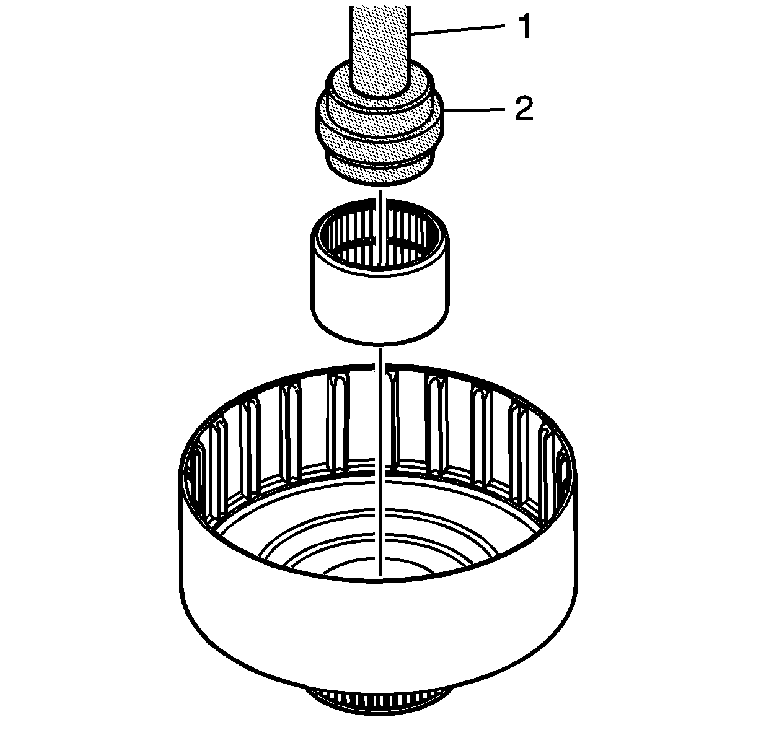
Important: In order to position the bearing at the proper depth, ensure that the double shoulder of the J 36370 is against the bearing.
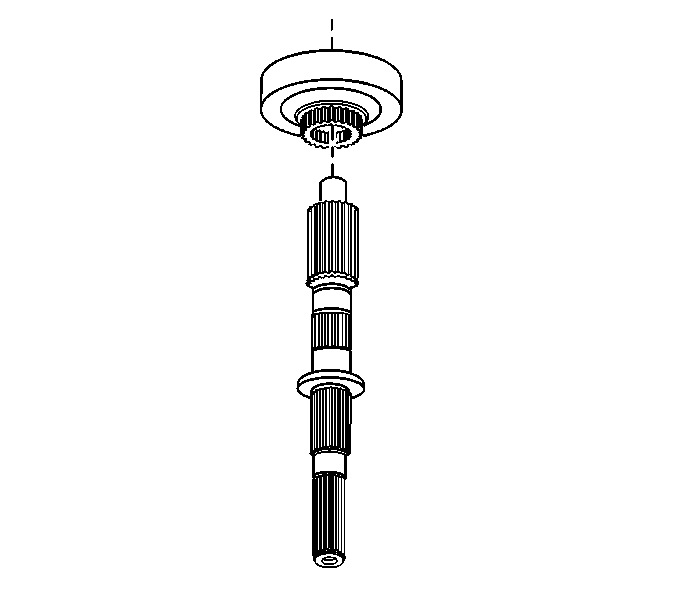
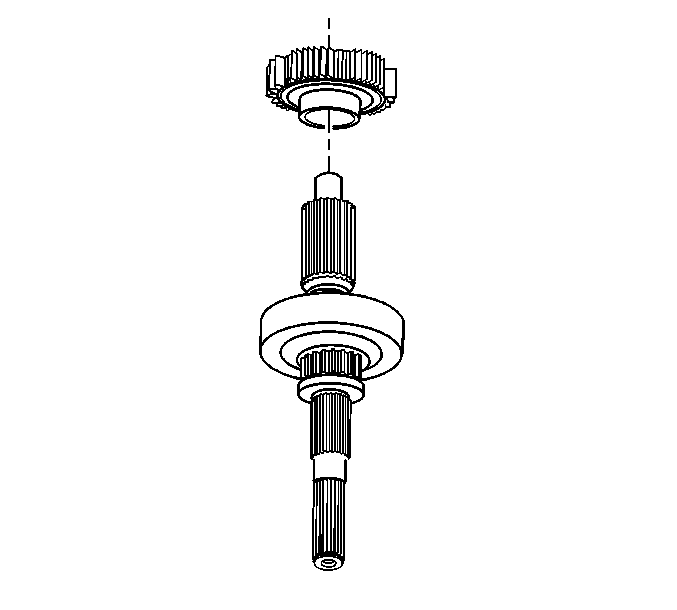
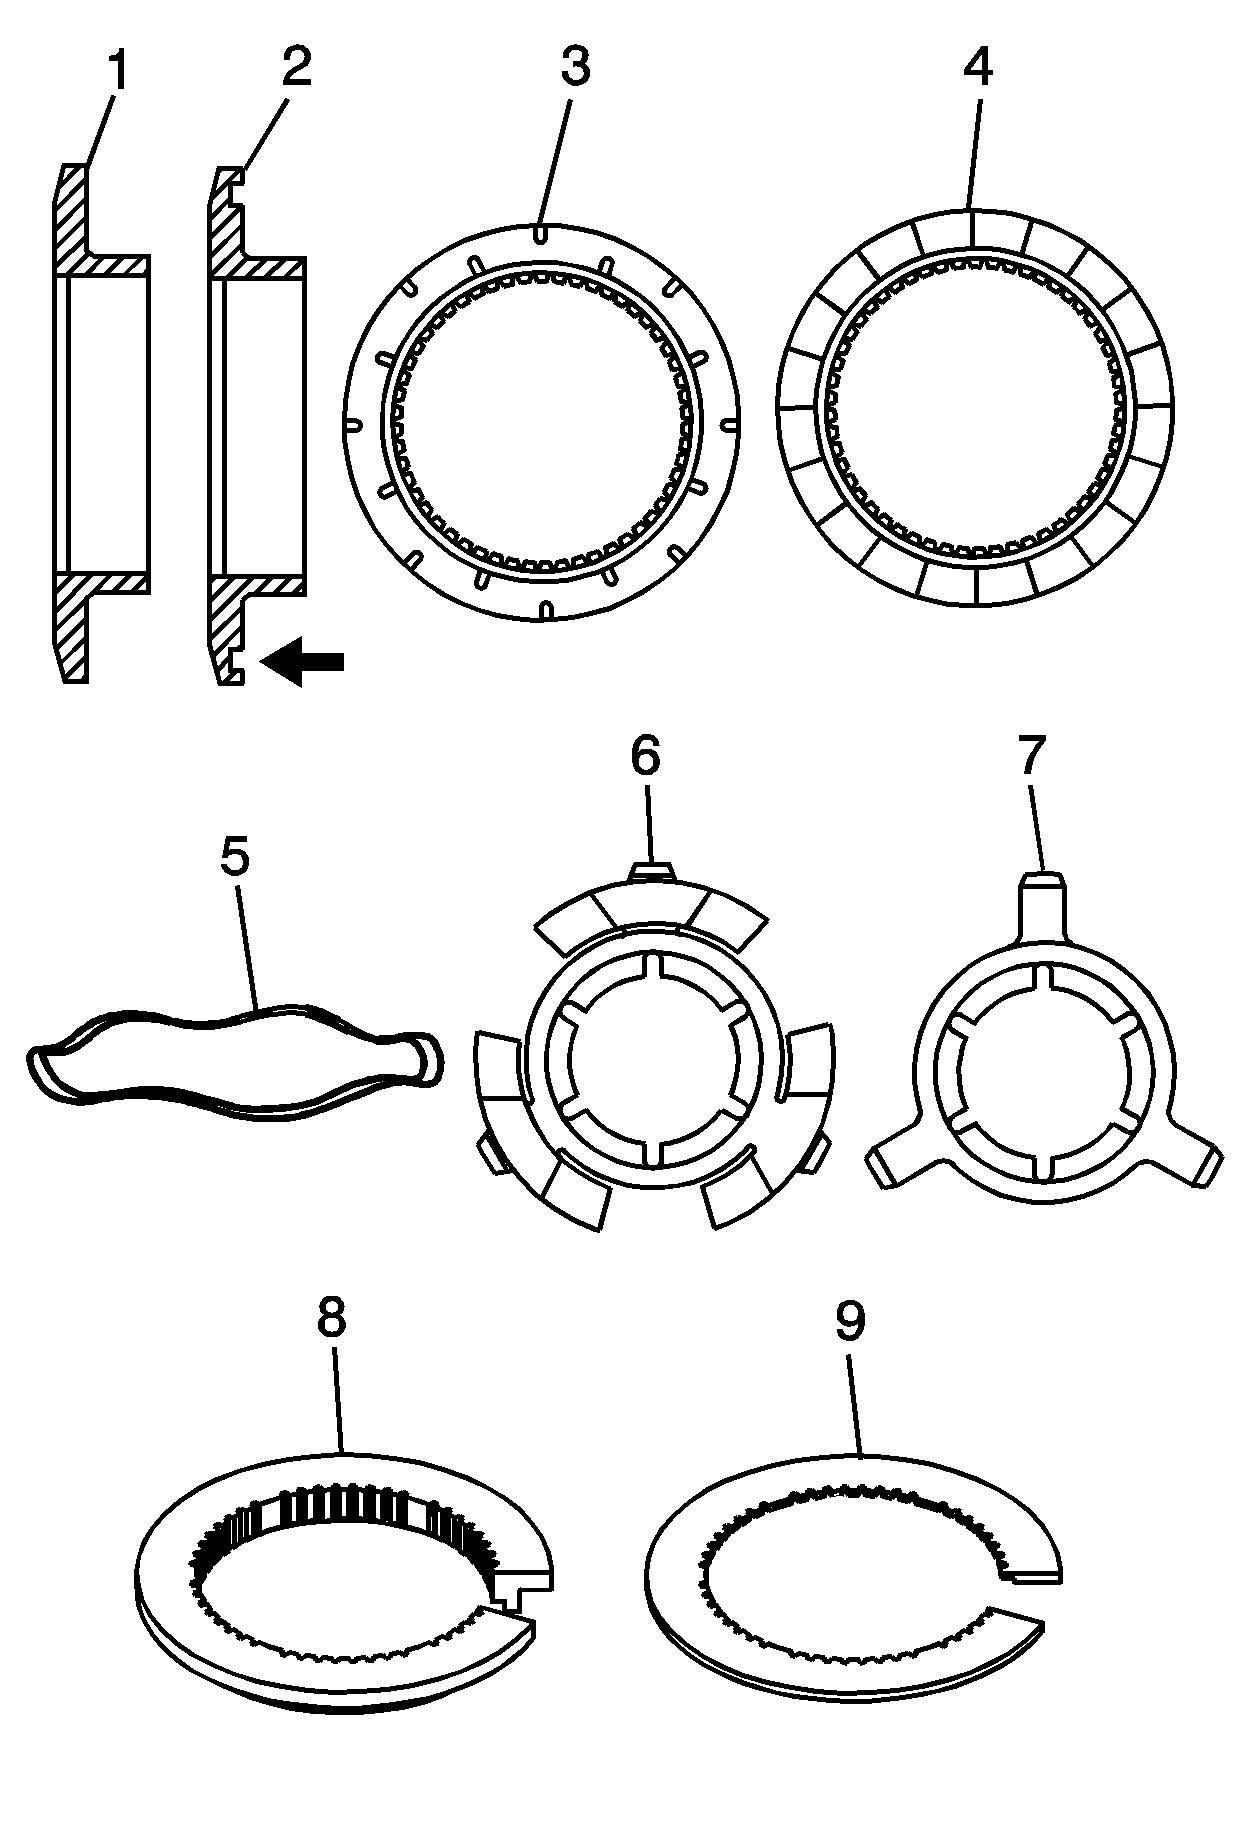
Important: There are different clutch components between the NVG 236 preload clutch, the NVG 246 non-preload clutch used with the K Pickup carry over model and the Utility, and the NVG 246 preload
clutch used with the K Pickup new model style. For correct assembly, the following clutch components are different:
• The clutch pressure plate - The non-preload clutch pressure plate (1) does not have a groove for the clutch spring. - The preload clutch pressure plate (2) has a groove for the clutch spring. • The clutch friction plate - The non-preload friction plate (3) has 8 grooves on the outside and 8 grooves on the inside. - The preload friction plate (4) has 20 grooves. • The clutch spring - The preload clutch spring (5) is located in the groove of the pressure plate. - The non-preload clutch spring (6) is located in the clutch hub. • The clutch oil restrictor plate (7) is used only with the preload clutch. • The clutch backing plate - The NVG 236 clutch backing plate (8) is thicker and has a step shoulder. - The NVG 246 clutch backing plate (9) is thin and only a notch.
Important: The fingers of the clutch hub oil restrictor plate face up.
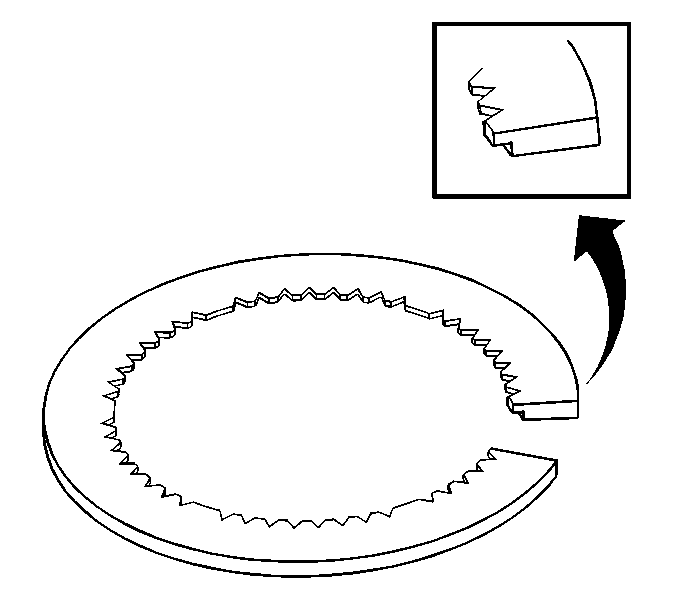
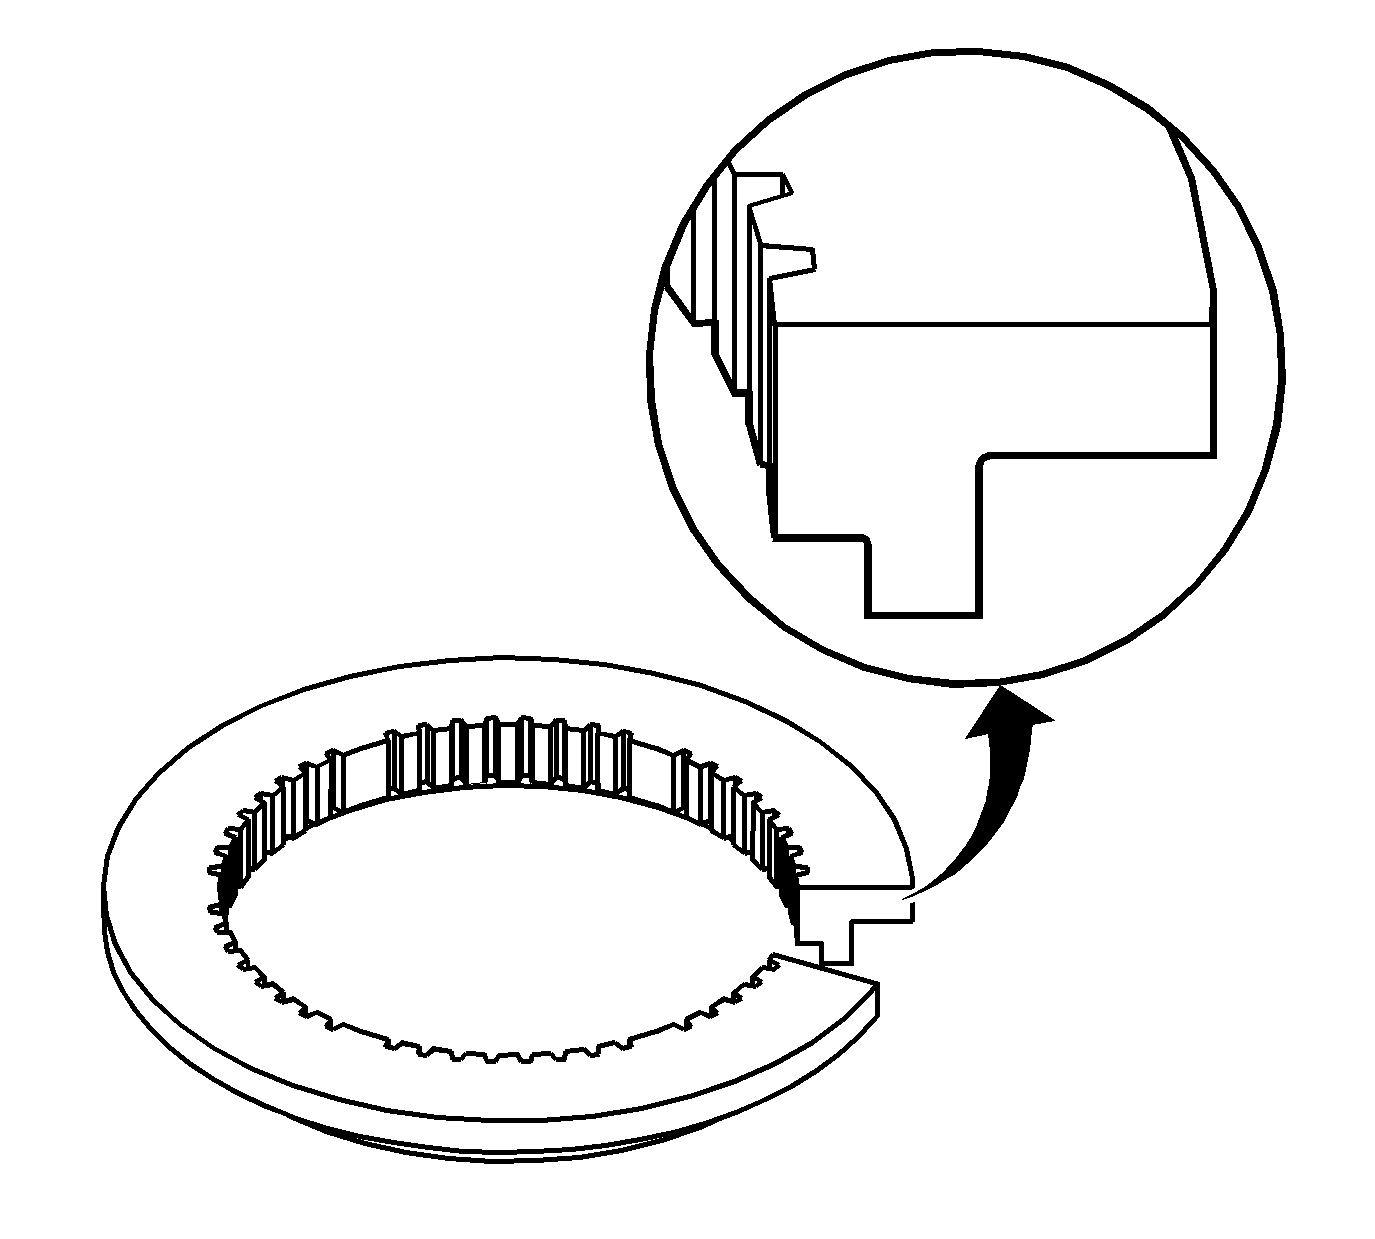
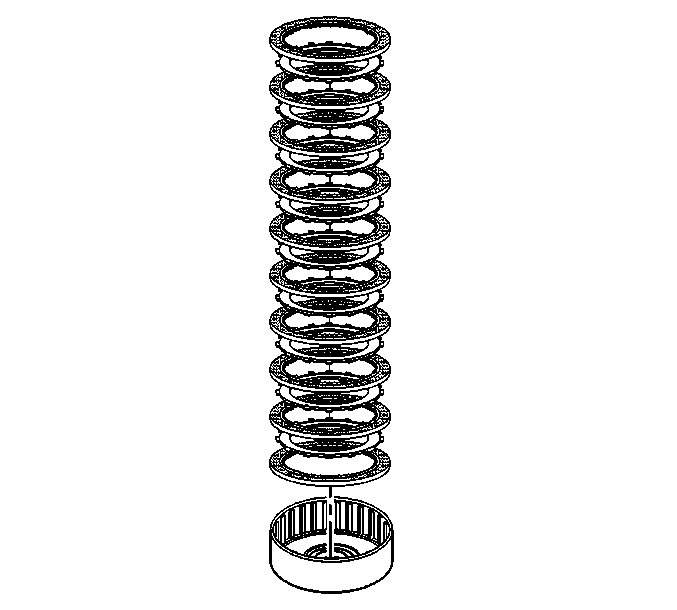
Important: The NVG 236 uses 8 friction clutch pressure plates and 7 steel clutch plates. The NVG 246 uses 10 friction clutch pressure plates and 9 steel clutch pressure plates. The assembly of the clutch components are the same.
| • | After installation of the correct amount of clutch plates, an inner clutch plate should be on top of the plate stack. |
| • | The tabs on all of the separator plates should all be aligned. |
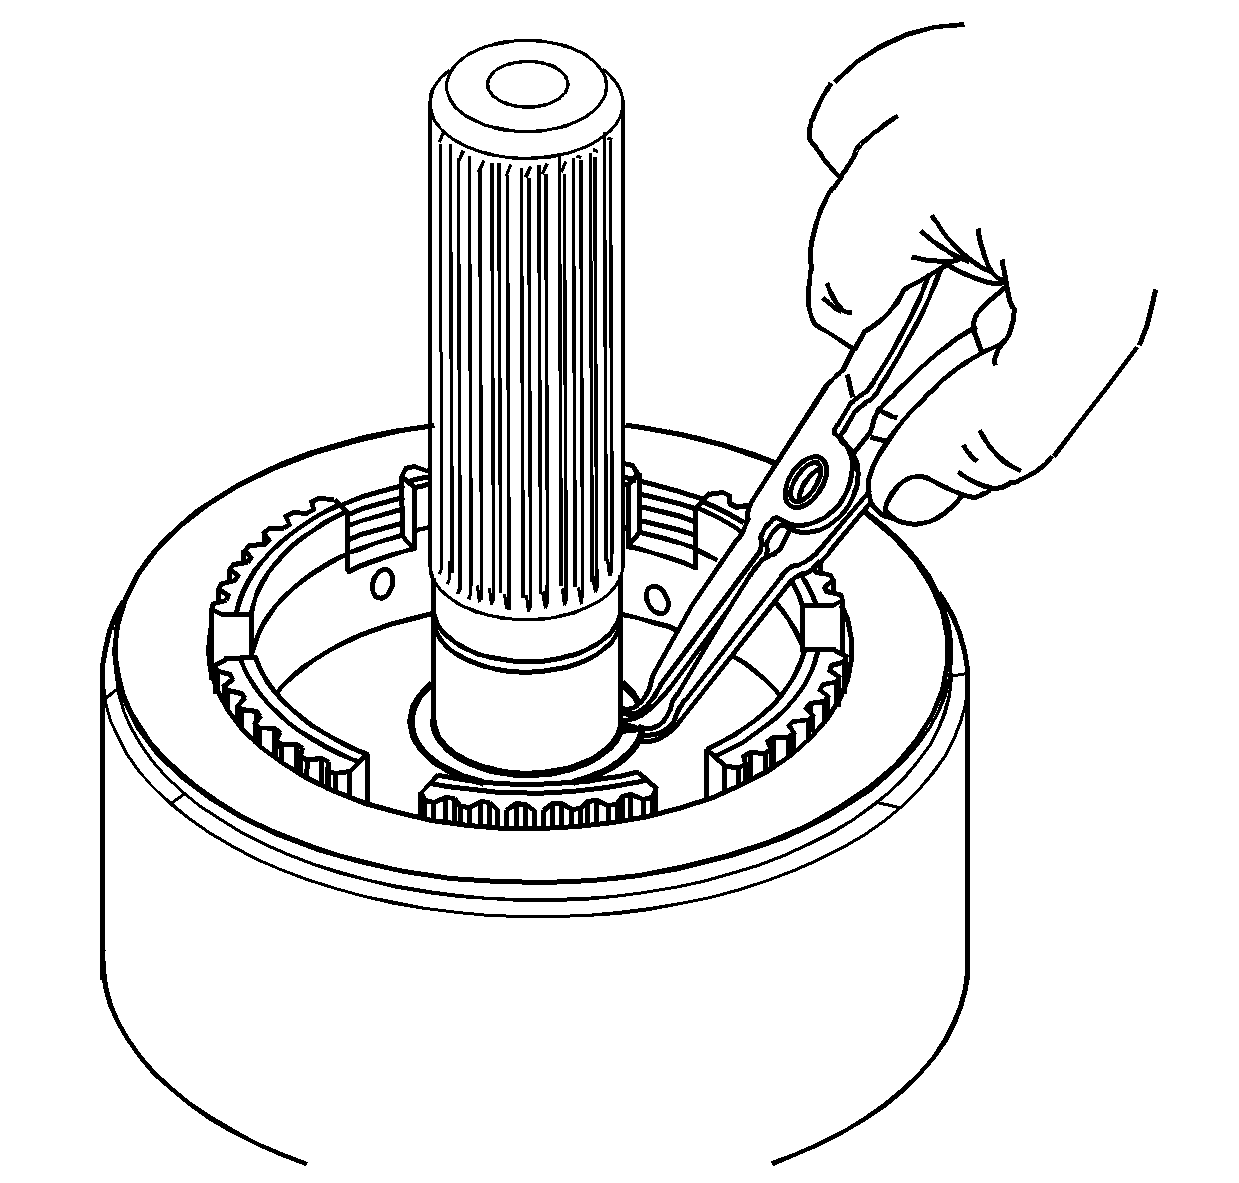
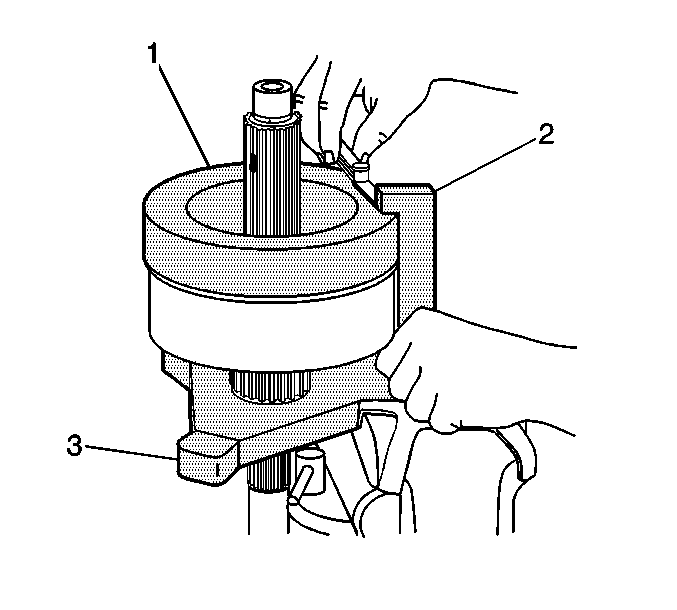
Important: A clutch plate shim package is necessary in order to have the proper shims available for setting the correct clutch pack preload. Improper preload can cause driveability concerns and failure of the transfer case.
Important: The specification is the average clearance remaining between the weight (1) and the gage block (2).
Important: Measure the clutch shims in the center area of the shim. The shims may have a burr or ridge around the inner or outer edge causing an incorrect measurement. The available shims may not combine to the desired measurement.
The shims in the clutch plate shim package are the following thickness:
| • | 0.30 mm (0.12 in) |
| • | 0.56 mm (0.022 in) |
| • | 0.81 mm (0.032 in) |
| • | 1.04 mm (0.041 in) |
| • | 1.30 mm (0.051 in) |
| • | 1.55 mm (0.061 in) |
| • | 1.80 mm (0.071 in) |
| • | 2.08 mm (0.081 in) |
Important: After obtaining the desired thickness of shims, do not remove the clutch plates from the clutch housing. If you remove, and then install the clutch plates again, it could change the measurement.
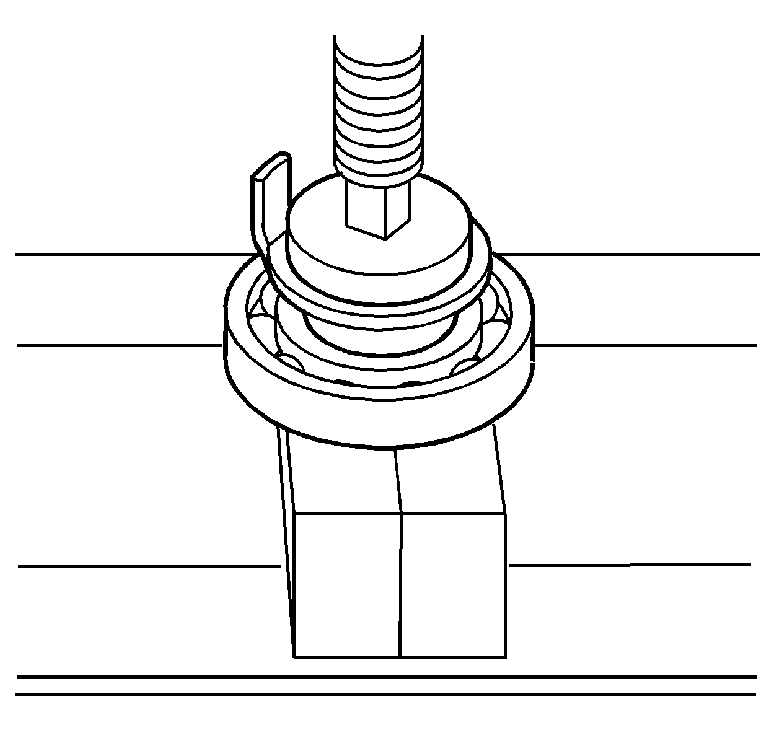
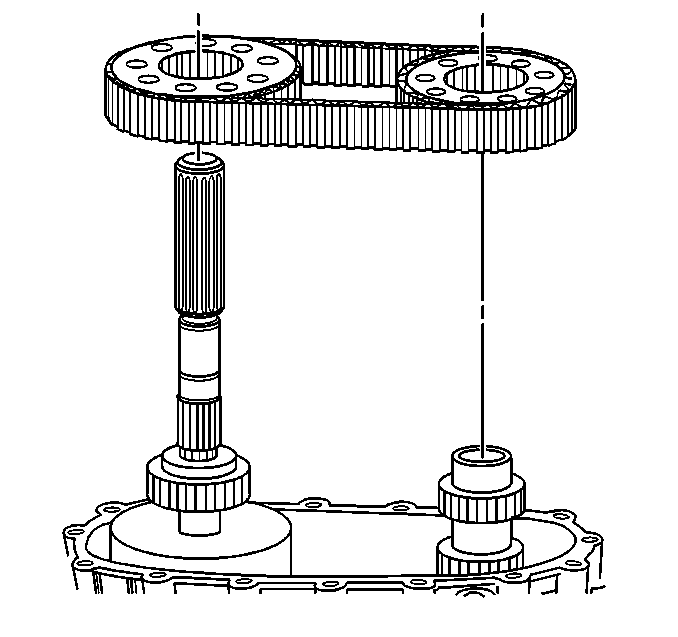
Important: Ensure to align the marks of the drive chain and sprockets if reusing the chain and sprockets.
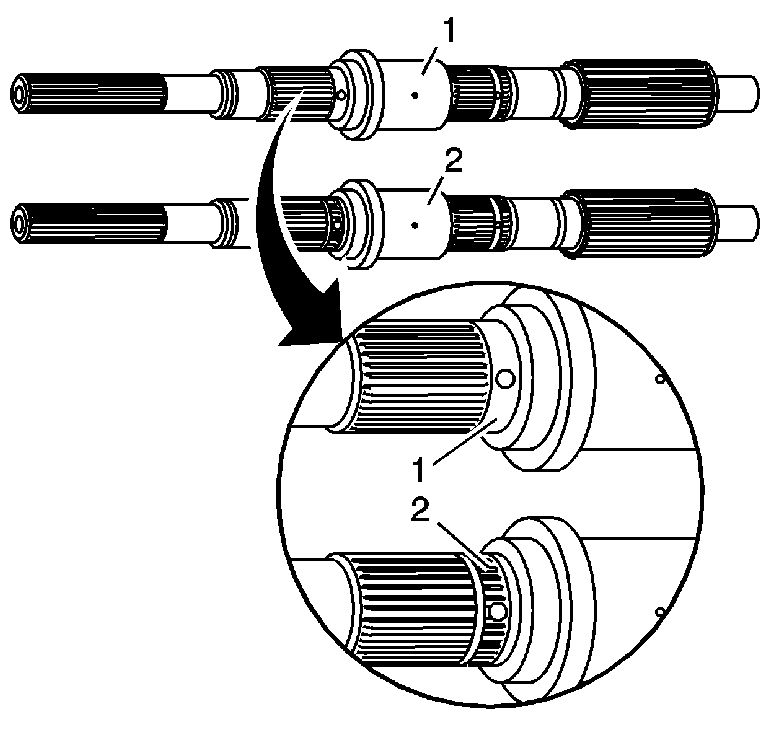
Important: The rear output shaft may be an original design (2) or the replacement design (1). The original design rear output shaft (2) uses an oil pump wave washer above the oil pump and a retaining ring under the oil pump. The original design rear output shaft (2) is identified by the splines in the area by the oil gallery hole. The replacement design rear output shaft has a smooth area by the oil gallery hole. Ensure to follow the steps for the correct rear output shaft.
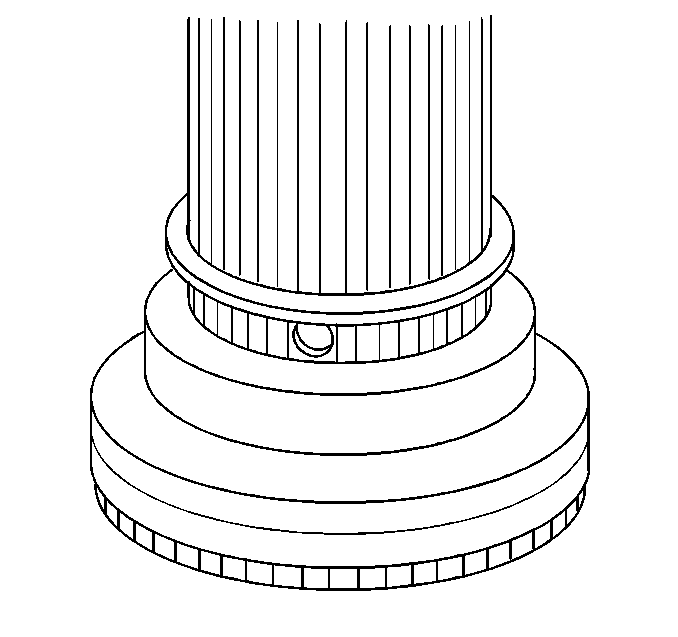
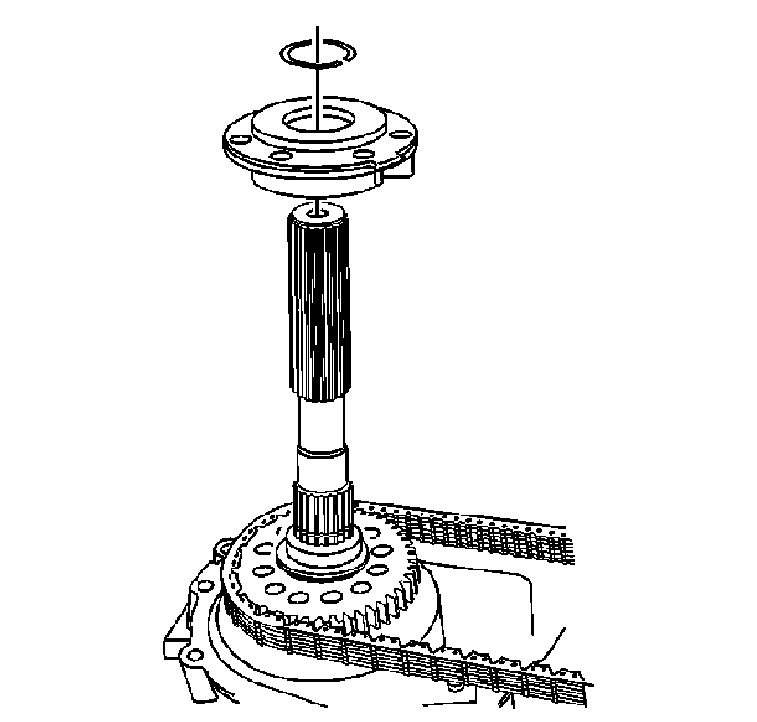
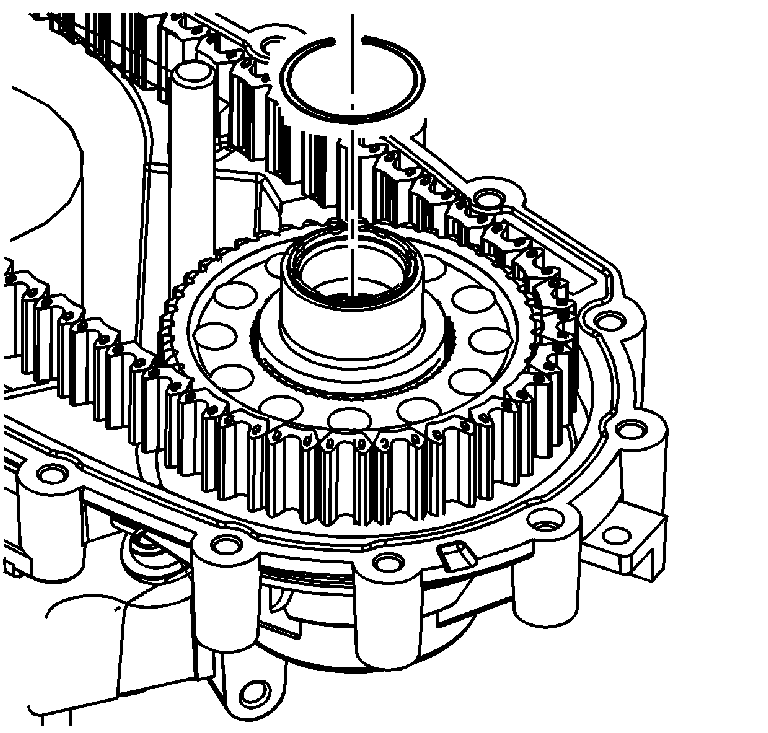
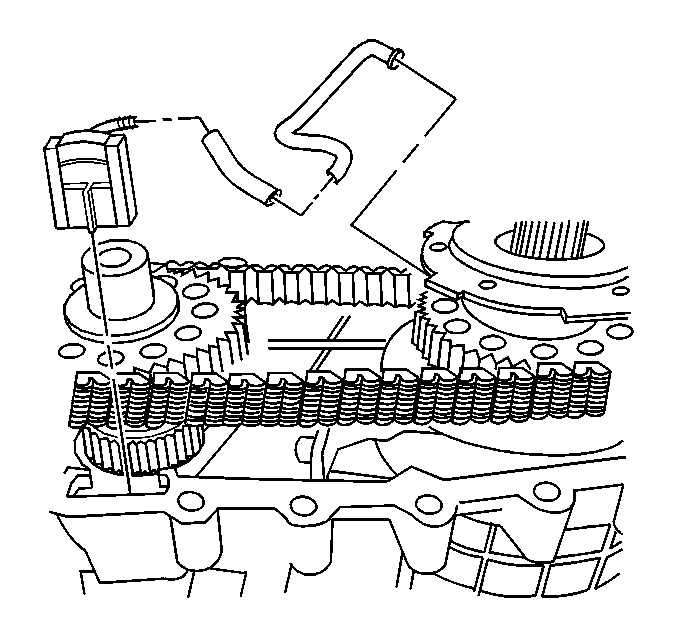
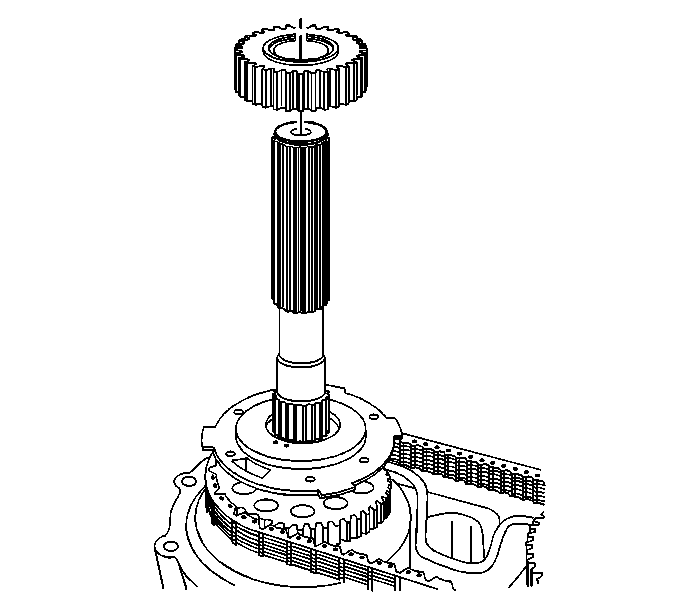
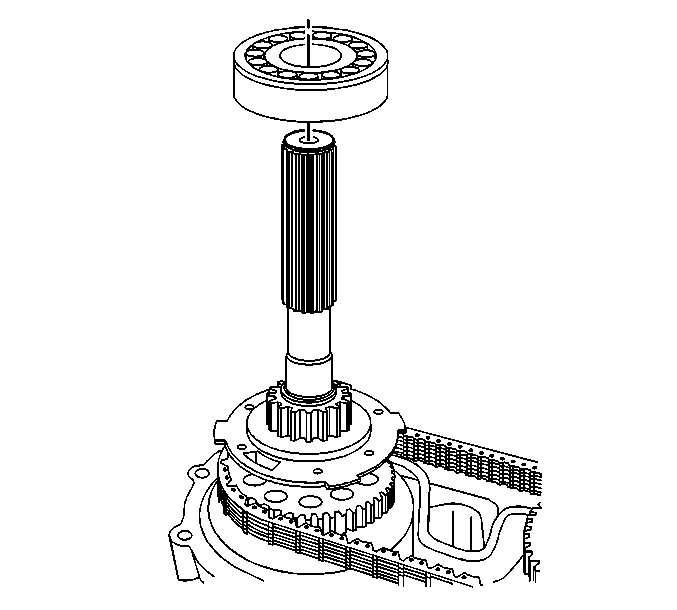
Important: Install the rear output shaft bearing with the groove for the retaining ring facing up.
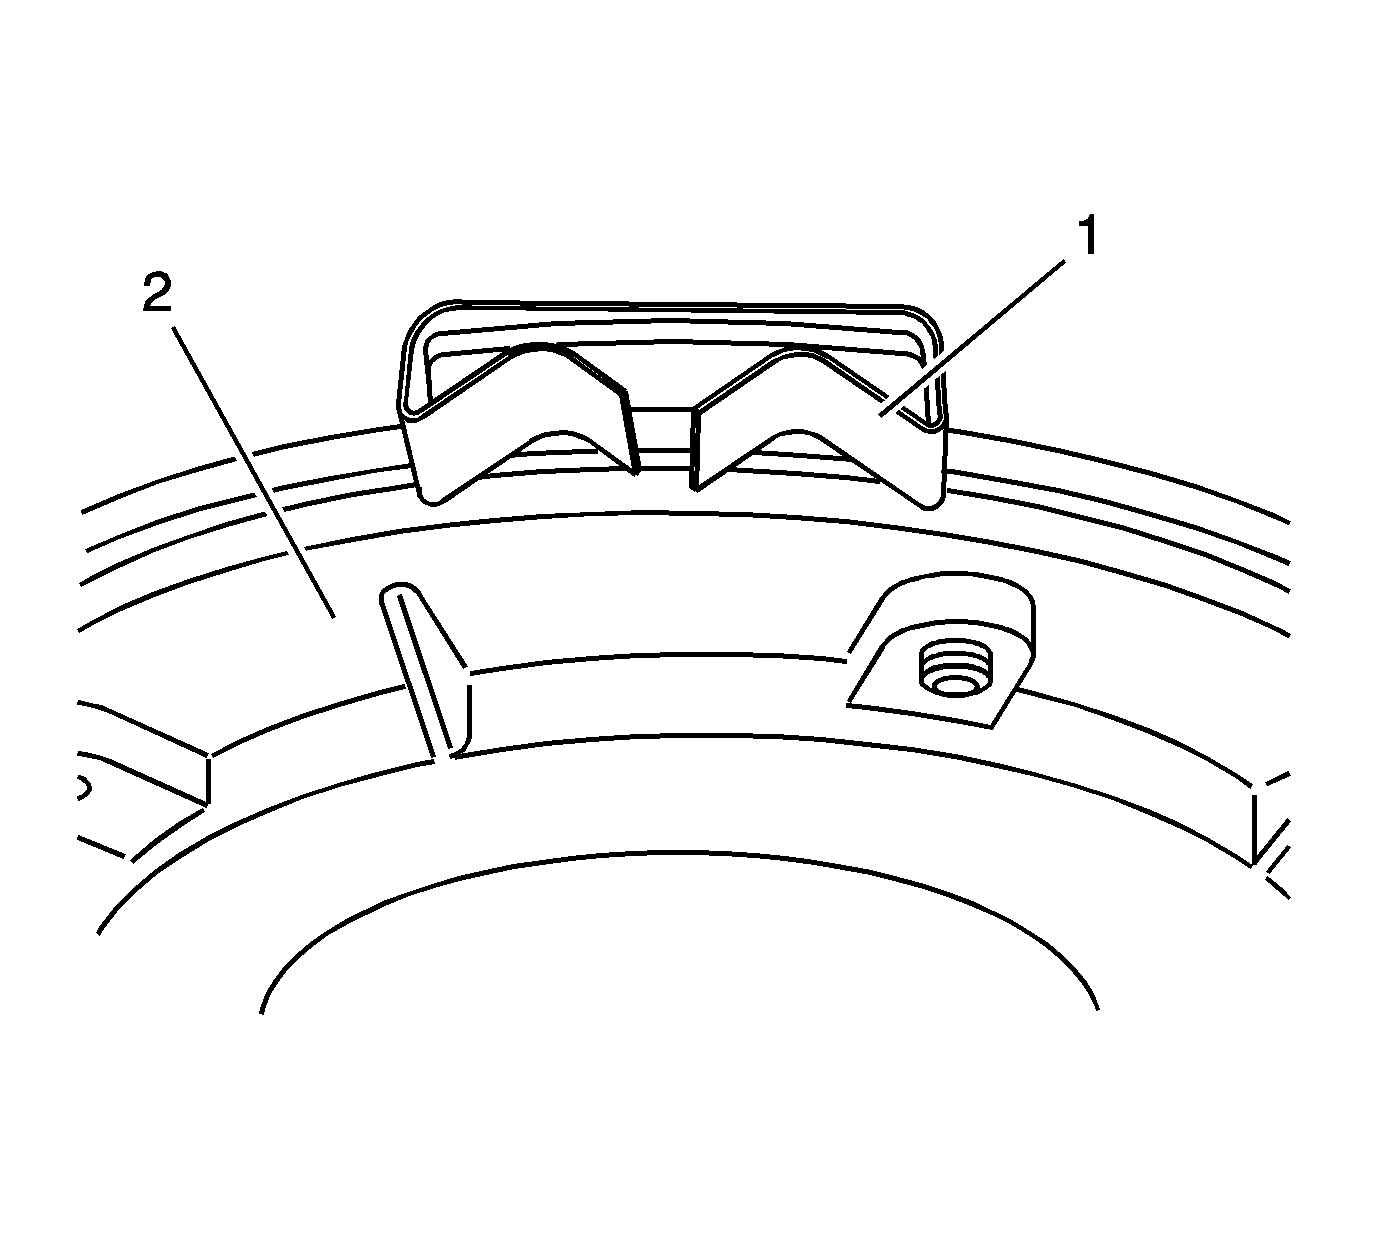
Important: Ensure the oil pump wear sleeve is properly positioned to the largest lug of the oil pump.
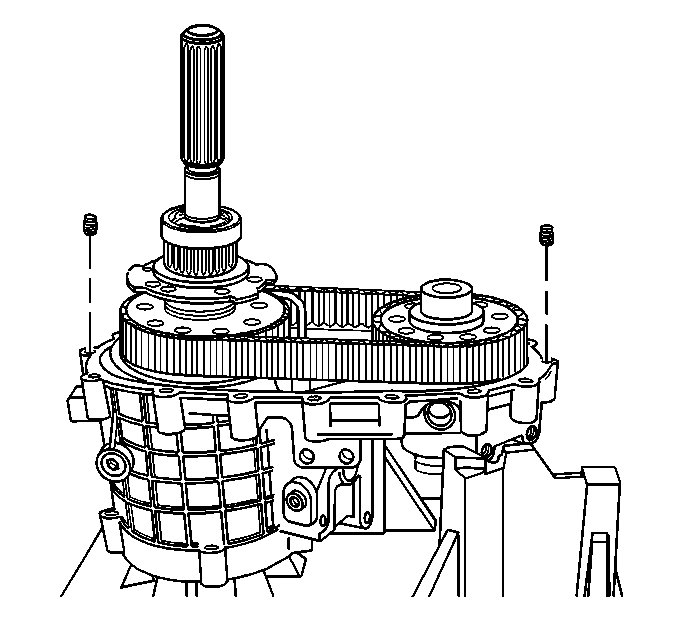
Important: Ensure the locating pins are installed in the front case half.
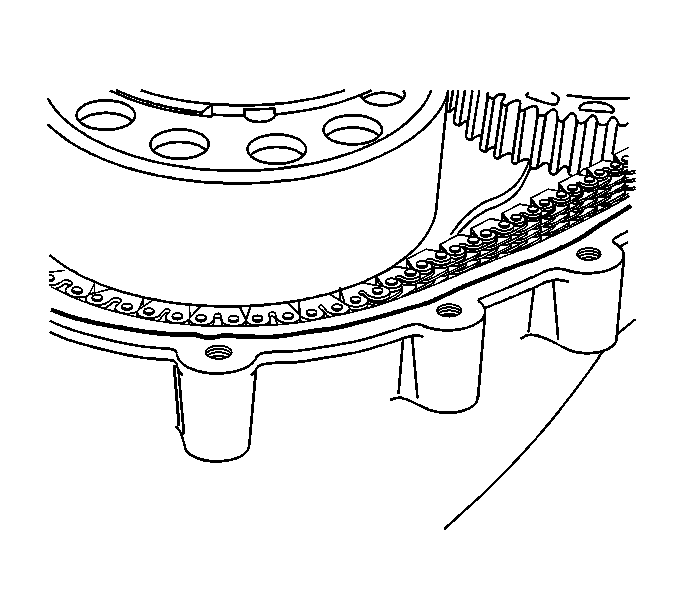
Notice: Apply the proper amount of sealant to the flange when assembling the transfer case. Excessive amounts of sealant can plug the oil pump screen, resulting in internal component failure.
Important: Ensure both sealing surfaces of the front and rear case halves are free of dirt, oil, and cleaning solvent.
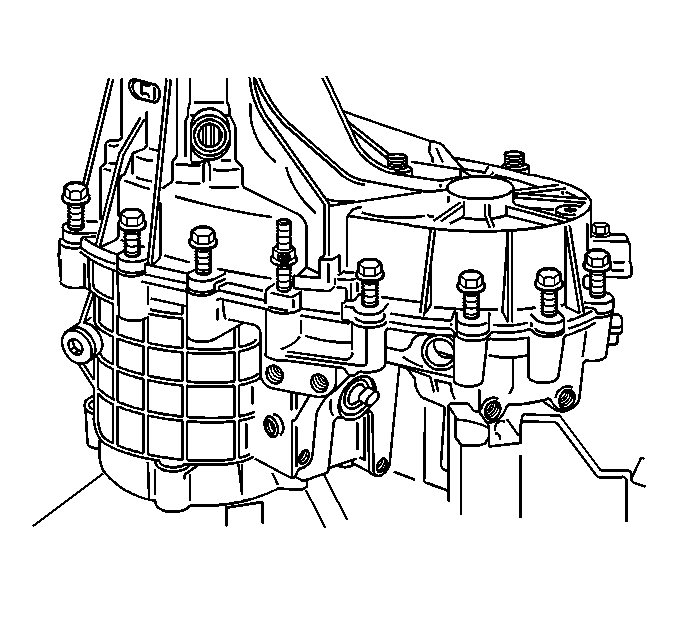
Notice: This component is made of magnesium. Proper assembly is required to prevent damage. Ensure the magnesium transfer case housings are properly insulated from all external steel components, or galvanic corrosion will occur. New nylon coated case bolts and aluminum washers must be used. Use only aluminum fill and drain plugs. Use only aluminum brackets under the case bolts. Ensure new seals are installed that have a rubber insulated outside diameter and have no tears or cuts. Extensive damage will occur if there is galvanic corrosion between the magnesium and steel components.
Important: The replacement case half bolts/studs have an aluminum cup style washer. The replacement case bolt/studs can be used again if the cup style washer is not faulty.
Tighten
Tighten the case bolts to 37 N·m (27 lb ft).
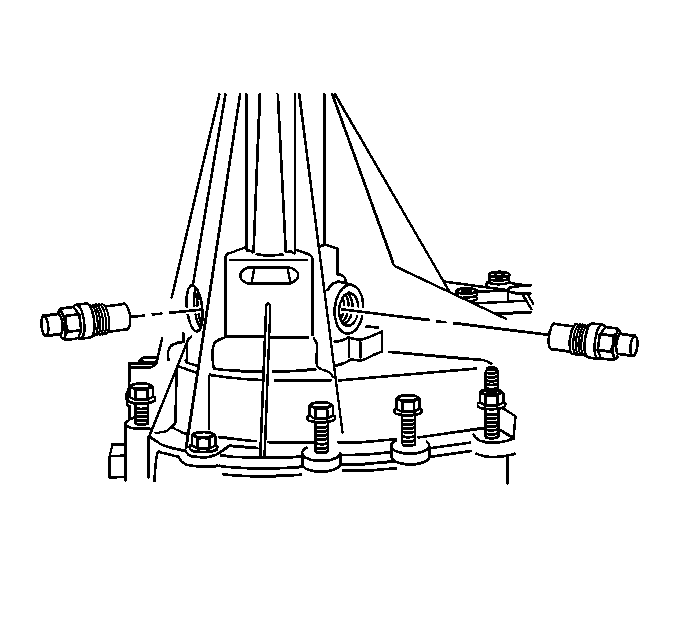
Tighten
Tighten the speed senor to 15 N·m (11 lb ft).
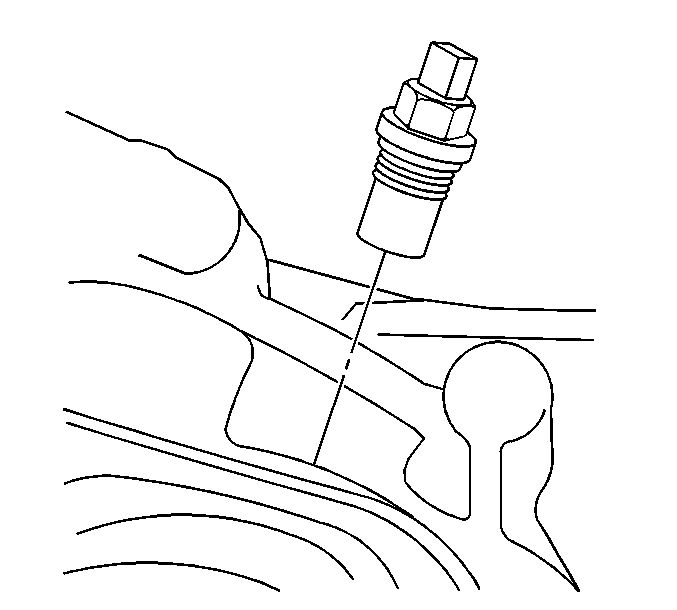
Tighten
Tighten the speed senor to 15 N·m (11 lb ft).
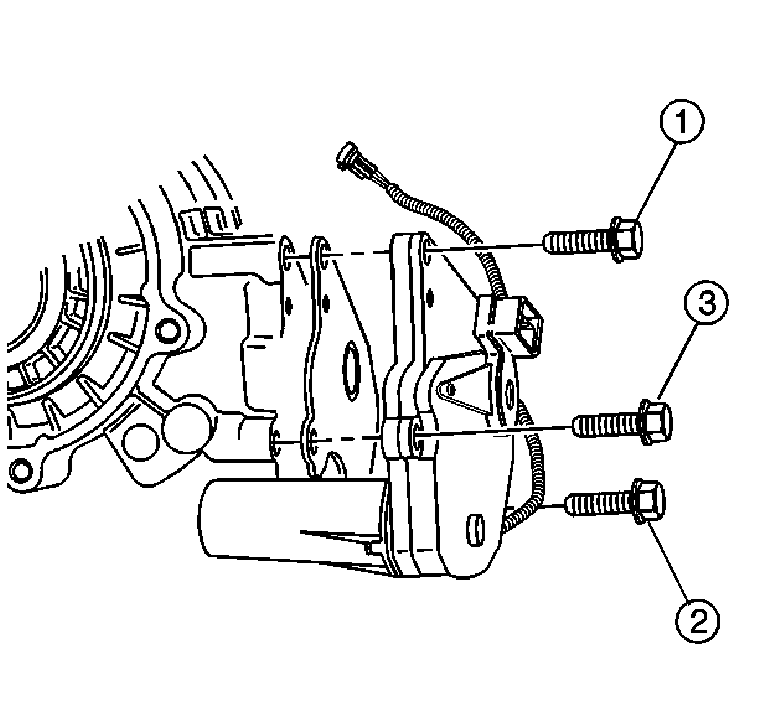
Tighten
Tighten the encoder motor mounting bolts, in the sequence shown, to 20 N·m (15 lb ft).
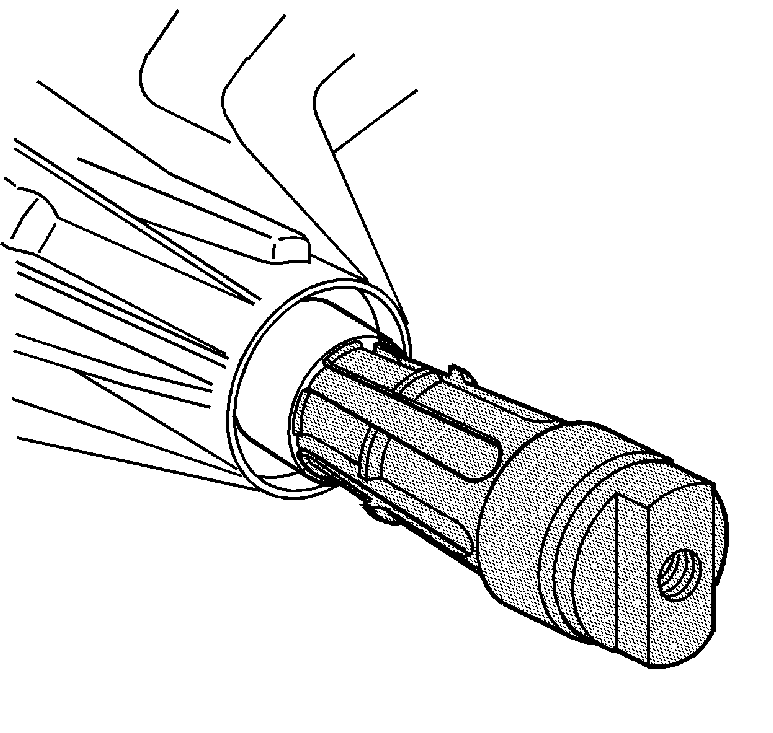
| 112.1. | Install the bushing on the finger section of the J 45380 . |
| 112.2. | Install the finger section to the main body of the J 45380 . |
| 112.3. | Position the bushing and tool to the case. |
| 112.4. | Using a hammer and the J 45380 , install the bushing. |
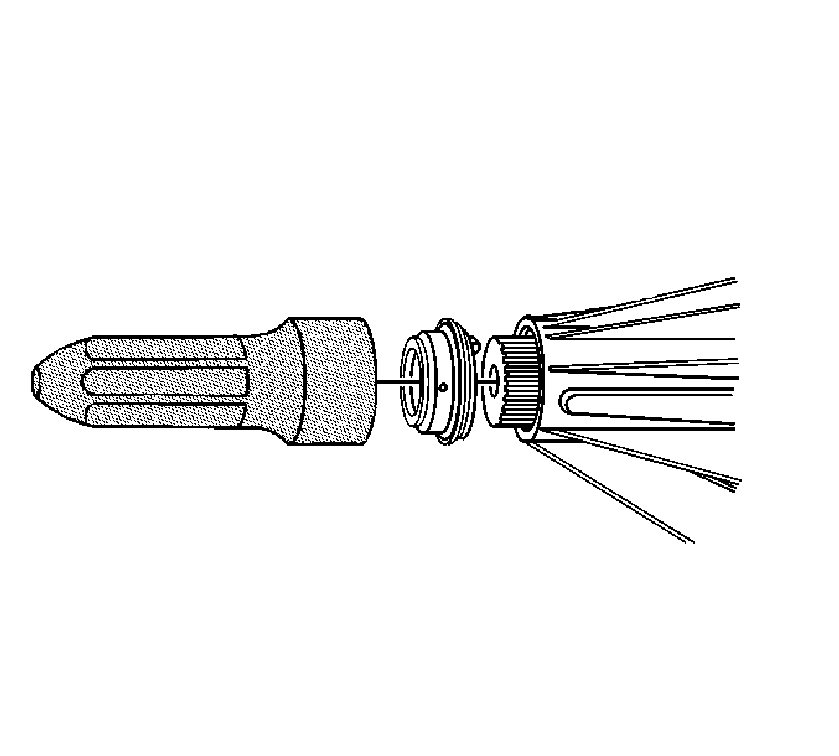
Important: When installing the rear output shaft seal, ensure that the drain hole is pointed down at an angle at which the transfer case would be installed in the vehicle.
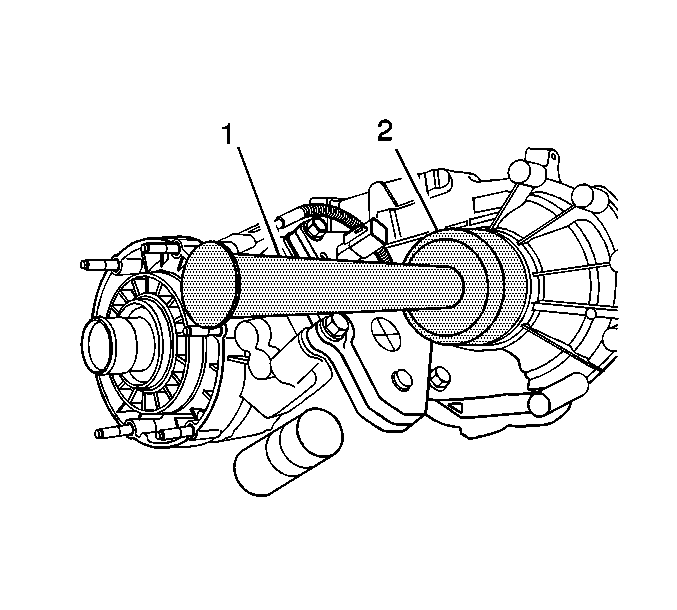
Important: All new NVG 246 replacement front output shaft seals are the internal sealing design and force fit on the front output shaft. Ensure to use the proper seal tool.
