Wheel Bearings Diagnosis Tapered
Tapered Roller Bearing Diagnosis
The following procedure describes how to inspect the wheel bearing for excessive looseness.
If excessive wheel bearing looseness is present, adjust the wheel bearings. Refer to Wheel Bearing Adjustment .
If excessive looseness is still present after adjustment, inspect the wheel bearings.
Consider the following factors when diagnosing the wheel bearing condition:
| • | General condition of the following parts during disassembly and inspection: |
| - | Wheel bearings |
| - | Races |
| - | Seals |
| - | Lubricant |
| - | Steering Knuckle |
| • | Classify the failure of the wheel bearing with the aid of the illustrations. |
| • | Determine the cause of the wheel bearing failure. |
| • | Replace the damaged parts. |
Abrasive Roller Wear
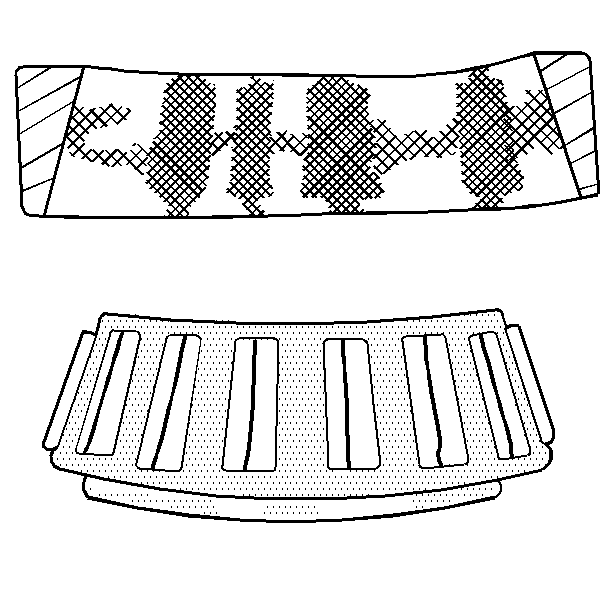
The pattern on the races and the rollers is caused by fine abrasives.
- Clean all of the parts and the housings.
- Check the seals and the bearings.
- Replace leaky seals, rough, or noisy bearings. Refer to Front Wheel Hub, Bearing, and Seal Replacement .
Abrasive Step Wear
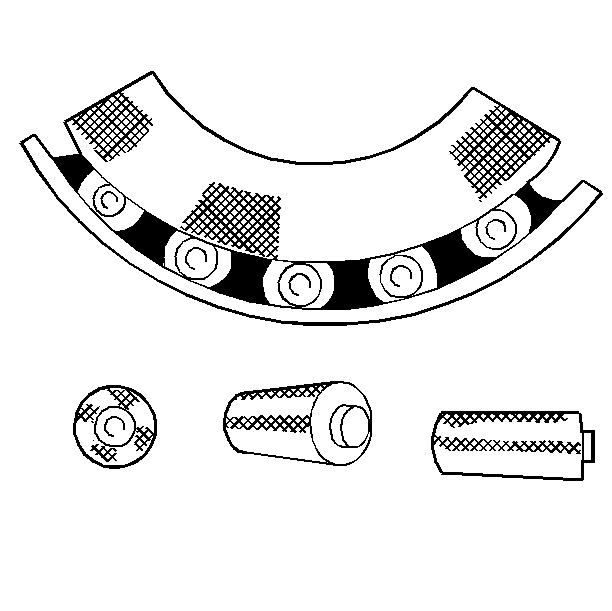
The pattern on the roller ends is caused by fine abrasives.
- Clean all of the parts and the housings.
- Check the seals and the bearings.
- Replace leaky seals, rough, or noisy bearings. Refer to Front Wheel Hub, Bearing, and Seal Replacement .
Galling
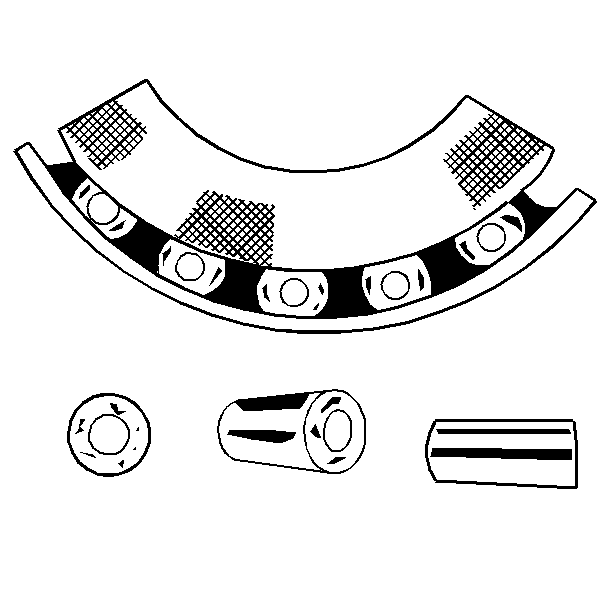
The metal smears on the roller ends are due to overheating, lubricant failure, or lubricant overload.
- Check the seals.
- Check for proper lubrication.
- Clean all of the parts and the housings.
- Replace the bearing. Refer to Front Wheel Hub, Bearing, and Seal Replacement .
Etching
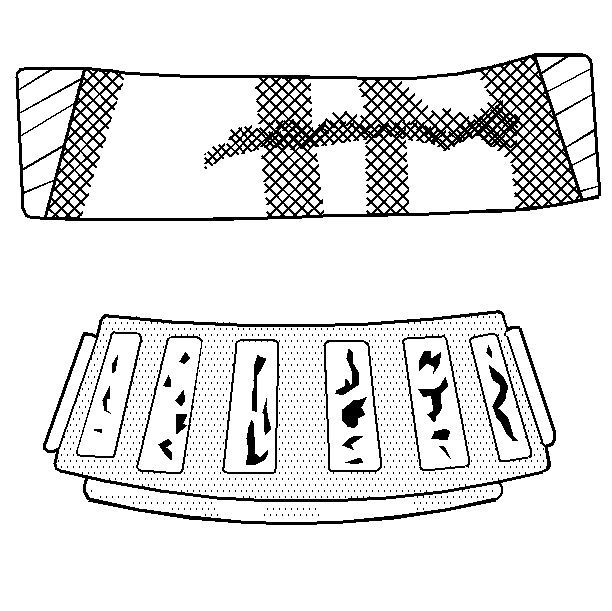
The bearing surfaces appear gray or grayish black in color, with related etching away of material usually at roller spacing.
- Check the seals.
- Check for proper lubrication.
- Clean all of the parts and the housings.
- Replace the bearings. Refer to Front Wheel Hub, Bearing, and Seal Replacement .
Bent Cage
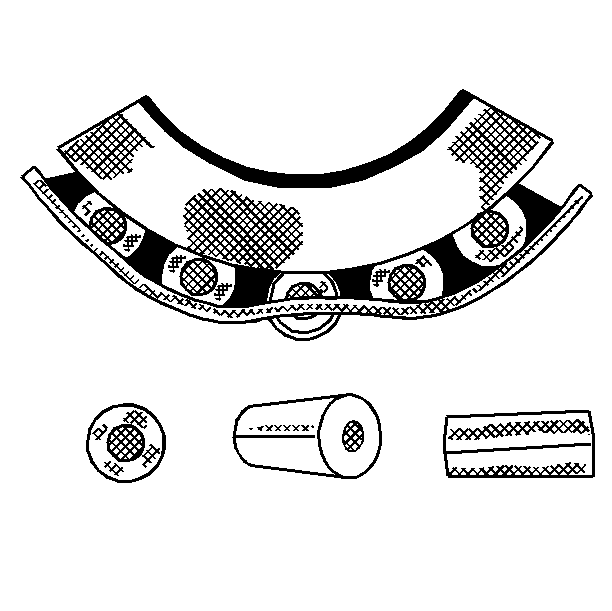
When a cage is damaged due to improper handling or improper tool usage. Replace the bearing. Refer to Front Wheel Hub, Bearing, and Seal Replacement .
Bent Cage
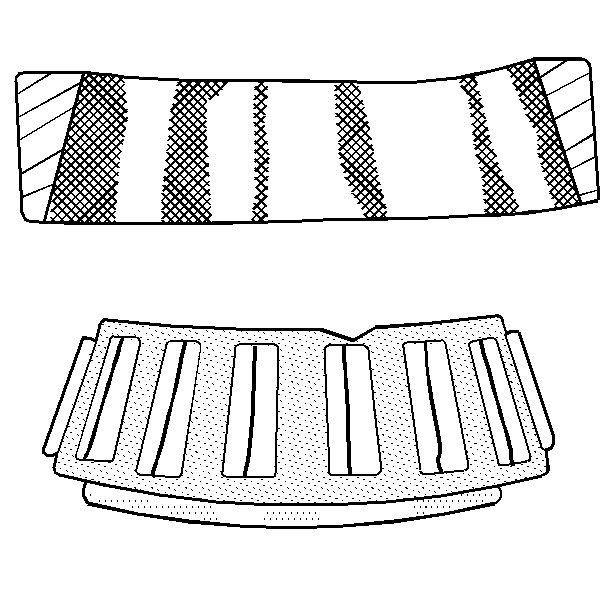
The cage may be damaged due to improper handling or improper tool usage. Replace the bearing. Refer to Front Wheel Hub, Bearing, and Seal Replacement .
Cage Wear
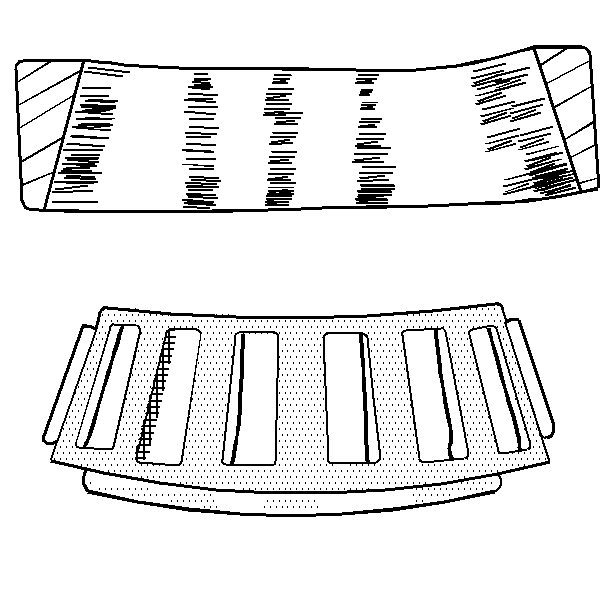
The wear around the outside diameter of the cage and the roller pockets is caused by abrasive material or inefficient lubrication.
- Check the seals.
- Clean all the parts and the housings.
- Replace the bearings. Refer to Front Wheel Hub, Bearing, and Seal Replacement .
Indentations
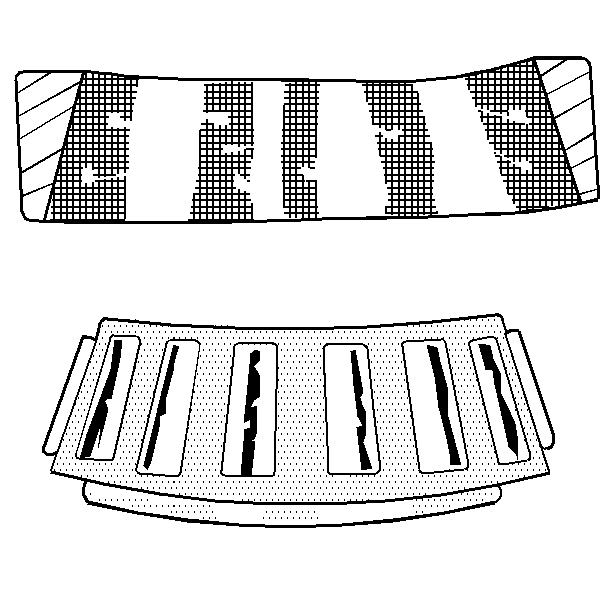
The surface depressions on the race and the rollers are caused by hard particles of foreign matter.
- Check the seals.
- Clean all the parts and the housings.
- Replace the bearings. Refer to Front Wheel Hub, Bearing, and Seal Replacement .
Frettage
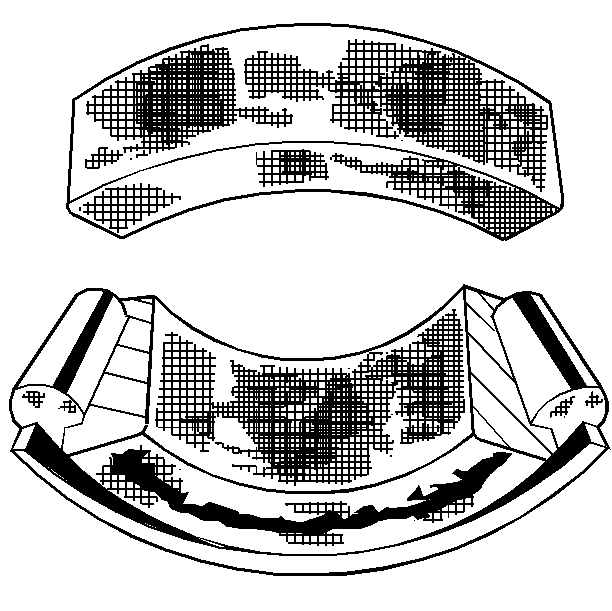
The corrosion caused by small relative movement of parts with no lubrication.
- Check the seals.
- Check for proper lubrication.
- Clean all the parts and the housings.
- Replace the bearings. Refer to Front Wheel Hub, Bearing, and Seal Replacement .
Smears
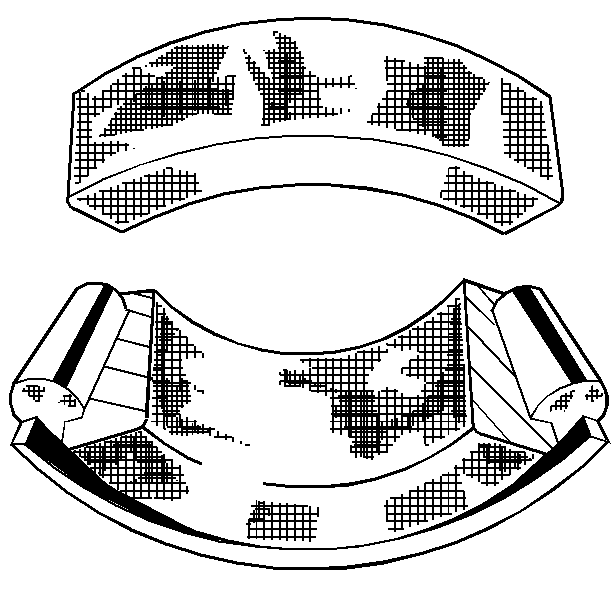
The smearing of the metal is due to slippage. Slippage can be caused by the following factors:
| • | Poor fits |
| • | Lubrication |
| • | Overheating |
| • | Overloads |
| • | Handling damage |
If this condition occurs, perform the following:
- Check the seals.
- Check for proper fit.
- Check for proper lubrication.
- Clean all the parts and the housings.
- Replace the bearings. Refer to Front Wheel Hub, Bearing, and Seal Replacement .
Stain Discoloration
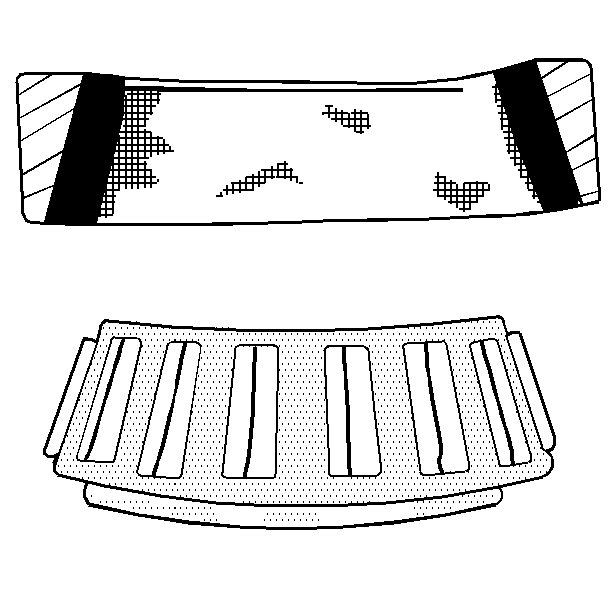
The discoloration on the bearings is caused by incorrect lubrication or moisture and ranges in color from light brown to black. Reuse the bearing if you can remove the stains with light polishing and there is no evidence of overheating.
If this condition occurs, perform the following:
- Check the seals.
- Clean all the parts and the housings.
- Replace the bearings, if necessary. Refer to Front Wheel Hub, Bearing, and Seal Replacement .
Heat Discoloration
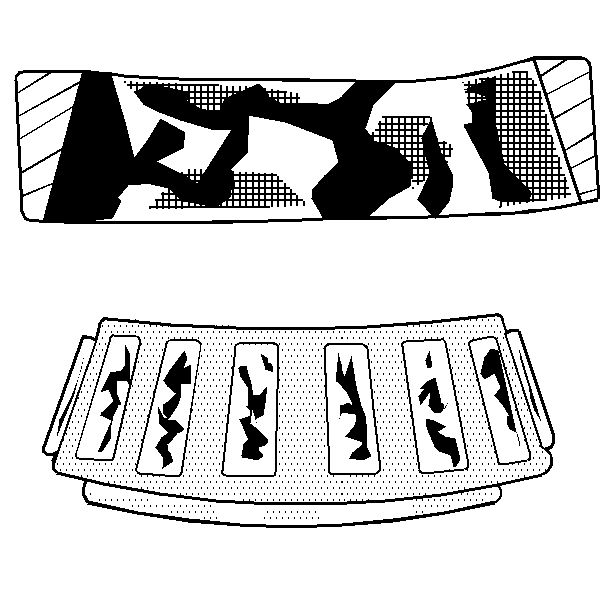
The heat discoloration on the bearings ranges from faint yellow to dark blue and results from overload or an incorrect lubricant. Excessive heat causes softening of the races or the rollers. In order to check for loss of temper on the races and the rollers, perform a file test. A file drawn over a tempered part will grab and cut the metal and fail the file test. A file drawn over a hard part will glide with no metal cutting.
If overheating damage is indicated, perform the following:
- Check the seals.
- Clean all the parts and the housings.
- Replace the bearings. Refer to Front Wheel Hub, Bearing, and Seal Replacement .
Misalignment
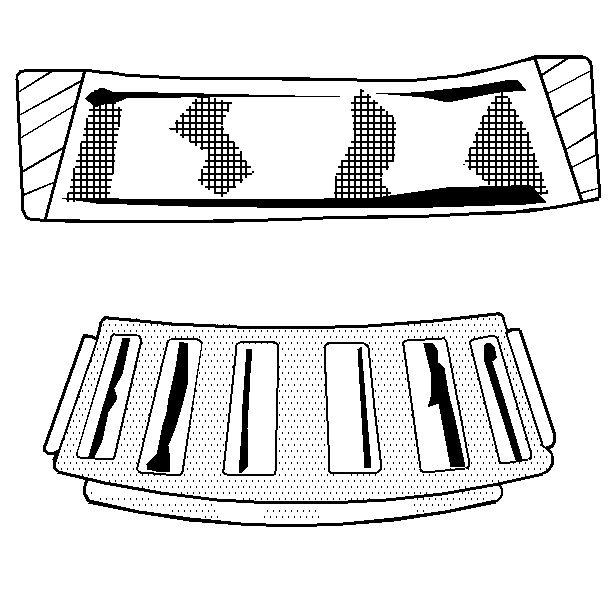
The outer race is misaligned due to a foreign object.
- Clean all the parts and the housings.
- Ensure the races are properly seated.
- Replace the bearing. Refer to Front Wheel Hub, Bearing, and Seal Replacement .
Cracked Inner Race
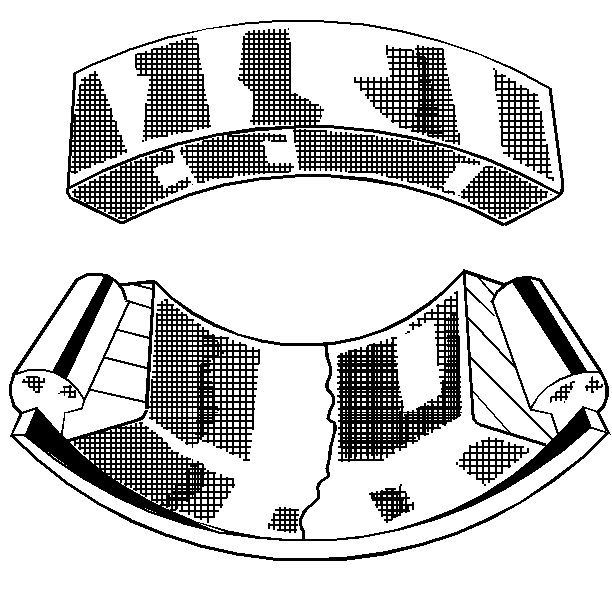
The race is cracked due to improper fit, cocking, or poor bearing seats.
- Clean all the parts and the housings.
- Ensure the races are properly seated.
- Replace the bearing. Refer to Front Wheel Hub, Bearing, and Seal Replacement .
Fatigue Spalling
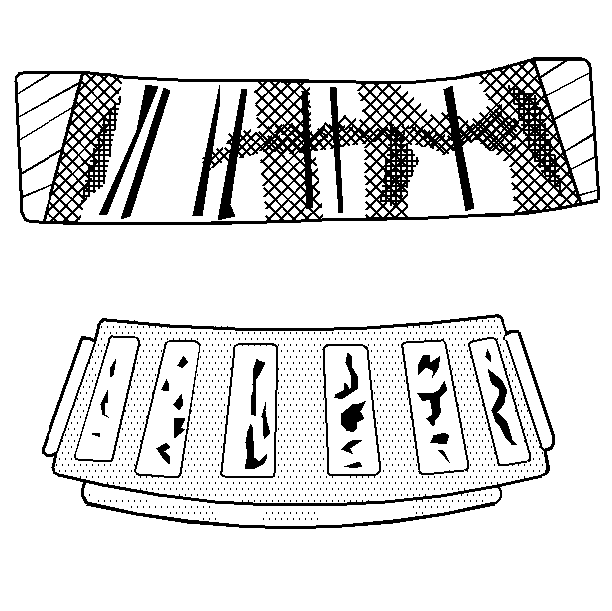
The surface is flaked with metal due to bearing fatigue.
- Clean all the parts and the housings.
- Replace the bearing. Refer to Front Wheel Hub, Bearing, and Seal Replacement .
Brinelling
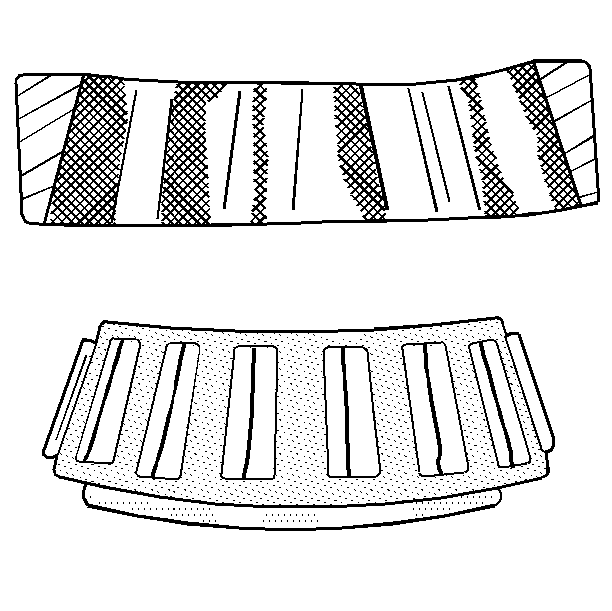
The surface indentations in the race way are caused by the rollers under impact loading or from vibration while the bearing is not rotating.
- Clean all the parts and the housings.
- Replace the bearing. Refer to Front Wheel Hub, Bearing, and Seal Replacement .
Wheel Bearings Diagnosis Sealed
Step | Action | Values | Yes | No |
|---|---|---|---|---|
1 | Did you review the General Description and perform the necessary inspections? | -- | ||
2 | Road test the vehicle in order to verify the customer's complaint. Does the vehicle operate normally? | -- | System OK | Go to Step 3 |
3 |
Did you find and correct the condition? | -- | Go to Step 7 | Go to Step 4 |
4 |
Did you locate the source of the wheel bearing noise? | -- | Go to Step 6 | Go to Step 5 |
5 |
Important: Support the vehicle by the lower control arms or the rear axle to prevent movement during wheel bearing/hub inspection. Is the measurement greater then the specified value? | 0.27 mm (0.005 in) | Go to Step 6 | System OK |
6 | Replace the wheel bearing. Refer to Front Wheel Hub, Bearing, and Seal Replacement in Front Suspension. Did you complete the repair? | -- | Go to Step 7 | -- |
7 | Road test the vehicle to verify the repair. Does the vehicle operate normally? | -- | System OK | Go to Step 3 |
