Sunroof Module Assembly Replacement CF5
Removal Procedure
- Remove the headliner. Refer to Headlining Trim Panel Replacement in Interior Trim.
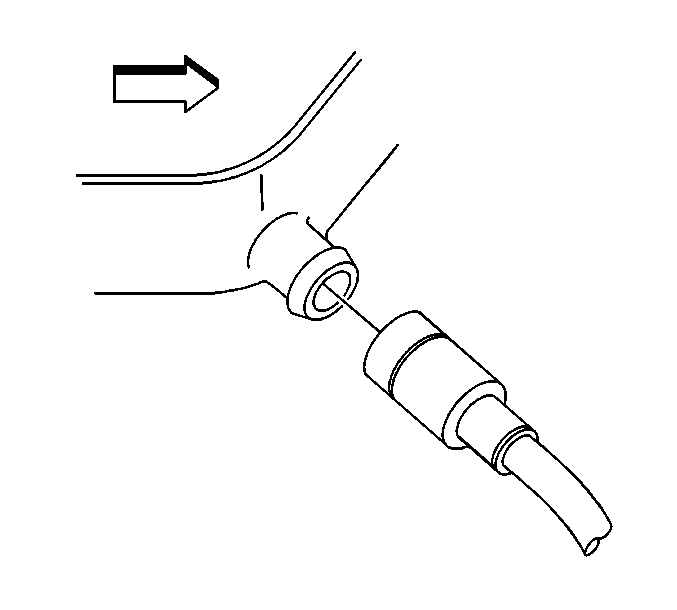
- Remove the sunroof drain hoses from the sunroof assembly. Refer to Sunroof Housing Front Drain Hose Replacement and Sunroof Housing Rear Drain Hose Replacement .
- Disconnect the electrical connectors.
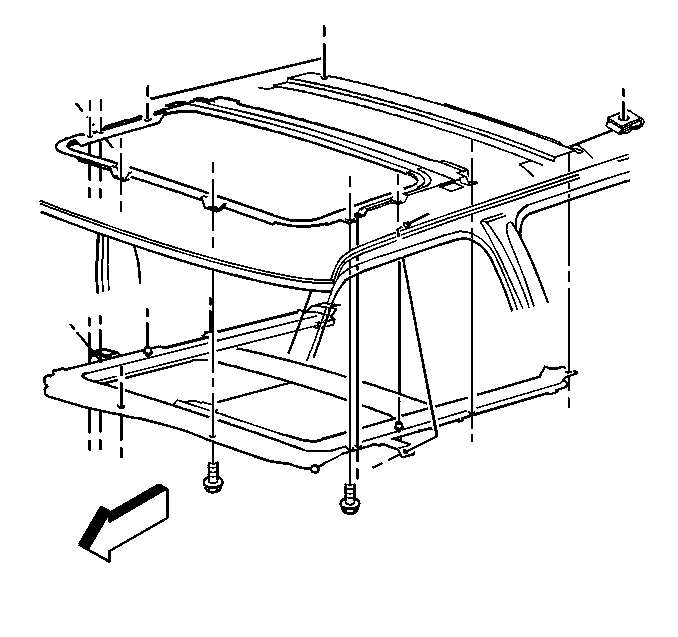
- Remove the bolts that retain the sunroof module assembly to the roof.
- Release the retainers that secure the sunroof module assembly to the roof.
- With an assistant, remove the sunroof module assembly from the vehicle.
Installation Procedure
- Install 2 nuts on the roof bow and a nut to each side rail.
- With an assistant, position the sunroof module assembly to the roof.
- Use the sunroof retainers in order to secure the sunroof module assembly to the roof.
- Ensure that all broken retainer pieces are removed from the vehicle in order to prevent a rattle noise.
- Install the bolts that retain the sunroof module assembly to the roof.
- Install the sunroof drain hoses to the sunroof module assembly. Refer to Sunroof Housing Front Drain Hose Replacement and Sunroof Housing Rear Drain Hose Replacement .
- Install the headliner. Refer to Headlining Trim Panel Replacement in Interior Trim.
- Perform the following steps in order to adjust the sunroof window, as needed:
- Open and close the sunroof.
- Inspect the fit of the sunroof window.
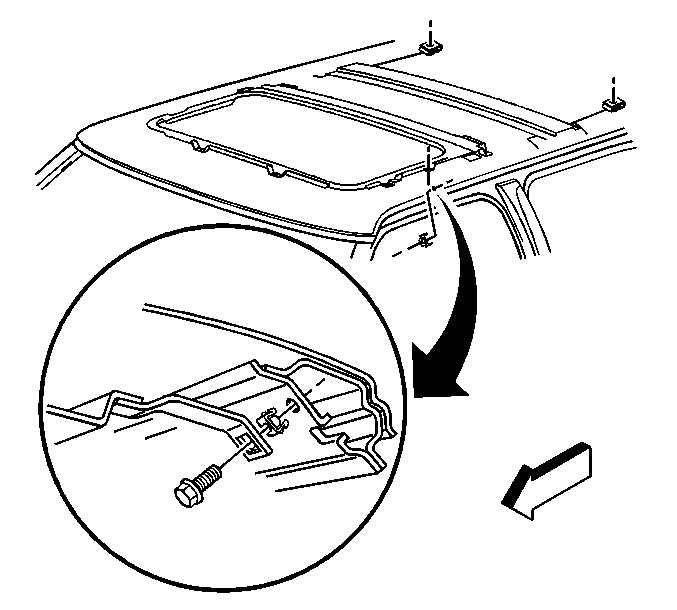

The sunroof retainers are used in order to assist in the assembly of the sunroof module assembly at the assembly plant. If a retainer is broken, do not replace the retainer.
Notice: Use the correct fastener in the correct location. Replacement fasteners must be the correct part number for that application. Fasteners requiring replacement or fasteners requiring the use of thread locking compound or sealant are identified in the service procedure. Do not use paints, lubricants, or corrosion inhibitors on fasteners or fastener joint surfaces unless specified. These coatings affect fastener torque and joint clamping force and may damage the fastener. Use the correct tightening sequence and specifications when installing fasteners in order to avoid damage to parts and systems.
Tighten
Tighten the sunroof module assembly mounting bolts to 9 N·m (80 lb in).
| 8.1. | Loosen the screws that retain the sunroof window to the sunroof module assembly. |
| 8.2. | Adjust the fit between the sunroof window and the roof opening. |
The fit should be equal on both sides.
| 8.3. | Adjust the rear edge of the window slightly higher than the front edge in order to minimize wind noise. |
| 8.4. | Secure the sunroof window in position by tightening the screws. |
Tighten
Tighten the screws to 3.5 N·m (31 lb in).
Sunroof Module Assembly Replacement ZRX/XTREME w/ CF5
Removal Procedure
- Position the sunroof window.
- Remove the window panel garnish molding. Refer to Sunroof Panel/Window Garnish Molding Replacement in Interior Trim.
- Disconnect the electrical connector from the motor/actuator.
- Remove the ground screw.
- Disconnect the power feed electrical connector.
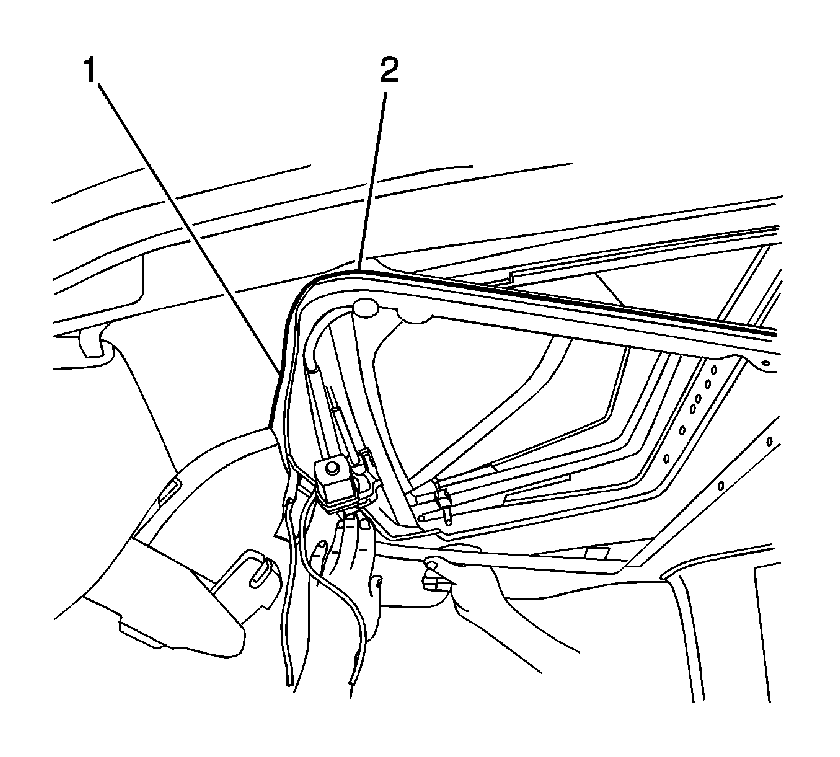
- Remove the lower frame assembly (2). Refer to Sunroof Frame Replacement in Interior Trim.
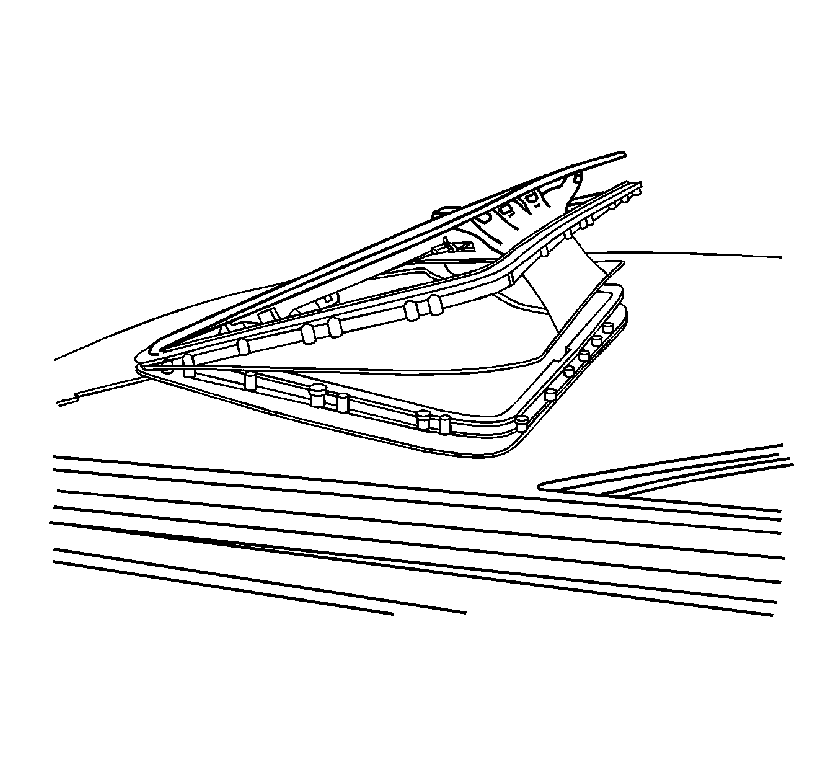
- With the palm of the hand, lift the upper frame assembly from the roof panel with the sunroof window in place.
- Remove the upper frame from the vehicle.
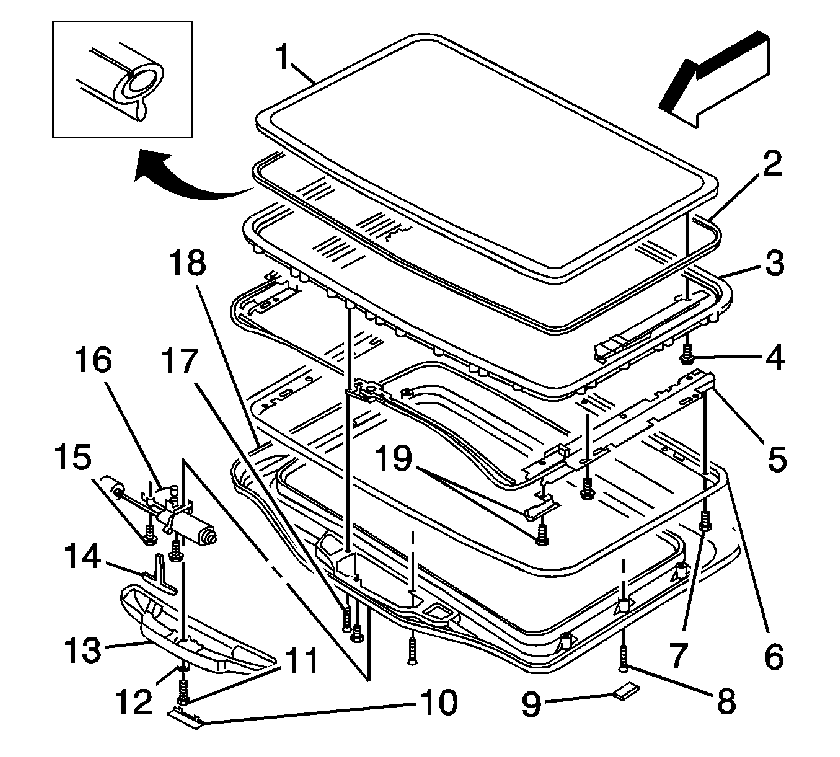
Important: The sunroof module assembly can be removed without removing the sunroof motor/actuator from the lower frame. The sunroof window will need to be transferred to the new sunroof module assembly after removal.
Installation Procedure
- Clean the foam tape from both upper and lower frame assemblies.
- Apply new foam tape to the compression side of the frame assemblies.
- Transfer the old sunroof window to the new upper frame assembly.
- Install the upper frame assembly to the outer roof panel.
- Carefully position the lower frame assembly (2) to the headliner and upper frame assembly.
- Install the screws to the lower frame assembly in order to secure the upper and lower frame assemblies.
- Install the panel window garnish molding. Refer to Sunroof Panel/Window Garnish Molding Replacement in Interior Trim.
- Water test the sunroof assembly. Refer to Waterleak Test Preparation in General Information.
Important: The sunroof assembly is a 2-piece design. Foam tape on the sealing surface of the upper and lower frame ring seals the sunroof assembly from the external elements. Ensure the foam tape is replaced with new foam tape upon installation of either the upper or lower portion of the sunroof frame assemblies.
Important: Be sure to cover the holes in the frame to ensure the fasteners are also sealed.
Notice: Refer to Fastener Notice in the Preface section.
Tighten
Tighten the sunroof window screws to 4.0 N·m (35 lb in).


Tighten
Tighten the lower frame assembly screws to 1.5 N·m (13 lb in).
