For 1990-2009 cars only
Tools Required
J 39400-A Halogen Leak Detector
Removal Procedure
- Recover the refrigerant from the A/C system. Refer to Refrigerant Recovery and Recharging .
- Remove the air cleaner outlet duct. Refer to Air Cleaner Outlet Resonator Replacement in Engine Controls-4.3L.
- Remove the drive belt.
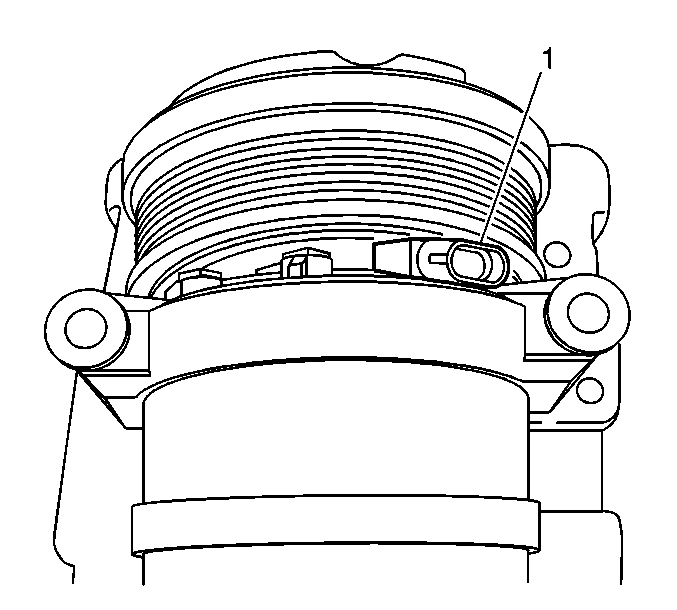
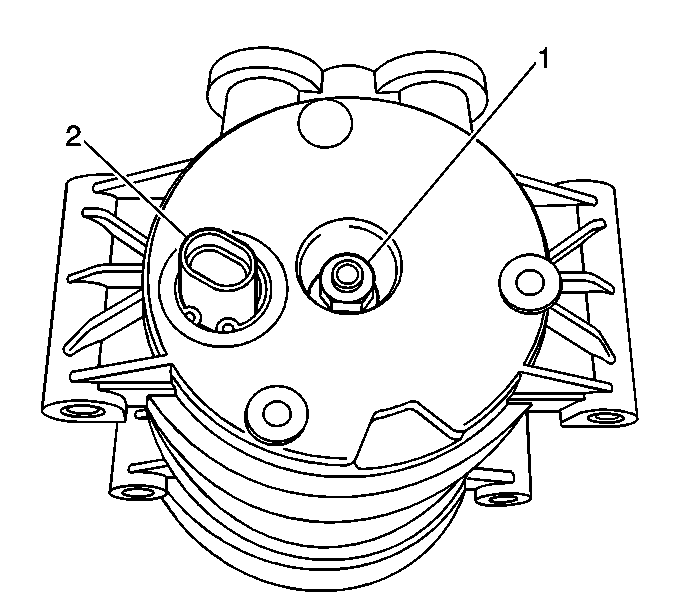
- Disconnect the A/C compressor clutch coil electrical connector (1).
- Disconnect the A/C high pressure switch electrical connector (2).
- Remove the compressor hose assembly from the compressor.
- Remove the compressor sealing washers and discard.
- Remove the nut and throttle control cable bracket from the throttle body.
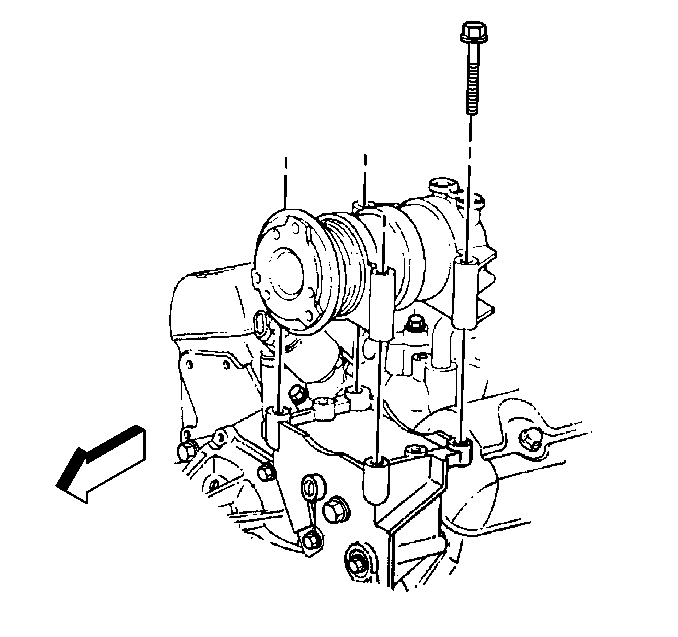
- Remove the compressor mounting bolts.
- Remove the compressor from the vehicle.
- If replacing the compressor, balance the refrigerant oil. Refer to Compressor Oil Balancing .


Important: Do not disconnect the compressor hose assembly from the condenser or the accumulator.

Installation Procedure
- Install the new compressor to the vehicle.
- Install the compressor mounting bolts.
- Install the throttle control cable bracket and nut to the throttle body.
- Install new compressor hose assembly sealing washers. Refer to Sealing Washer Replacement .
- Install the compressor hose assembly to the compressor.
- Connect the A/C high pressure switch electrical connector (2).
- Connect the A/C compressor clutch coil electrical connector (1).
- Install the drive belt.
- Install the air cleaner outlet duct. Refer to Air Cleaner Outlet Resonator Replacement in Engine Controls-4.3L.
- Evacuate and recharge the A/C system. Refer to Refrigerant Recovery and Recharging .
- Leak test the fittings of the components using J 39400-A .

Notice: Refer to Fastener Notice in the Preface section.
Tighten
Tighten the bolts to 50 N·m (37 lb ft).
Tighten
Tighten the nut to 12 N·m (106 lb in).


