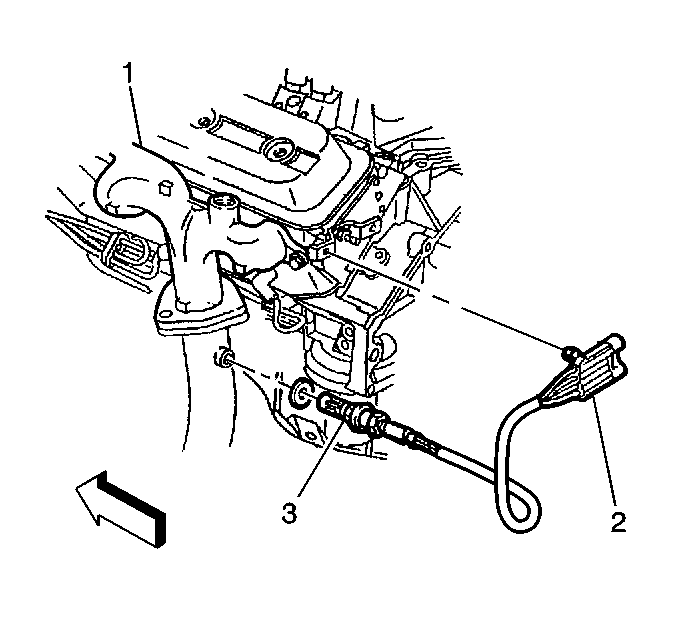
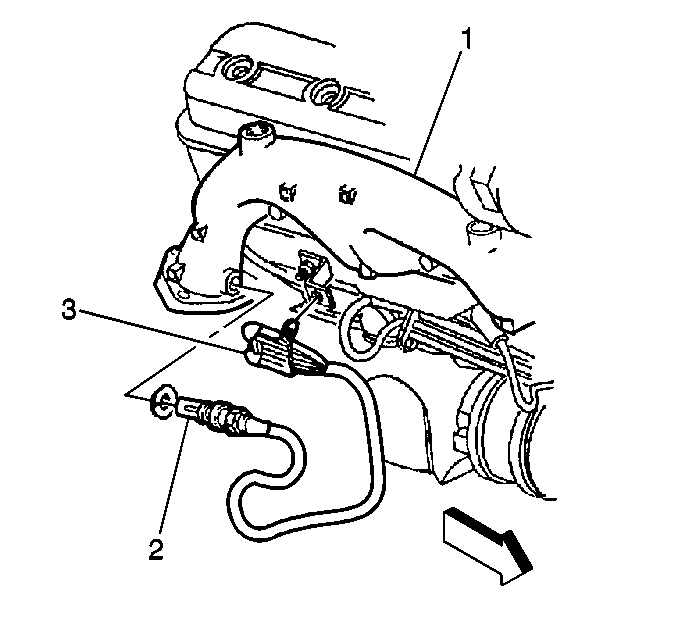
Heated Oxygen Sensor Replacement Bank 1 Front and Rear Sensors
Notice: The heated oxygen sensors each use a permanently attached pigtail and connector. Do not remove the pigtail from the heated oxygen sensor. Damage or removal of the pigtail or the connector affects proper operation of the heated oxygen sensor. Handle the oxygen sensor carefully. Do not drop the oxygen sensor. Keep the in-line connector and the louvered end free of grease, dirt, or other contaminants. Do not use cleaning solvents of any type. Do not repair the wiring, the connector, or the terminals. Replace the oxygen sensor if the pigtail wiring, the terminals, or the connector is damaged. Proper oxygen sensor operation requires an external air reference. This external air reference is obtained by way of the oxygen sensor signal and heater wires. Any attempt to repair the wires, the connectors, or the terminals results in the obstruction of the air reference and degrades the oxygen sensor performance. A dropped oxygen sensor is a bad oxygen sensor.
Important:: Take care when handling the heated oxygen sensor. The in-line electrical connector and louvered end must be kept free of grease, dirt or other contaminants. Also, avoid using cleaning solvents of any type. Do not drop or roughly handle the heated oxygen sensor/catalyst monitor. A dropped sensor is a bad sensor.
Removal Procedure
- Raise the vehicle.
- Disconnect the left (front/rear) HO2S electrical connector.
- Carefully back out the left (front/rear) heated oxygen sensor.
Important: The heated oxygen sensor may be difficult to remove when engine temperature is below 48°C (120°F). Excessive force may damage threads in exhaust manifold or exhaust pipe. It may be necessary to lower the exhaust system to gain sufficient access to an HO2S and/or its connector. Refer to Section 6F, Exhaust System.

Installation Procedure
- Coat the threads of the heated oxygen sensor with anti-seize compound P/N 12377953, or equivalent if necessary.
- Install the left (front/rear) heated oxygen sensor.
- Connect the left (front/rear) HO2S electrical connector.
- Lower the Vehicle.
Important:: A special anti-seize compound is used on the heated oxygen sensor threads. The compound consists of graphite suspended in fluid and glass beads. The graphite will burn away, but the glass beads will remain, making the sensor easier to remove. New or service sensors will already have the compound applied to the threads. If a sensor is removed from an engine and if for any reason is to be reinstalled, the threads must have anti-seize compound applied before reinstallation.

Tighten
Tighten the left (front/rear) HO2S to 41 N·m (30 lb ft).
Heated Oxygen Sensor Replacement Bank 2 Front and Rear Sensors
Notice: The heated oxygen sensors each use a permanently attached pigtail and connector. Do not remove the pigtail from the heated oxygen sensor. Damage or removal of the pigtail or the connector affects proper operation of the heated oxygen sensor. Handle the oxygen sensor carefully. Do not drop the oxygen sensor. Keep the in-line connector and the louvered end free of grease, dirt, or other contaminants. Do not use cleaning solvents of any type. Do not repair the wiring, the connector, or the terminals. Replace the oxygen sensor if the pigtail wiring, the terminals, or the connector is damaged. Proper oxygen sensor operation requires an external air reference. This external air reference is obtained by way of the oxygen sensor signal and heater wires. Any attempt to repair the wires, the connectors, or the terminals results in the obstruction of the air reference and degrades the oxygen sensor performance. A dropped oxygen sensor is a bad oxygen sensor.
Important:: Take care when handling the heated oxygen sensor. The in-line electrical connector and louvered end must be kept free of grease, dirt or other contaminants. Also, avoid using cleaning solvents of any type. Do not drop or roughly handle the heated oxygen sensor/catalyst monitor. A dropped sensor is a bad sensor.
Removal Procedure
- Raise the vehicle.
- Disconnect the right (front/rear) HO2S electrical connector.
- Carefully back out the right (front/rear) HO2S from the exhaust.
Important: The HO2S sensor may be difficult to remove when the engine temperature is below 48°C (120°F). Excessive force may damage threads in exhaust manifold or exhaust pipe. It may be necessary to lower the exhaust system to gain sufficient access to an HO2S and/or its connector. Refer to Section 6F, Exhaust System.

Installation Procedure
- Coat the threads of the HO2S with anti-seize compound P/N 12377953, or equivalent.
- Install the right (front/rear) HO2S.
- Connect the right (front/rear) HO2S electrical connector.
- Lower the Vehicle.
Important: A special anti-seize compound is used on the HO2S sensor threads. The compound consists of graphite suspended in fluid and glass beads. The graphite will burn away, but the glass beads will remain, making the sensor easier to remove. New or service sensors will already have the compound applied to the threads. If a sensor is removed from an engine and if for any reason is to be reinstalled, the threads must have anti-seize compound applied before reinstallation.

Tighten
Tighten the right (front/rear) HO2S to 41 N·m (30 lb ft).
