Oil Cooler Hose/Pipe Replacement LT1
Removal Procedure (5.7L)
Use only double wrapped and brazed steel tubing, if replacement of the automatic transmission oil cooler pipes and hoses is required. Ensure that the tubing is double flared and meets GM Specifications 123 M, or equivalent.
- Raise the vehicle. Suitably support the vehicle. Refer to General Vehicle Lifting and Jacking in General Information.
- Remove the oil cooler lower hose fitting at the radiator.
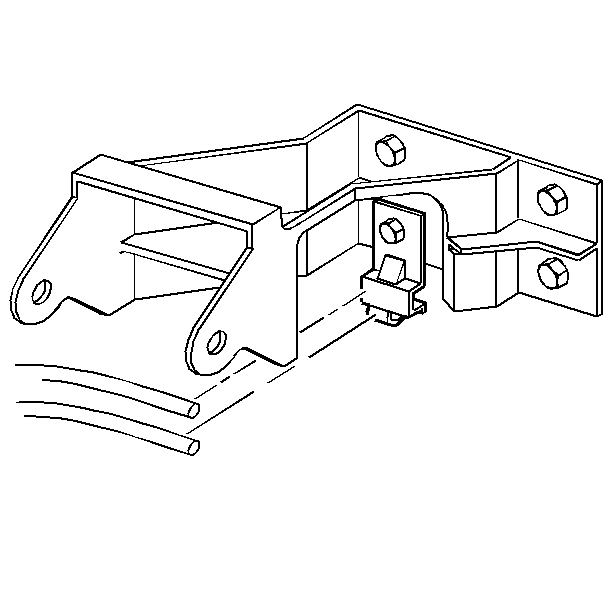
- Remove the oil cooler upper hose clamp from the upper hose and the pipe.
- Remove the propeller shaft. Refer to Propeller Shaft.
- Remove the rear axle torque arm. Refer to Torque Arm Replacement in Rear Suspension.
- Remove the catalytic converter hanger. Refer to Converter Hanger Assembly
- Support the automatic transmission with a transmission stand.
- Remove the transmission support member. Refer to Body Dimensions and Underbody.
- Lower the transmission stand slightly. This will allow access to the oil cooler fittings at the transmission.
- Remove the fitting on the transmission end of the upper pipe.
- Remove the fitting on the transmission end of the lower pipe.
- Remove the upper pipe from the oil cooler pipe clips.
- Remove the lower pipe from the oil cooler pipe clips.


Installation Procedure (5.7L)
- Install the lower pipe to the transmission oil cooler pipe clips.
- Install the upper pipe to the transmission oil cooler pipe clips.
- Install the fitting on the transmission end of the lower pipe.
- Install the fitting on the transmission end of the upper pipe.
- Raise the transmission.
- Install the transmission support member. Refer to Body Dimensions and Underbody.
- Remove the transmission stand.
- Install the catalytic converter hanger. Refer to Converter Hanger Assembly
- Install the rear axle torque arm. Refer to Torque Arm Replacement in Rear Suspension.
- Install the propeller shaft. Refer to Propeller Shaft.
- Install the transmission oil cooler upper hose clamp to the upper hose and the pipe.
- Install the oil cooler lower hose fitting at the radiator.
- Lower the vehicle.
Tighten
Tighten the fittings to 27 N·m (20 lb ft).
Notice: Use the correct fastener in the correct location. Replacement fasteners must be the correct part number for that application. Fasteners requiring replacement or fasteners requiring the use of thread locking compound or sealant are identified in the service procedure. Do not use paints, lubricants, or corrosion inhibitors on fasteners or fastener joint surfaces unless specified. These coatings affect fastener torque and joint clamping force and may damage the fastener. Use the correct tightening sequence and specifications when installing fasteners in order to avoid damage to parts and systems.
Tighten
Tighten the fitting to 27 N·m (20 lb ft).
Oil Cooler Hose/Pipe Replacement Upper Hose
Removal Procedure
- Remove the fitting on the radiator end of the upper oil cooler hose.
- Raise the vehicle. Suitably support the vehicle. Refer to General Vehicle Lifting and Jacking in General Information.
- Remove the transmission oil cooler upper hose clamp.
- Remove the transmission oil cooler upper hose from the upper pipe.


Installation Procedure
- Install the transmission oil cooler upper hose to the upper pipe.
- Install the transmission oil cooler upper hose clamp.
- Lower the vehicle.
- Install the fitting on the radiator end of the upper oil cooler hose.
Tighten
Tighten the fitting to 27 N·m (20 lb ft).
Notice: Use the correct fastener in the correct location. Replacement fasteners must be the correct part number for that application. Fasteners requiring replacement or fasteners requiring the use of thread locking compound or sealant are identified in the service procedure. Do not use paints, lubricants, or corrosion inhibitors on fasteners or fastener joint surfaces unless specified. These coatings affect fastener torque and joint clamping force and may damage the fastener. Use the correct tightening sequence and specifications when installing fasteners in order to avoid damage to parts and systems.
Oil Cooler Hose/Pipe Replacement L36
Removal Procedure (3800)
Use only double wrapped and brazed steel tubing, if replacement of the automatic transmission oil cooler pipes and hoses is required. Ensure that the tubing is double flared and meets GM Specifications 123 M, or equivalent.
- Raise the vehicle. Suitably support the vehicle. Refer to General Vehicle Lifting and Jacking in General Information.
- Remove the oil cooler lower hose fitting at the radiator.
- Remove the oil cooler upper hose clamp from the upper hose and the pipe.
- Remove the propeller shaft. Refer to Propeller Shaft.
- Remove the rear axle torque arm. Refer to Torque Axle Replacement in Rear Suspension.
- Remove the catalytic converter hanger. Refer to Converter Hanger Assembly
- Support the automatic transmission with a transmission stand.
- Remove the transmission support member. Refer to Body Dimensions and Underbody.
- Lower the transmission stand slightly. This will allow access to the oil cooler fittings at the transmission.
- Remove the fitting on the transmission end of the upper pipe.
- Remove the fitting on the transmission end of the lower pipe.
- Remove the upper pipe from the oil cooler pipe clips.
- Remove the lower pipe from the oil cooler pipe clips.
Installation Procedure (3800)
- Install the lower pipe to the oil cooler pipe clips.
- Install the upper pipe to the oil cooler pipe clips.
- Install the fitting on the transmission end of the lower pipe.
- Install the fitting on the transmission end of the upper pipe.
- Raise the transmission.
- Install the transmission support member. Refer to Body Dimensions and Underbody.
- Remove the transmission stand.
- Install the catalytic converter hanger. Refer to Converter Hanger Assembly
- Install the rear axle torque arm. Refer to Torque Arm Replacement in Rear Suspension.
- Install the propeller shaft. Refer to Propeller Shaft.
- Install the oil cooler upper hose clamp to the upper hose and the pipe.
- Install the oil cooler lower hose fitting at the radiator.
- Lower the vehicle.
Tighten
Tighten the fittings to 27 N·m (20 lb ft).
Notice: Use the correct fastener in the correct location. Replacement fasteners must be the correct part number for that application. Fasteners requiring replacement or fasteners requiring the use of thread locking compound or sealant are identified in the service procedure. Do not use paints, lubricants, or corrosion inhibitors on fasteners or fastener joint surfaces unless specified. These coatings affect fastener torque and joint clamping force and may damage the fastener. Use the correct tightening sequence and specifications when installing fasteners in order to avoid damage to parts and systems.
Tighten
Tighten the fitting to 27 N·m (20 lb ft).
