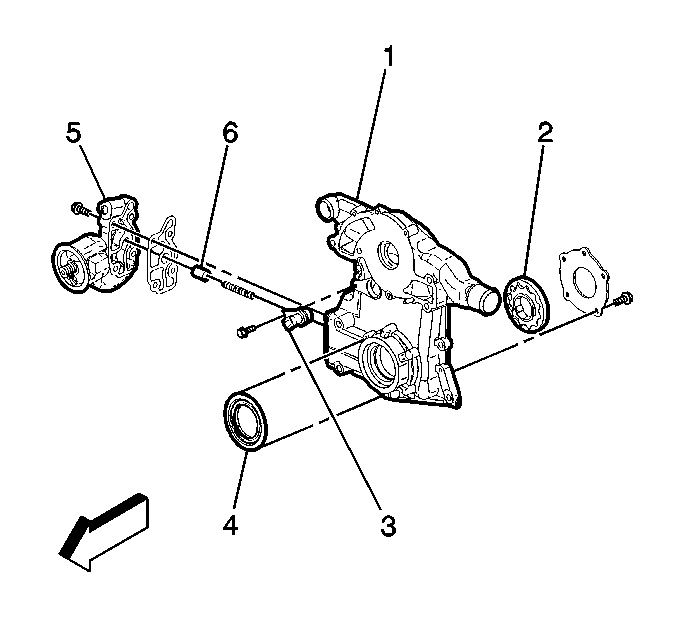
- If replacing the front
cover (1), assemble the following parts:
| 1.1. | Oil pump gear set (2) |
| 1.3. | Oil filter adapter (5) and new gasket |
| 1.4. | Oil pressure relief valve (6) and spring |
- Install a new crankshaft front oil seal (4)
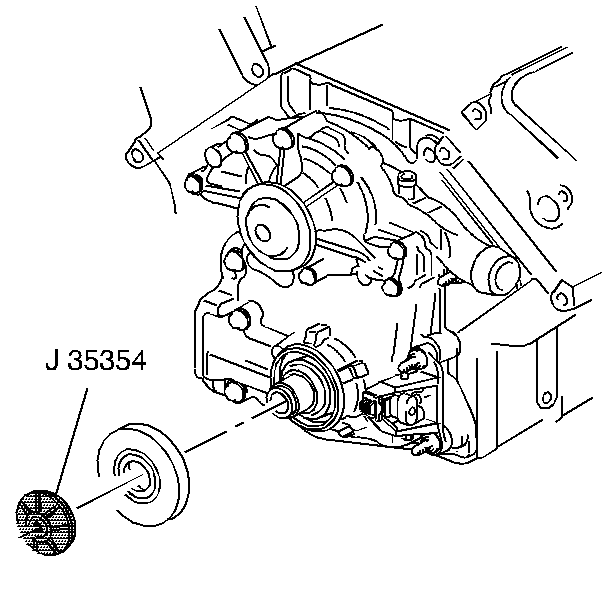
- Install the crankshaft
front oil seal to the front cover using the J 35354
and a soft faced hammer.
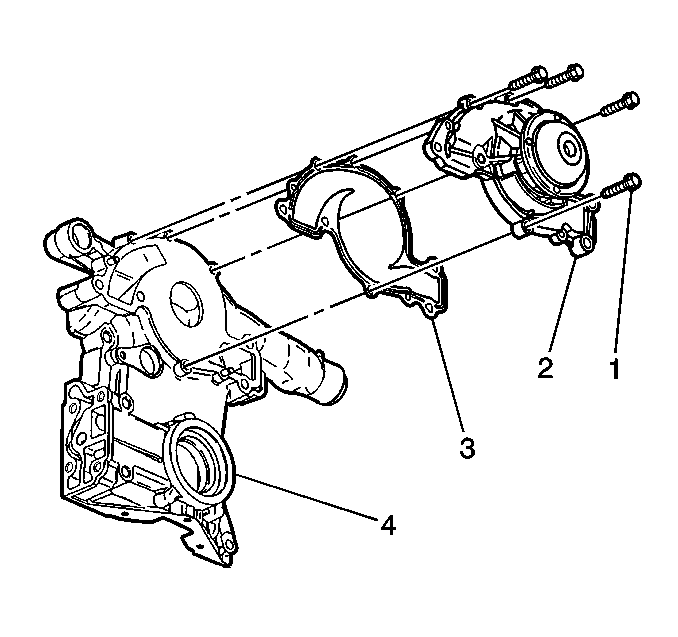
- Install the coolant pump
gasket (3) to the front cover (4).
- Install the coolant pump (2).
Notice: Use the correct fastener in the correct location. Replacement fasteners
must be the correct part number for that application. Fasteners requiring
replacement or fasteners requiring the use of thread locking compound or sealant
are identified in the service procedure. Do not use paints, lubricants, or
corrosion inhibitors on fasteners or fastener joint surfaces unless specified.
These coatings affect fastener torque and joint clamping force and may damage
the fastener. Use the correct tightening sequence and specifications when
installing fasteners in order to avoid damage to parts and systems.
- Install the coolant pump bolts (1).
Tighten
Tighten the coolant pump bolts (1) to 15 N·m (11 lb ft).
Using J 36660-A
tighten the
coolant pump bolts (1) an additional 80 degrees.
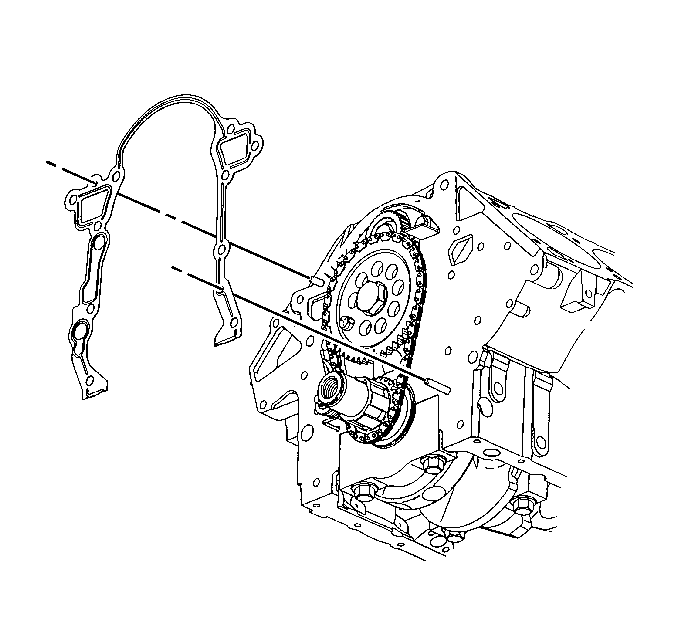
- Install the engine front
cover gasket to the engine block.
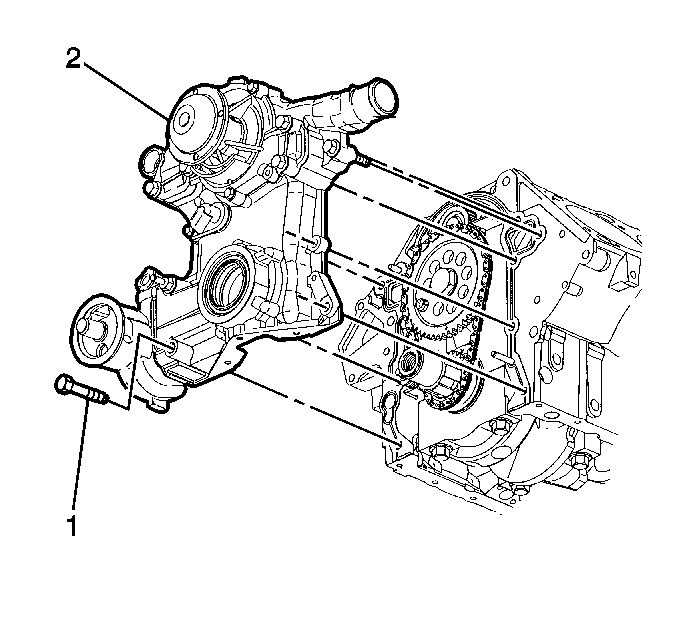
- Install the engine front
cover (2).
- Align the cogs on the crankshaft sprocket with the cogs on the
oil pump in the engine front cover.
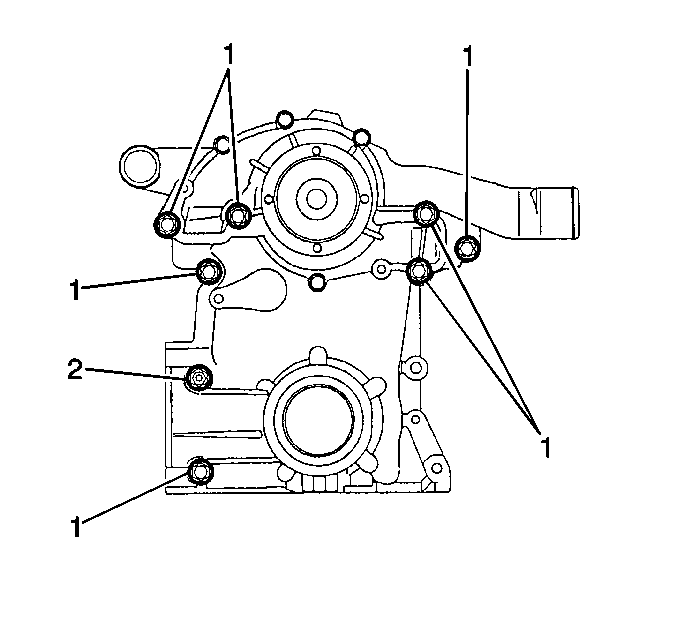
- Apply sealant GM P/N 12346004
or equivalent to the engine front cover bolts (1) and stud (2).
- Install the engine front cover bolts (1) and stud (2).
Tighten
Tighten the front cover bolts (1) and studs to 20 N·m (15 lb ft).
Using J 36660-A
tighten the
front cover bolts (1) and stud (2) an additional 40 degrees.
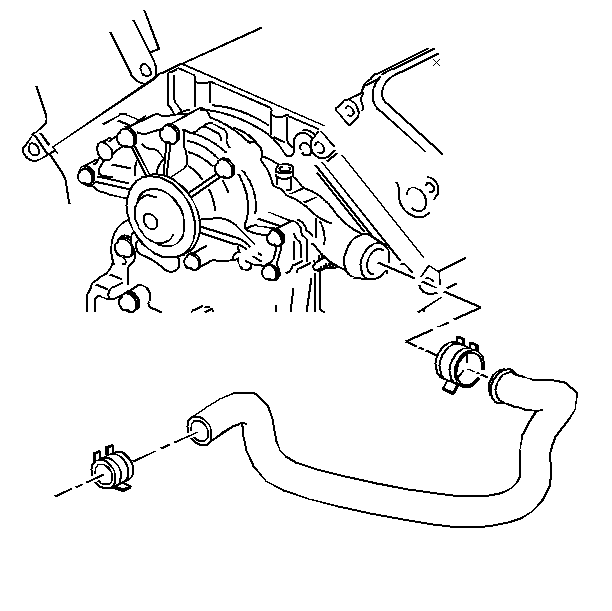
- Install the radiator outlet
hose to the front cover.
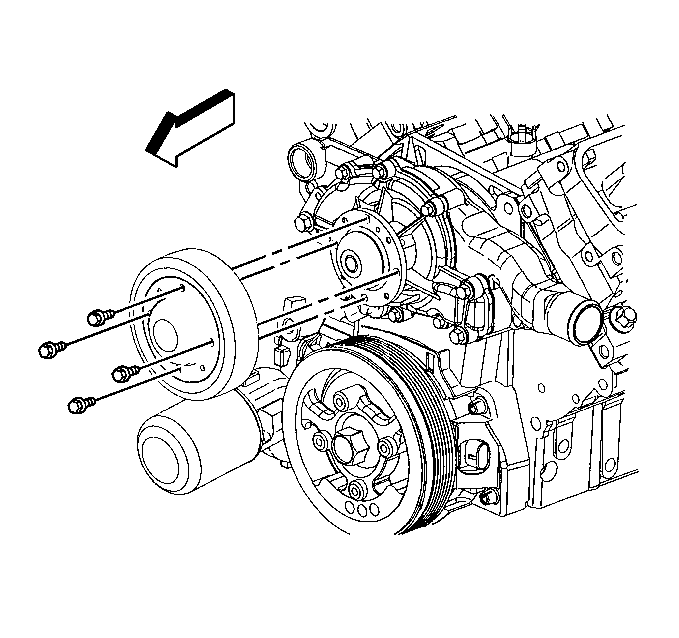
- Install the coolant pump
pulley.
- Install the coolant pump pulley bolts.
Tighten
Tighten the coolant pump pulley bolts to 13 N·m (115 lb in).
- Raise and suitably support the vehicle. Refer to
Lifting and Jacking the Vehicle
in General Information.
- Install the oil pan to front cover bolts.
- Tighten the loose oil pan bolts.
Tighten
Tighten the oil pan bolts to 14 N·m (10 lb ft).
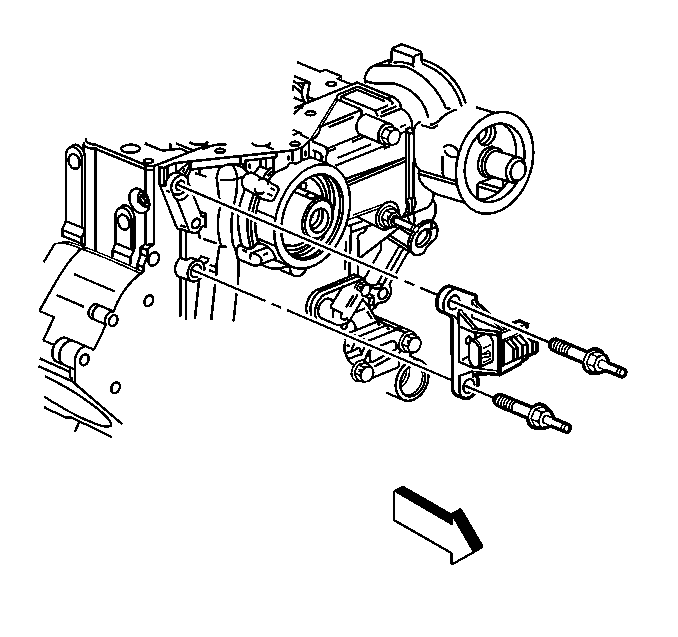
- Install the crankshaft
position sensor.
- Apply sealant GM P/N 12346004 or equivalent to the crankshaft
position sensor studs.
- Install the crankshaft position sensor studs.
Tighten
Tighten the crankshaft position sensor studs to 20 N·m
(15 lb ft). Using J 36660-A
tighten the sensor studs an additional 40 degrees.
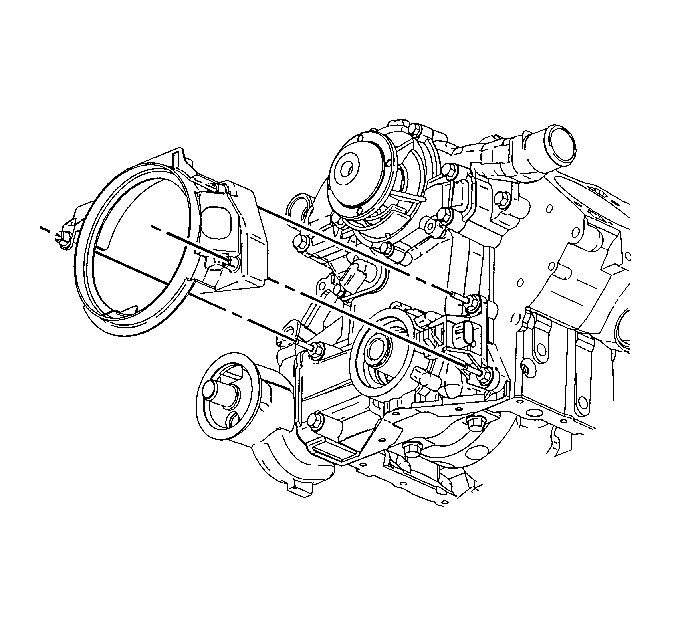
- Install the crankshaft
position sensor shield.
- Connect the crankshaft position sensor electrical connector.
- Install the crankshaft balancer. Refer to
Crankshaft Balancer Replacement
.
- Lower the vehicle.
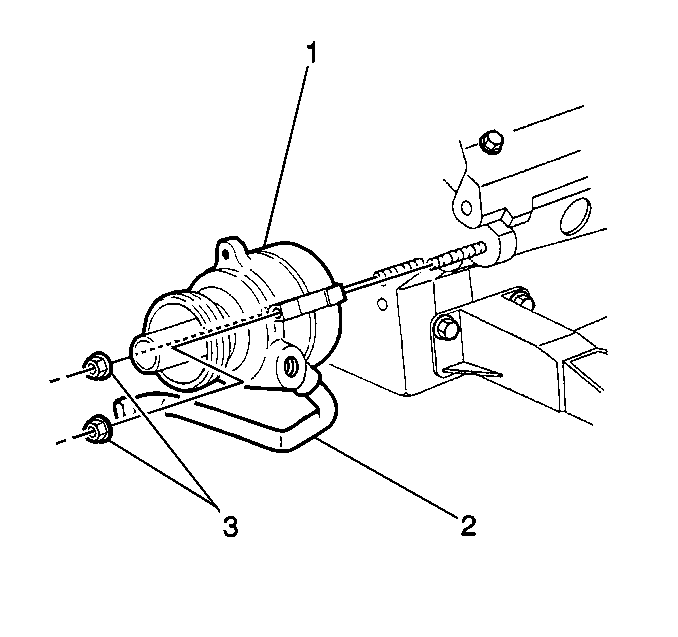
- Install the power steering
pump (1).
- Install the power steering pump nuts (3).
Tighten
Tighten the power steering pump nuts to 30 N·m (23 lb ft).
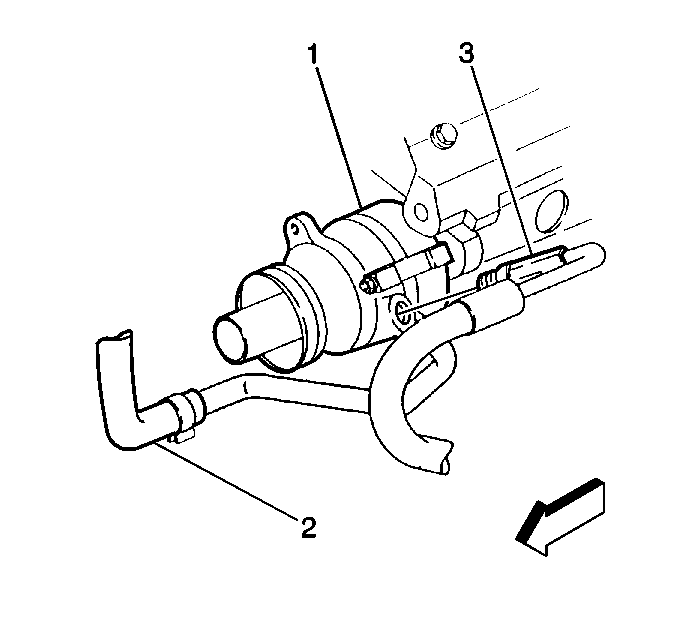
- Connect the reservoir
hose return line (2) to the power steering pump (1).
- Position the return line (2) hose clamp in the correct location.
- Connect the inlet hose (3) to the power steering pump (1).
Tighten
Tighten the inlet hose (3) fitting to 28 N·m (21 lb ft).
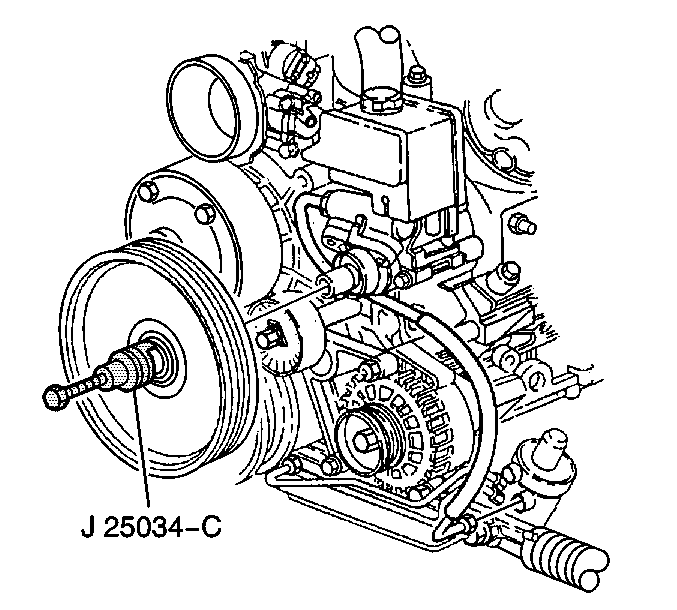
- Use the J 25033-C
to install the power steering pump
pulley.
- Remove the J 25033-C
.
- Install the drive belt tensioner. Refer to
Drive Belt Tensioner Replacement
.
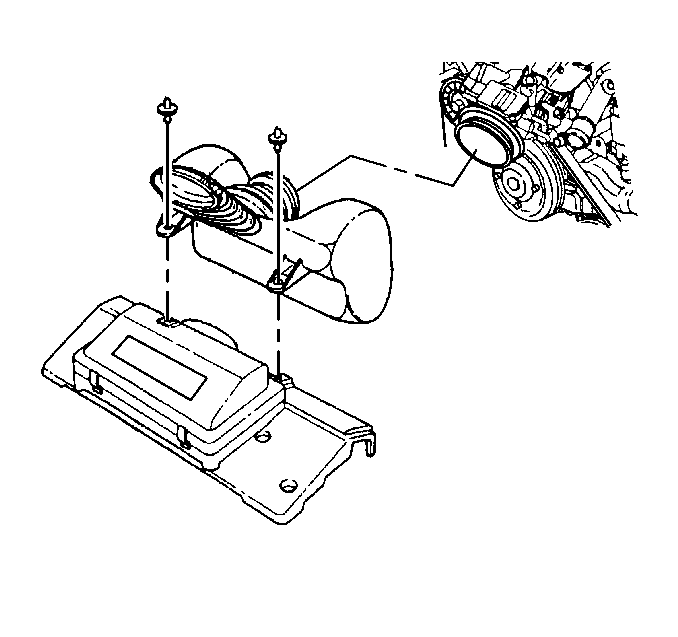
- Install the air intake
duct.
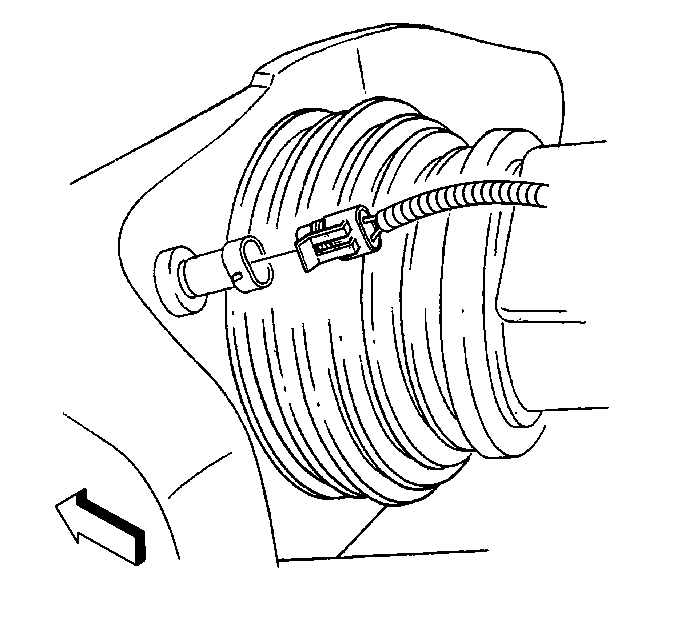
- Connect the intake air
temperature (IAT) sensor electrical connector.
- Refill the engine oil.
- Refill the engine coolant. Refer to
Cooling System Draining and Filling
in Engine Cooling.


