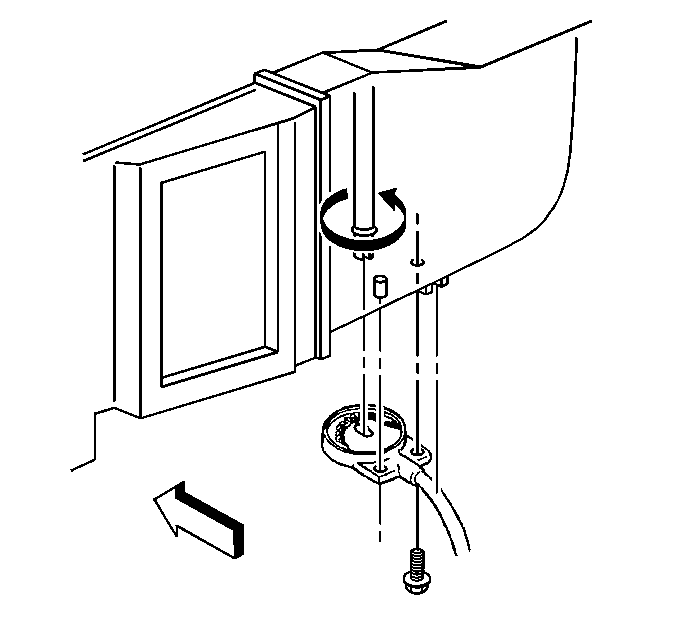
Removal Procedure
- Remove the right I/P insulator. Refer to
Instrument Panel Insulator Replacement
in Instrument
Panel, Gauges and Console.

- Remove the temperature
control cable bolt.
- Disconnect the temperature control cable at the A/C module.

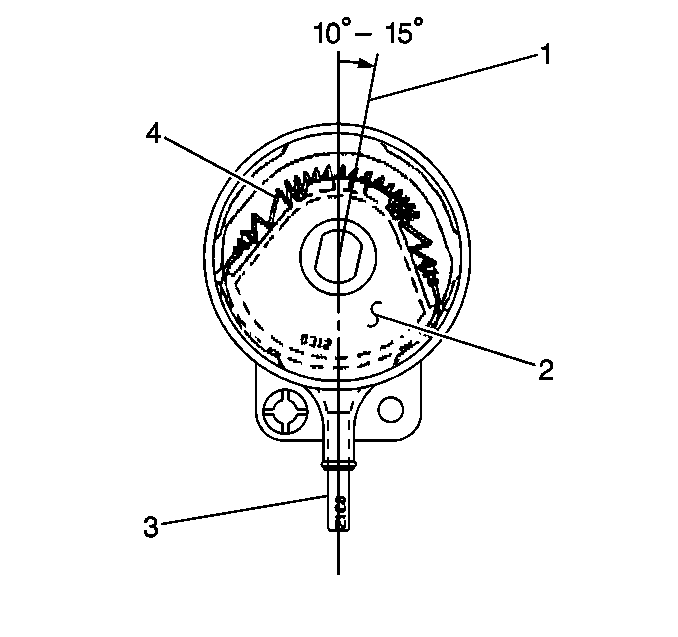
Important: Ensure that the temperature control cable (3) is still attached to the
HVAC control.
- Cycle the temperature control knob between the following positions:
- Replace the temperature control cable if one of the following
situations occur:
| • | The temperature control cable binds |
| • | The temperature control cable does not rotate freely |
- Set the temperature control knob to the detent position half way
between the full cold and the full hot positions.
- Inspect the position of the temperature control cable pulley (2).
Adjust the temperature control cable pulley (2):
| • | Do not adjust the pulley if the pulley is skewed 5-10 degrees
toward the full cold side. |
| • | Adjust the control cable if the pulley is skewed toward the full
hot side. |
- Remove the spring (4) from the temperature control cable pulley.
- Adjust the temperature control cable pulley 5-10 degrees
toward the full cold position.
Installation Procedure

- Install the temperature
control cable spring
(4) to the temperature control cable pulley (2).
- Connect the temperature control cable (5) to the heater module.

- Connect the temperature
control cable to the
A/C module.
- Install the temperature control cable bolt.
Tighten
Tighten the temperature control cable bolt to 1.9 N·m (17 lb in).
- Install the right I/P insulator. Refer to
Instrument Panel Insulator Replacement
in Instrument
Panel, Gauges and Console.


