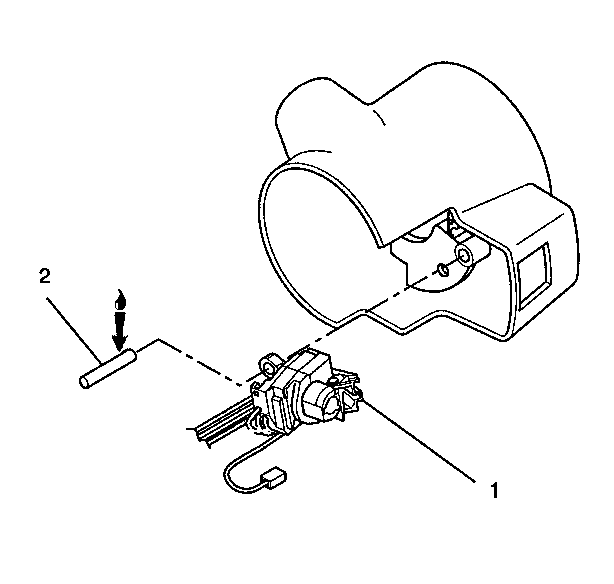
- Lubricate the switch actuator pivot pin (2) with synthetic grease.
- Install the switch actuator pivot pin (2) to the windshield wiper and washer dimmer switch assembly (1).
- Install the windshield wiper and washer switch assembly (1) into the lock housing cover assembly.
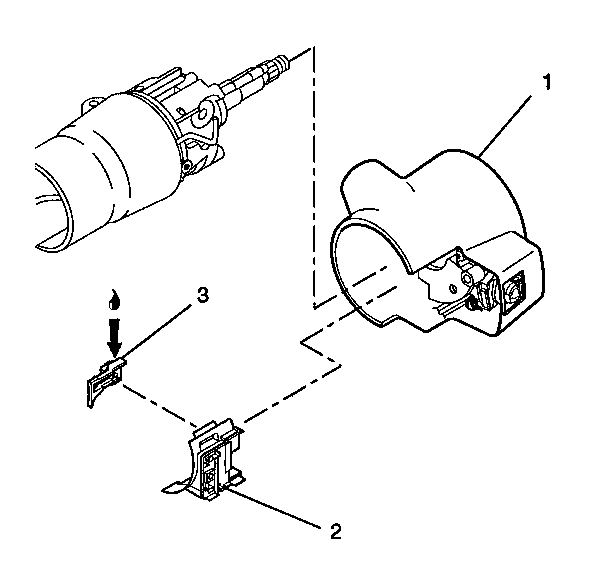
- Lubricate the dimmer switch rod actuator (3) with lithium grease.
- Install the dimmer switch rod actuator (3) to the column housing cover end base plate (2).
- Install the column housing cover end base plate (2) to the lock housing cover and sleeve assembly (1).
- Align the lock housing cover and sleeve assembly (1) onto the steering column.
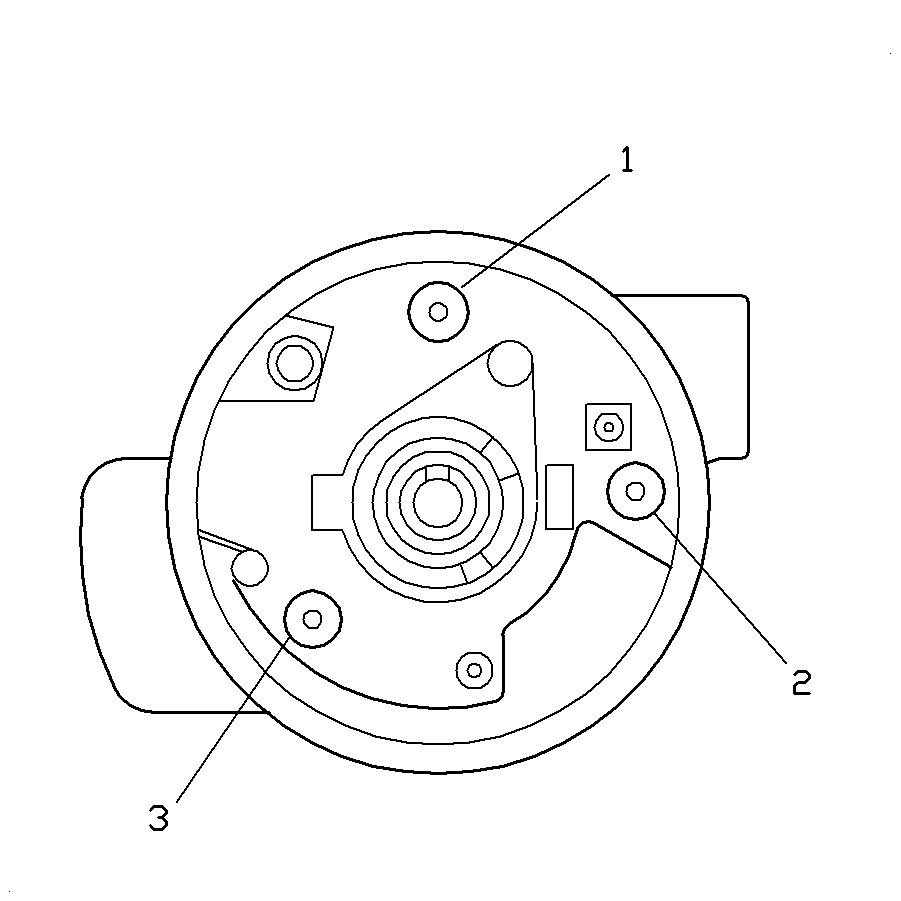
- Install the 3 pan head 6-lobed socket tapping screws: (1) at 12 o'clock position first, (3) at 8 o'clock position second, and (2) at 3 o'clock position third.
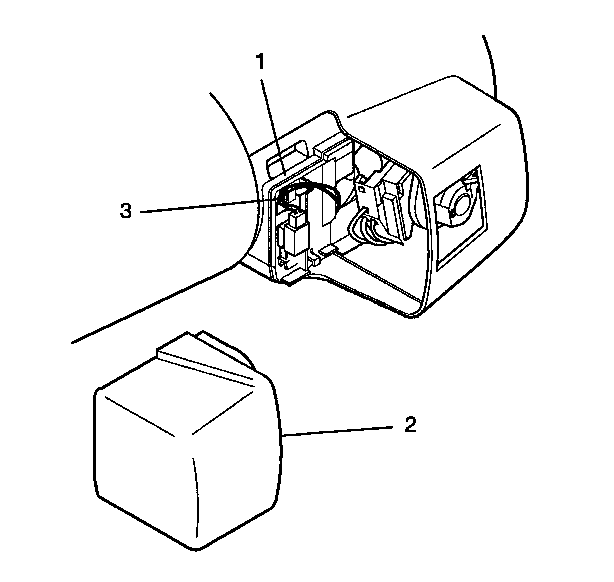
- Mount the cruise control connector (3) on the base plate (1).
- Install the column housing cover end cap (2).
- Install the steering column lock cylinder set. Refer to Steering Column Lock Cylinder Set - Assemble - Off Vehicle .
- Enable the inflatable restraint steering wheel module. Refer to Enabling the SIR System in SIR.


Important: The bottom edge of the dimmer switch rod actuator must rest on the bend of the dimmer switch rod.

Notice: Use the correct fastener in the correct location. Replacement fasteners must be the correct part number for that application. Fasteners requiring replacement or fasteners requiring the use of thread locking compound or sealant are identified in the service procedure. Do not use paints, lubricants, or corrosion inhibitors on fasteners or fastener joint surfaces unless specified. These coatings affect fastener torque and joint clamping force and may damage the fastener. Use the correct tightening sequence and specifications when installing fasteners in order to avoid damage to parts and systems.
Tighten
Tighten the 3 pan head 6-lobed socket screws to 9 N·m
(80 lb in).

