Side Door Opening Frame Replacement Coupe
The side door opening frame on the Camaro/Firebird can be either replaced as a unit or sectioned, following the proper techniques. The service part frame will come as a complete unit and will need to be trimmed to fit each application such as coupe, T-Tops, etc. Templates are provided with the service part as a guide for trimming.
The following items may need to be removed or protected before replacing or sectioning the frame, the door hinges, outer rocker panel, upper outer side rail, windshield, weather-stripping, roof outer panel and T-Tops (if applicable), quarter panel assembly and rear end deck lid assembly.
Removal Procedure
- Remove all related panels and components.
- Remove appropriate sealer.
- Drill out factory welds around the frame perimeter with a 8 mm (5/16 in) drill bit.
- Remove the frame.
- Prepare mating surfaces for installation of new frame.
- The recommended locations for sectioning are shown. A sectioning procedure may be performed at these locations by overlapping the original panel by 20 mm.
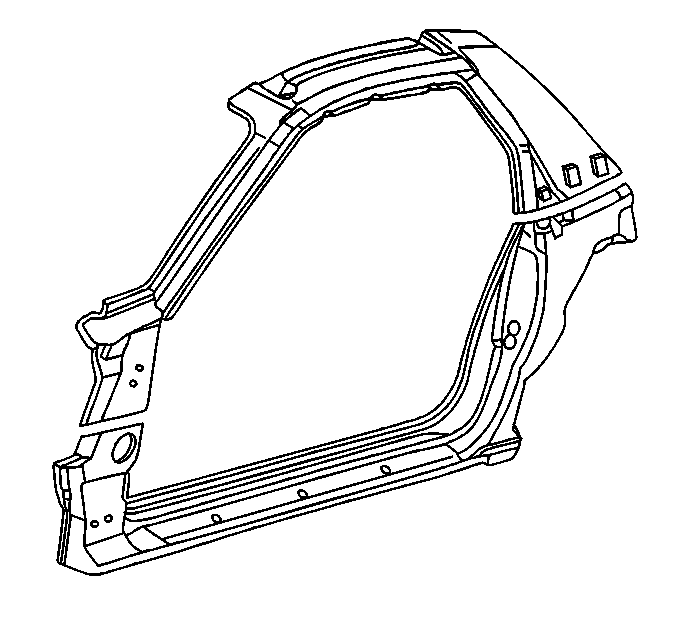
Important: When drilling out welds, use caution so that the inner panels are not damaged.
Installation Procedure
- On the new frame, drill 8 mm (5/16 in) holes in locations as noted from the original frame.
- Align frame and clamp to hold in place.
- Using a MIG welder plug weld at same locations as original.
- Clean and prepare welded surfaces. Apply Brushable Seam Sealer 3M P/N 08361 or equivalent as necessary.
- Prime with 2-part catalyzed primer.
- Apply sealers and anti-corrosion materials as necessary.
- Install all the related panels and components removed.

Important: If the original frame is damage beyond recognition, place the holes for welding 1 1/2 in apart.
Important: Prior to refinishing, refer to GM 4901MD-99 Refinish Manual for recommended products. Do not combine paint systems. Refer to paint manufacturer's recommendations.
Side Door Opening Frame Replacement Sectioning
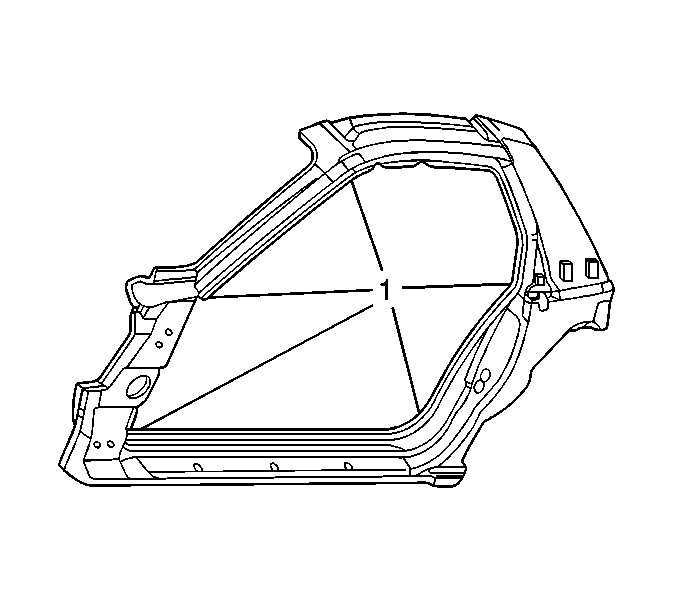
When sectioning the door opening frame, note that there are 5 locations where sectioning should not take place. Sectioning in these areas would jeopardize the structural integrity of the vehicle. When sectioning in an area with no reinforcement, a backing plate or sleeve must be used.
Removal Procedure
- Remove all related panels and components.
- Measure, mark, cut and remove the damaged panel, being careful in areas where there are multiple layers of steel.
- Measure, mark, cut and install the new panel.
- Check for a proper fit.
- When the replacement panel fits properly, remove it from the vehicle and set aside.
- In areas having no inner reinforcements, cut pieces to service as backing plates of the same configuration (approximately 3 in long) from the areas where the splices are to be made. Use the damaged panel or the excess portions of the replacement panel.
- Modify the pieces so they fit snugly to the backside of the splice joints.
- Pre-drill 8 mm (5/16 in) plug weld holes indicated on the illustrations for installation of a new panel.
- Fit the backing plate halfway into the splice joint on the vehicle. Clamp and MIG weld the backing plate to the vehicle.
- When all the backing plates are welded in place, reinstall the new part.
- Check the fit.
- When the replacement panel is properly fit and aligned, clamp and MIG weld it to the backing plates. Use an alternating weld sequence to reduce heat and metal distortion.
- Complete the splice joint by welding the joint gap closed using an alternating stitch MIG weld. This will minimize heat build up and distortion.
- MIG plug weld all previously resistance-weld locations.
- Grind excess weld off joints and inspect.
- When satisfied that the weld and splice joints are structurally sound, proceed with the recommended finishing procedures.
- Prime with 2-part catalyzed primer.
- Apply sealers and anti-corrosion materials as necessary.
- Install all related panels and components.
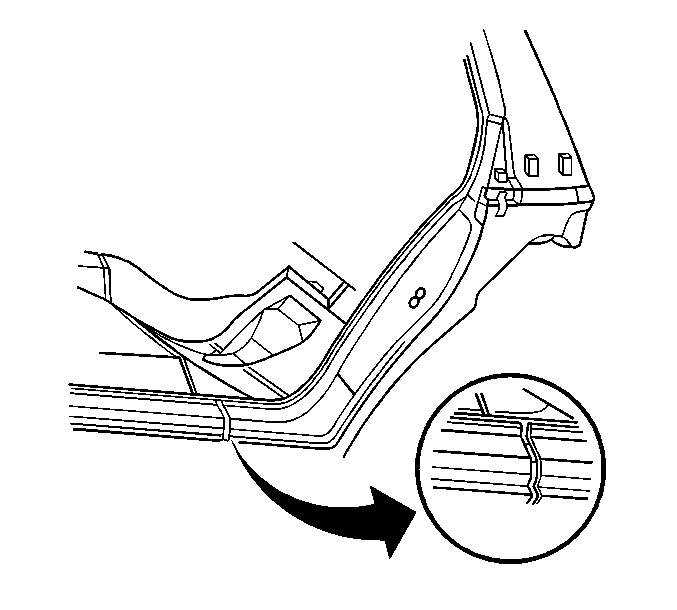
Important: A gap of 1 1/2 times the thickness of the metal must be maintained at the joint between the old panel and the replacement panel. Trim as required.
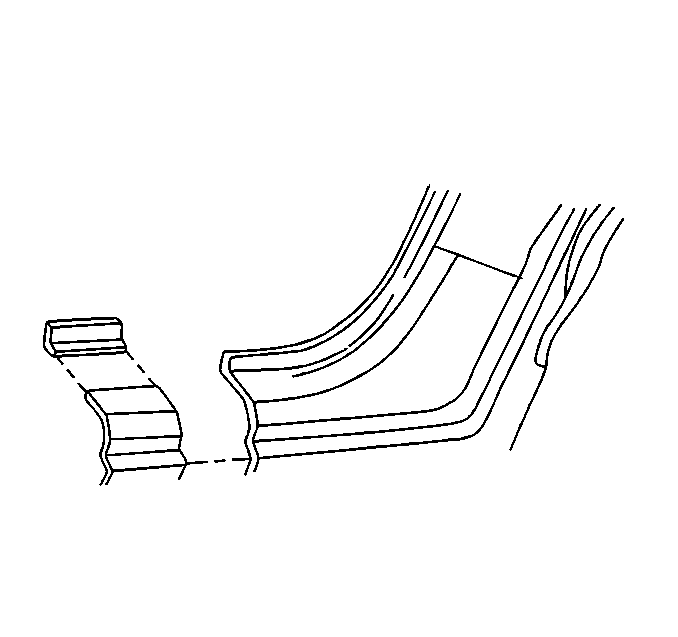
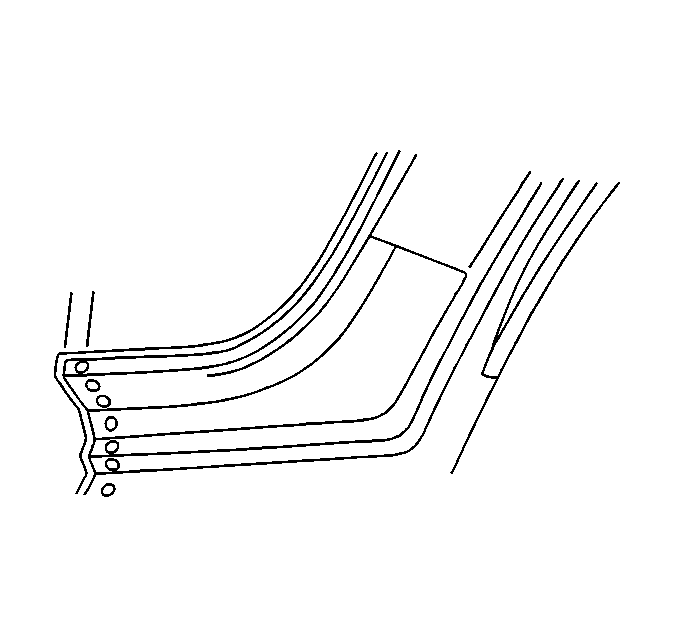
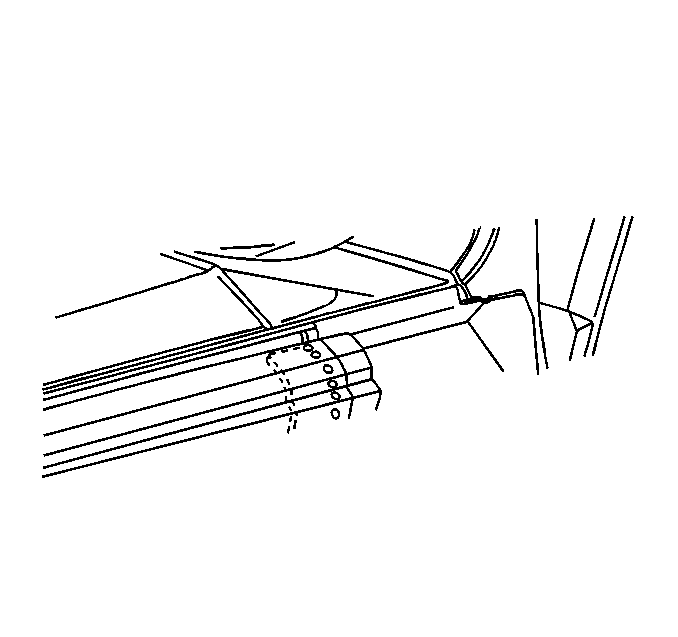
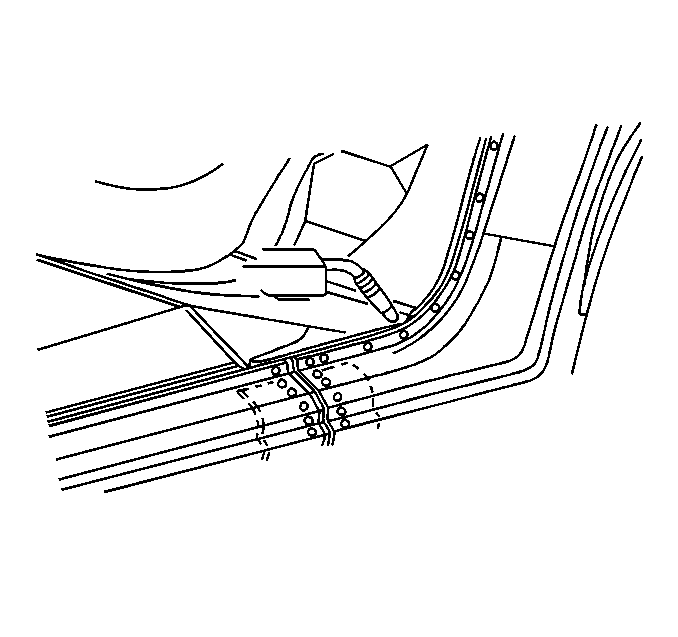
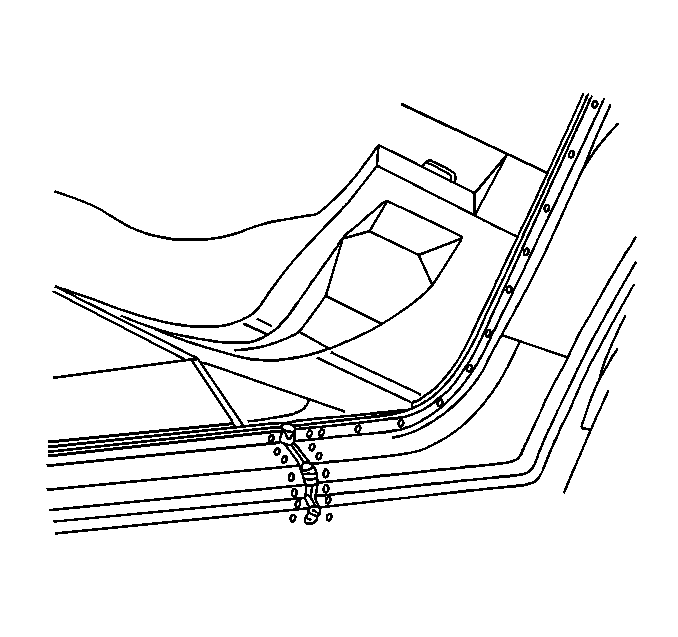
Important: Prior to refinishing, refer to GM 4901MD-99 Refinish Manual for recommended products. Do not combine paint systems. Refer to paint manufacturer's recommendations.
Clean and prepare welded surfaces. Apply Brushable Seam Sealer 3M P/N 08361 as necessary.
Side Door Opening Frame Replacement Convertible
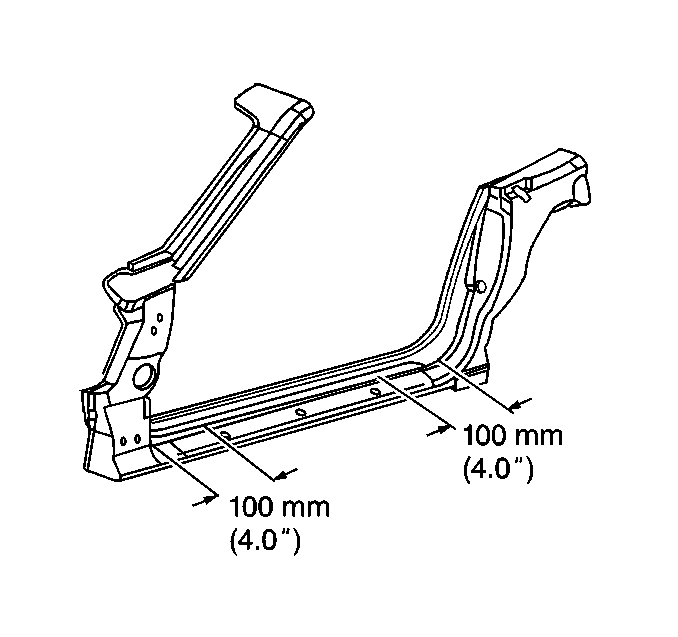
When sectioning the door opening frame on the Camaro/Firebird convertible there are three locations where sectioning should not take place. Sectioning in these areas could jeopardize the structural integrity of the vehicle. The door ring service panel is unique for convertibles. The panel can be installed as a complete assembly or modified for sectioning. When sectioning in an area with no reinforcement, a backing plate or sleeve must be used.
Removal Procedure
- Remove all related panels and components.
- Visually inspect the damaged areas.
- Restore as much of the damage as possible to factory specifications.
- Remove the sealers, the sound deadeners, and the anticorrosion materials as necessary.
- Locate, mark and drill out factory welds as necessary. Note the number of welds for installation of the new assembly.
- Measure, mark, cut and remove the damaged section of the frame, being careful in areas where there are multiple layers of steel.
Installation Procedure
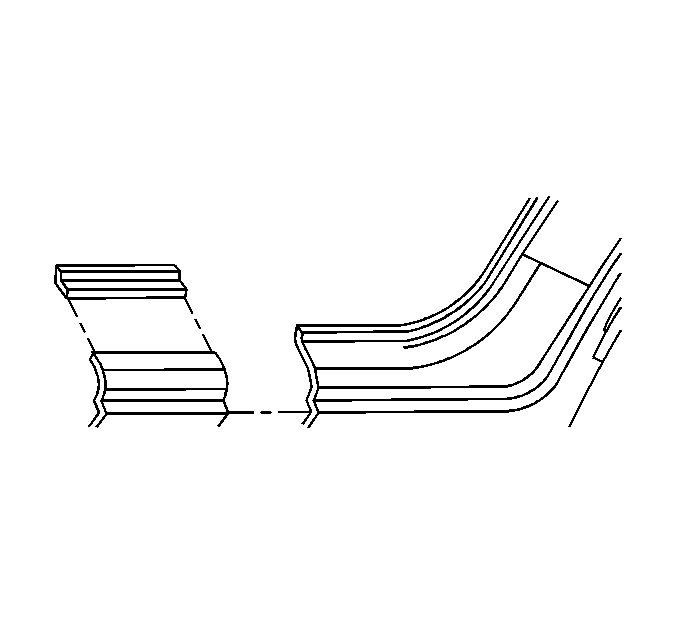
- Prepare the new door opening frame by measuring and cutting to match the removed section. Check for proper fit.
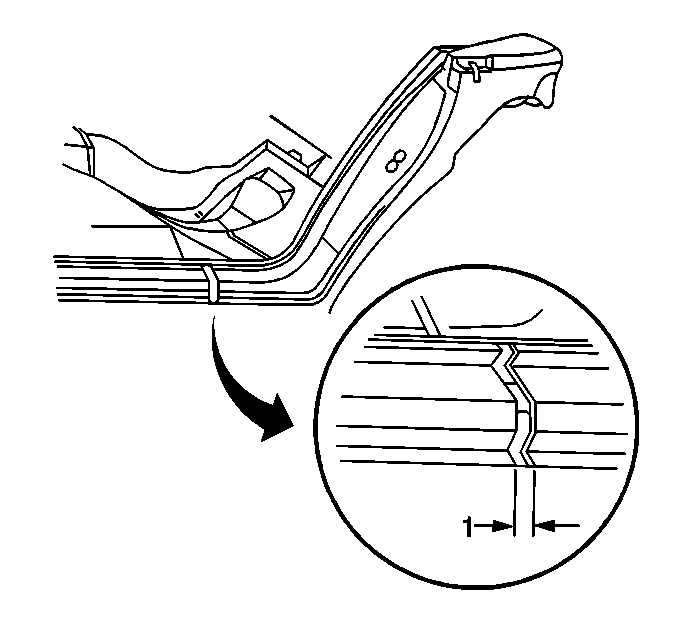
- A gap 1 1/2 times the thickness of the metal (1) must be maintained at the joint between the old frame and replacement frame. Trim the replacement frame as required to achieve this fit.
- In areas having no inner reinforcements, cut pieces to serve as backing plates of the same configuration from the areas where sectioning is to be done. These should be approximately 75 mm (3 in) length. Use the damaged frame or the excess portions of the replacement frame.
- Modify the pieces so they fit snugly to the backside of the section joints.
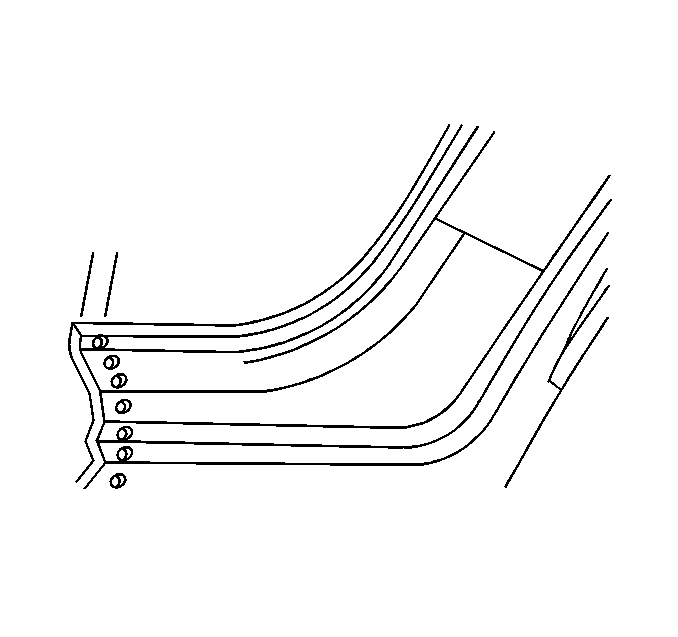
- Pre-drill 8 mm (5/16 in) plug weld holes for installation of the new frame.
- Fit the backing plate halfway into the section joint on the vehicle. Clamp and MIG weld the backing plate to the vehicle.
- When all the backing plates are welded in place, reinstall the new part and check the fit using body dimensions.
- When the replacement frame is properly fitted and aligned, clamp and MIG weld it to the backing plates. An alternating weld sequence to reduce heat and metal distortion.
- MIG plug weld all previously resistance-welded locations.
- Clean and prepare welded surfaces.
- Prime with 2-part catalyzed primer.
- Apply sealers and anti-corrosion materials as necessary.
- Reinstall all the related panels and components.

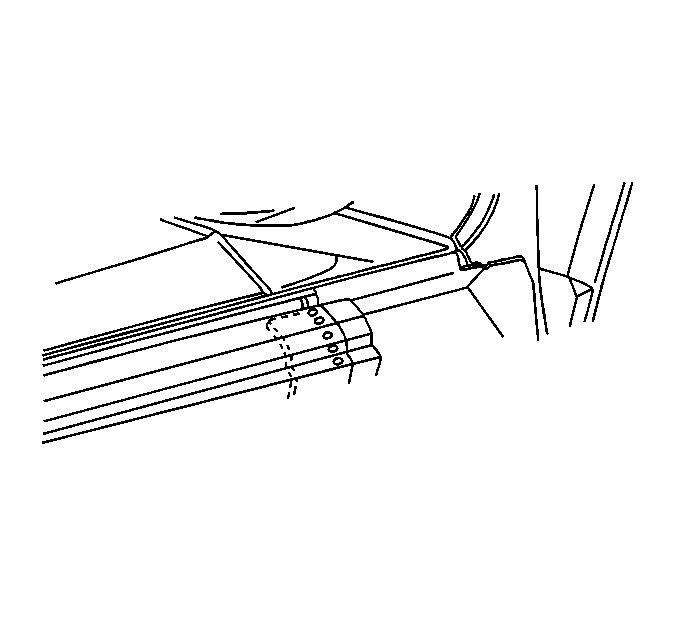
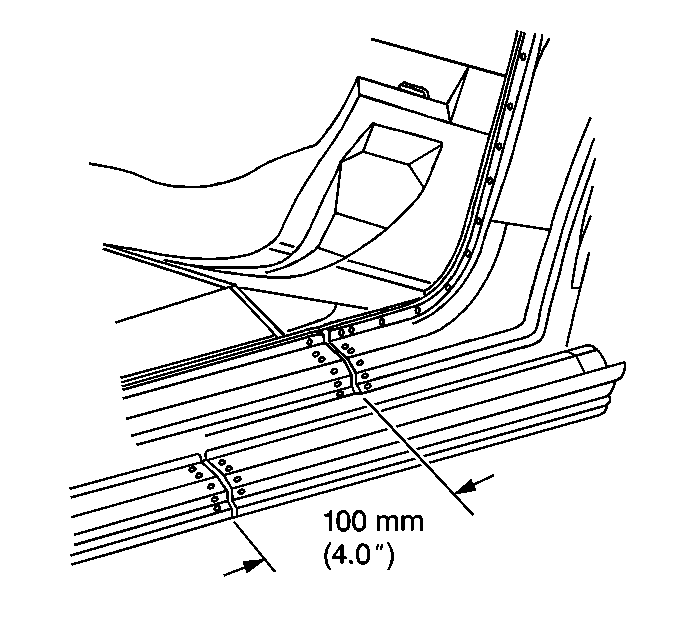
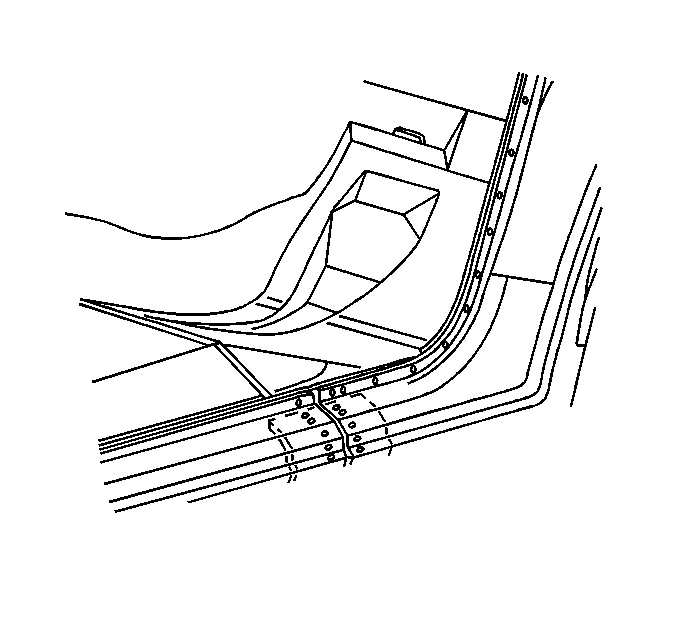
Important: Do not section within 100 mm (4 in) of either inner lower curve of the door opening frame or outer rocker panel sectioning.
Important: Prior to refinishing, refer to GM 4901MD-99 Refinish Manual for recommended products. Do not combine paint systems. Refer to paint manufacturer's recommendations.
