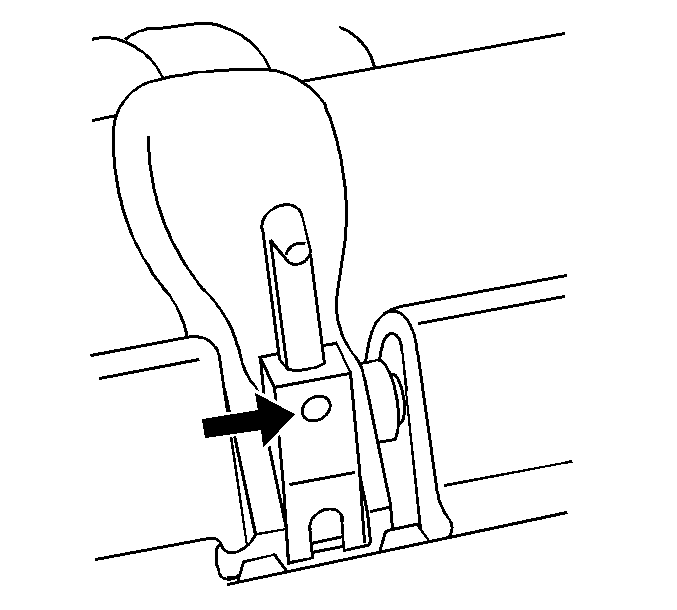
Front Latch Adjustment
Adjustment of the front latch determines the sealing quality of the
number 1 bow to the windshield header and the latching or releasing
effort of the latch mechanism.
A long latch hook adjustment is identified by a low latching effort
or if the number 1 bow is set too high off of the windshield header.
A long latch hook adjustment can cause wind noise and water leaks.
A short latch hook adjustment will cause an excessively high latching
effort and the number 1 bow will sink below the windshield header when
latched. A short latch hook adjustment may cause weatherstrip damage or latch
failure.
Important:
| • | A proper front latch hook adjustment should reveal 3 to
4 threads outside of the clamp body. If fewer than 3 or greater than 4 threads
are visible, inspect the folding top for other mechanical problems. |
| • | If the latch needs adjustment, inspect both sides of the vehicle
and adjust as needed. |
- Use the following procedure in order to adjust the latch:
- Raise and latch the folding top to the windshield header.
| 2.1. | Observe the operation of the latch and the latching effort. |
| 2.2. | Ensure the latching effort is equal on both sides. |
- Inspect the fit between the number 1 bow and the windshield
header.
| 3.1. | The number 1 bow should be flush to 2 mm (1/16 in)
below the windshield header trim. |
| 3.2. | Inspect the other side of the vehicle. |
- Adjust the latch
| 4.1. | Raise the folding top off of the windshield header. |

| 4.2. | Loosen the clamp body set screw. |
| 4.3. | Turn the front latch hook in the appropriate direction. |
| | Important: Face the front latch hook forward.
|
| 4.4. | Raise and latch the folding top and inspect the latch adjustment. |
If further adjustment is necessary, repeat the previous step. If no
further adjustment is necessary, continue with the following step.
Notice: Use the correct fastener in the correct location. Replacement fasteners
must be the correct part number for that application. Fasteners requiring
replacement or fasteners requiring the use of thread locking compound or sealant
are identified in the service procedure. Do not use paints, lubricants, or
corrosion inhibitors on fasteners or fastener joint surfaces unless specified.
These coatings affect fastener torque and joint clamping force and may damage
the fastener. Use the correct tightening sequence and specifications when
installing fasteners in order to avoid damage to parts and systems.
- Lower the folding
top and tighten the clamp body set screw.
Tighten
Tighten the clamp body set screw to 10 N·m (89 lb in).
- Repeat on the other side of the vehicle if necessary.

