Cruise Control Cable Replacement without RPO NW9
Removal Procedure
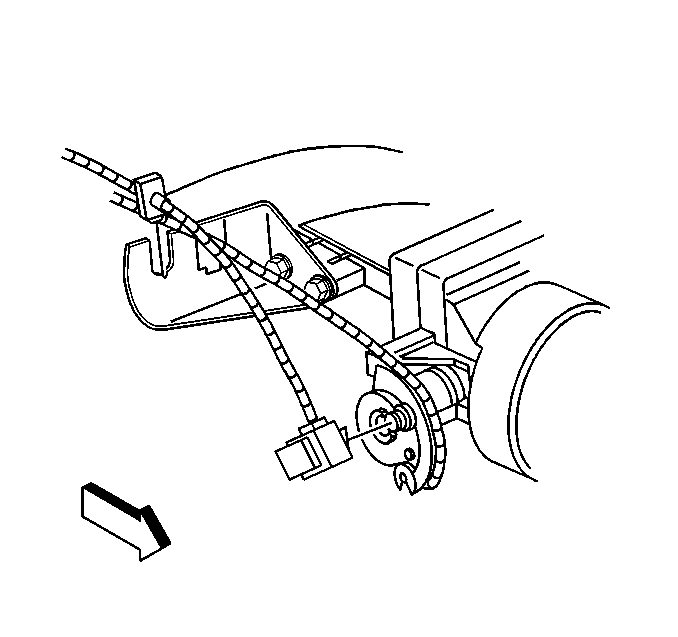
- Rotate the throttle lever rearward.
- Push down the cable end to remove it from the throttle lever pin.
- Using a flat bladed tool, push in the cable retainer at the throttle body bracket.
- Slide the cruise control cable up from the throttle body bracket.
- Remove the cruise control cable from under the accelerator/cruise control cable servo bracket.
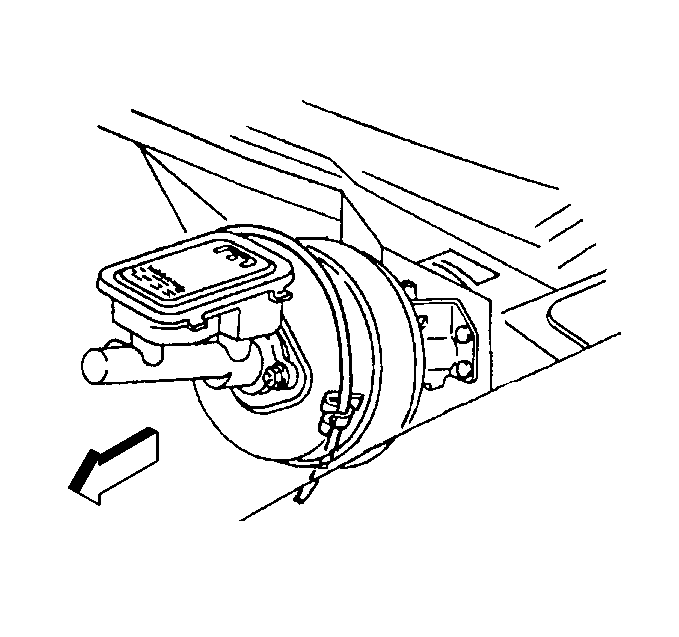
- Remove the cruise control cable clip from the brake booster.
- Raise and suitably support the vehicle. Refer to Lifting and Jacking the Vehicle in General Information.
- Remove the left front bumper fascia lower deflector. Refer to Front Bumper Fascia Air Deflector Replacement in Bumpers.
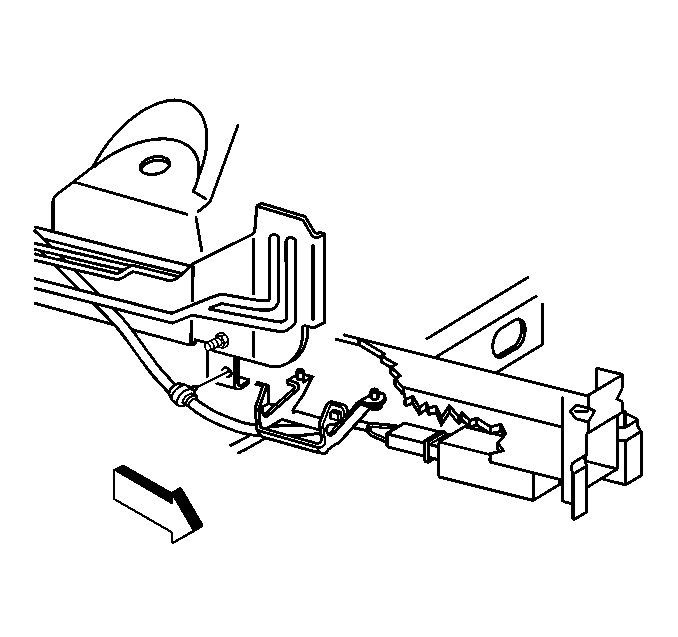
- Disconnect the cruise control cable rosebud clip from the brake pipe clip.
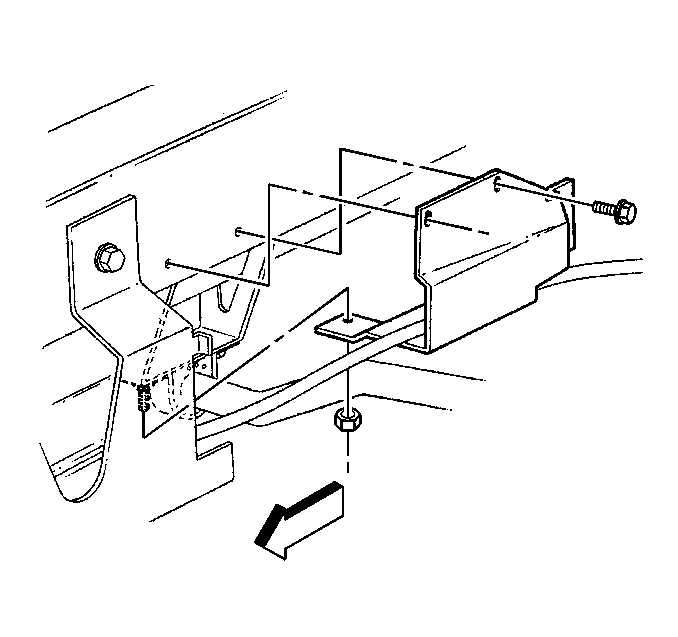
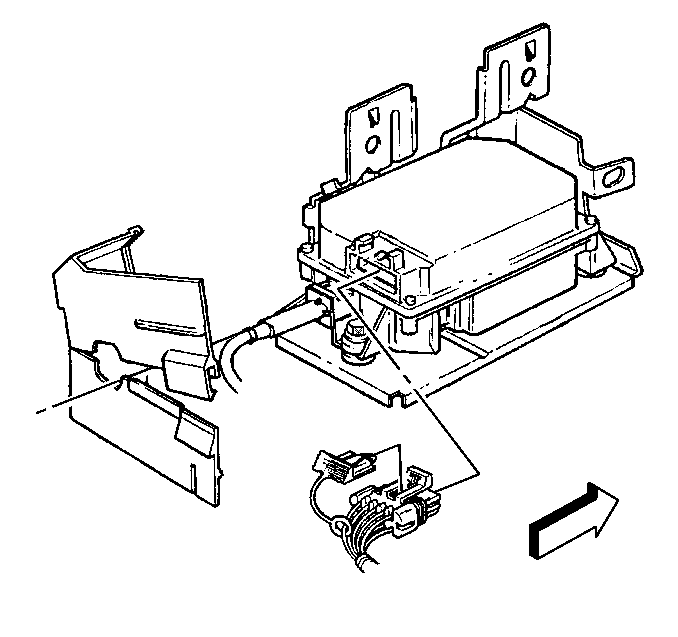
- Remove the cruise control module shield bolts and nut.
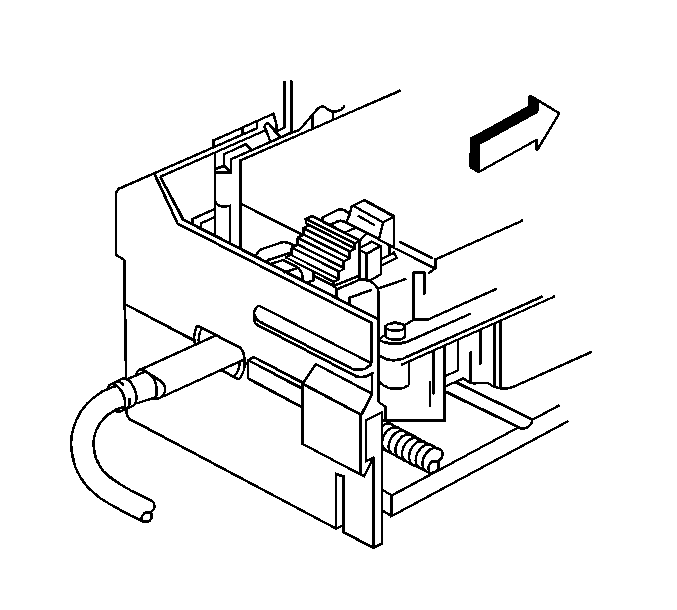
- Remove the cruise control module shield.
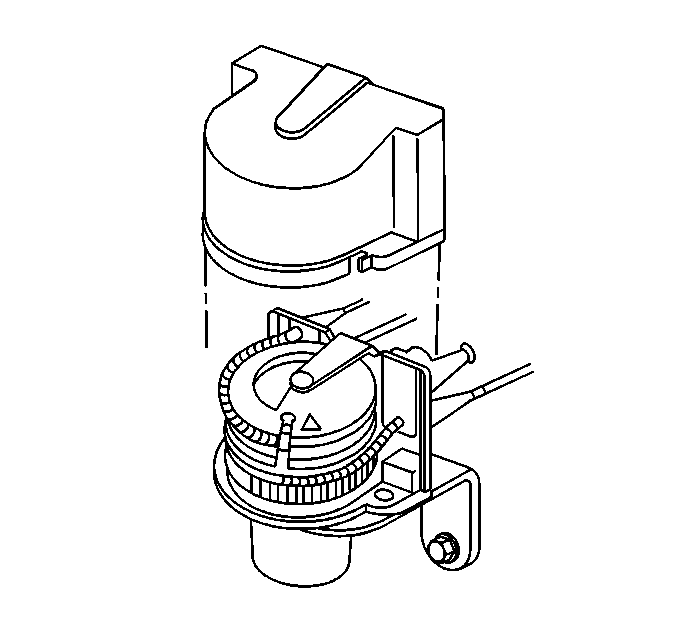
- Unsnap and remove the cruise control module cover.
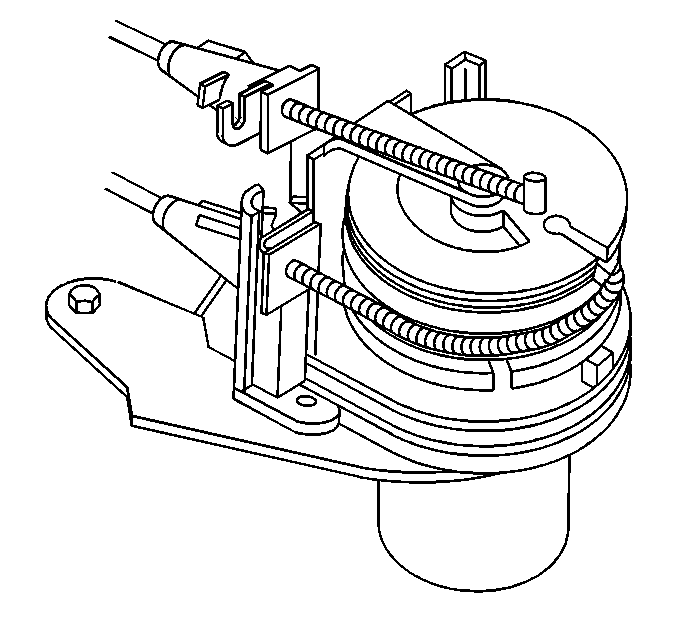
- Remove the cable locking retainer from the module.
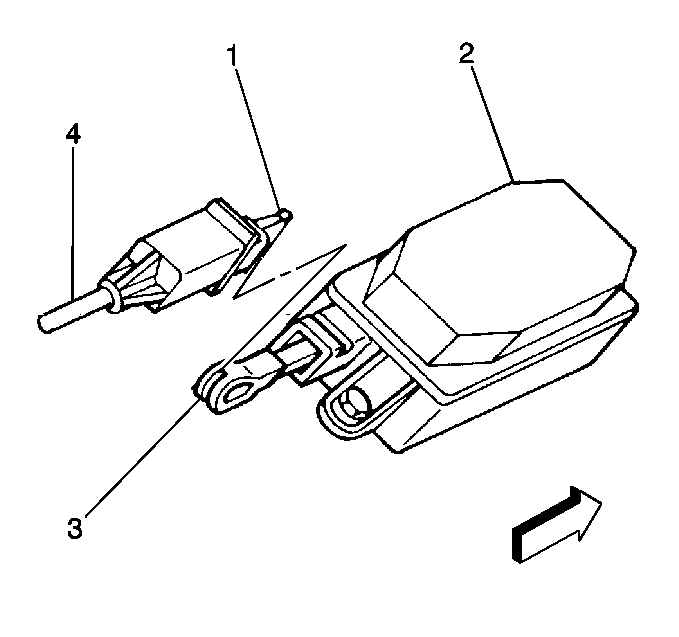
- Pull the cruise control cable (4) out from the module (2).
- Unhook the cable bead (1) from the module ribbon (3).
- Remove the cruise control cable from the vehicle.
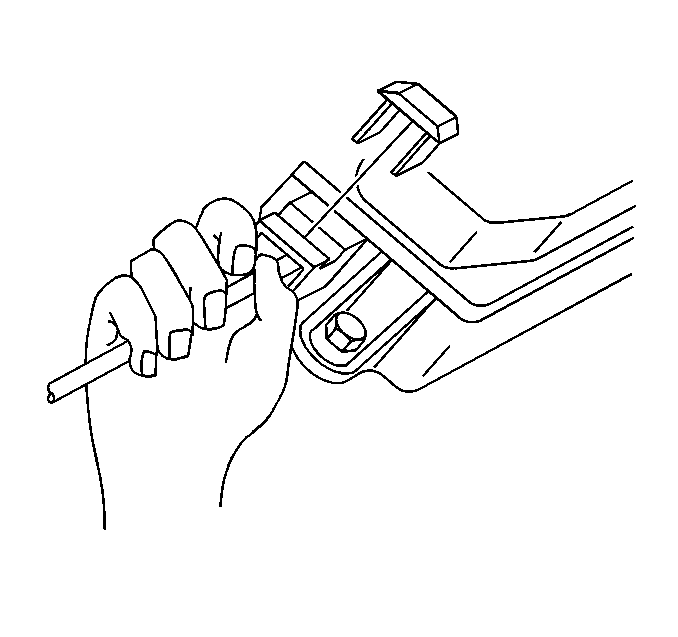
Compress the conduit tangs
Installation Procedure
- Install the cruise control cable to the vehicle.
- Inspect the cable end to insure the O-ring is in place.
- Hook the cable bead (1) to the module ribbon (3)
- Remove the shipping retainer.
- Rotate the cable end if necessary, to straighten the ribbon.
- Pull the throttle body end of the cable until the cable is taut.
- Push the cable fitting end over the ribbon.
- Snap the cable end into the module.
- Ensure that the conduit tangs are engaged.
- Install the cable locking retainer to the module.
- Align the cruise control module cover over the cable and bracket.
- Snap the cover closed over the flanges on the bracket.
- Install the cruise control module shield.
- Install the cruise control module shield bolts and nut.
- Connect the cruise control cable rosebud clip to the brake pipe clip.
- Install the left front bumper fascia lower deflector. Refer to Front Bumper Fascia Air Deflector Replacement in Bumpers.
- Lower the vehicle.
- Install the cruise control cable clip to the brake booster.
- Install the cruise control cable under the accelerator/cruise control cable servo bracket.
- Rotate the throttle lever rearward.
- Snap the cruise control cable end to the throttle lever.
- Align cable and slide onto slot, locking tab must be snapped into position.
- Adjust the cruise control cable as needed. Refer to Cruise Control Cable Adjustment .



Notice: Use the correct fastener in the correct location. Replacement fasteners must be the correct part number for that application. Fasteners requiring replacement or fasteners requiring the use of thread locking compound or sealant are identified in the service procedure. Do not use paints, lubricants, or corrosion inhibitors on fasteners or fastener joint surfaces unless specified. These coatings affect fastener torque and joint clamping force and may damage the fastener. Use the correct tightening sequence and specifications when installing fasteners in order to avoid damage to parts and systems.
Tighten
| • | Tighten the cruise control module shield bolts to 6 N·m (53 lb in). |
| • | Tighten the cruise control module shield nut to 27 N·m (20 lb ft). |


Cruise Control Cable Replacement with RPO NW9
Removal Procedure
- Unsnap and remove the cruise control servo cable adjuster cover.
- Rotate the upper cam, and remove the cruise control cable slug from the servo cable adjuster.
- Unsnap the locking tab and remove the cable from the slot.
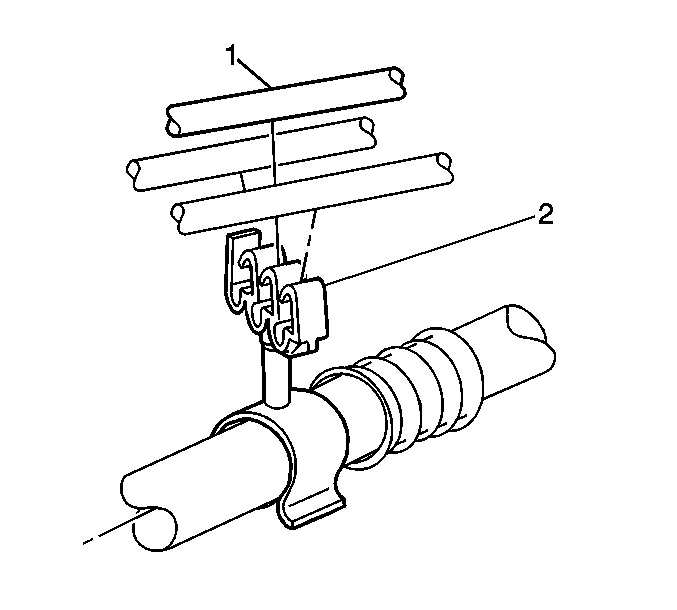
- Unsnap the cruise control cable (1) from the accelerator control cable clip (2).
- Remove the cruise control cable from under the accelerator/cruise control cable servo bracket.
- Remove the cruise control cable clip from the brake booster.
- Raise and suitably support the vehicle. Refer to Lifting and Jacking the Vehicle in General Information.
- Remove the left front bumper fascia lower deflector. Refer to Front Bumper Fascia Air Deflector Replacement in Bumpers.
- Disconnect the cruise control cable rosebud clip from the brake pipe clip.
- Remove the cruise control module shield bolts and nut.
- Remove the cruise control shield.
- Unsnap and remove the cruise control module cover.
- Remove the cable locking retainer from the module.
- Pull the cruise control cable (4) out from the module (2).
- Unhook the cable bead (1) from the module ribbon (3)
- Remove the cruise control cable from the vehicle.


Compress the conduit tangs

Installation Procedure
- Install the cruise control cable to the vehicle.
- Inspect the cable end to insure the O-ring is in place.
- Hook the cable bead (1) to the module ribbon (3).
- Remove the shipping retainer.
- Rotate the cable end if necessary, to straighten the ribbon.
- Pull the throttle body end of the cable until the cable is taut.
- Push the cable fitting end over the ribbon.
- Snap the cable end into the module.
- Ensure that the conduit tangs are engaged.
- Install the cable locking retainer to the module.
- Align the cruise control module cover over the cable and bracket.
- Snap the cover closed over the flanges on the bracket.
- Install the cruise control module shield.
- Install the cruise control module shield bolts and nut.
- Connect the cruise control cable rosebud clip to the brake pipe clip.
- Install the left front bumper fascia lower deflector. Refer to Front Bumper Fascia Air Deflector Replacement in Bumpers.
- Lower the vehicle.
- Install the cruise control cable clip to the brake booster.
- Install the cruise control cable under the accelerator/cruise control cable servo bracket.
- Snap the cruise control cable (1) into the accelerator control cable clip (2).
- Rotate the upper cam, and install the cruise control cable slug to the servo cable adjuster.
- Slide the cable onto the slot, ensure locking tab is snapped into position.
- Slide the cruise control servo cable adjuster cover down and snap into place.
- Adjust the cruise control cable as needed. Refer to Cruise Control Cable Adjustment .


Notice: Use the correct fastener in the correct location. Replacement fasteners must be the correct part number for that application. Fasteners requiring replacement or fasteners requiring the use of thread locking compound or sealant are identified in the service procedure. Do not use paints, lubricants, or corrosion inhibitors on fasteners or fastener joint surfaces unless specified. These coatings affect fastener torque and joint clamping force and may damage the fastener. Use the correct tightening sequence and specifications when installing fasteners in order to avoid damage to parts and systems.
Tighten
| • | Tighten the cruise control module shield bolts to 6 N·m (53 lb in). |
| • | Tighten the cruise control module shield nut to 27 N·m (20 lb ft). |


