Tick/Creak Noise at Front or Rear of Headliner (Remove Front and Rear Datum Pin) (Export)

| Subject: | Tick/Creak Noise at Front or Rear of Headliner (Remove Front and Rear Datum Pins) |
| Models: | 2007-2008 Chevrolet Caprice, Lumina (Export) |
Condition
Customer may comment on a tick or creak type noise from either the front or rear of the headliner. This noise may be generated while driving on any type of road surface.
Cause
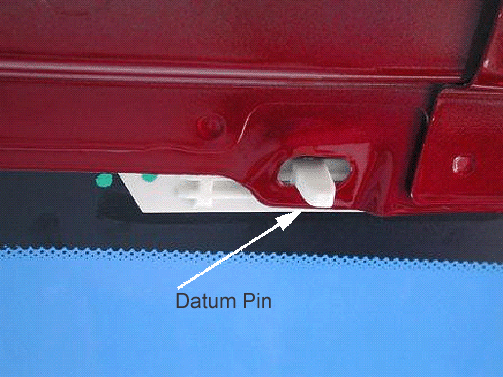
The cause of the tick/creak is contact between the windscreen datum pin (plastic production assembly aid) and the body sheet metal. Front glass datum pins are white and rear glass datum pins are black.
Correction
After verifying that the vehicle has the condition as described above, remove the front and rear datum pins per the following procedure.
Remove the datum pins by breaking off with a thin chisel or paint scraper. To break off the pin and ensure that there is no contact between the remaining pin and the sheet metal, the following steps should be used. The pictures shown have the headlining completely removed for clarity only.
Step 1 -- Locate the datum pin on the glass as follows.

Front Windshield:
Gently lower the headlining approximately 5-10mm. There are two pins on the windscreen, one LHS and one RHS. The sunvisors do not need to be removed. The datum pin will be 120mm inboard from the sunvisor pivot and just behind the front edge of the headliner.
Sedan Rear Glass:

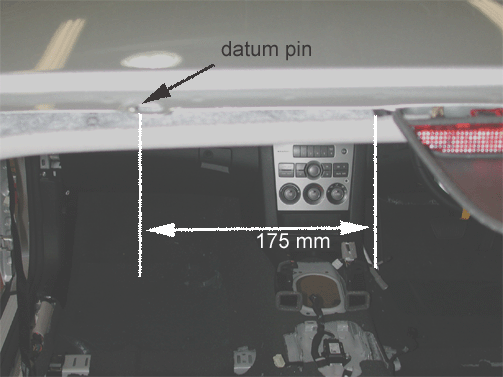
Gently lower the headlining approximately 5-10mm. There are two pins on the rear glass, one LHS and one RHS. The clips along the rear of the headlining do not need to be unclipped. The datum pin will be 175mm outboard from the outer edge of the high-mounted stoplamp and just in front of the rear edge of the headliner, as shown above.
Ute Rear Glass:

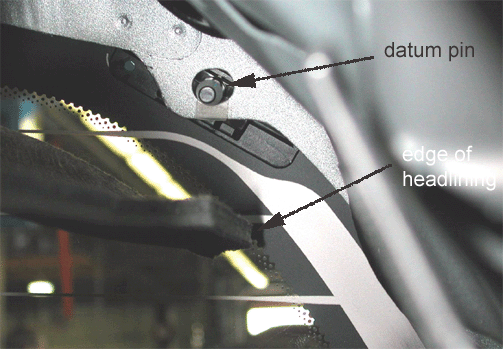
Remove the B-pillar center and upper trims. The datum pin is located directly behind the outermost edge of the headlining, as shown above. There are two pins on the rear glass, one LHS and one RHS.
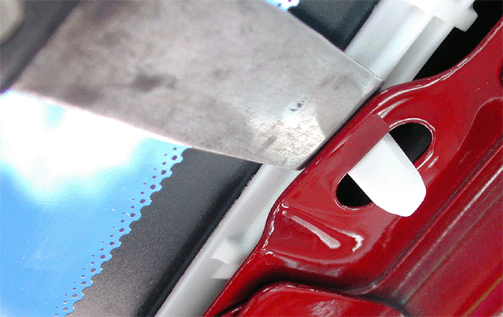
Position of chisel prior to breakage

Step 2 -- Place a chisel/scraper as shown above and tap gently until the pin breaks off.
Remember to add tape over the end of the datum pin to capture it after breakage.
Note: It is recommended to place a piece of tape over the datum pin to restrict its movement after it breaks off.
Step 3 -- Remove the broken pin.
Step 4 -- Reinstall all trim.
Warranty Information
For vehicles repaired under warranty, use:
Labor Operation | Description | Labor Time |
|---|---|---|
C0020 | Remove windscreen datum pins - front and rear | 0.3 hr (add 0.3 or Ute) |
