For 1990-2009 cars only
Removal Procedure
- Remove the fuel filler cap.
- Raise and support the vehicle. Refer to Lifting and Jacking the Vehicle .
- Drain the fuel tank below the level of the fuel filler hose. Refer to Fuel Tank Draining .
- Remove the right rear wheel. Refer to Tire and Wheel Removal and Installation .
- Remove the Wheelhouse Liner Replacement - Rear. Refer to Rear Inner Wheelhouse Replacement .
- Remove the rear bumper fascia. Refer to Rear Bumper Fascia Replacement .
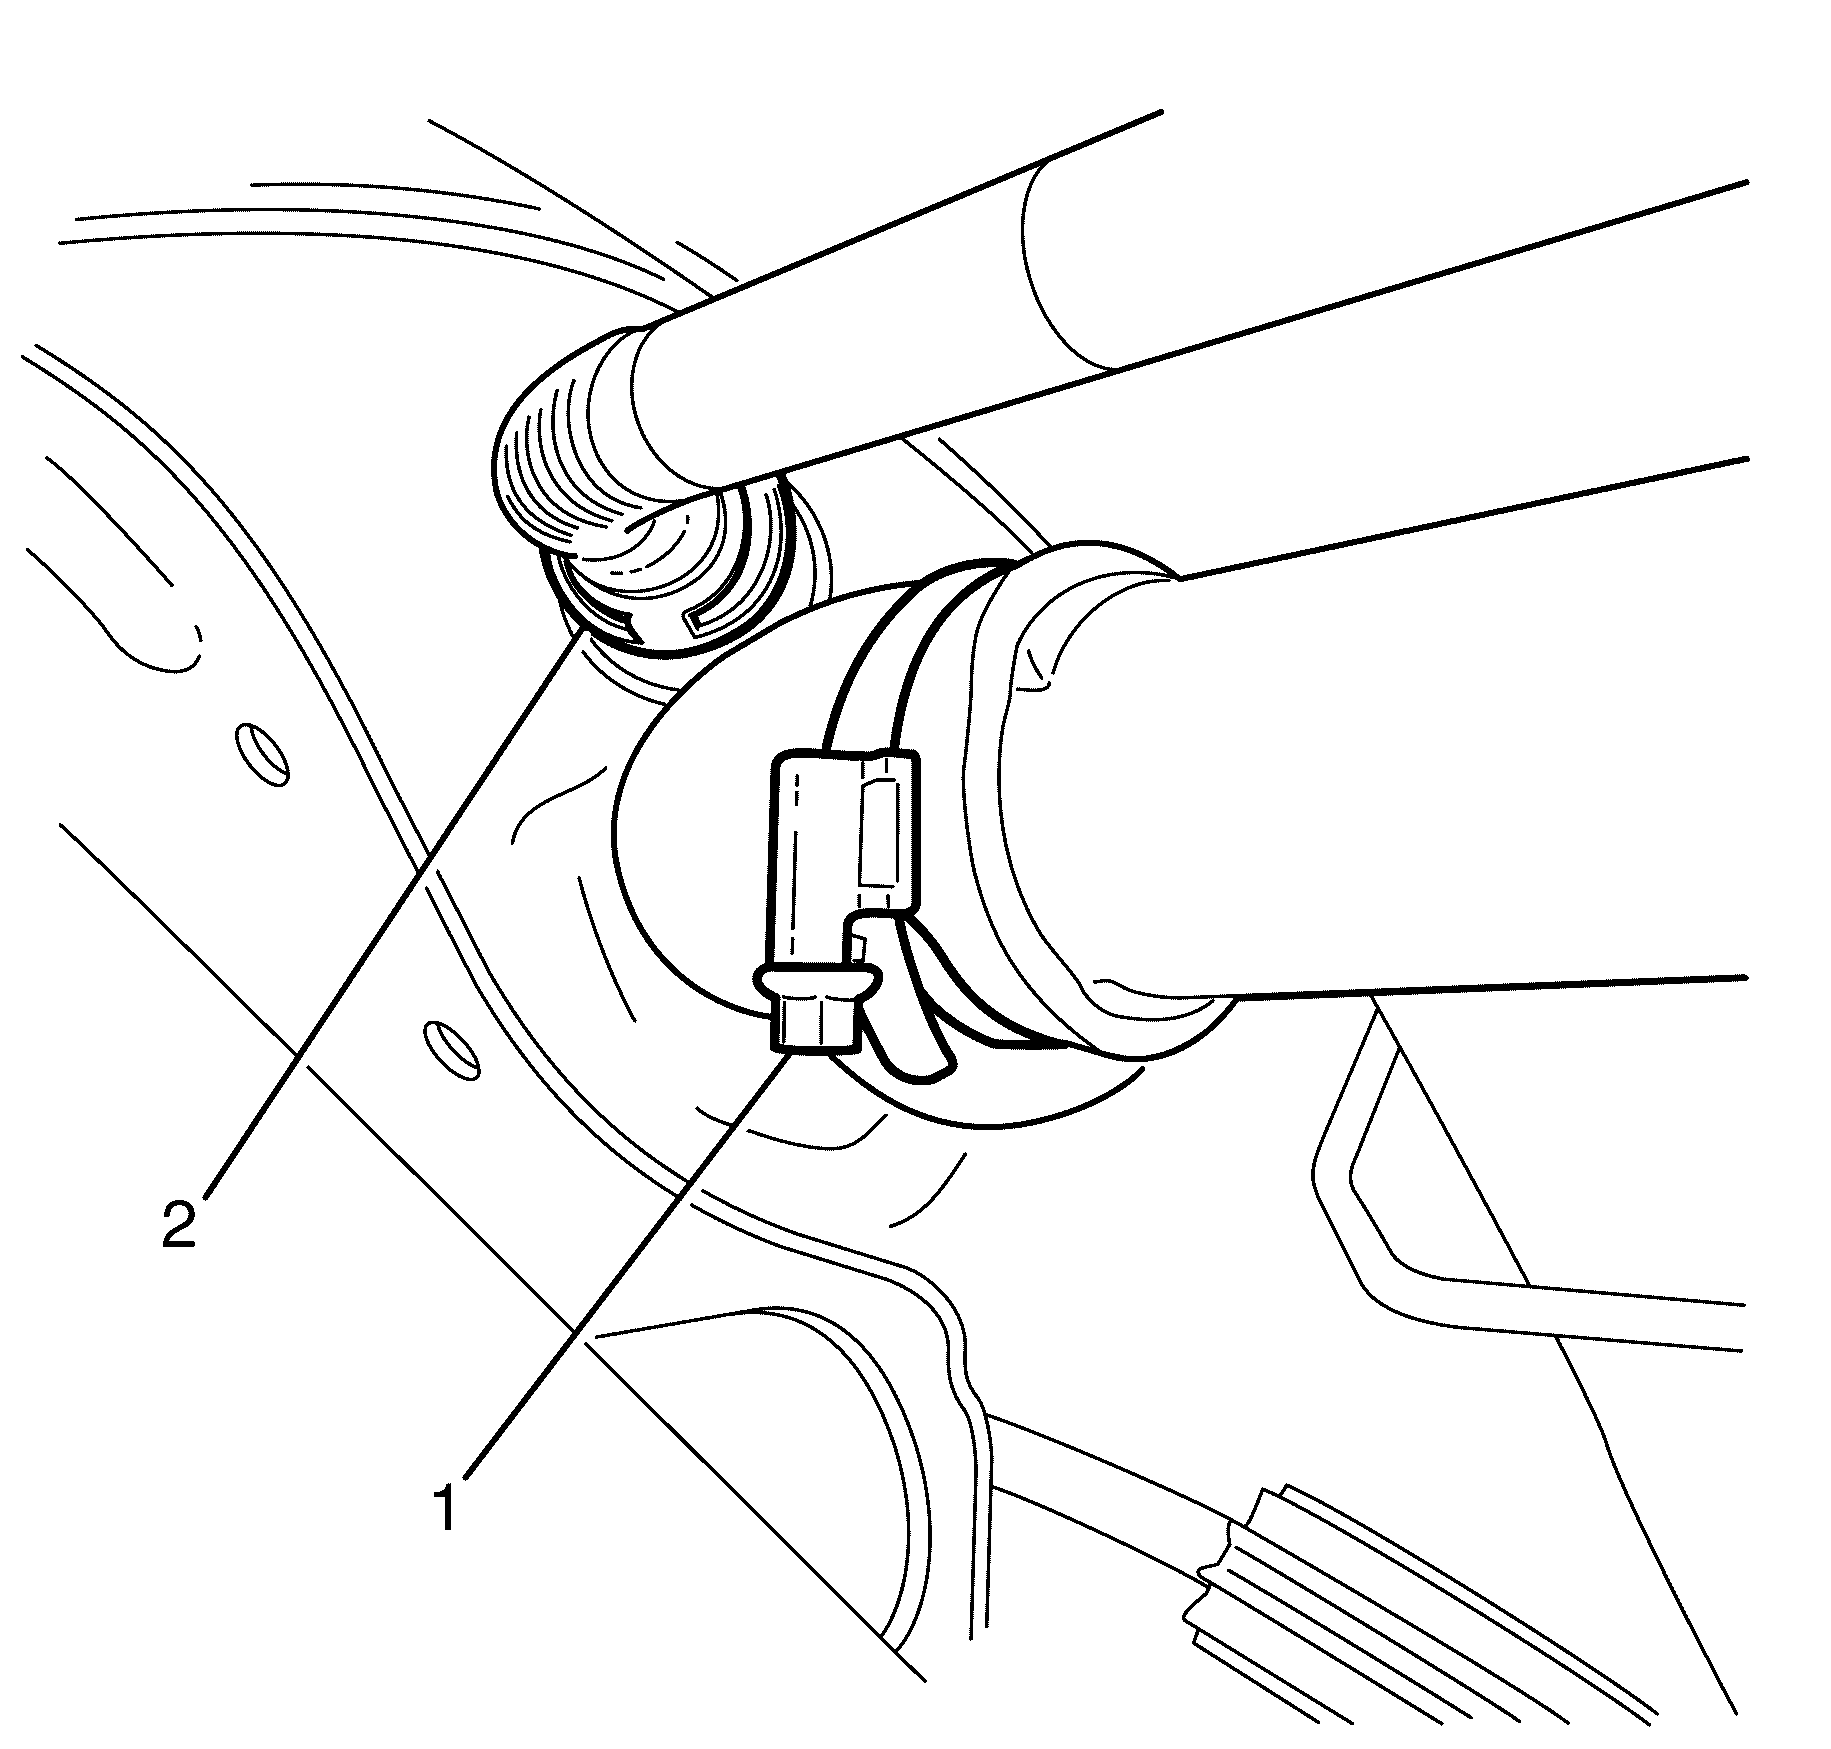
- Disconnect the filler tube from the fuel tank (1).
- Disconnect the evaporative emission (EVAP) line (2), by squeezing both sides of the line and pulling it toward the rear of the vehicle.
- Remove rubber seal surround from the filler tube .
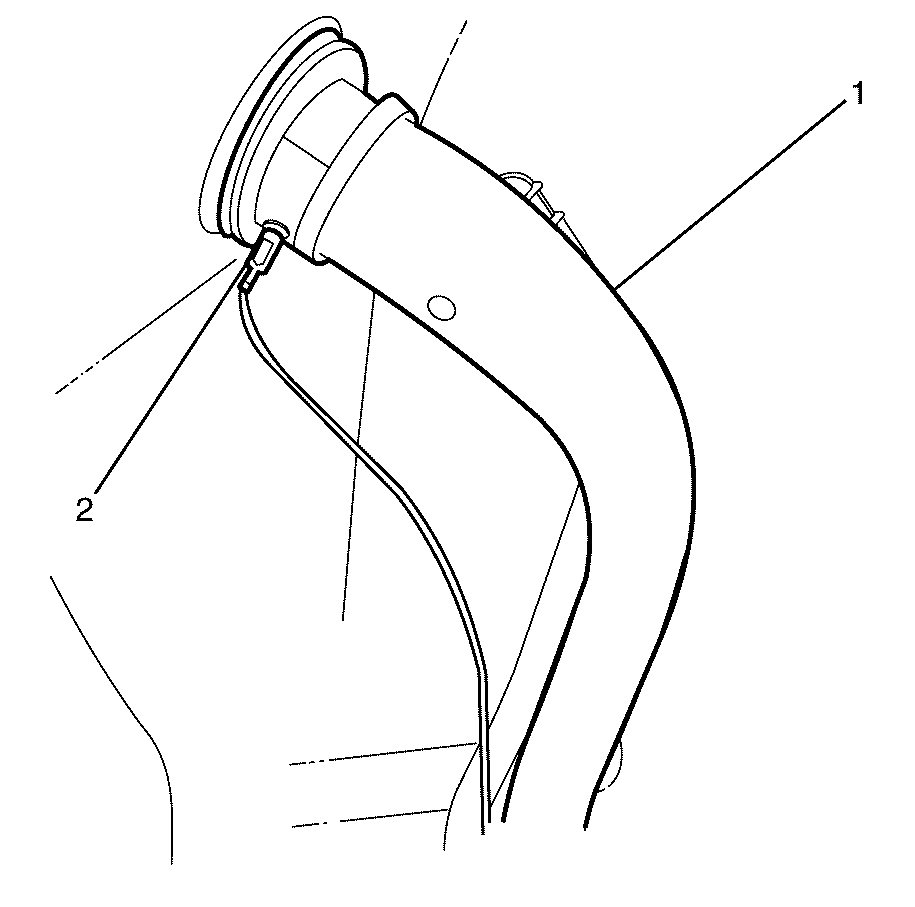
- Remove the earth lead (2) from the filler tube (1).
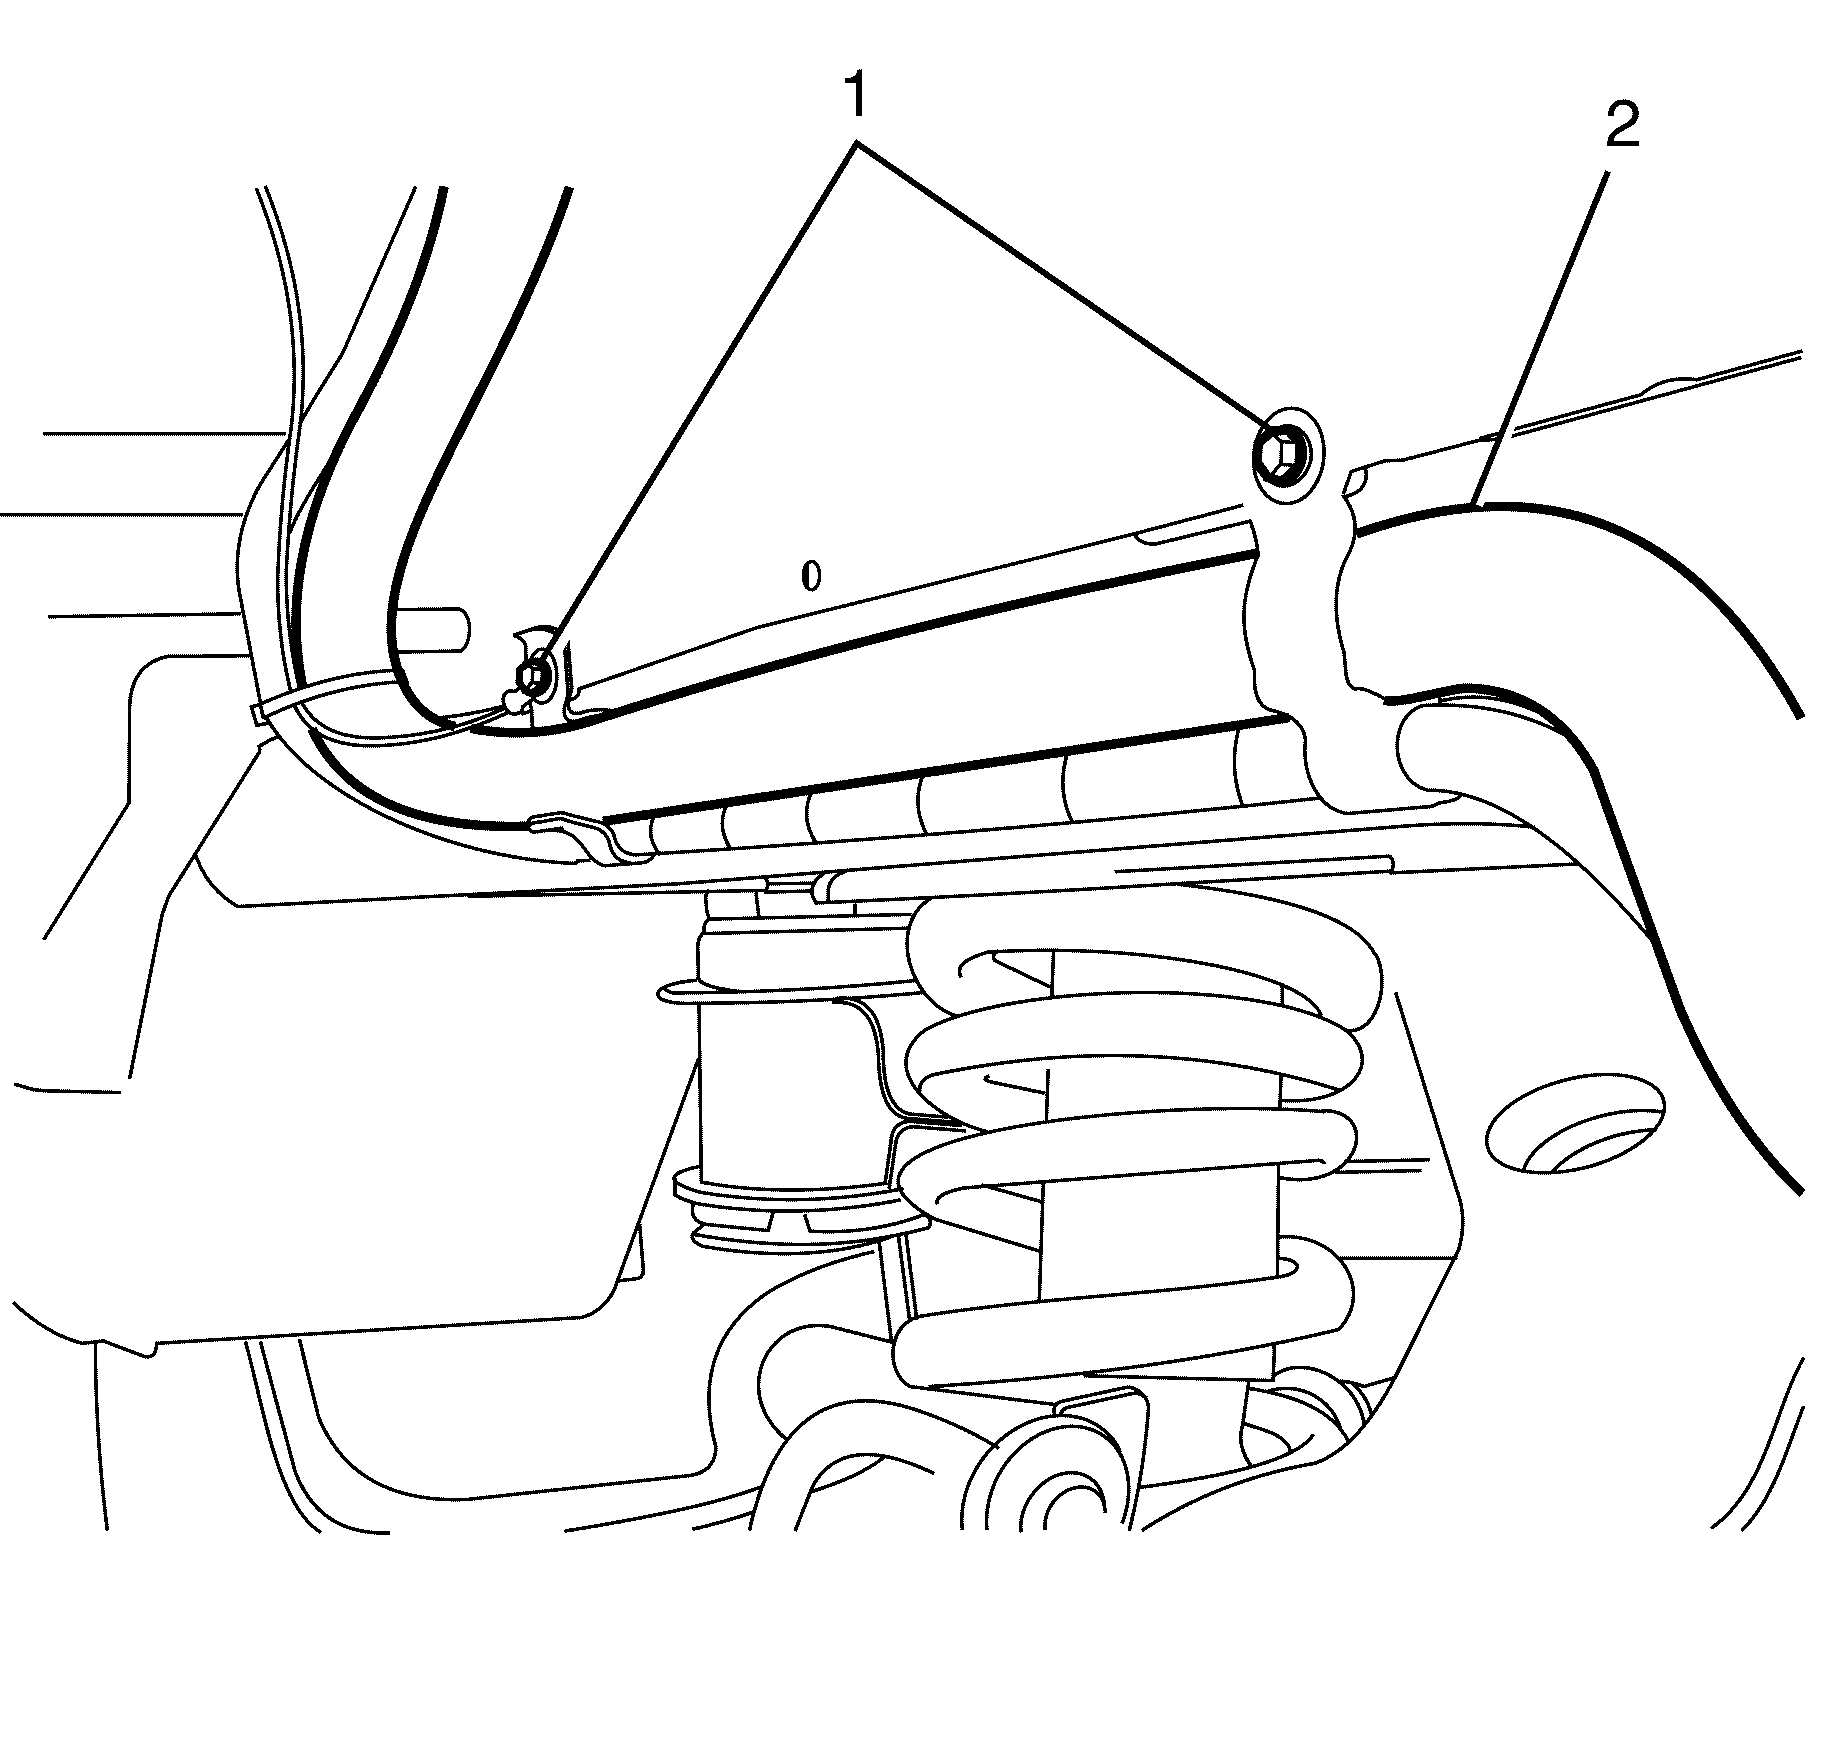
- Remove the filer tube to chassis retaining bolts (1 from filler tube (2).
- Remove the fuel filler tube from the vehicle (2).
Caution: Refer to Safety Glasses Caution in the Preface section.
Caution: Refer to Vehicle Lifting Caution in the Preface section.


Installation Procedure
- Position the fuel filler tube to the vehicle.
- Connect the filler hose (1) to the fuel tank.
- Install the evaporative emission (EVAP) line (2), listen for an audible click to confirm fitting.
- Install the fuel filler tube to chassis retaining bolts.
- Install rubber seal surround to the filler tube (1).
- Install the earth lead to the filler tube (2).
- Install the rear bumper fascia. Refer to Rear Bumper Fascia Replacement .
- Install the Wheelhouse Liner Replacement - Rear. Refer to Rear Inner Wheelhouse Replacement .
- Lower the vehicle.
- Add fuel to the fuel tank.
- Inspect for fuel leaks.
- Install the fuel filler cap.
Notice: Refer to Component Fastener Tightening Notice in the Preface section.

Tighten
Tighten the fuel filler tube hose clamp (3)
to 3.5 N·m (31 lb in).
Notice: Refer to Fastener Notice in the Preface section.

Tighten
Tighten the bolts to 9 N·m (80 lb in).

