For 1990-2009 cars only
Removal Procedure
- Remove the front fender. Refer to Front Fender Replacement .
- Mark the door hinge to pillar and door hinge to door location for installation alignment purposes.
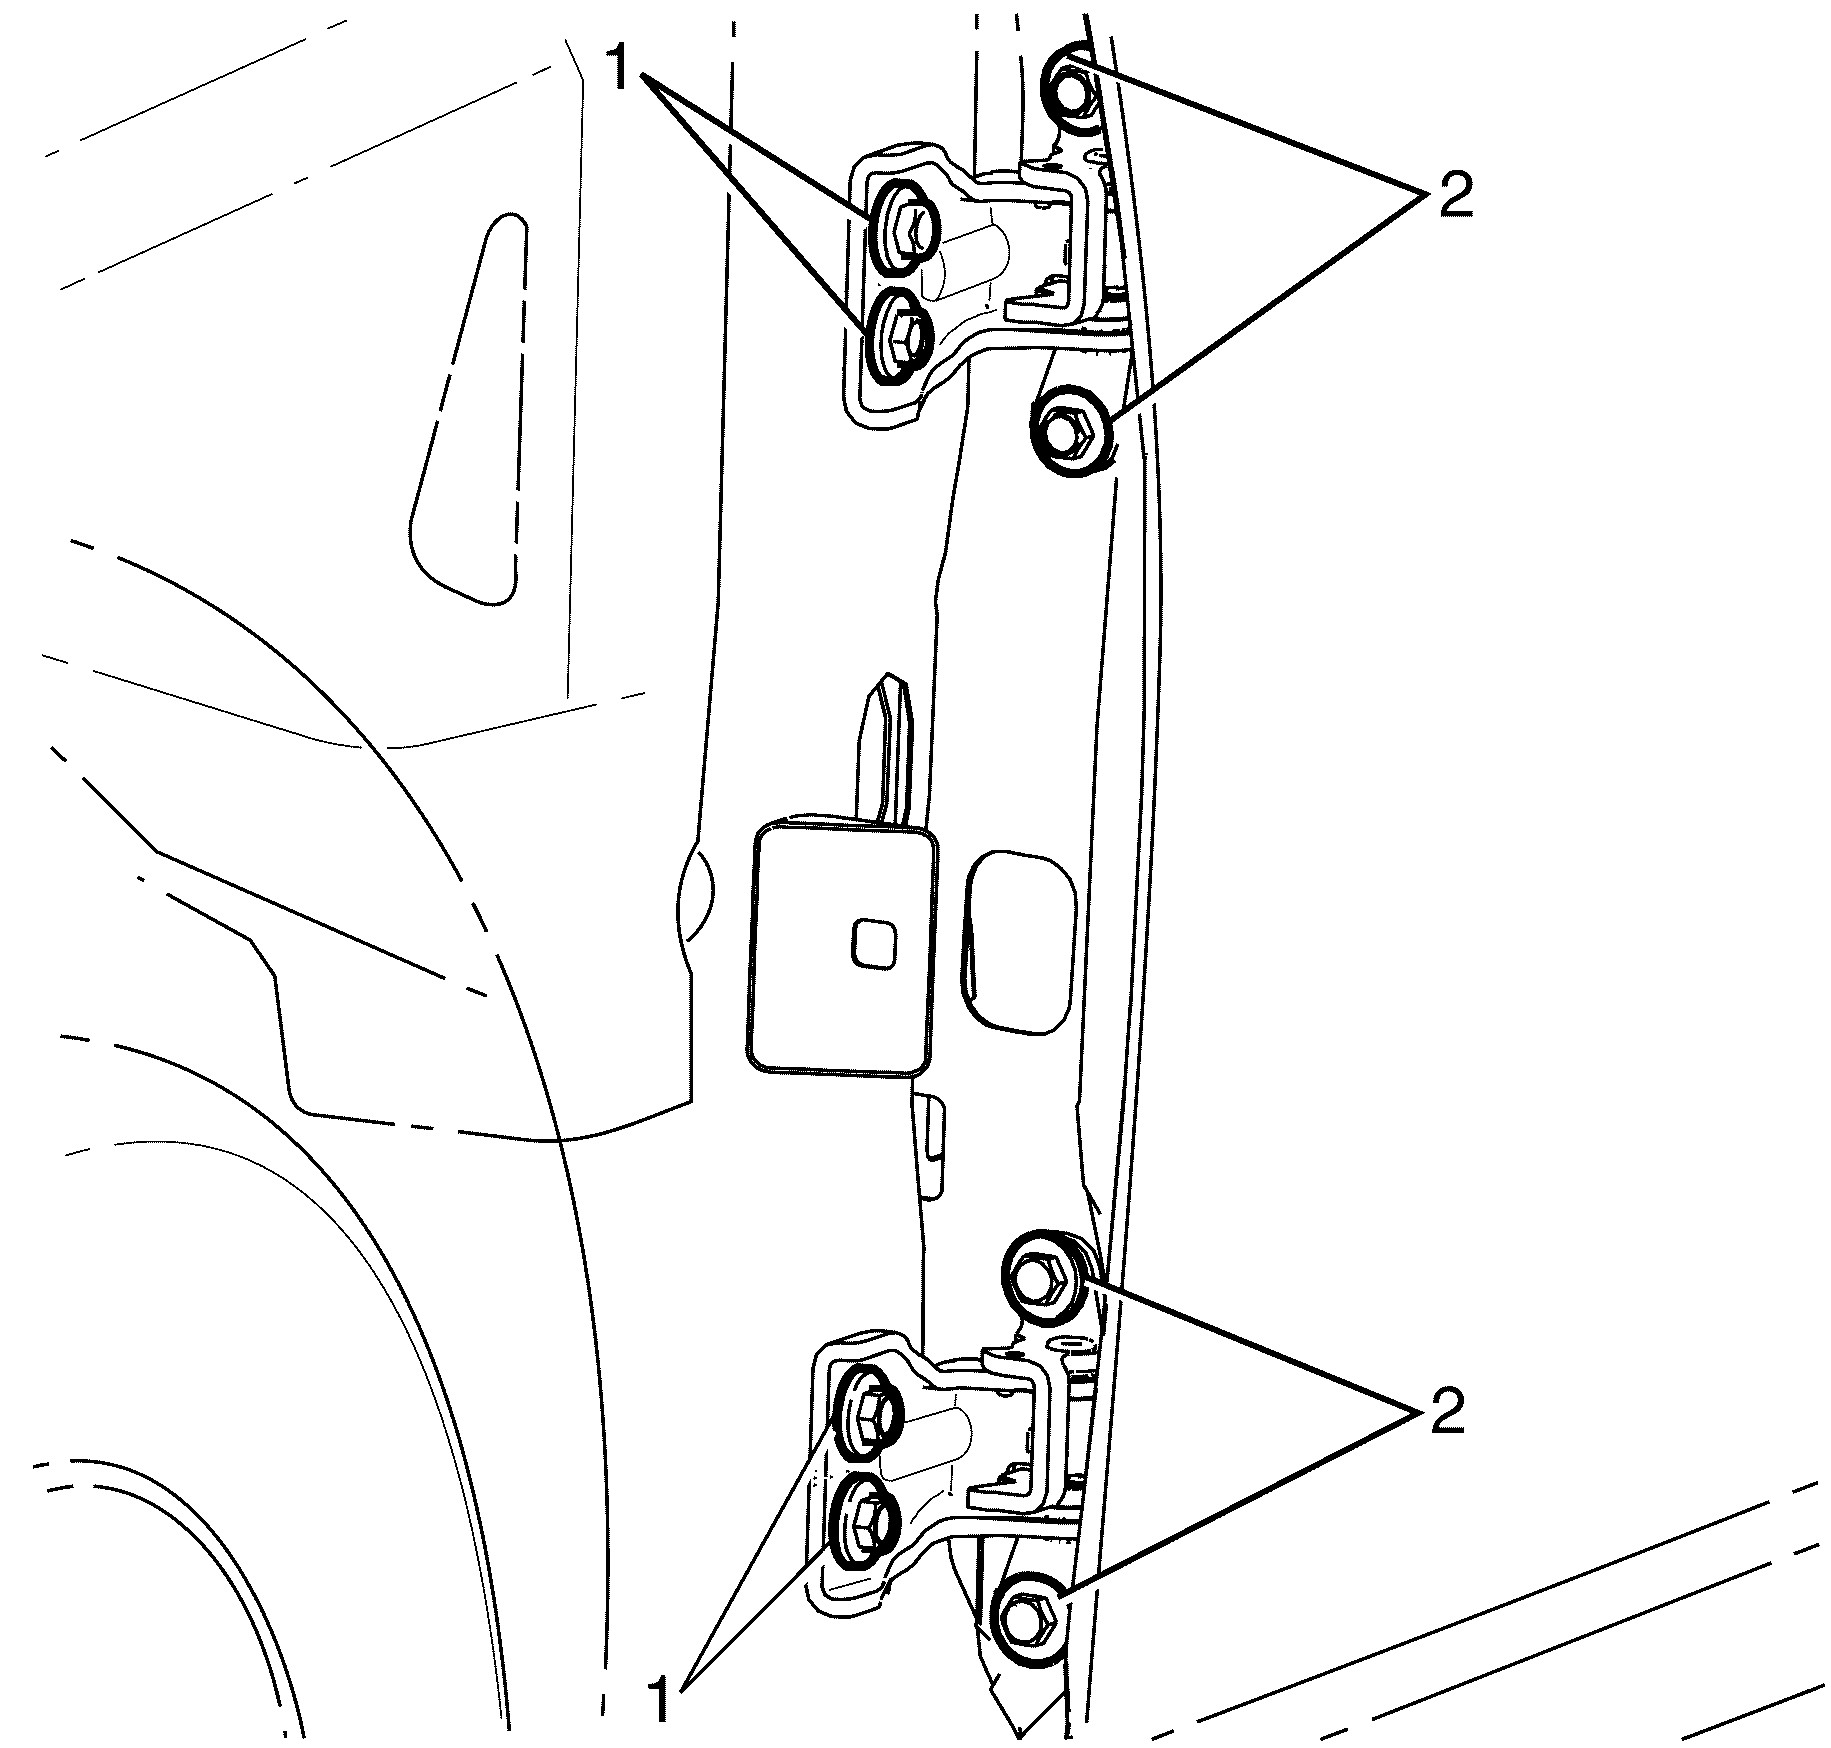
- Remove the door hinge to door retaining bolts (2).
- Remove the door hinge to pillar retaining bolts (1) and remove the door hinges one at a time.

Important: Replace one hinge at a time then repeat procedure for the second hinge if needed.
Important: Remove the door hinge with the door fully latched on the striker.
Installation Procedure
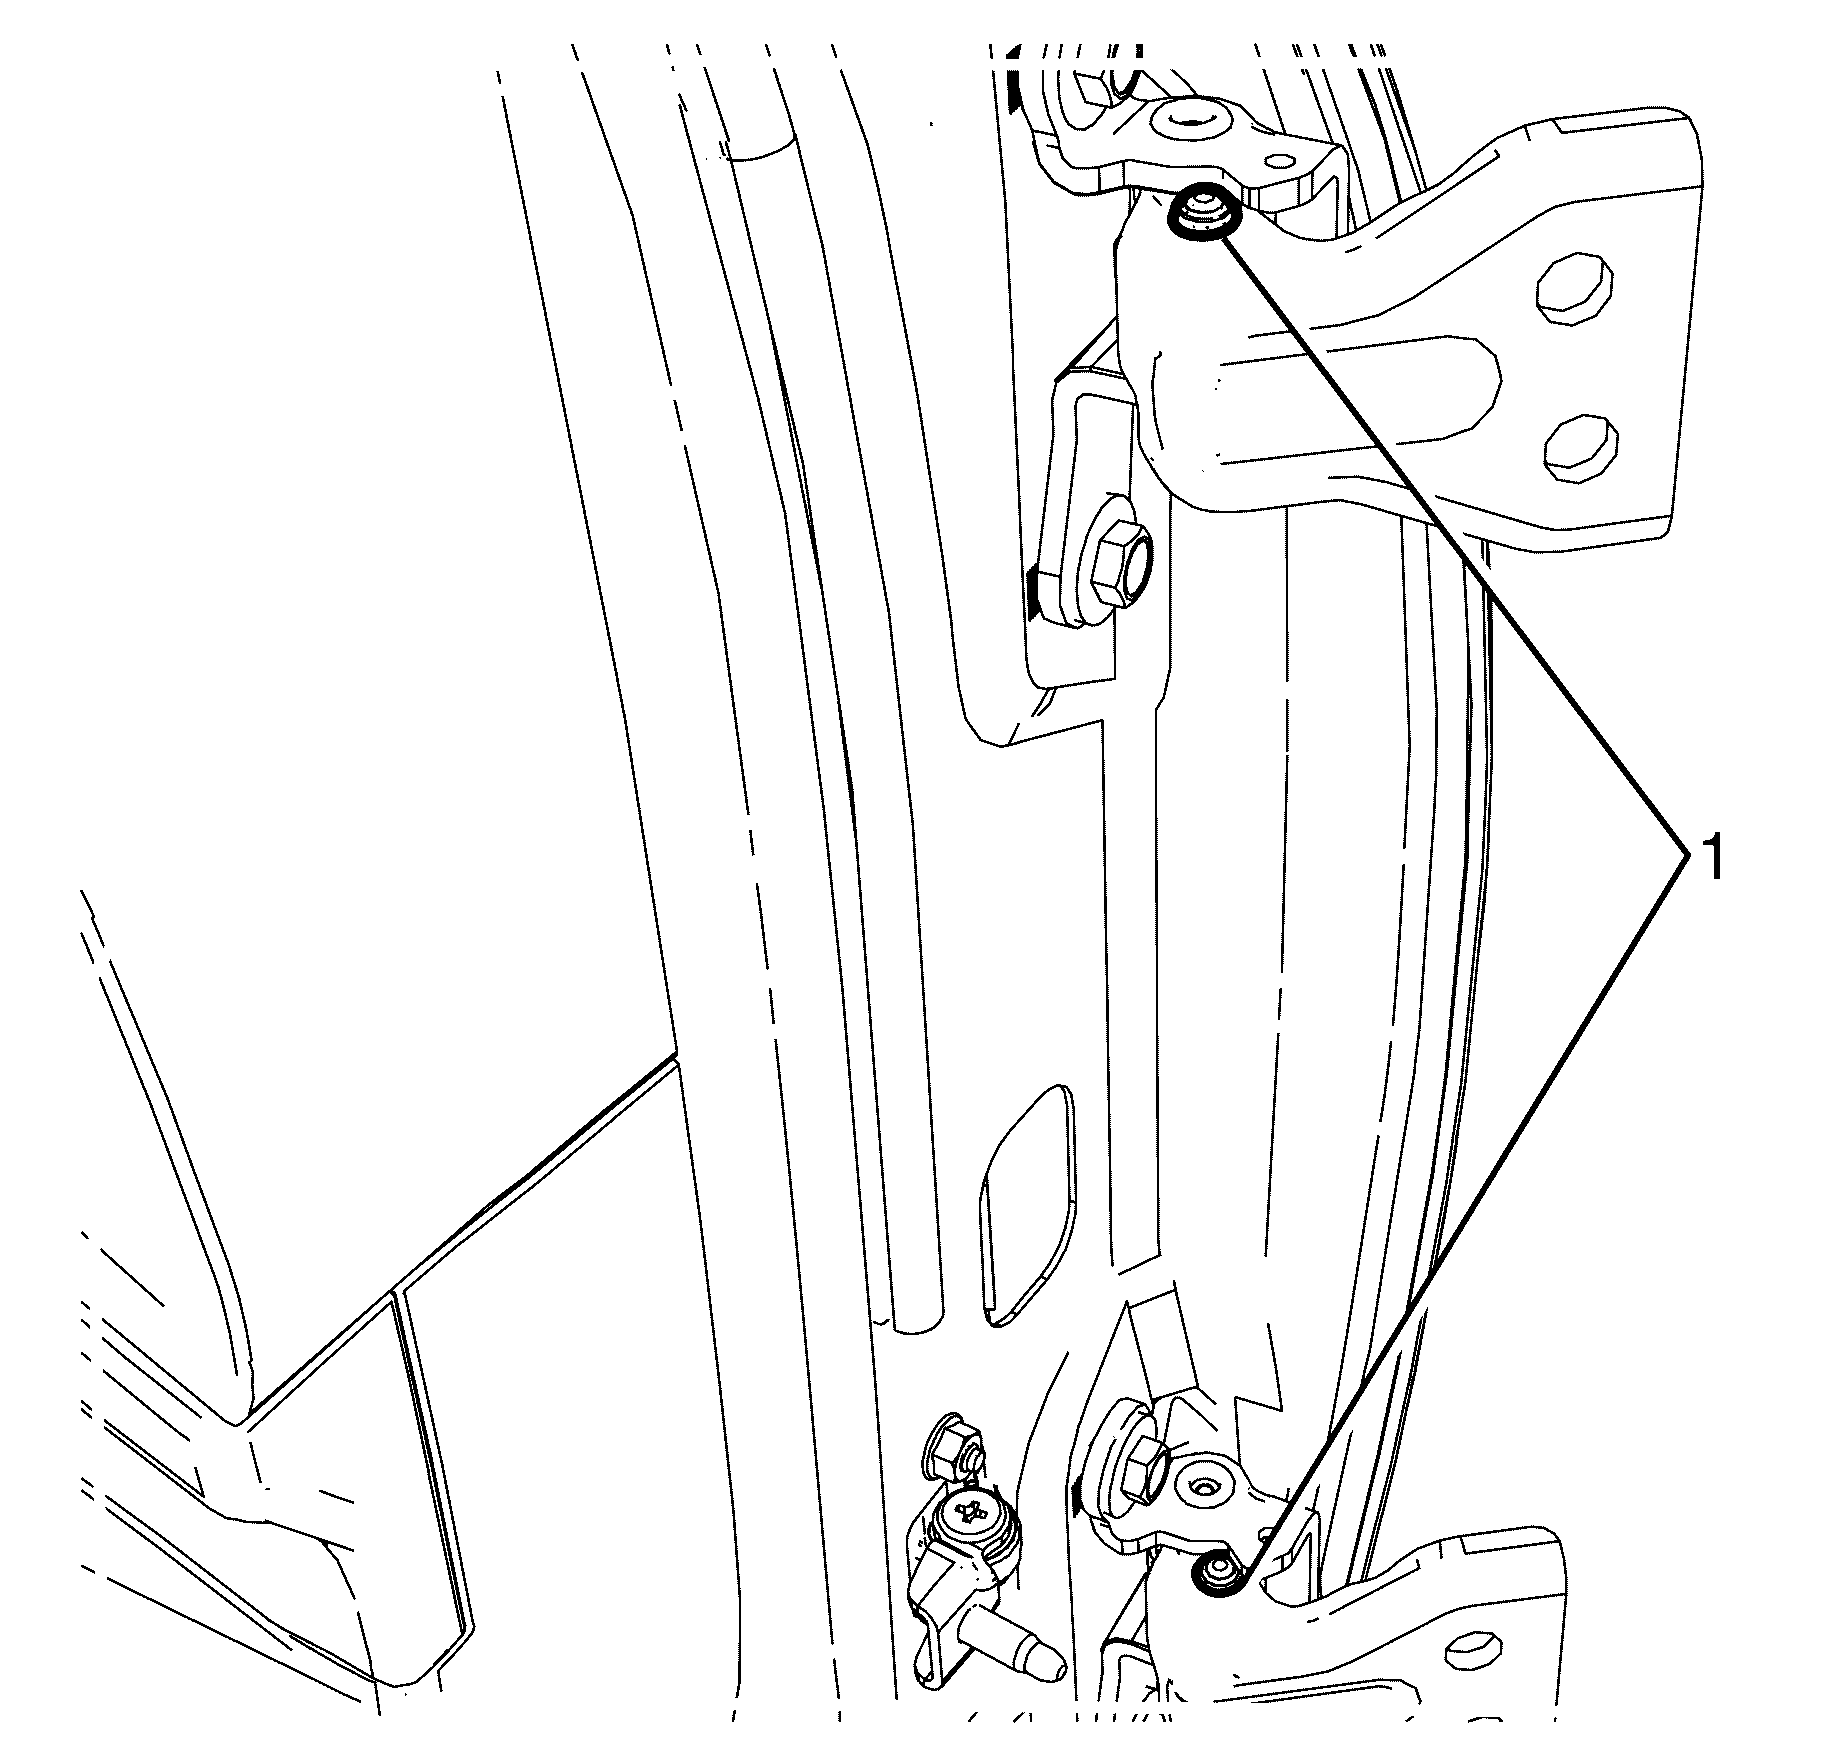
- Remove the paint pins (1) from the NEW door hinges.
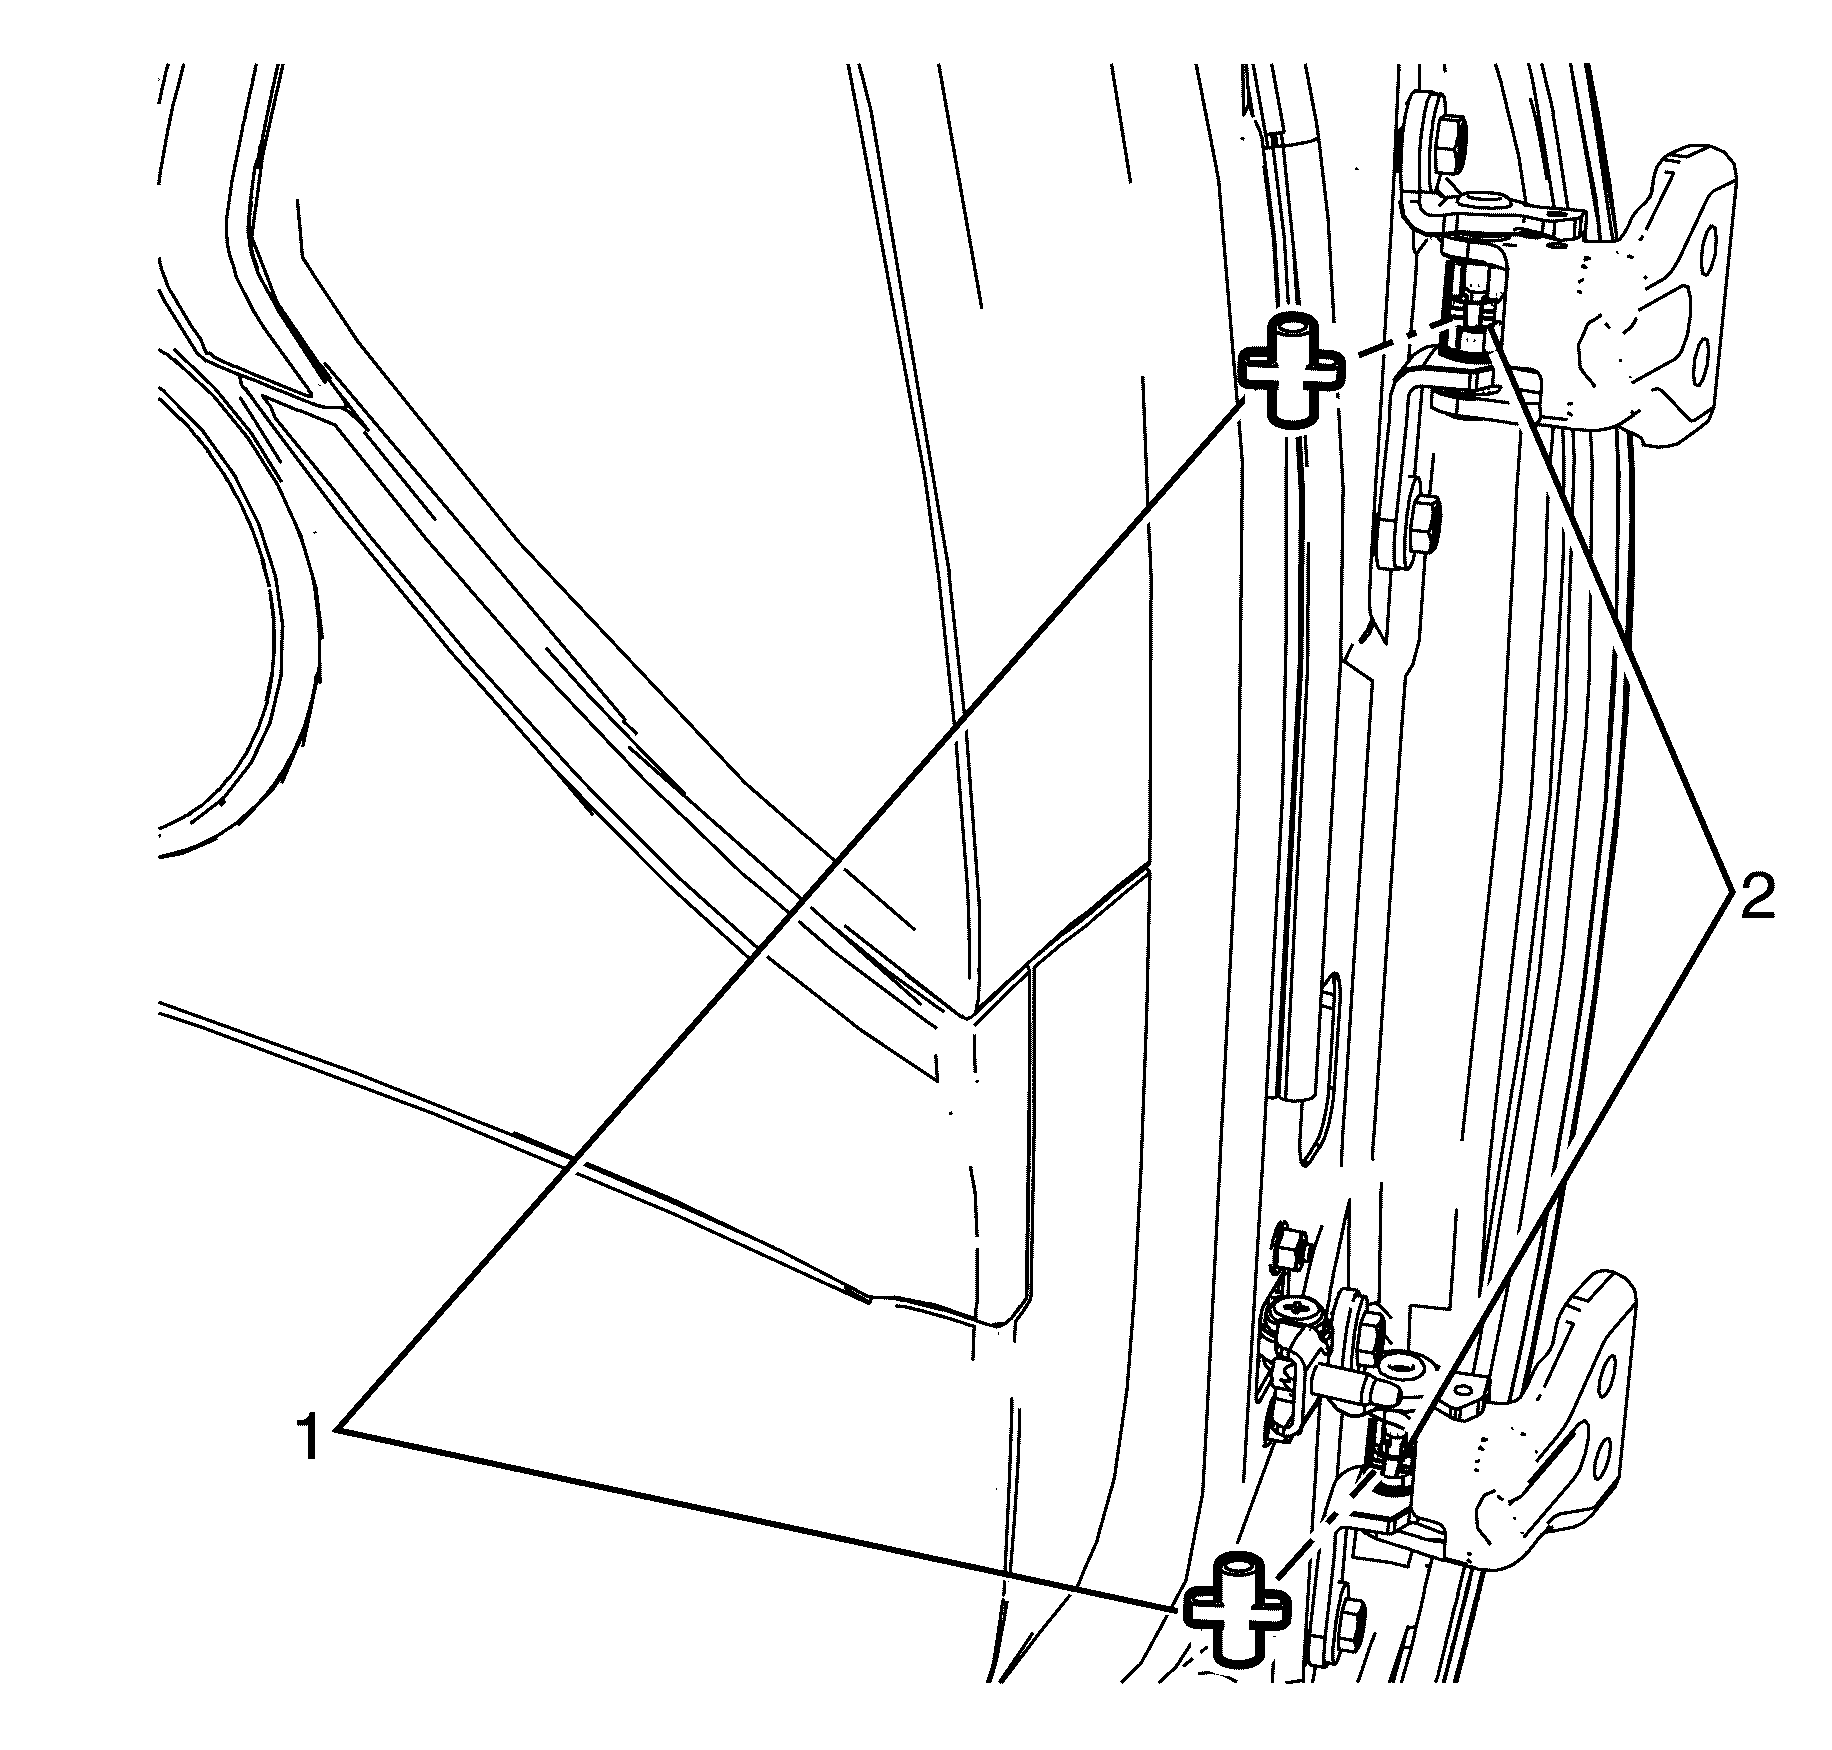
- Remove the shipping clips (1) from the NEW door hinges (2).
- Align the door hinge to pillar and door hinge to door marks made prior to removal.
- Install the door hinge to pillar retaining bolts (1).
- Install the door hinge to door retaining bolts (2).
- Install the front fender. Refer to Front Fender Replacement .
- Adjust the door. Refer to Door Adjustment .

Important: Paint pins (1) are installed in NEW door hinges and must be removed when fitted.
Important: Use a suitable tool to pry the paint pins (1) from the NEW door hinges.

Important: The shipping clips (1) are only to hold the NEW door hinges (2) together in transit and must be removed when fitted.
Important: Use a suitable tool to remove the shipping clips (1) from the NEW door hinges (2).
Notice: Refer to Fastener Notice in the Preface section.

Tighten
Tighten the bolts to 28 N-m (21 lb ft).
Tighten
Tighten the bolts to 28 N-m (21 lb ft).
