Squeal from Engine Compartment (Install Mounting Sleeves to A/C Compressor) (Export)

| Subject: | Squeal from Engine Compartment (Install Mounting Sleeves to A/C Compressor) |
| Models: | 2007-2008 Chevrolet Caprice, Lumina (Export) |
| with V6 Engine |
Condition
Some customers may comment on a constant squeal noise coming from the engine compartment, particularly after a cold start, at idle and/or slow acceleration.
The squeal noise should not be confused with a start up "chirp" noise which only occurs during engine cranking.
In addition, the noise is not influenced by the A/C being on or off or alternator load (i.e. high electrical load = high accessory drive load).
Cause
It is possible for the A/C compressor pulley to be out of alignment by approximately ½ a belt rib (2mm) relative to the engine crankshaft accessory drive belt pulley.
This means, that on checking with a laser device (refer to "Note" at the end of this bulletin), the A/C compressor pulley will be forward, relative to the crankshaft accessory drive belt pulley. This is caused by excessive clearance between the compressor mounting holes and bolts.
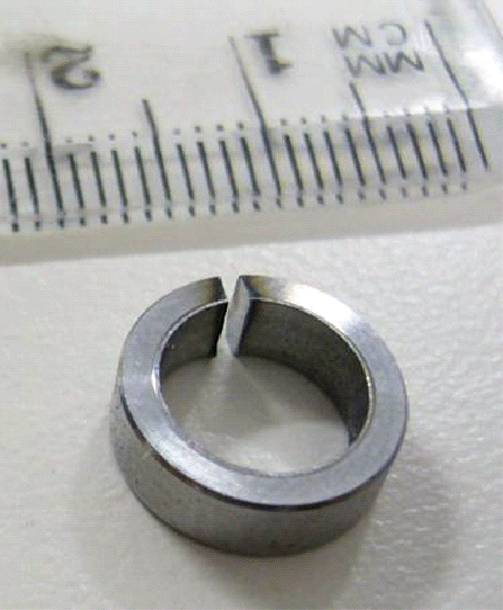
As an interim solution, A/C compressor mounting sleeves (refer to graphic above) have been developed for implementation in production as well as a field fix.
ISOVIN | Build Date |
|---|---|
6G1EK52B48L101141 | 11/09/07 |
Important:
• It is not necessary to remove the A/C compressor plumbing and wiring as part of this procedure. • Refer to Drive Belt Squeal, Chirping and Whine Diagnosis within SI (Global Connect - document #1990868).
Correction
After verifying that the vehicle has the condition described above, install mounting sleeves to the A/C compressor using the following procedure.
If required, it may be helpful to refer to the following section is SI (Global Connect) -- Air Conditioning Compressor Replacement-3.6L Engine (document # 1977379).
- Raise the vehicle on a hoist to gain access to the A/C compressor.
- Remove the three bolts holding the A/C compressor into the bracket and angle the compressor slightly forward towards the front of the vehicle so the sleeves, 2 only, can be inserted. The following diagram and photo are to illustrate the location of the three bolts only.
- The sleeves are to be inserted on the mating side of the A/C compressor to the bracket - the two bolts closest to the front of the vehicle (bolts numbered 1 and 2 only as above).
- Insert the sleeves using the following procedure:
- Re-install the A/C compressor to the bracket.
- If belt squeal is still present after installation of the sleeves, check alignment of the accessory belt drive to confirm if any other part of the system is the cause.
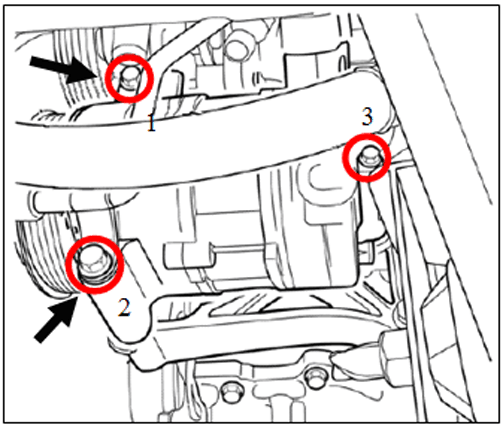
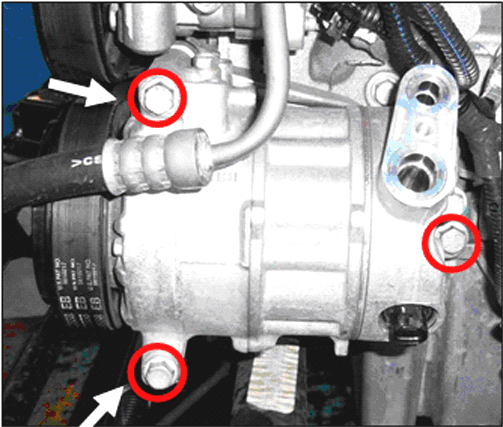
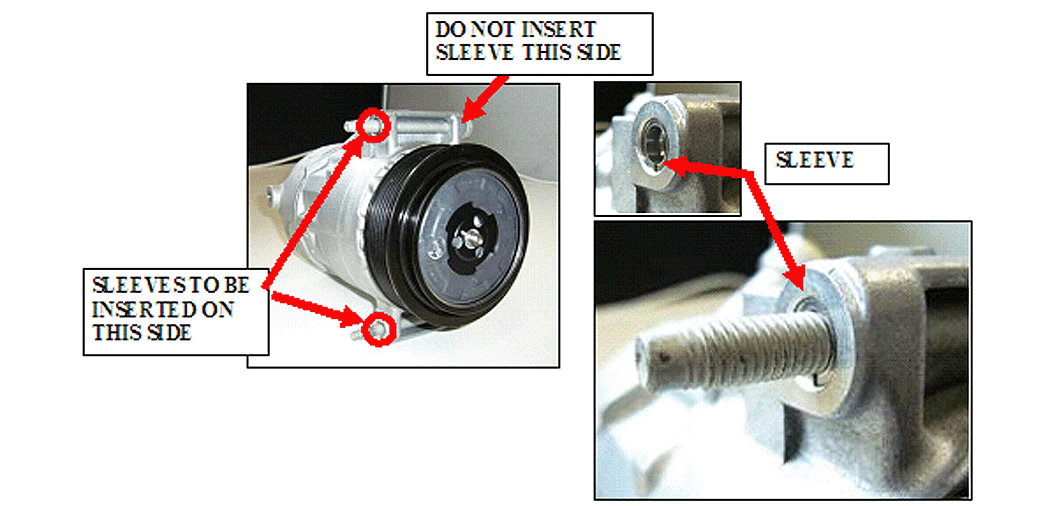
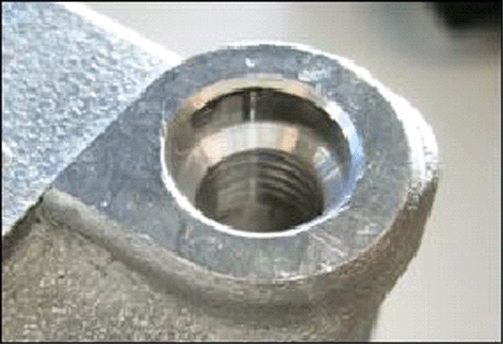
| 4.1. | Sit the sleeve insert over the bolt hole. |
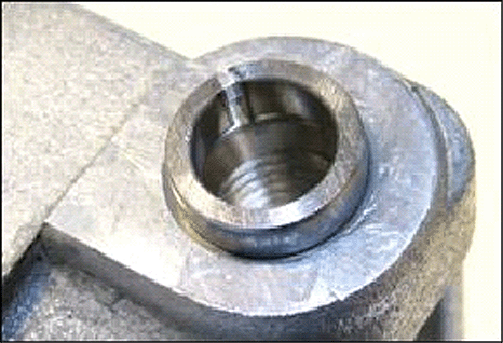
| 4.2. | Push the sleeve insert into the bolt hole (a few gentle taps may be required). |
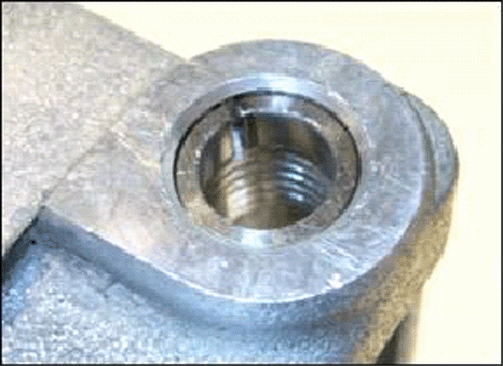
| 4.3. | Ensure the sleeve insert is fully seated so that it is not protruding above the bracket mounting face. |
Note: A "Drivealign Laser Tool" from Gates Australia (p/n 91006), or any similar type of laser type belt alignment checking tool, is advantageous for conducting quick and accurate alignment of the accessory drive belt system.
Parts Information
Part Number | Description | Qty |
|---|---|---|
92221235 | Sleeve | 2 |
Warranty Information
For vehicles repaired under warranty, use:
Labor Operation | Description | Labor Time |
|---|---|---|
D4440 | A/C Compressor - R&R | 0.7 hr |
