Tools Required
J 45299 Engine Preluber
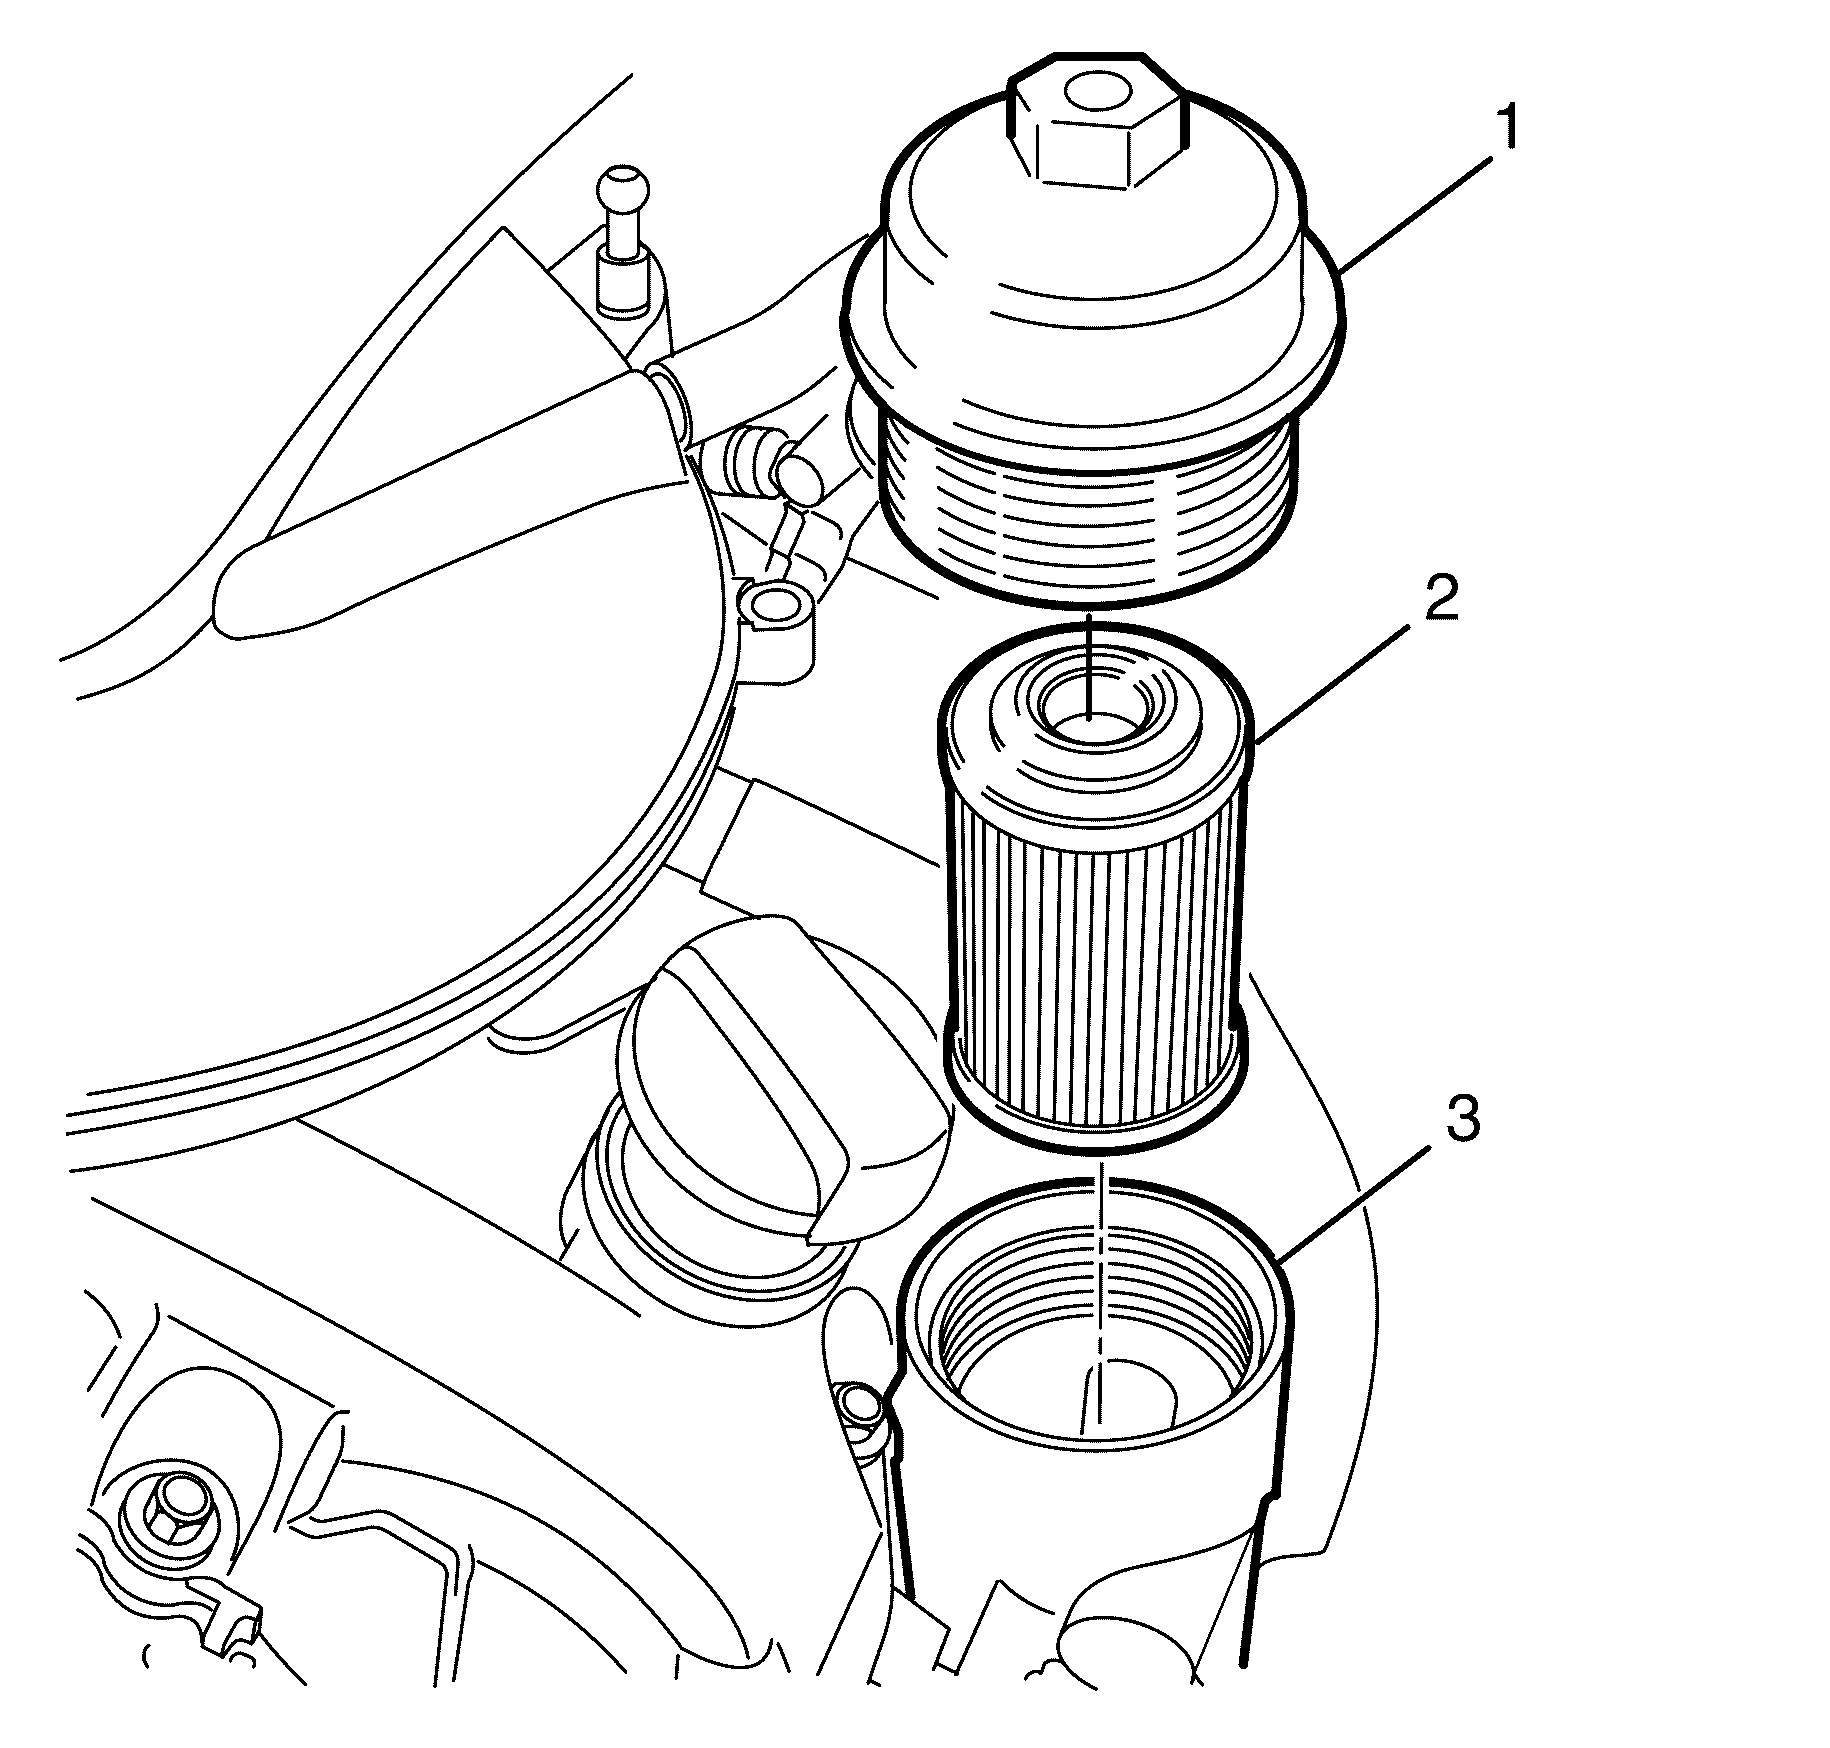
- Remove the oil filter adapter cap (1) from the engine oil filter adapter (3).
- Remove the oil filter cartridge (2).
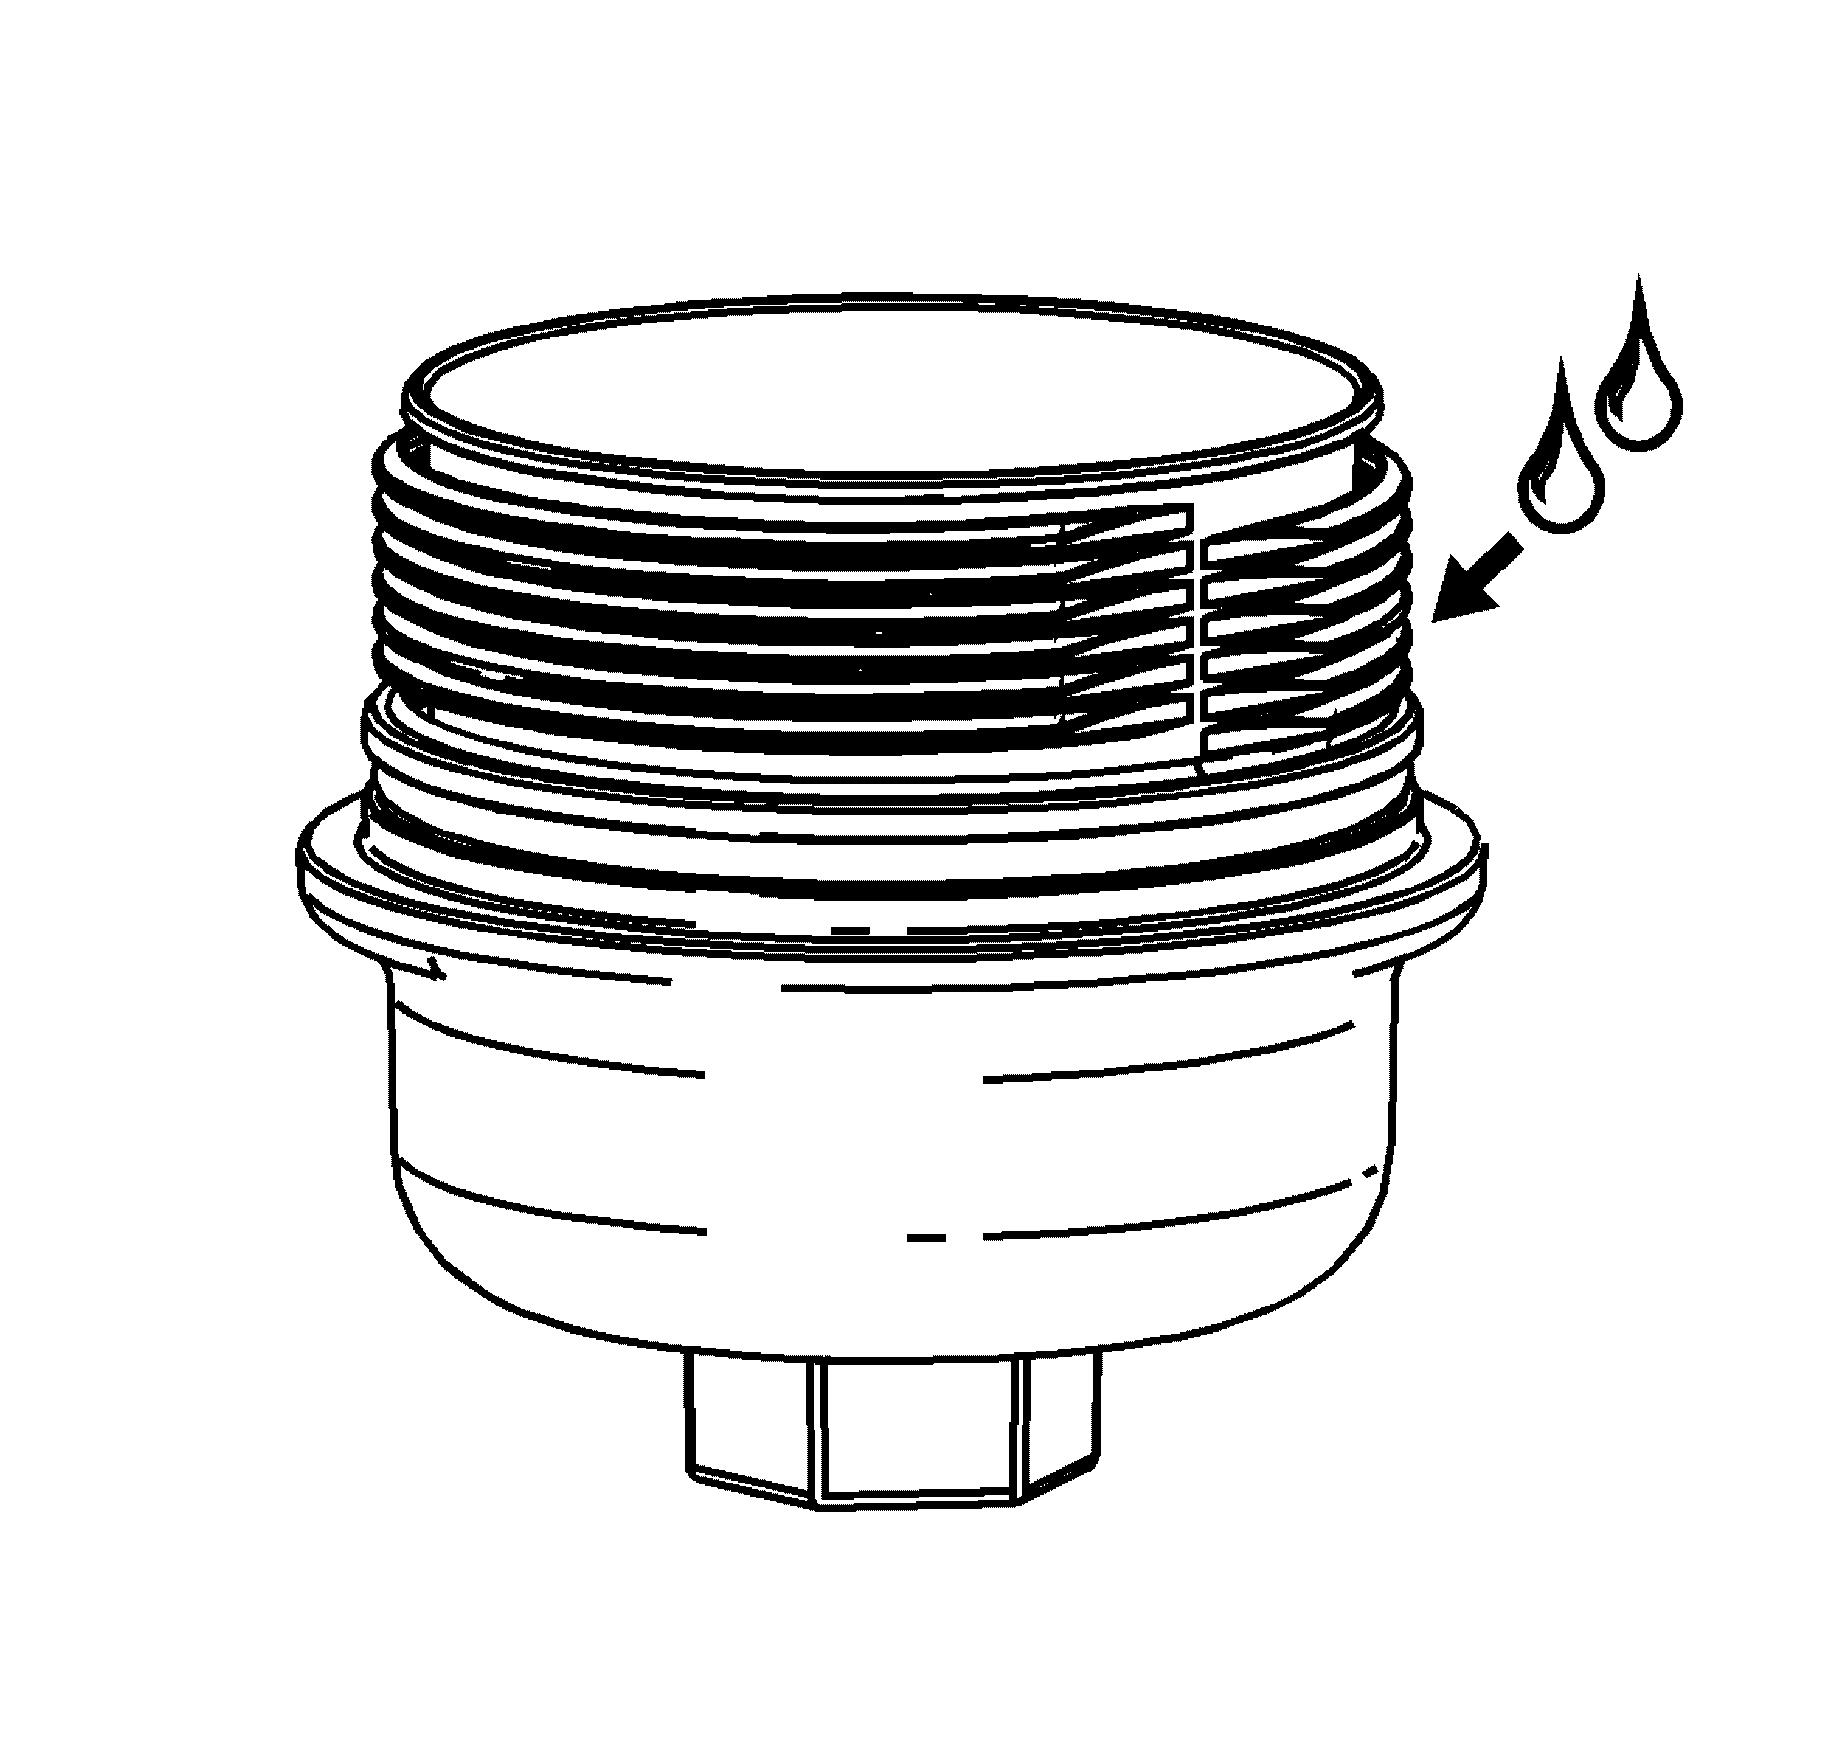
- Lubricate the oil filter cap threads with clean engine oil.
- Install the NEW oil filter cartridge (2).
- Install the oil filter adapter cap (1) to the engine oil filter adapter (3).
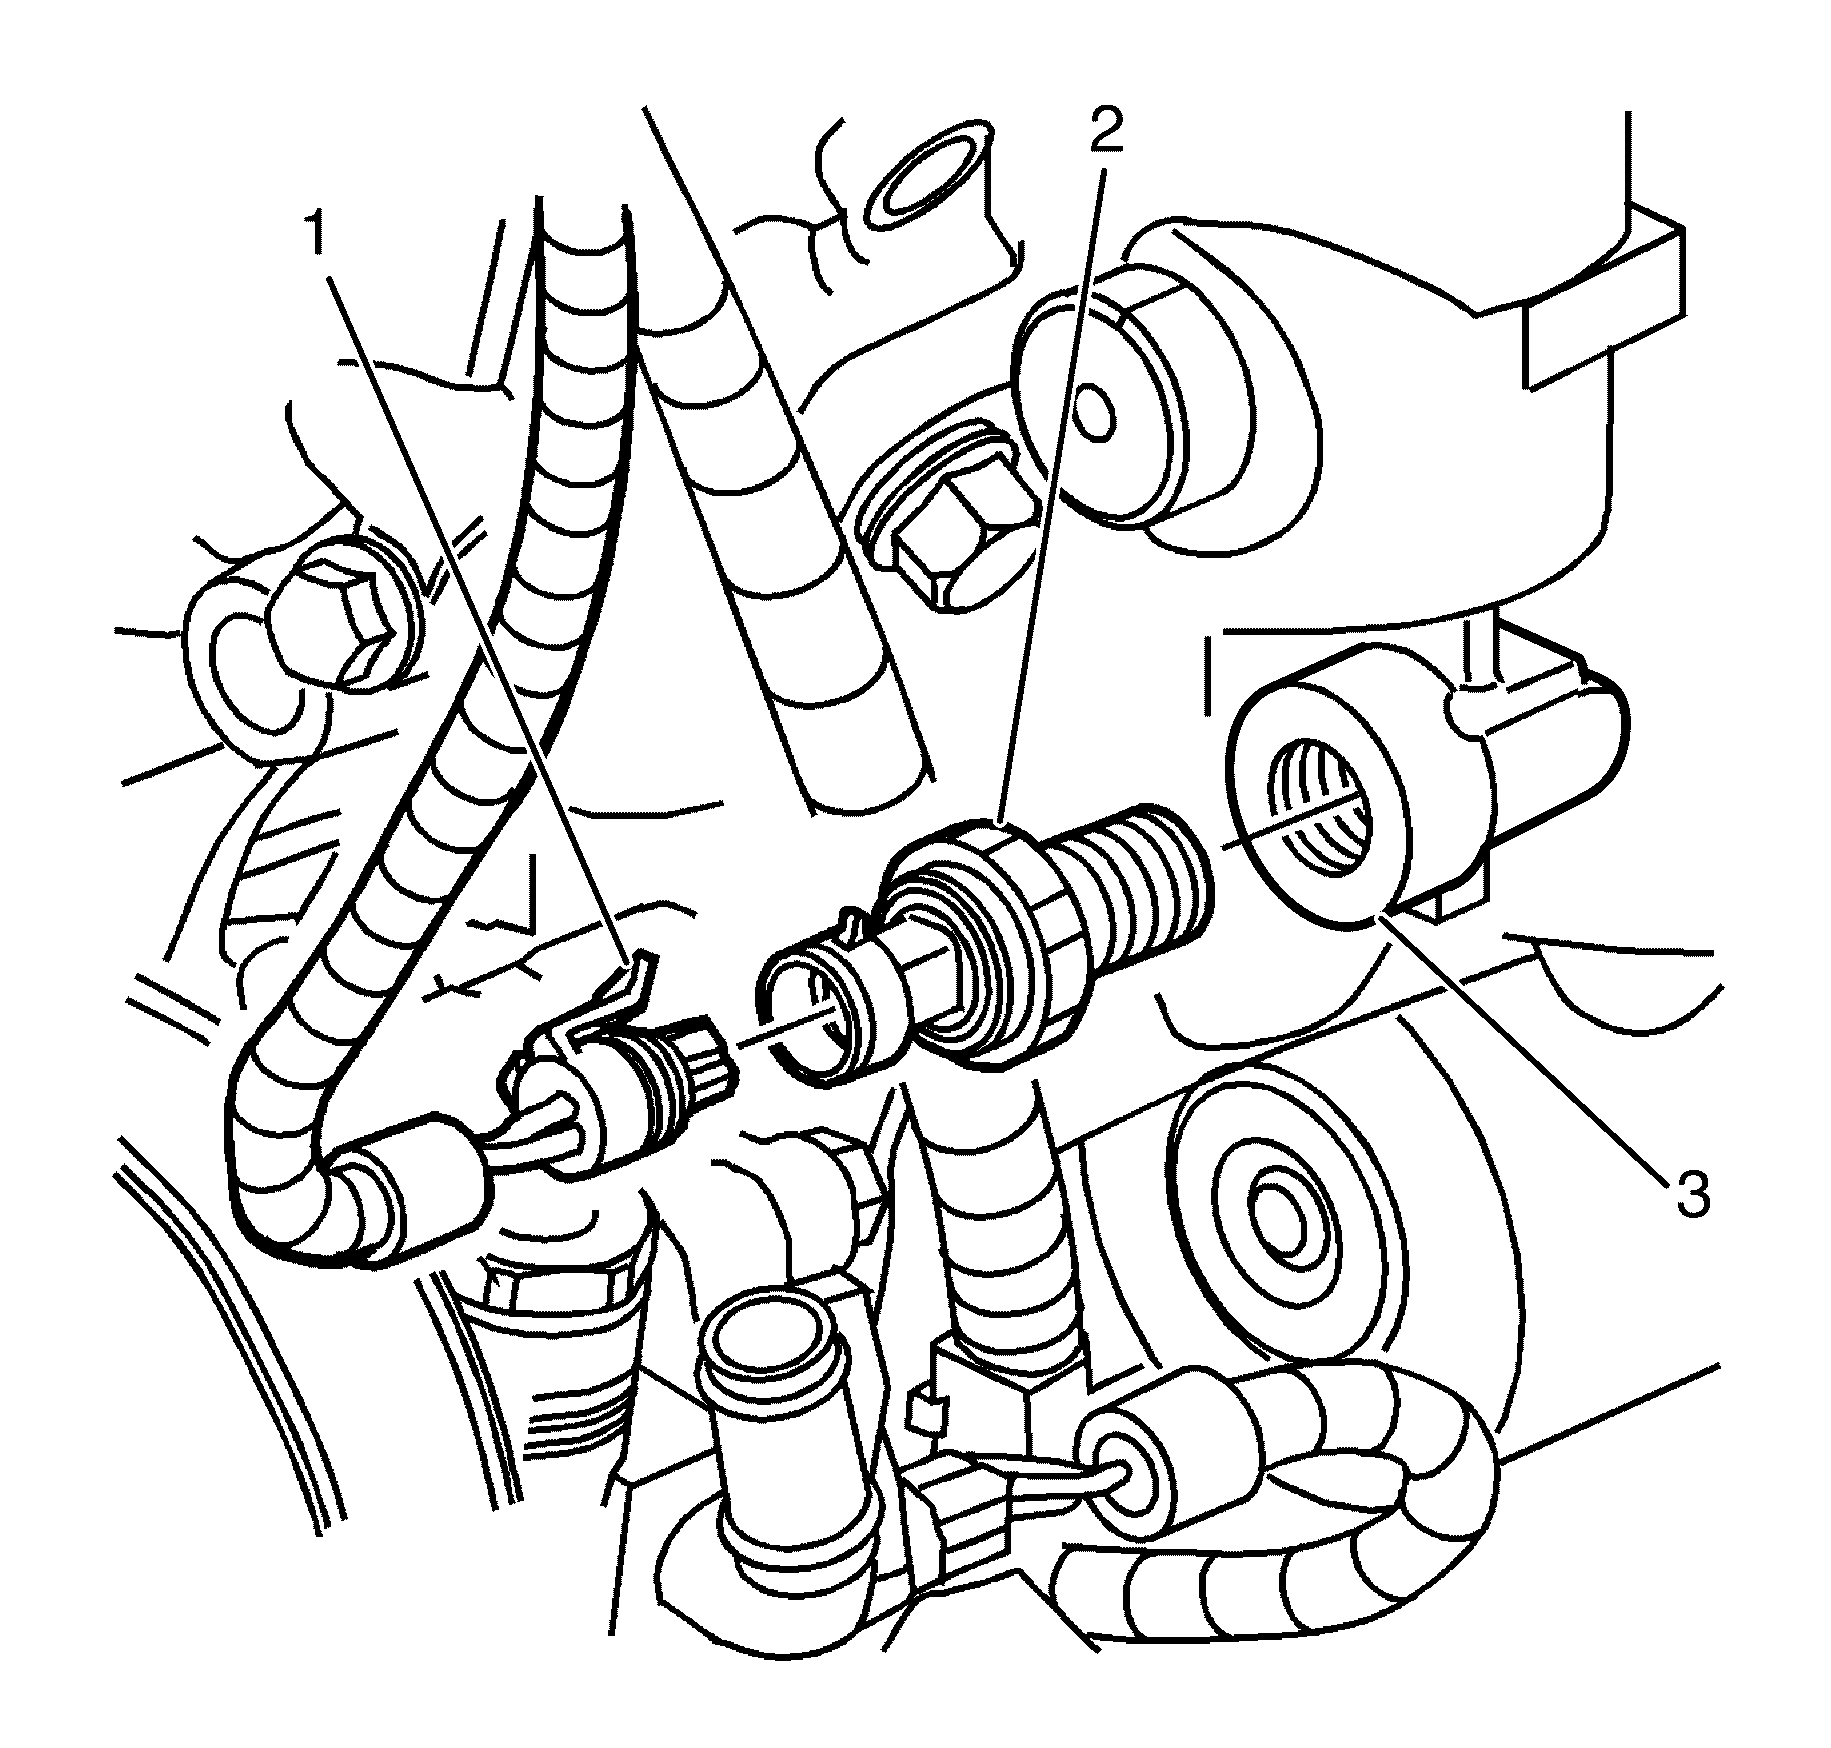
- Remove the oil pressure sending unit (2) from the oil filter adapter (3).
- Disconnect the oil pressure sending unit electrical connector (1).
- Install a 14 x 1.5 mm adapter to the oil filter adapter (3).
- Install the flexible hose to the adapter and open the valve.
- Pump the handle on the J 45299 in order to flow a minimum of 1-1.9 liters (1-2 quarts) of engine oil. Observe the flow of engine oil through the flexible hose and into the engine assembly.
- Close the valve and remove the flexible hose and adapter from the oil filter adapter.
- Install the oil pressure sending unit (2) to the oil filter adapter (3).
- Connect the oil pressure sending unit electrical connector (1).
- Top-off the engine oil to the correct level.
Important: A constant and continuous flow of clean engine oil is required in order to properly prime the engine. Be sure to use an approved engine oil as specified in the owners manual.

Important: Use a six-point socket to remove the oil filter cap (1).
Discard the oil filter cartridge (2).
Notice: Refer to General Repair Instructions in the Preface section.


Notice: Refer to Fastener Notice in the Preface section.
Notice: Refer to General Repair Instructions in the Preface section.
Important: Use a six-point socket to install the oil filter cap.
Tighten
Tighten the oil filter cap to 25 N·m
(18 lb ft).

Important: A constant and continuous flow of clean engine oil is required in order to properly prime the engine. Be sure to use an approved engine oil as specified in the owners manual.

Tighten
Tighten the oil pressure sending unit to 20 N·m
(15 lb ft).
