For 1990-2009 cars only
Repeater Lamp Replacement SWB
Removal Procedure - Side Indicator Type A
- Disconnect the battery ground cable. Refer to Battery Negative Cable Disconnection and Connection.
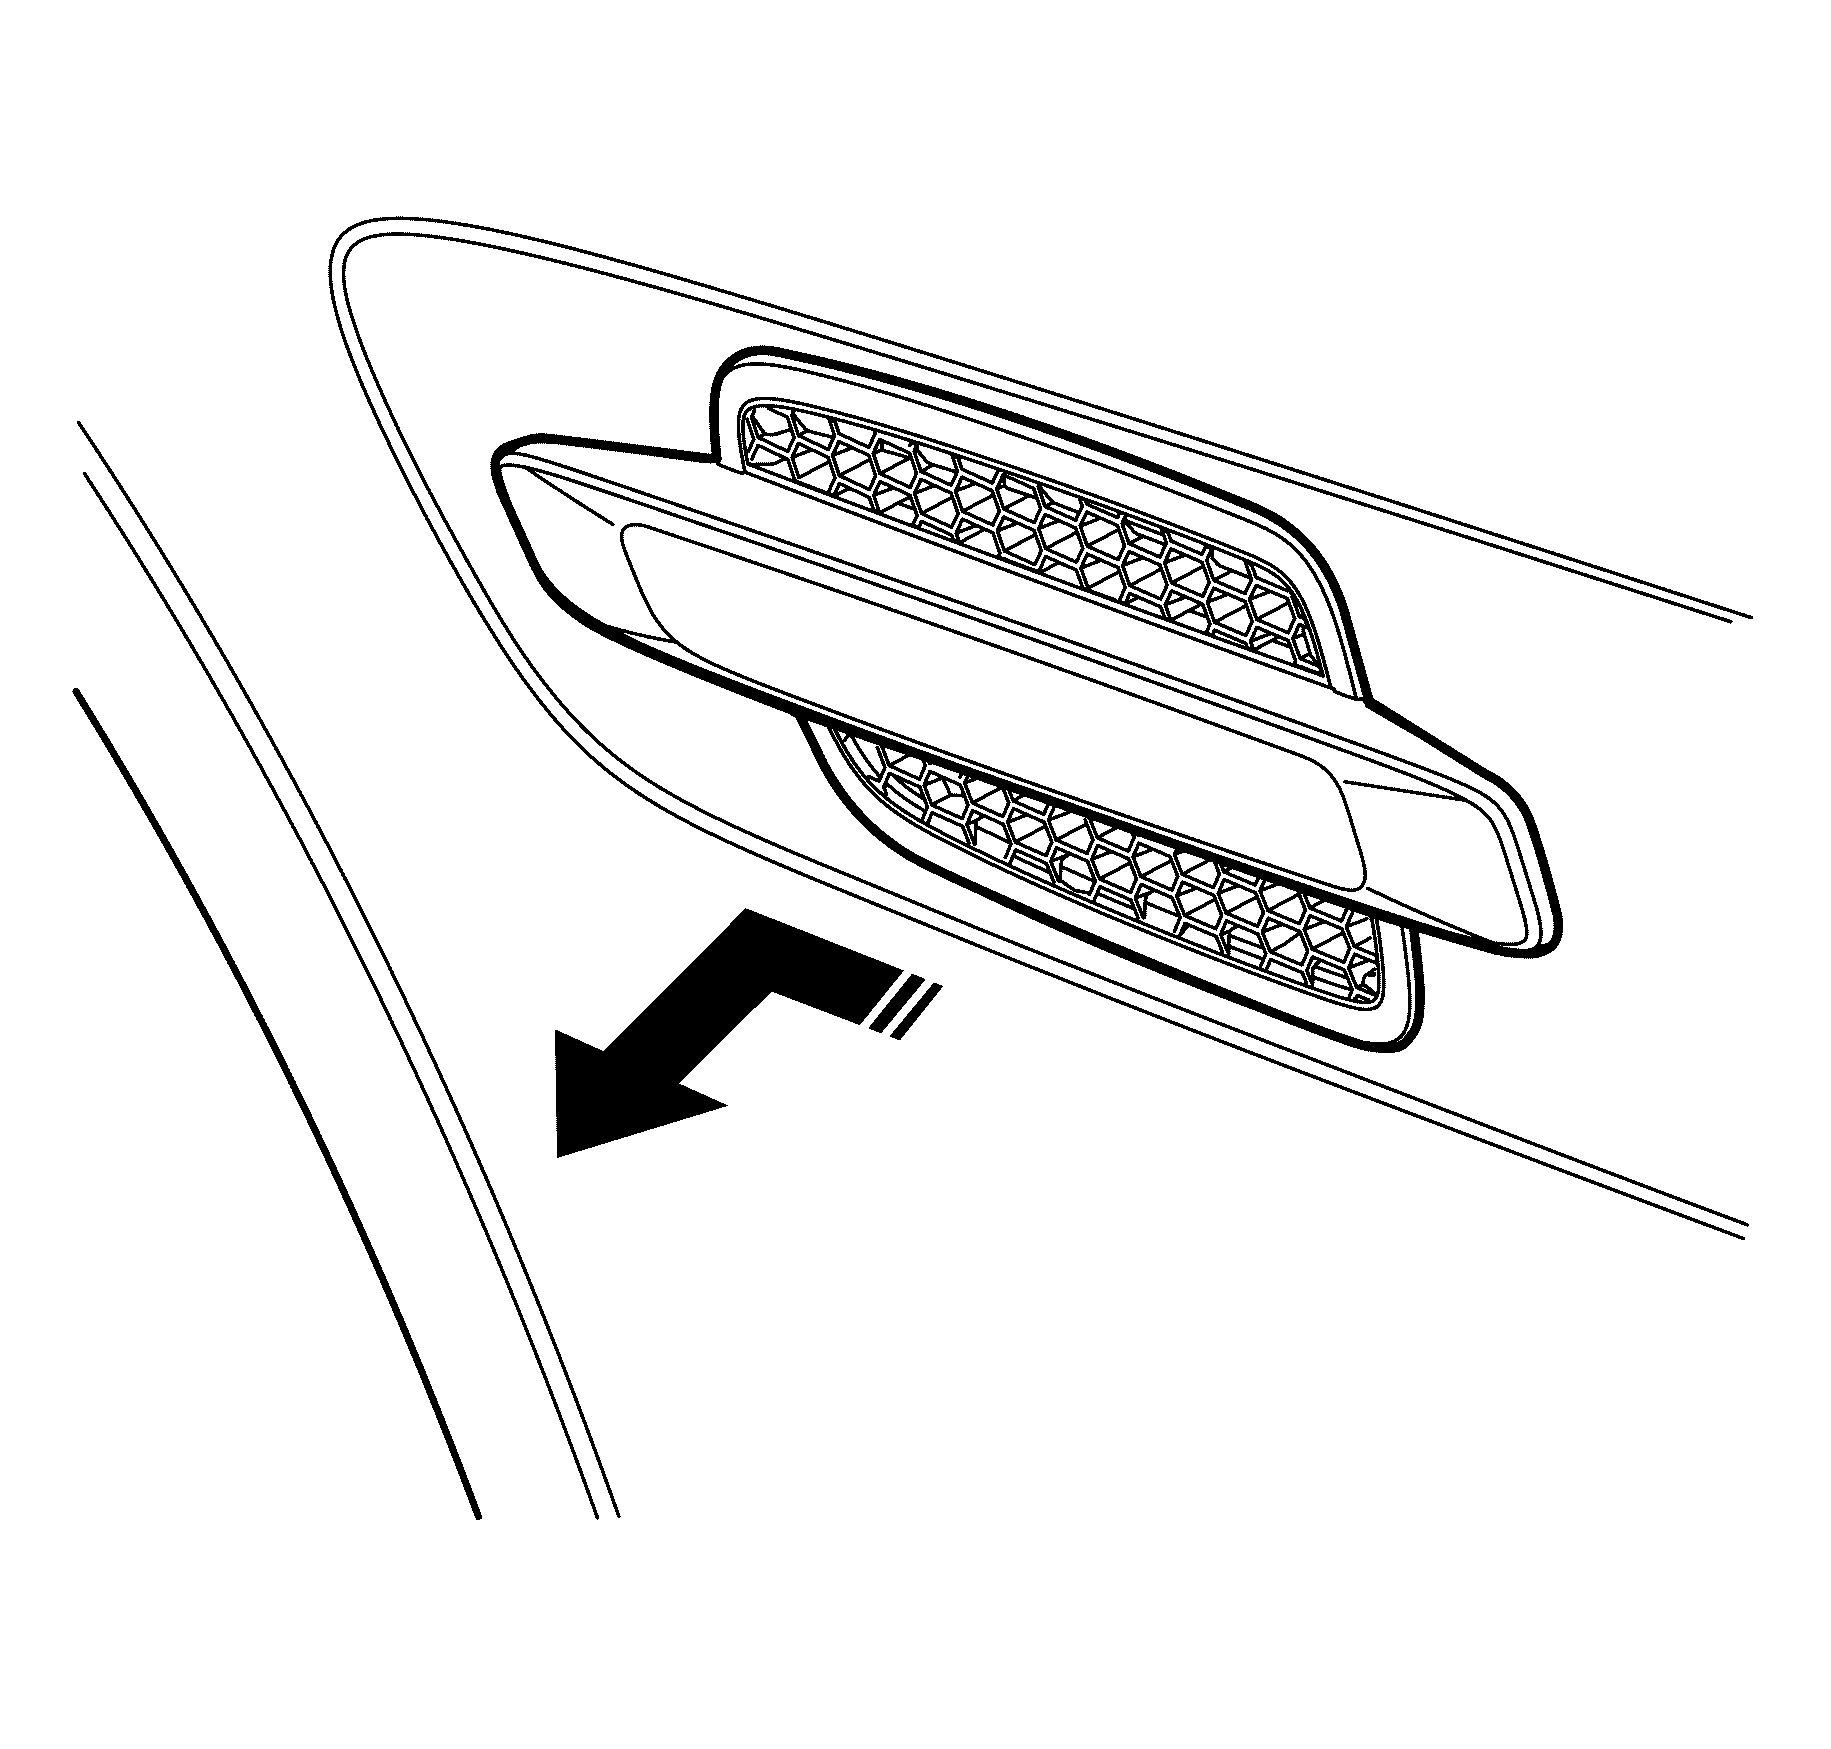
- Remove side indicator lamp assembly from the fender by grasping the assembly and pushing the assembly forward to disengage the rear clip from the fender.
- Tilt the rear of the side indicator lamp assembly out and remove the assembly from the front fender.
- Disconnect the bulb socket from the side indicator lamp assembly by rotating the socket counterclockwise.
- Disconnect the electrical connector from the bulb socket, by depressing the connector clip and pulling connector from bulb socket.
- Discard the repeater lamp.
Caution: Refer to Battery Disconnect Caution in the Preface section.
Installation Procedure - Side Indicator Type A
- Install the bulb socket into the new side indicator lamp assembly and rotate the socket clockwise to secure the bulb.
- Connect electrical connector to the bulb socket, note oretayion of the electrcal connector.
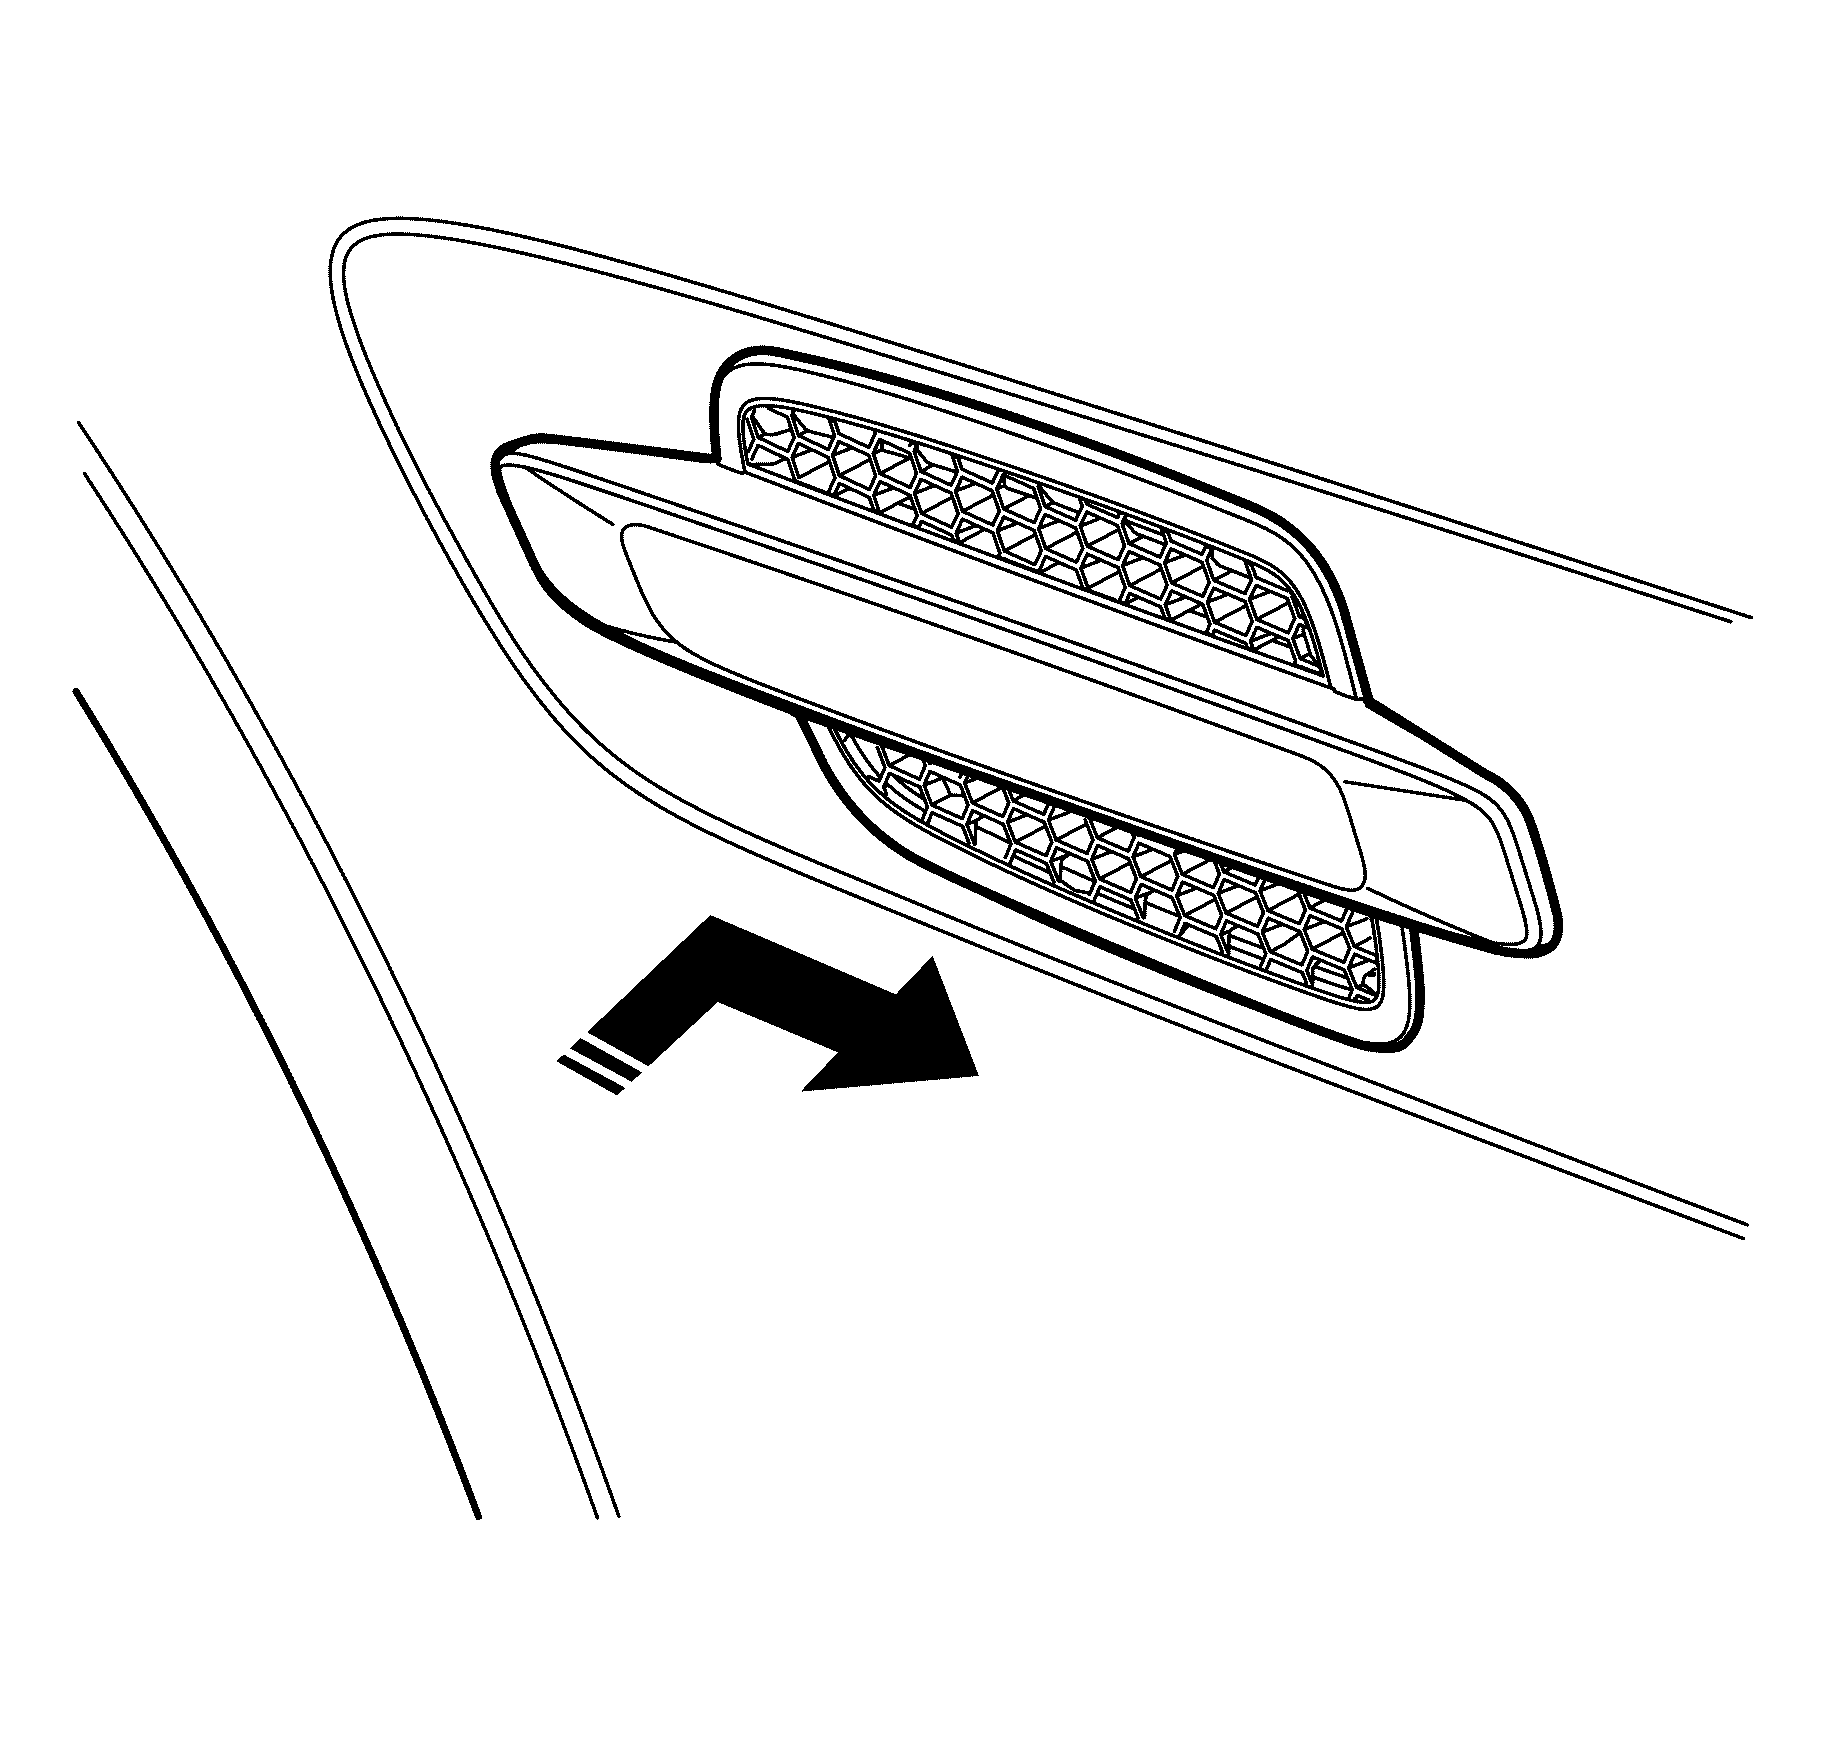
- Install rear portion of the side indicator lamp assembly into the fender and then push the front of the lamp assembly inwards to engage the front clip.
- Connect the battery ground cable. Refer to Battery Negative Cable Disconnection and Connection.
- Check all vehicle lights for correct operation.
Caution: Refer to Battery Disconnect Caution in the Preface section.
Repeater Lamp Replacement LWB
Removal Procedure - Side Indicator Type B
- Raise and support the vehicle to a suitable working height. Refer to Lifting and Jacking the Vehicle.
- Remove the front wheelhouse liner. Refer to Front Wheelhouse Liner Replacement.
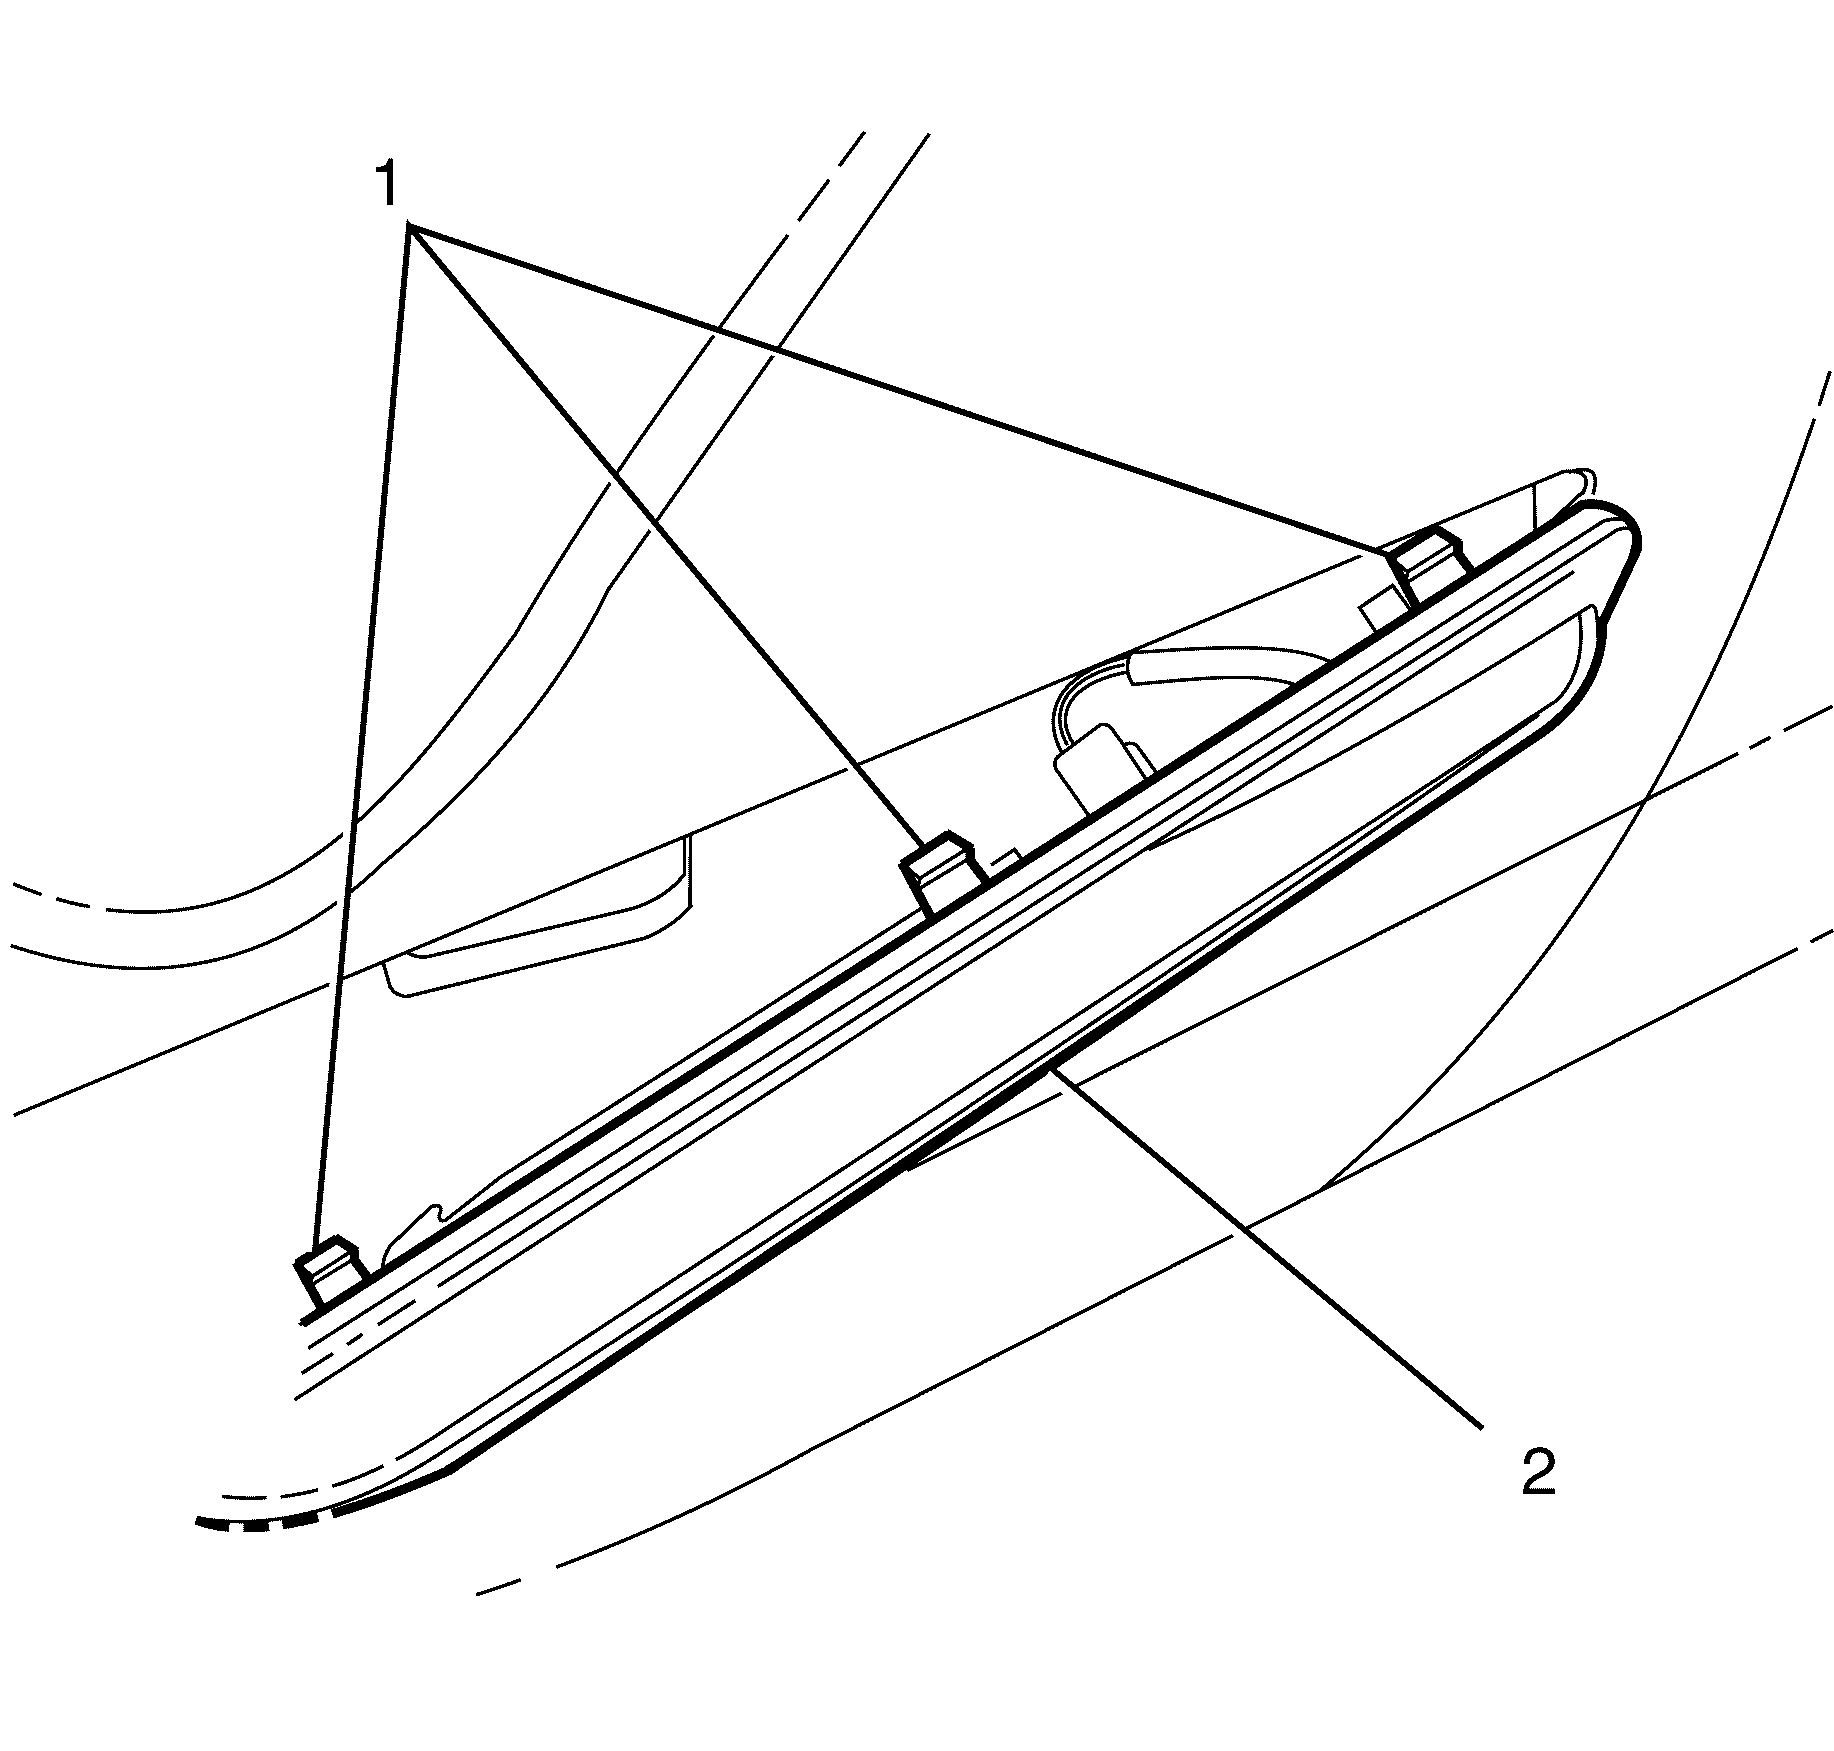
- Unclip the side indicator (2) retaining clips (1) and detach from the fender.
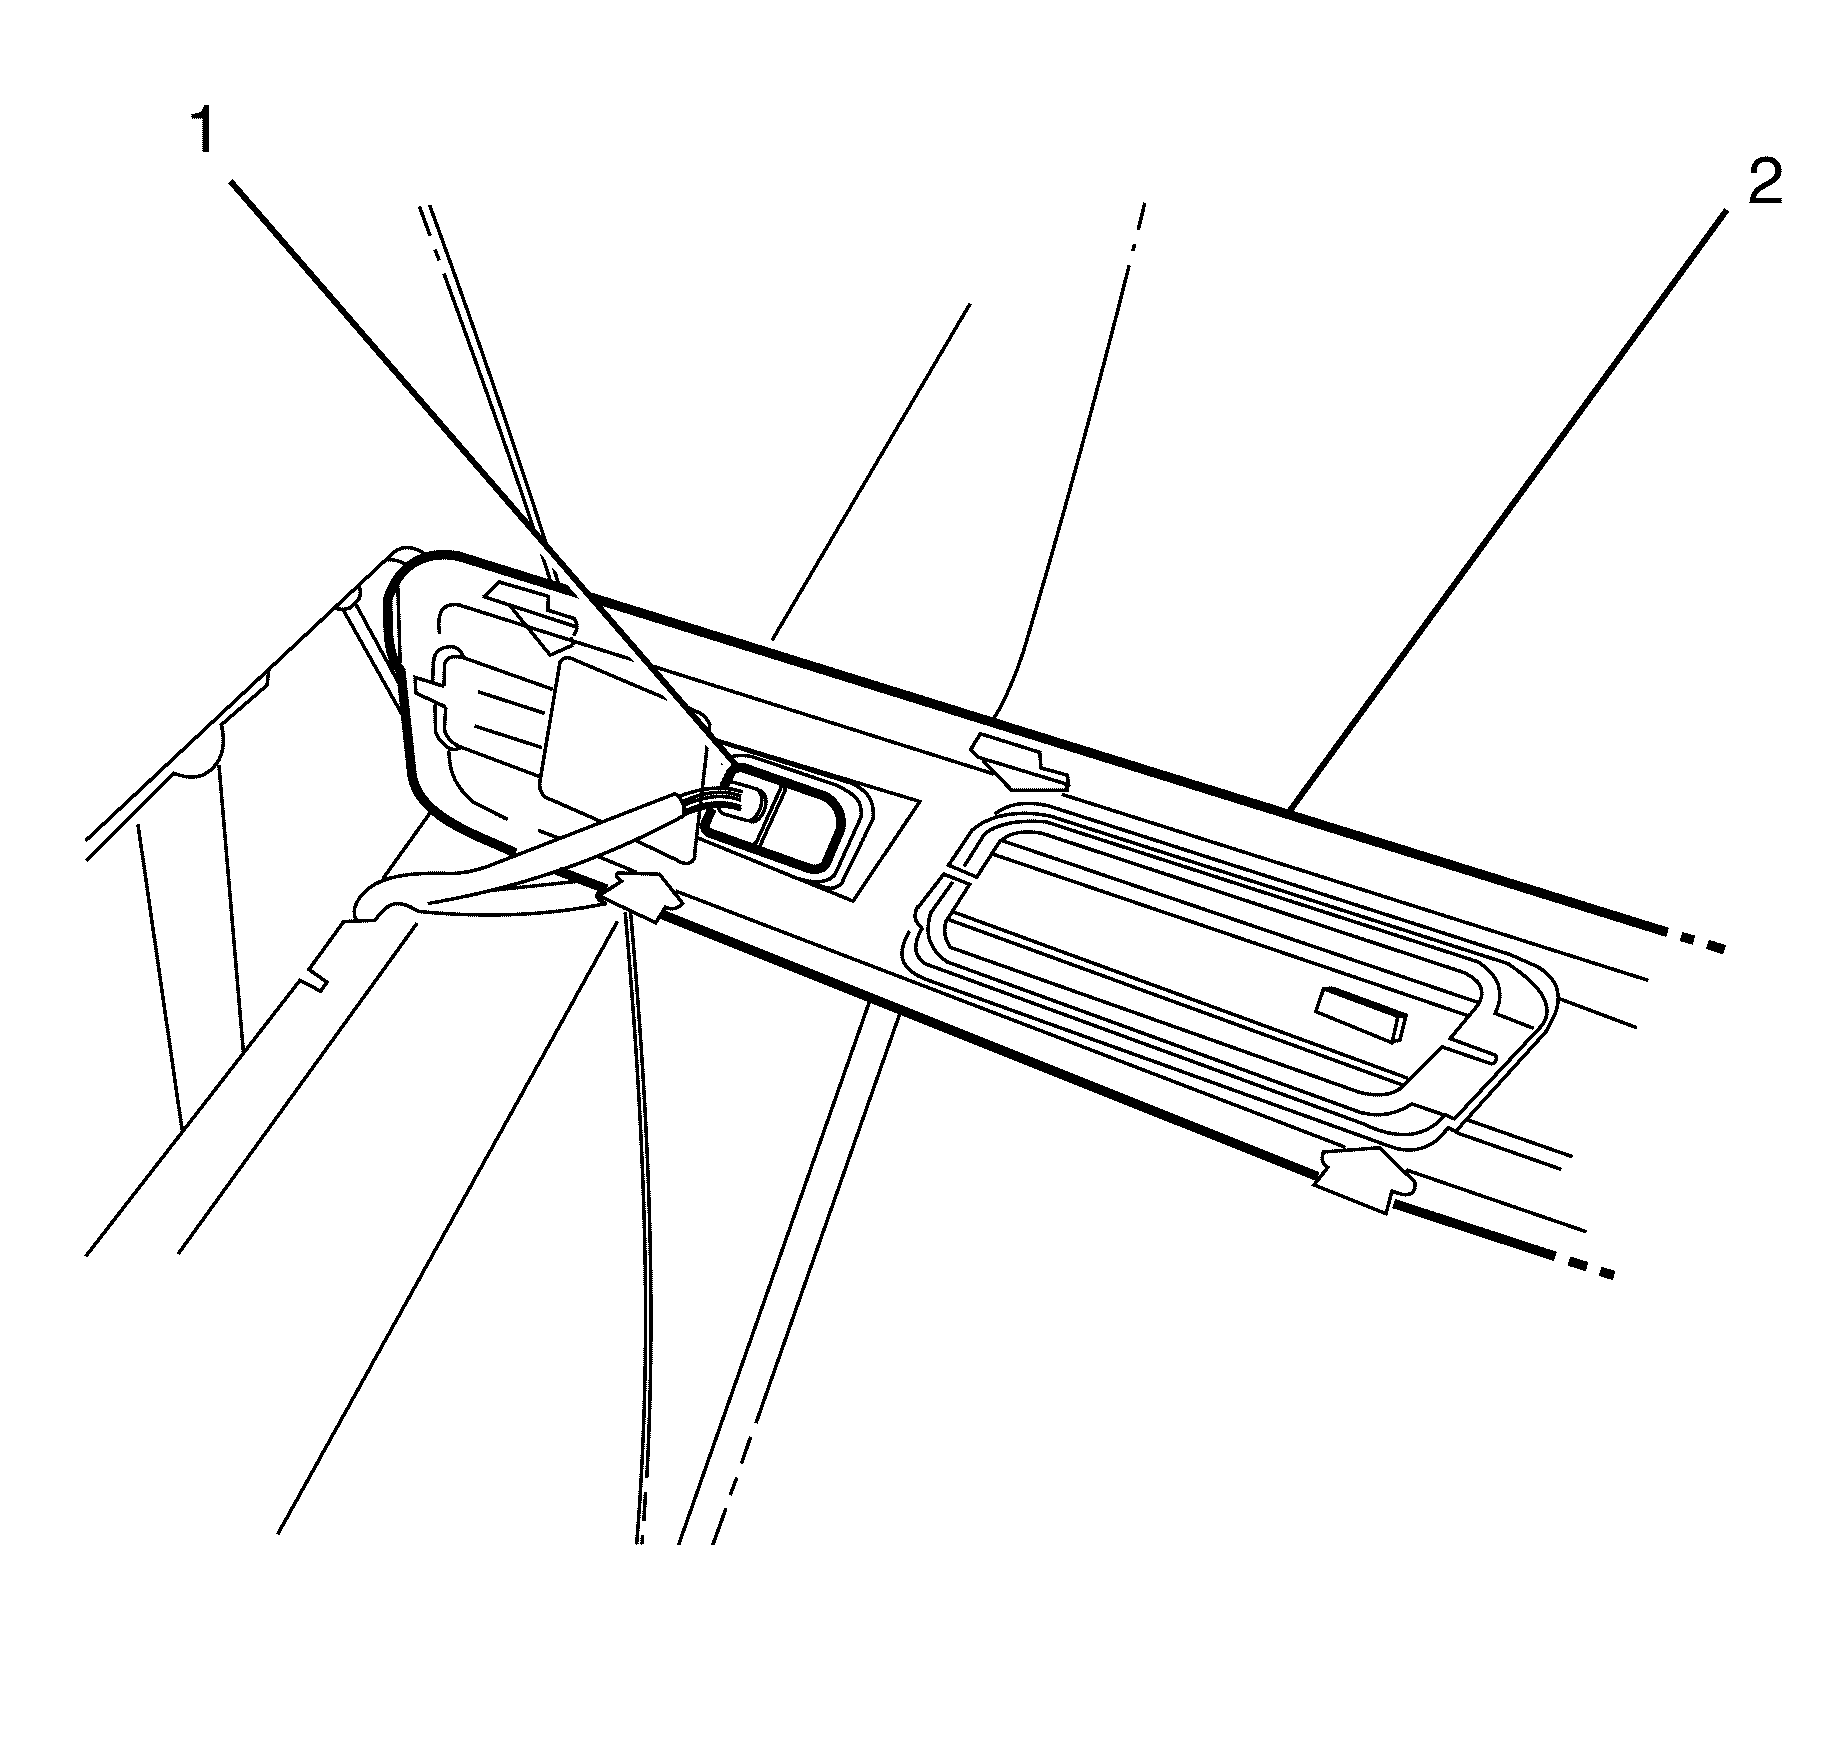
- Disconnect the side indicator lamp (2) electrical connector (1).
- Remove the side indicator lamp (2).
Caution: Refer to Safety Glasses Caution in the Preface section.
Caution: Refer to Vehicle Lifting Caution in the Preface section.
Installation Procedure
- Connect the side indicator lamp (2) electrical connector (1).
- Align the side indicator lamp (2) with the fender.
- Install the side indicator lamp (2) into the fender, ensuring that the retaining clips (1) are fully located in the fender. Listen for an audible click to confirm fitting.
- Install the front wheelhouse liner. Refer to Front Wheelhouse Liner Replacement.
- Lower the vehicle.
- Test the side indicator lamp for correct operation.


Repeater Lamp Replacement CSV SWBHSV VXR8
Removal Procedure - Side Indicator Type C
- Disconnect the battery negative cable. Refer to Battery Negative Cable Disconnection and Connection .
- Remove the fender vent. Refer to Front Fender Center Molding Replacement
- Using a suitable tool, release the side indicator lamp retaining clip (1) and remove the side indicator lamp (2).
Caution: Refer to Battery Disconnect Caution in the Preface section.
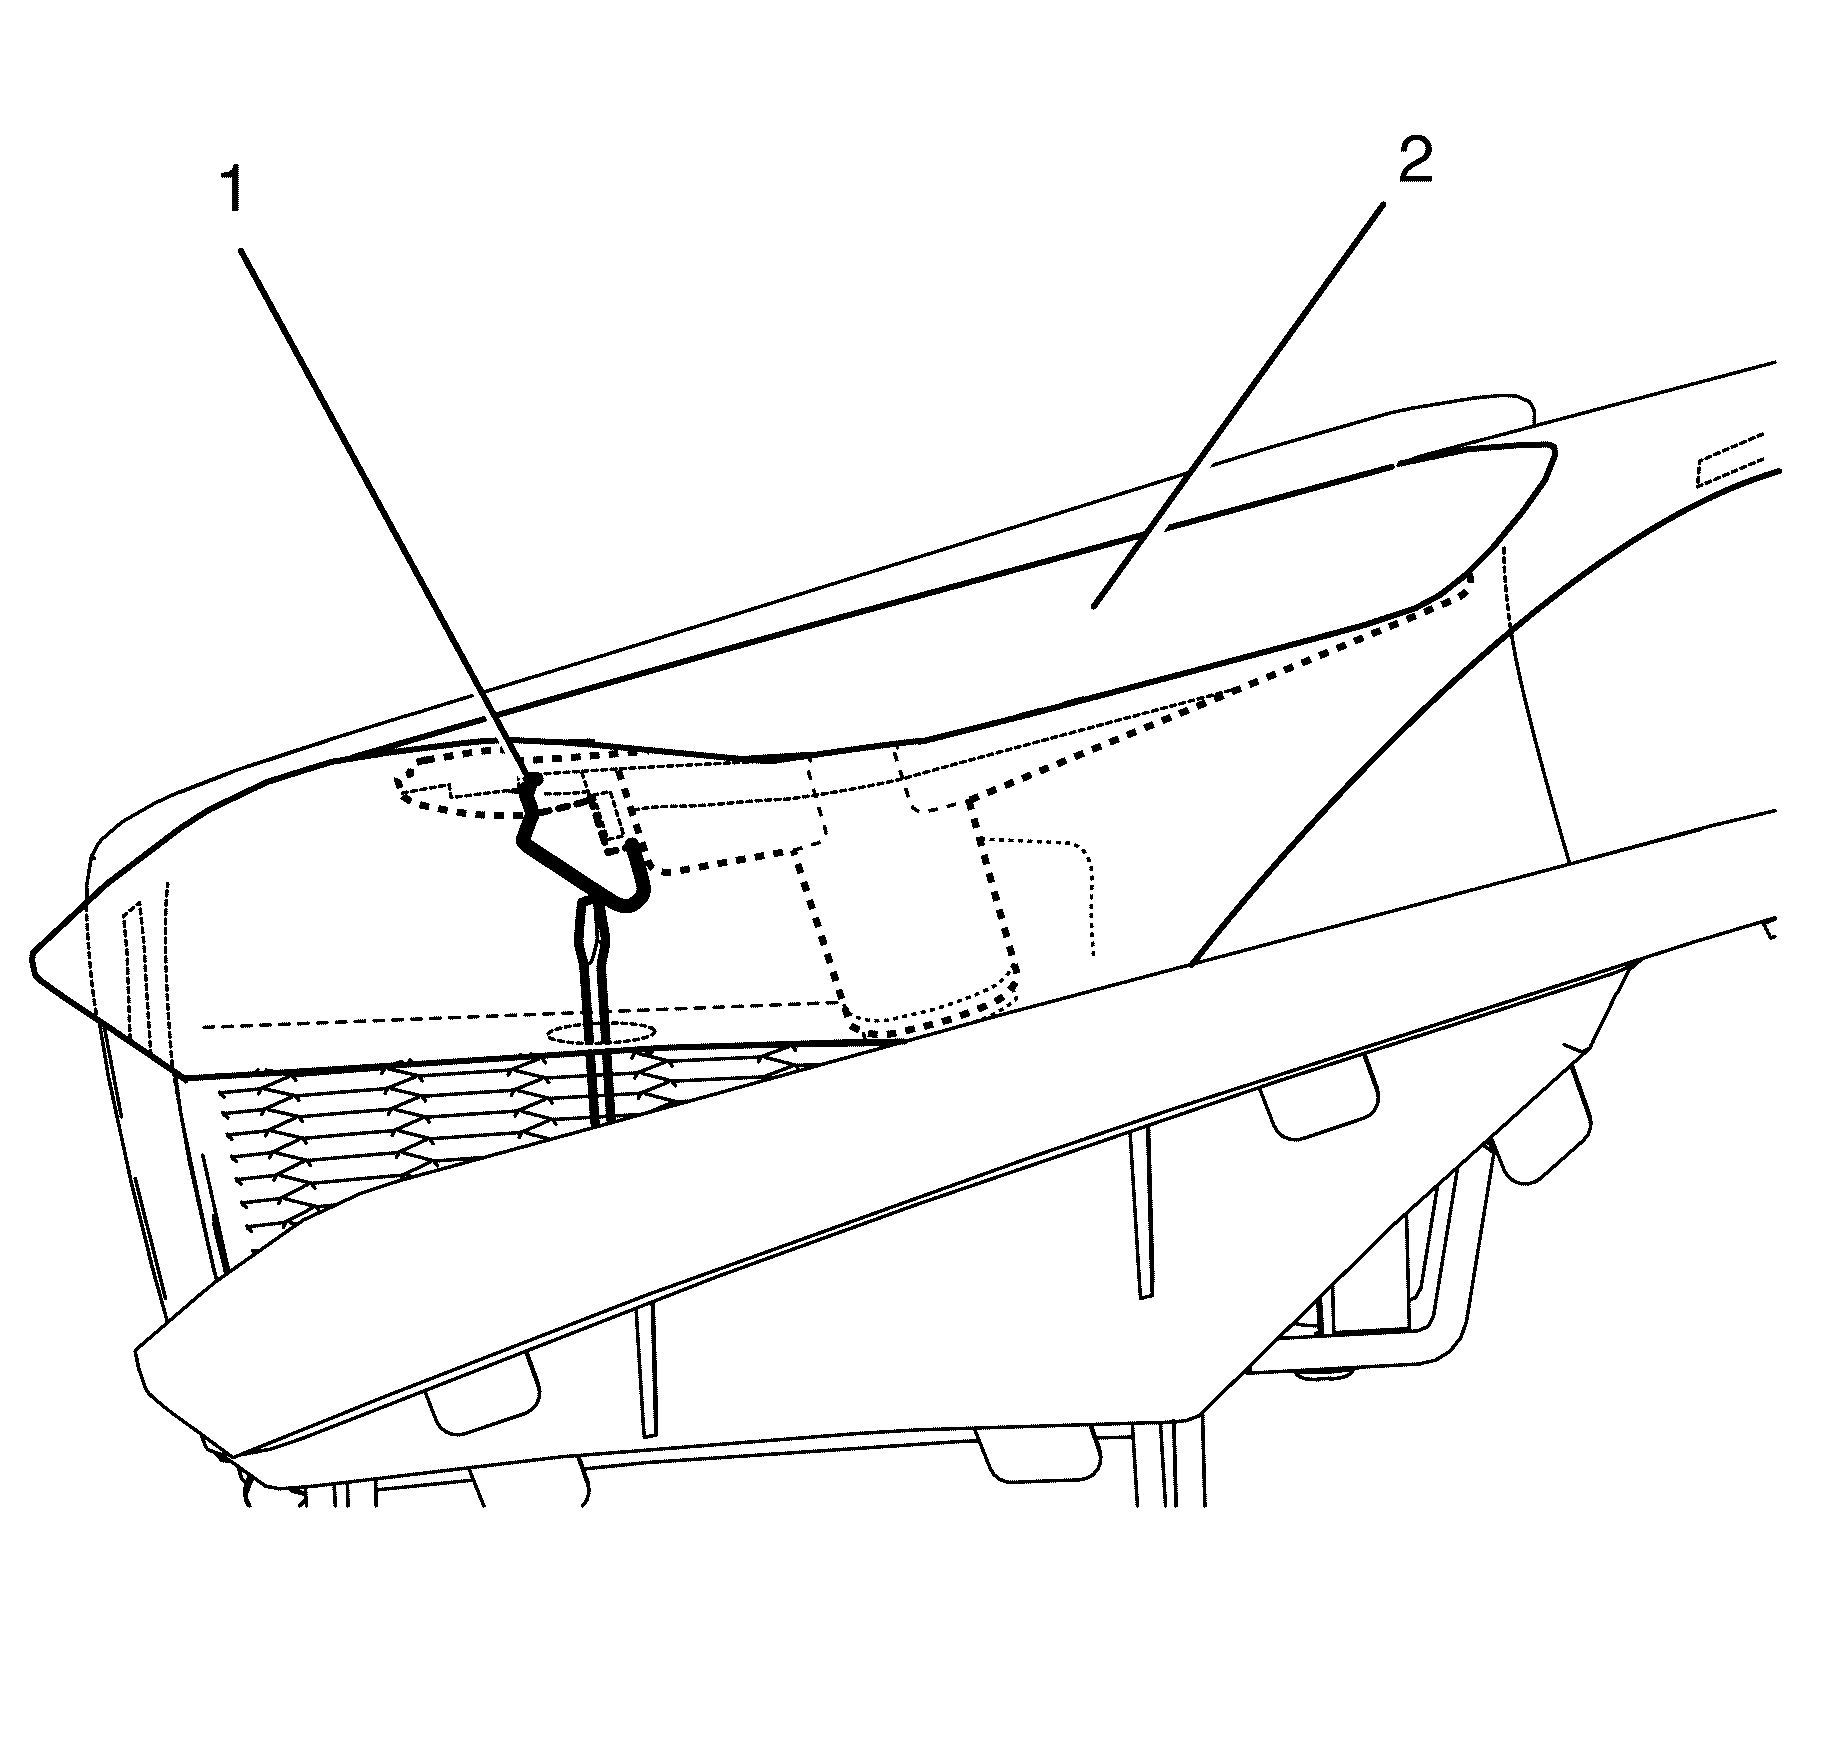
Installation Procedure - Side Indicator Type C
- Install the side indicator lamp to the fender vent.
- Install the fender vent. . Refer to Front Fender Center Molding Replacement
- Connect the battery negative cable. Refer to Battery Negative Cable Disconnection and Connection .
Caution: Refer to Battery Disconnect Caution in the Preface section.
