Rear Spoiler Replacement LWB SWB CSV Clubsport GTS VXR8
Removal Procedure
Type A
- Open the rear compartment lid.
- Support the rear compartment lid with a suitable brace.
- Remove the rear spoiler to rear compartment lid retaining nuts (1).
- Remove the suitable brace from the rear compartment lid.
- Close the rear compartment lid.
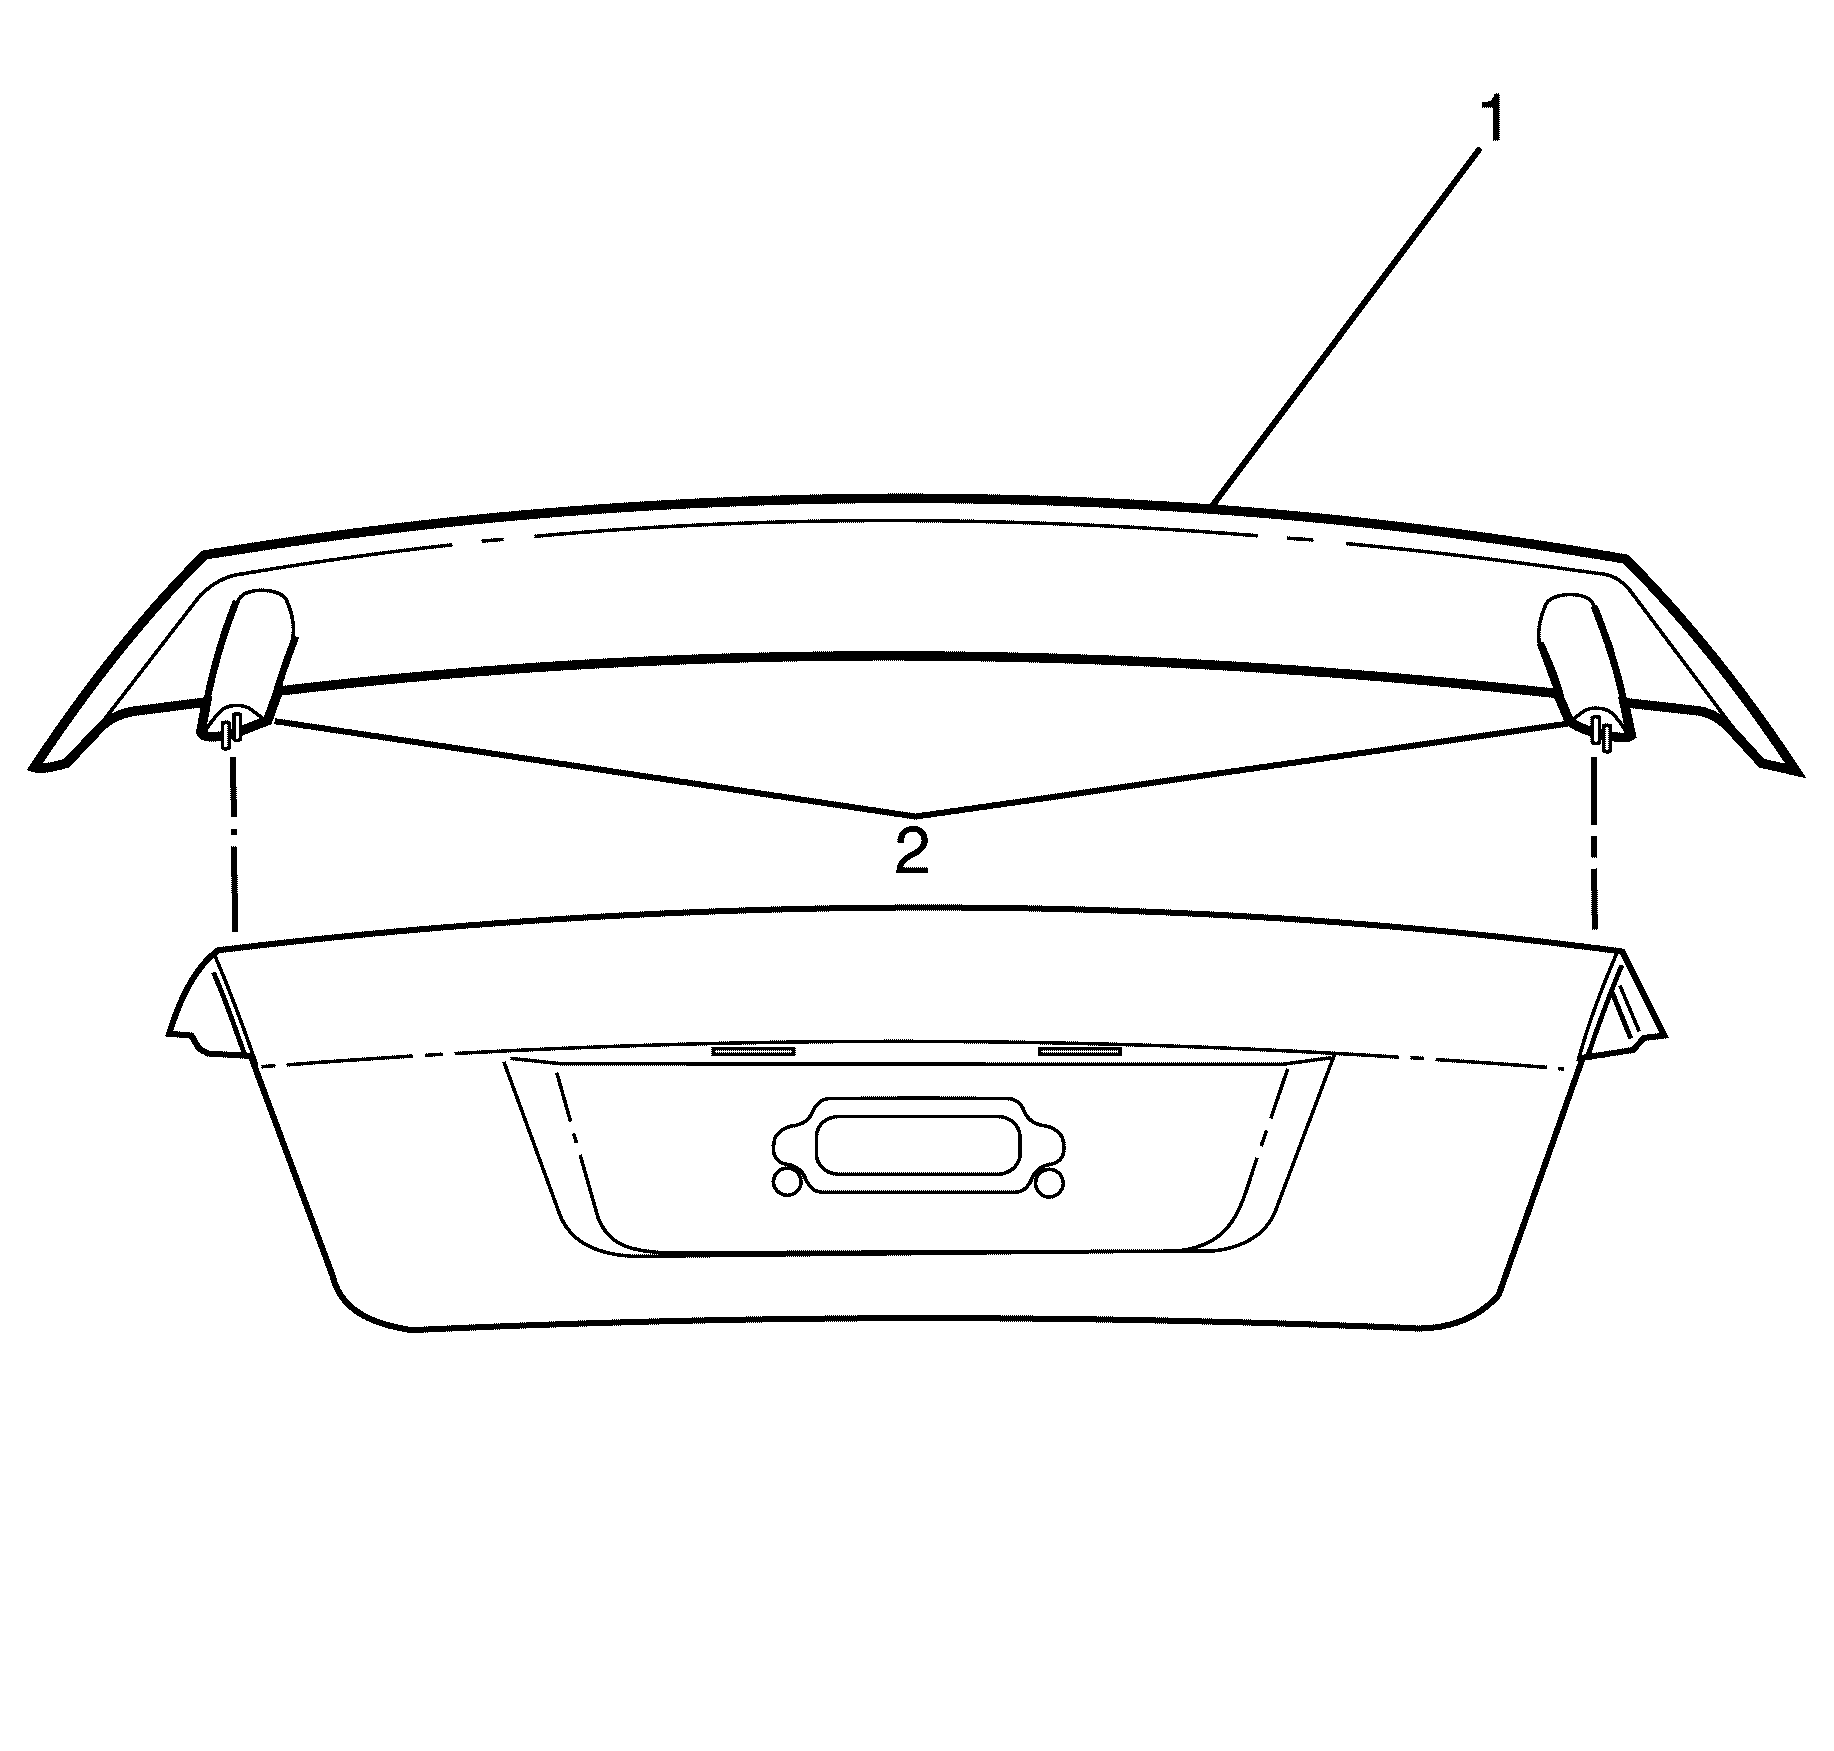
- Carefully remove the rear spoiler (1) from the vehicle.
- Make sure the rear spoiler gaskets (2) are intact and on the rear spoiler.
- Clean the rear compartment lid with a suitable cleaning solution, using a lint free cloth.
Important: When a suitable hold open device is being removed or installed, provide alternate support to avoid the possibility of damage to the vehicle or personal injury.
Removal Procedure
Type B
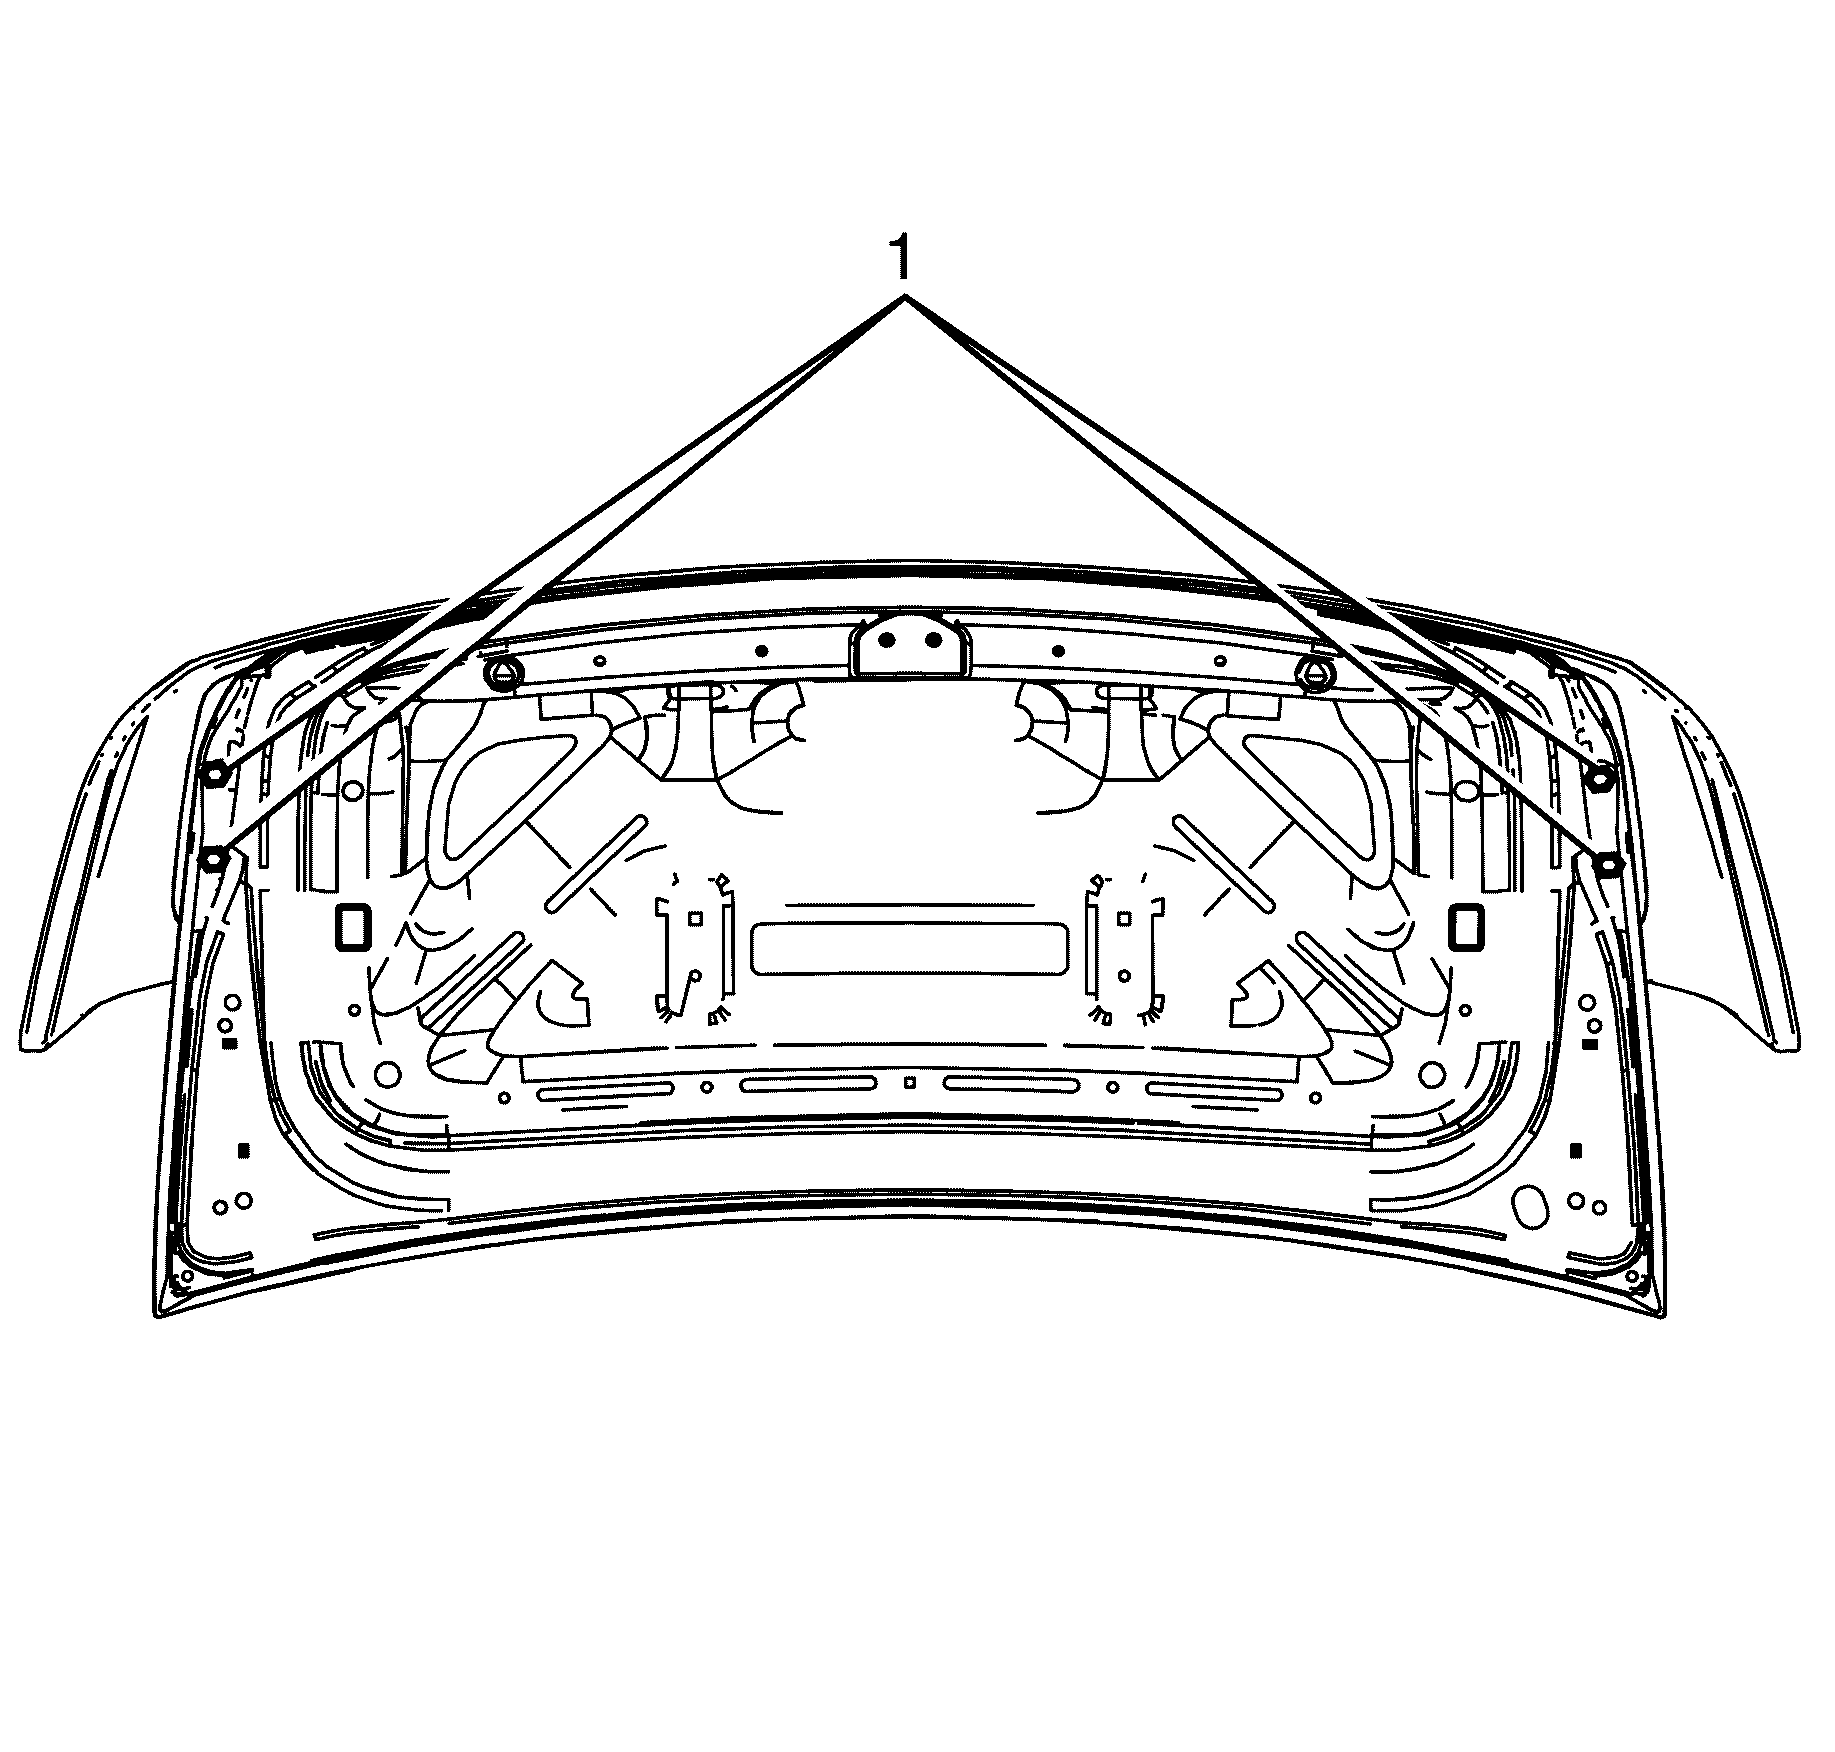
- Open the rear compartment lid.
- Support the rear compartment lid with a suitable brace.
- Remove the rear spoiler to rear compartment lid retaining nuts (1).
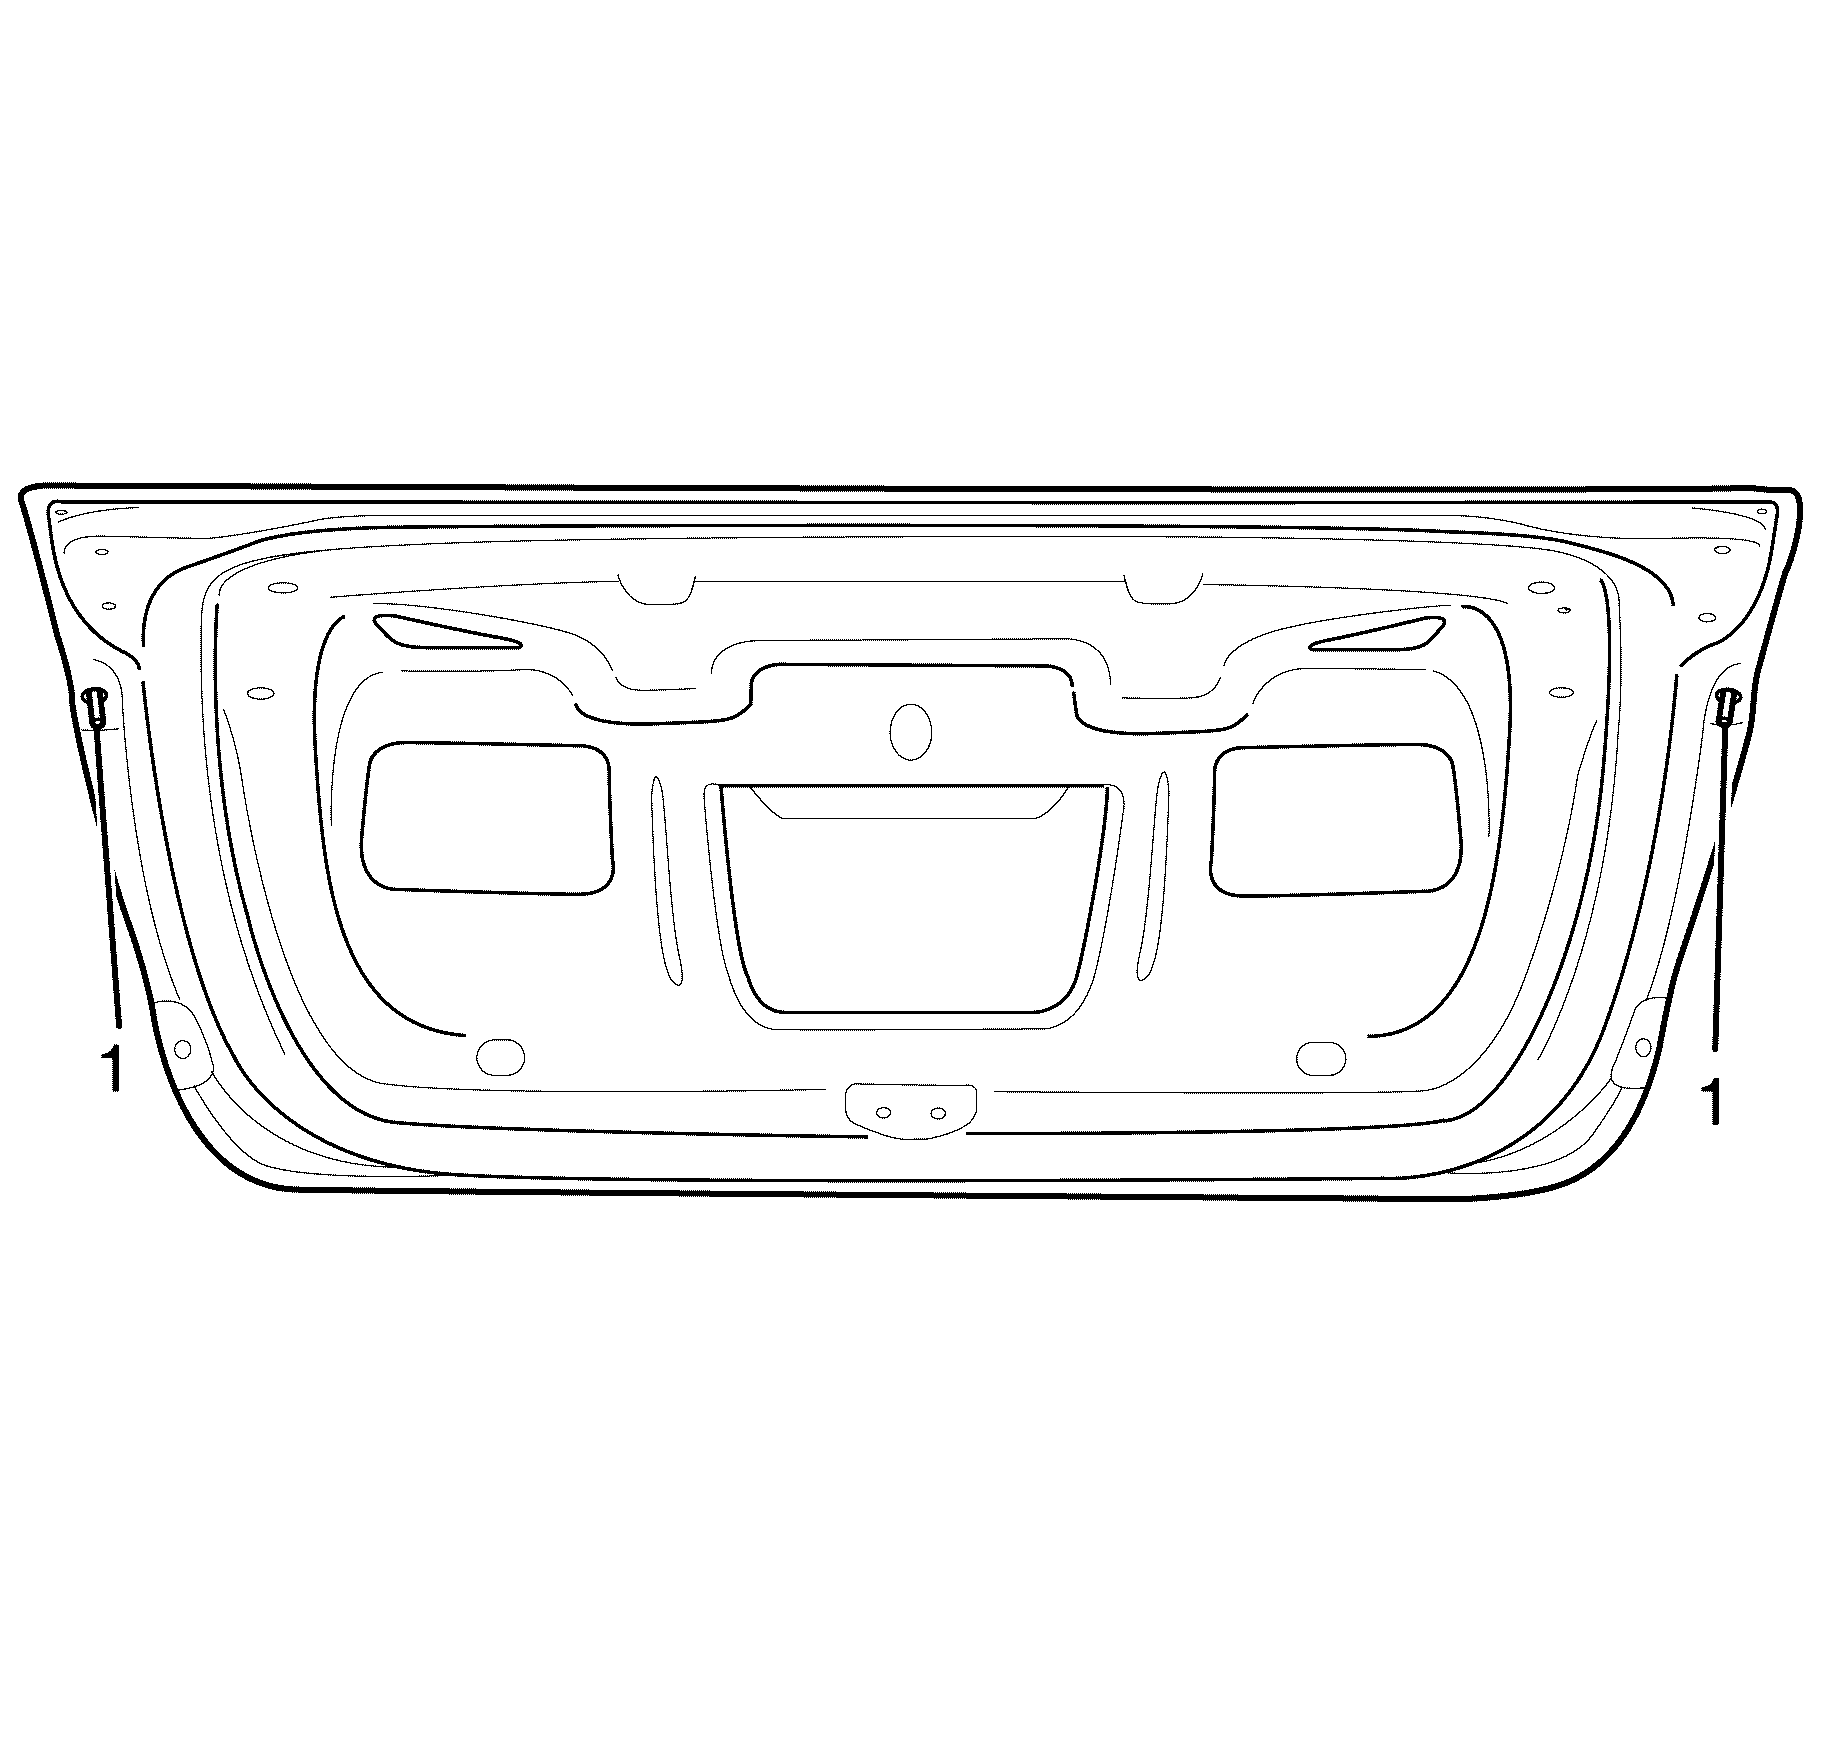
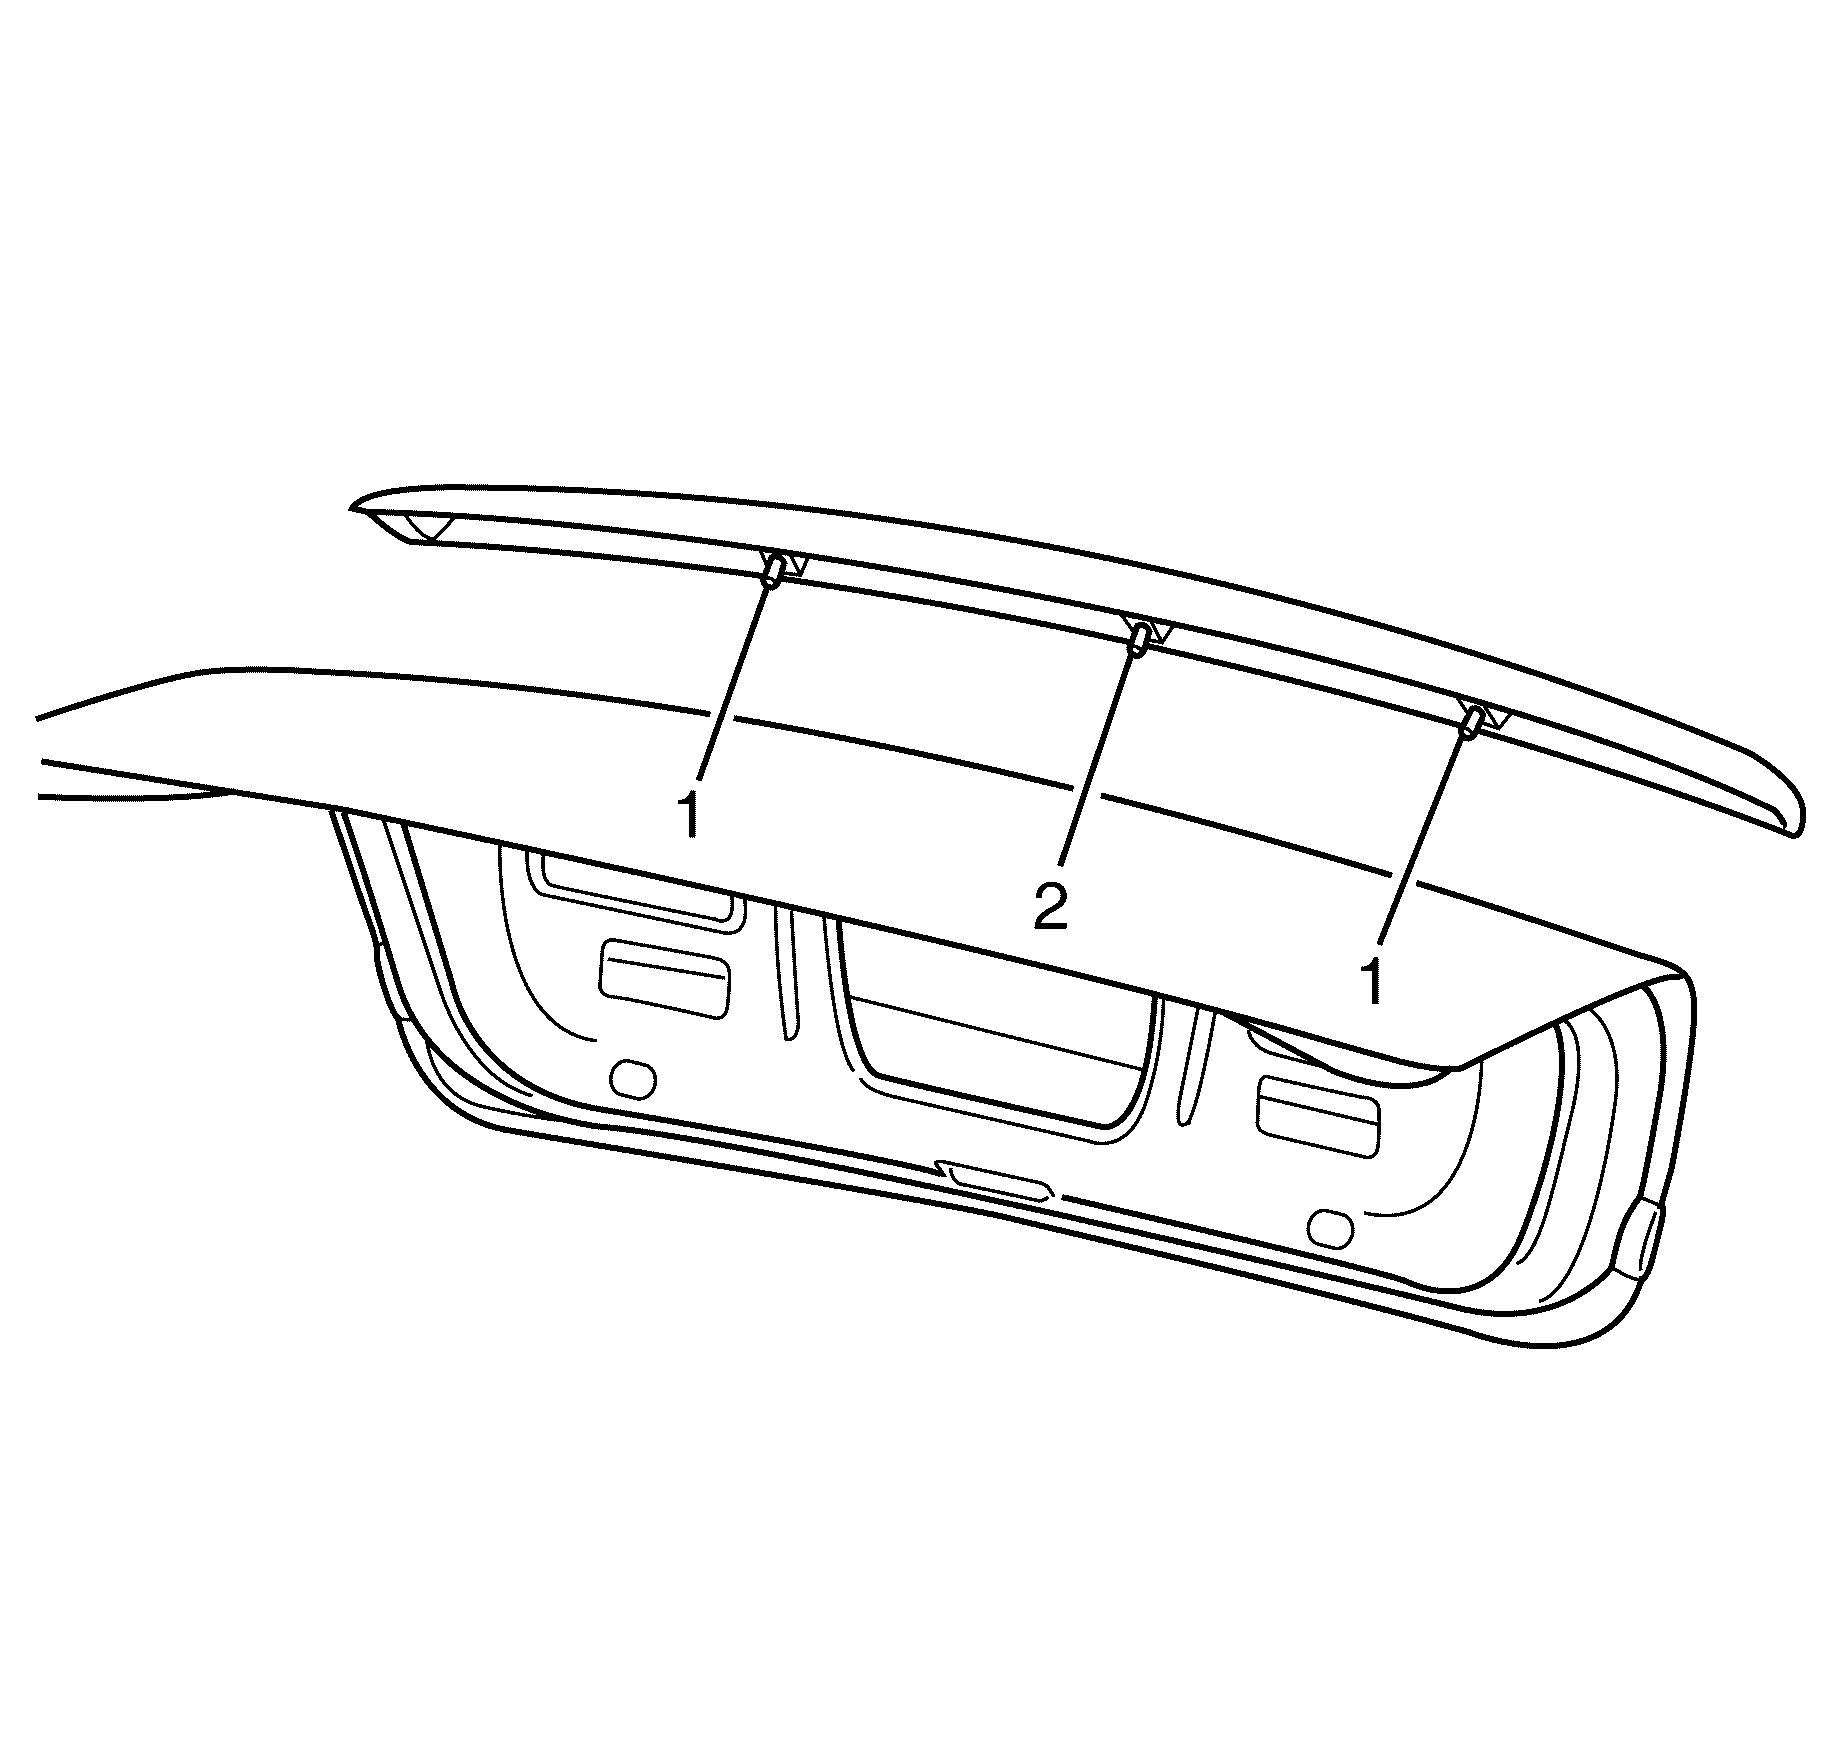
- Carefully disengage the rear compartment lid lip spoiler retaining clips (1) from the rear compartment lid.
- Slowly remove the rear compartment lid lip spoiler from the rear compartment lid.
- Clean the rear compartment lid with a suitable cleaning solution, using a lint free cloth.
Important: When a suitable hold open device is being removed or installed, provide alternate support to avoid the possibility of damage to the vehicle or personal injury.
Installation Procedure
Type A
- Clean the rear spoiler gaskets with a suitable cleaning solution, using a lint free cloth.
- Install the rear spoiler (1) to the rear compartment lid.
- Open the rear compartment lid.
- Support the rear compartment lid with a suitable brace.
- Install the rear spoiler to rear compartment lid retaining nuts (1).
- Remove the suitable brace from the rear compartment lid.
- Close the rear compartment lid.
Important: When a suitable hold open device is being removed or installed, provide alternate support to avoid the possibility of damage to the vehicle or personal injury.

Notice: Refer to Fastener Notice in the Preface section.

Tighten
Tighten the nuts to 3 N·m (27 lb in).
Installation Procedure
Type B
- If reusing the compartment lid rear applique, clean the compartment lid rear applique with a suitable cleaning solution, using a lint free cloth.
- Install the rear compartment lid lip spoiler to the rear compartment lid retraining clips (1).
- Open the compartment lid rear.
- Support the rear compartment lid with a suitable brace.
- Install the rear compartment lid lip spoiler to rear compartment lid retaining nuts (1).
- Remove the suitable brace from the rear compartment lid.
- Close the compartment lid rear.
Important: When a suitable hold open device is being removed or installed, provide alternate support to avoid the possibility of damage to the vehicle or personal injury.
Important: Use spec HN2021 type 13A and HN2021 type 6.
Important: Do not allow the adhesive tape to come in contact with any dirt or foreign matter.
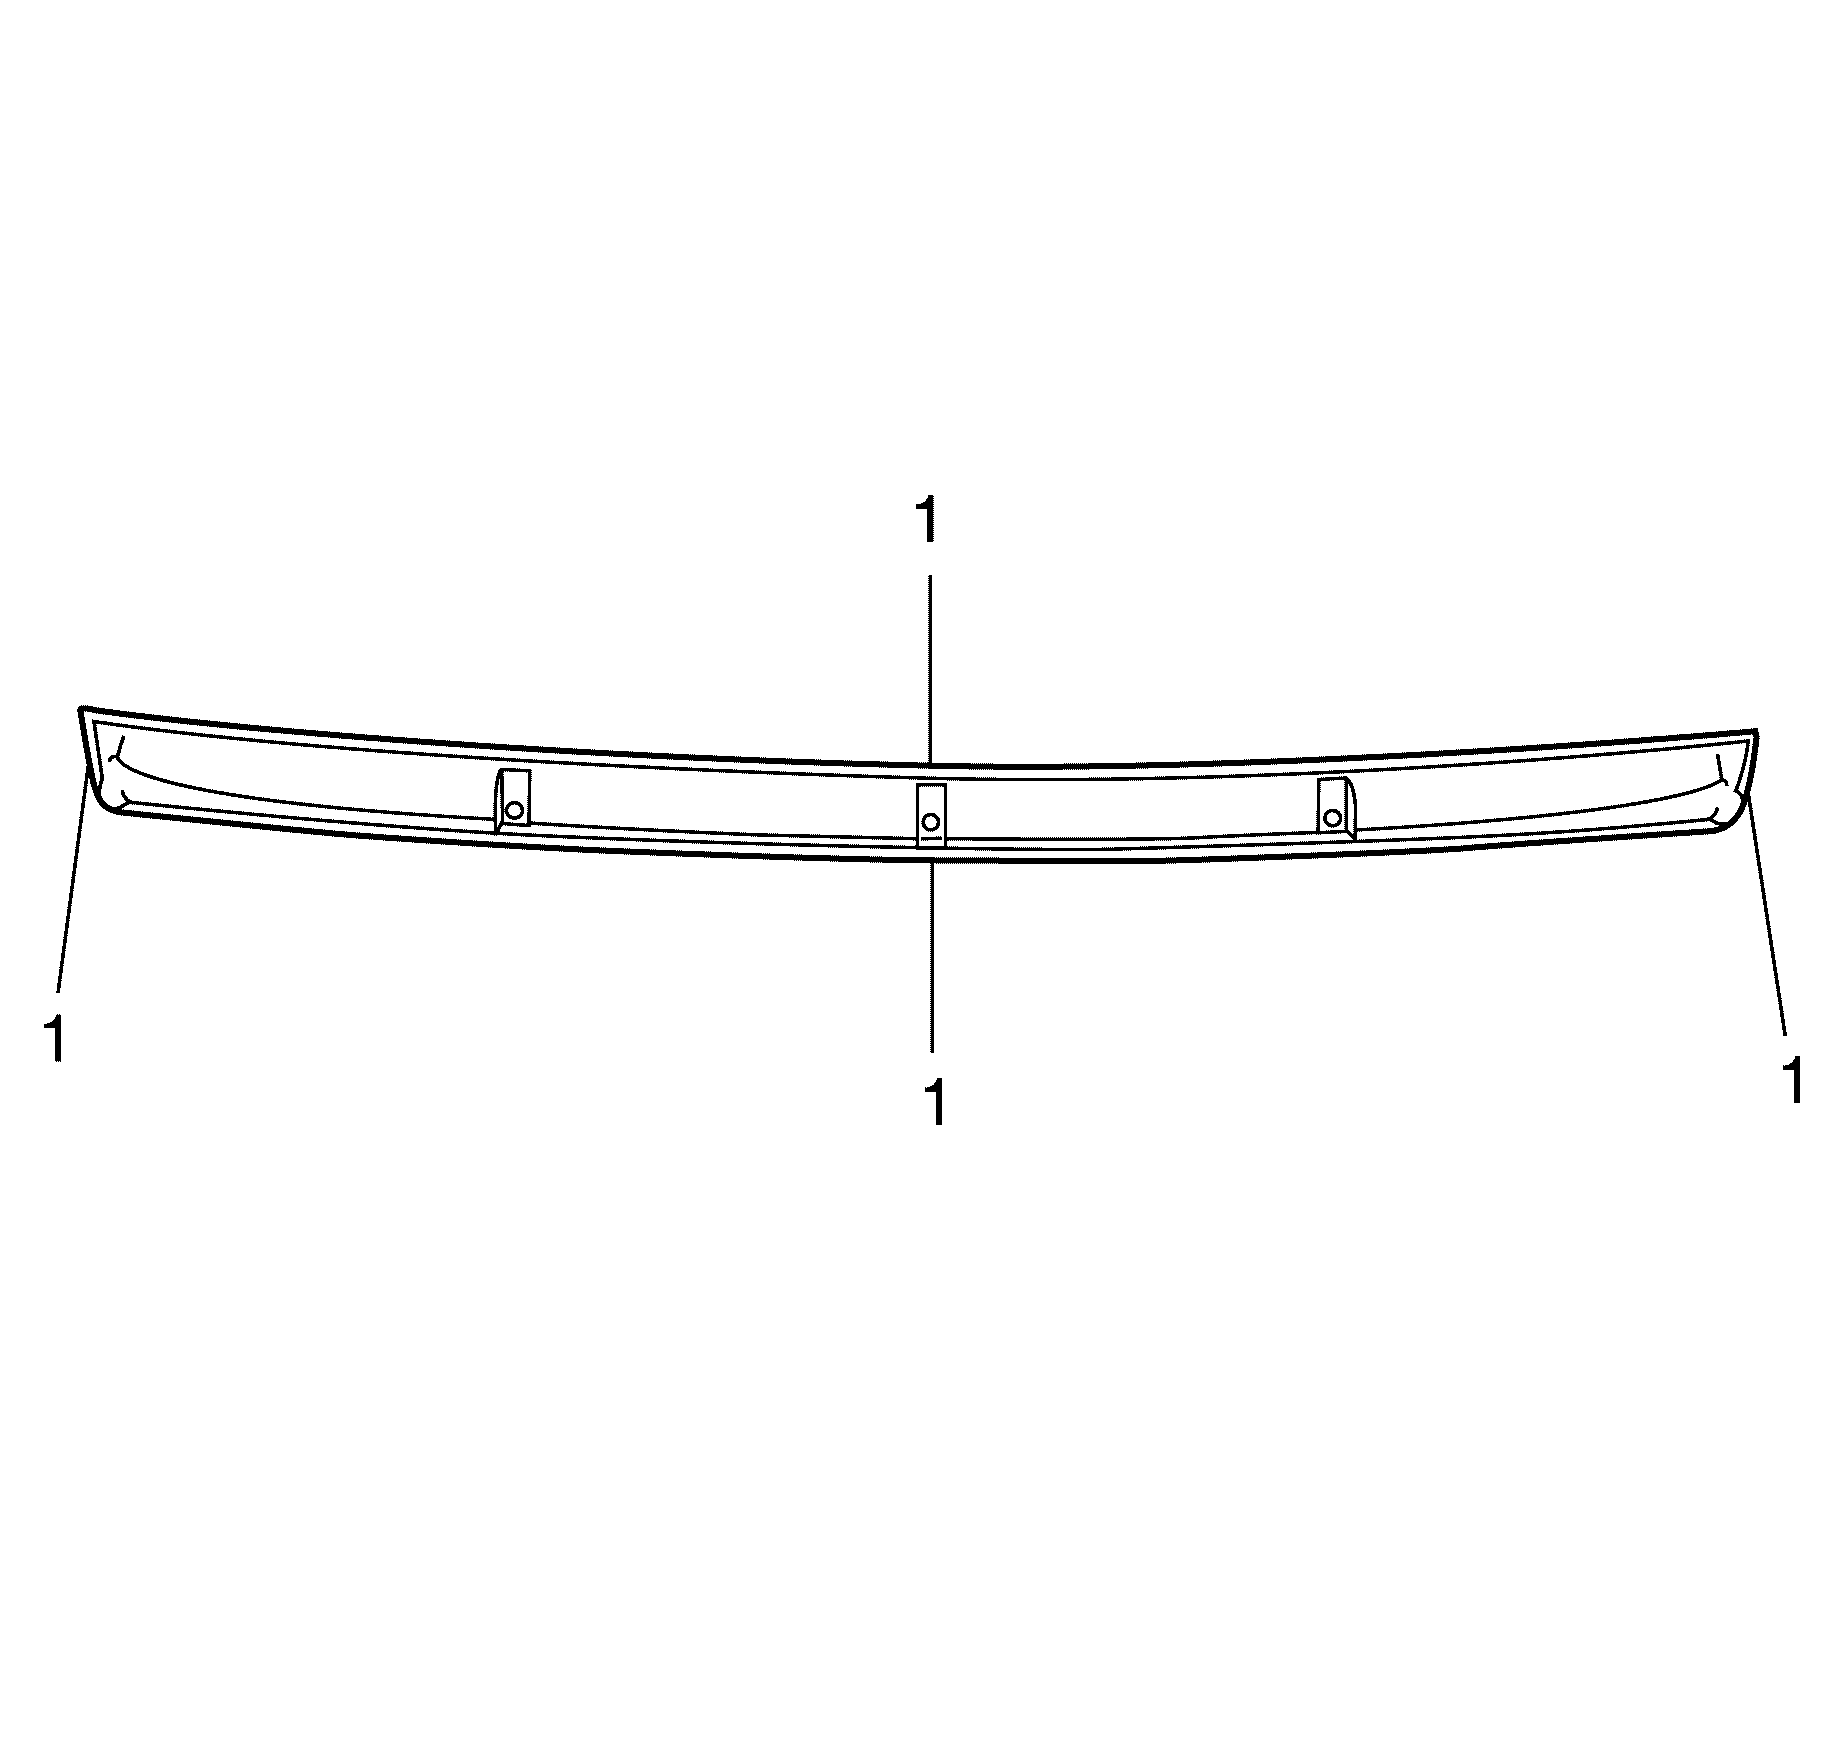
| 1.1. | Apply the double sided tape HN2021 (1) to the outer edges of the rear compartment lid lip spoiler. |
| 1.2. | Trim back the tape to the outer edges of the rear compartment lid lip spoiler. |

Notice: Refer to Fastener Notice in the Preface section.

Tighten
Tighten the nuts to 3 N·m (27 lb in).
Rear Spoiler Replacement SWBHSV Except Clubsport and GTS
Removal Procedure
Type D
- Open the rear compartment lid and support with a suitable brace.
- The rear compartment lid carpet requires the lower rear and two side clips to be removed to allow access to the central attaching nut and stud.
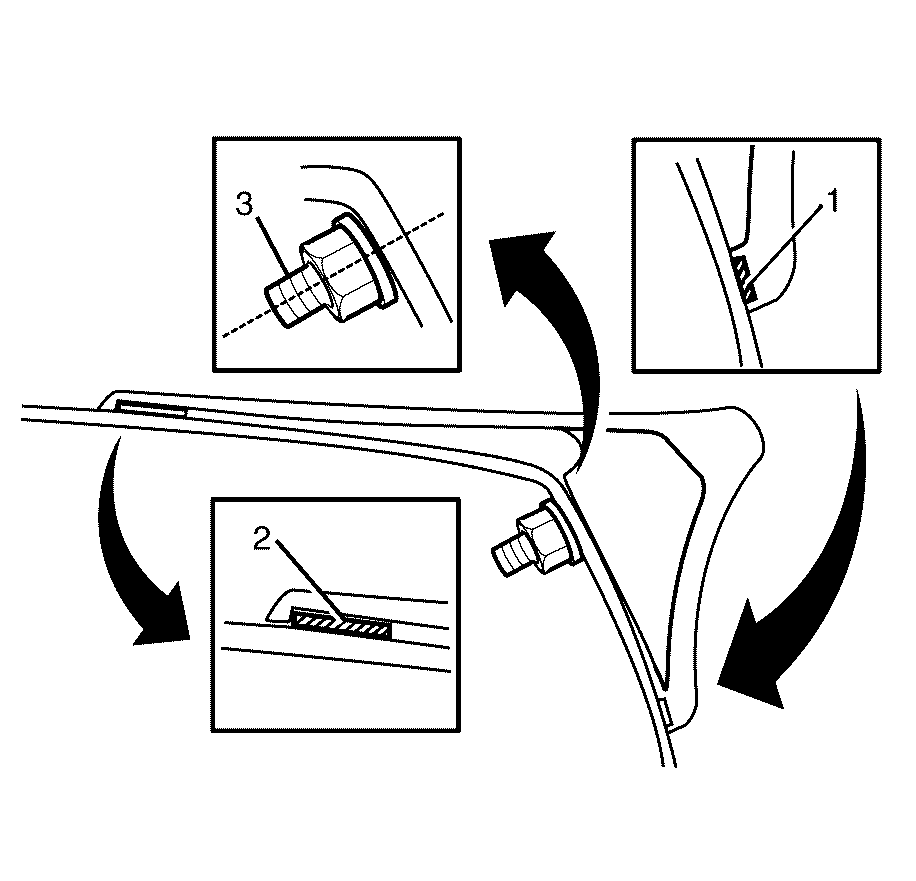
- Using a suitable tool, remove the centre stud retaining nut (3), washer (2) and stud (1).
- Remove the rear spoiler to rear compartment lid retaining nuts (4).
- Apply 50 mm wide masking tape around the complete outer edge of the rear compartment lid, butting it up to the complete edge of the spoiler.
- Remove suitable brace and lower the rear compartment lid
- Using a suitable sheet plastic tool, slice through the double sided retaining tape located around the edge of the spoiler.
- Remove the rear spoiler (1) from the rear compartment lid (2).
- Remove the tape and clean the rear compartment lid (2) with a suitable cleaning solution, using a lint free cloth.
Caution: When a rear compartment lid hold open device is being removed or installed, provide alternate support to avoid the possibility of damage to the vehicle or personal injury.
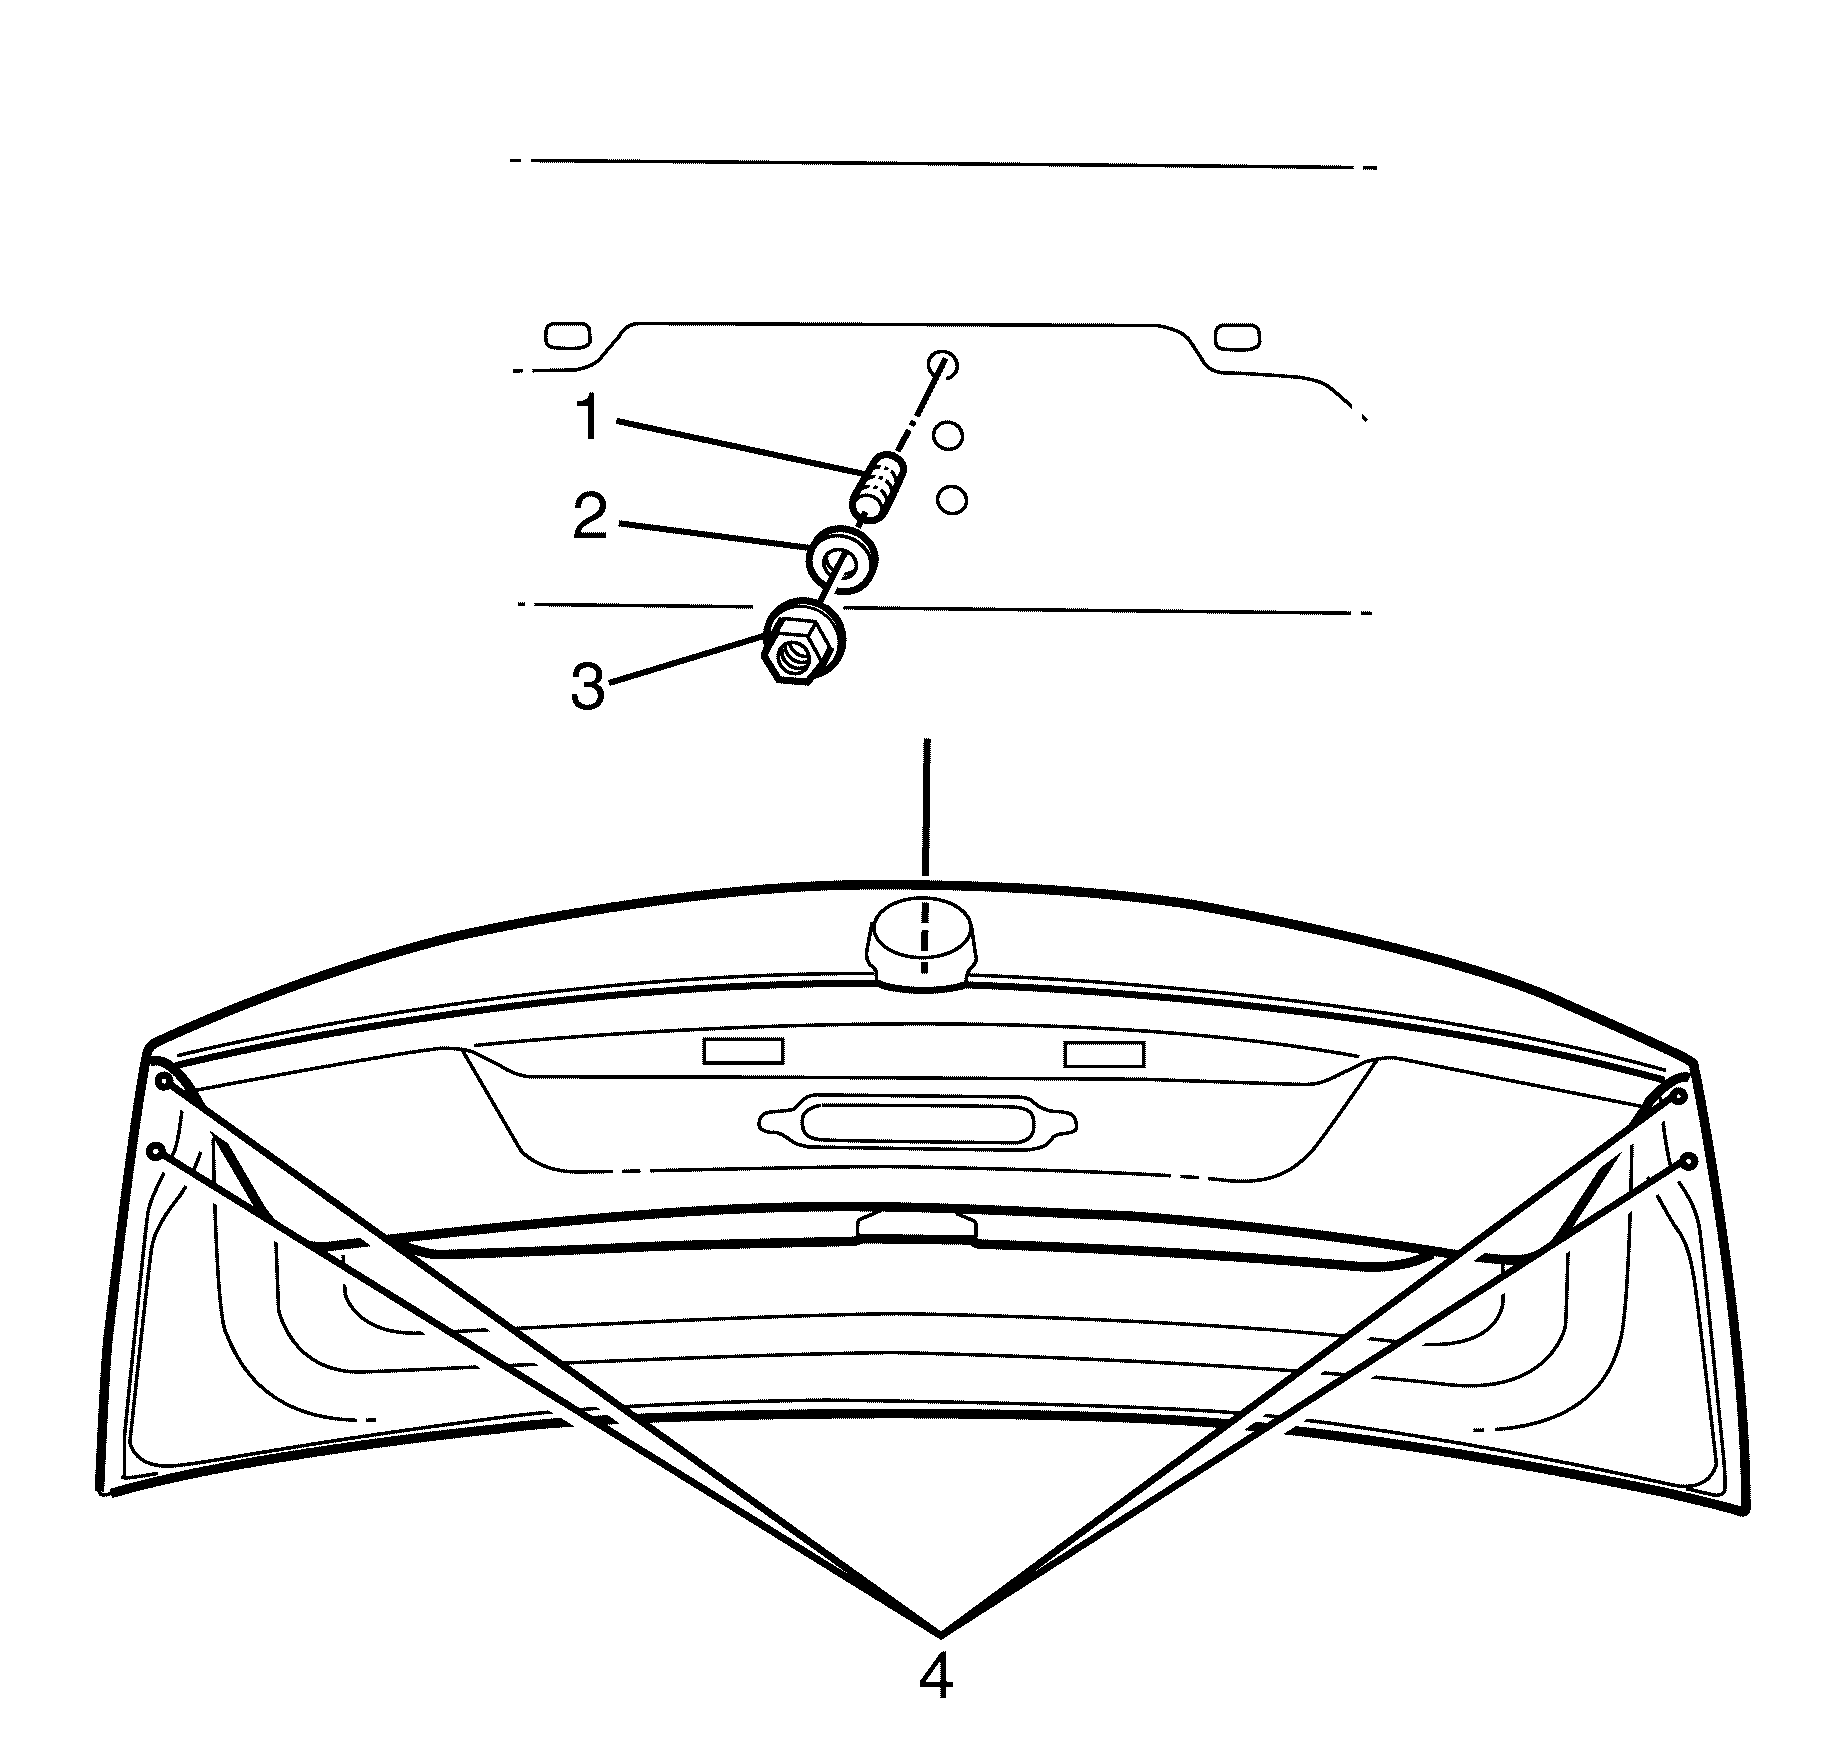
Important: Access is made from inside the rear compartment lid cavity.
Important: While lowering the rear compartment lid, carefully hold rear spoiler in position so as not to let it fall away from vehicle.
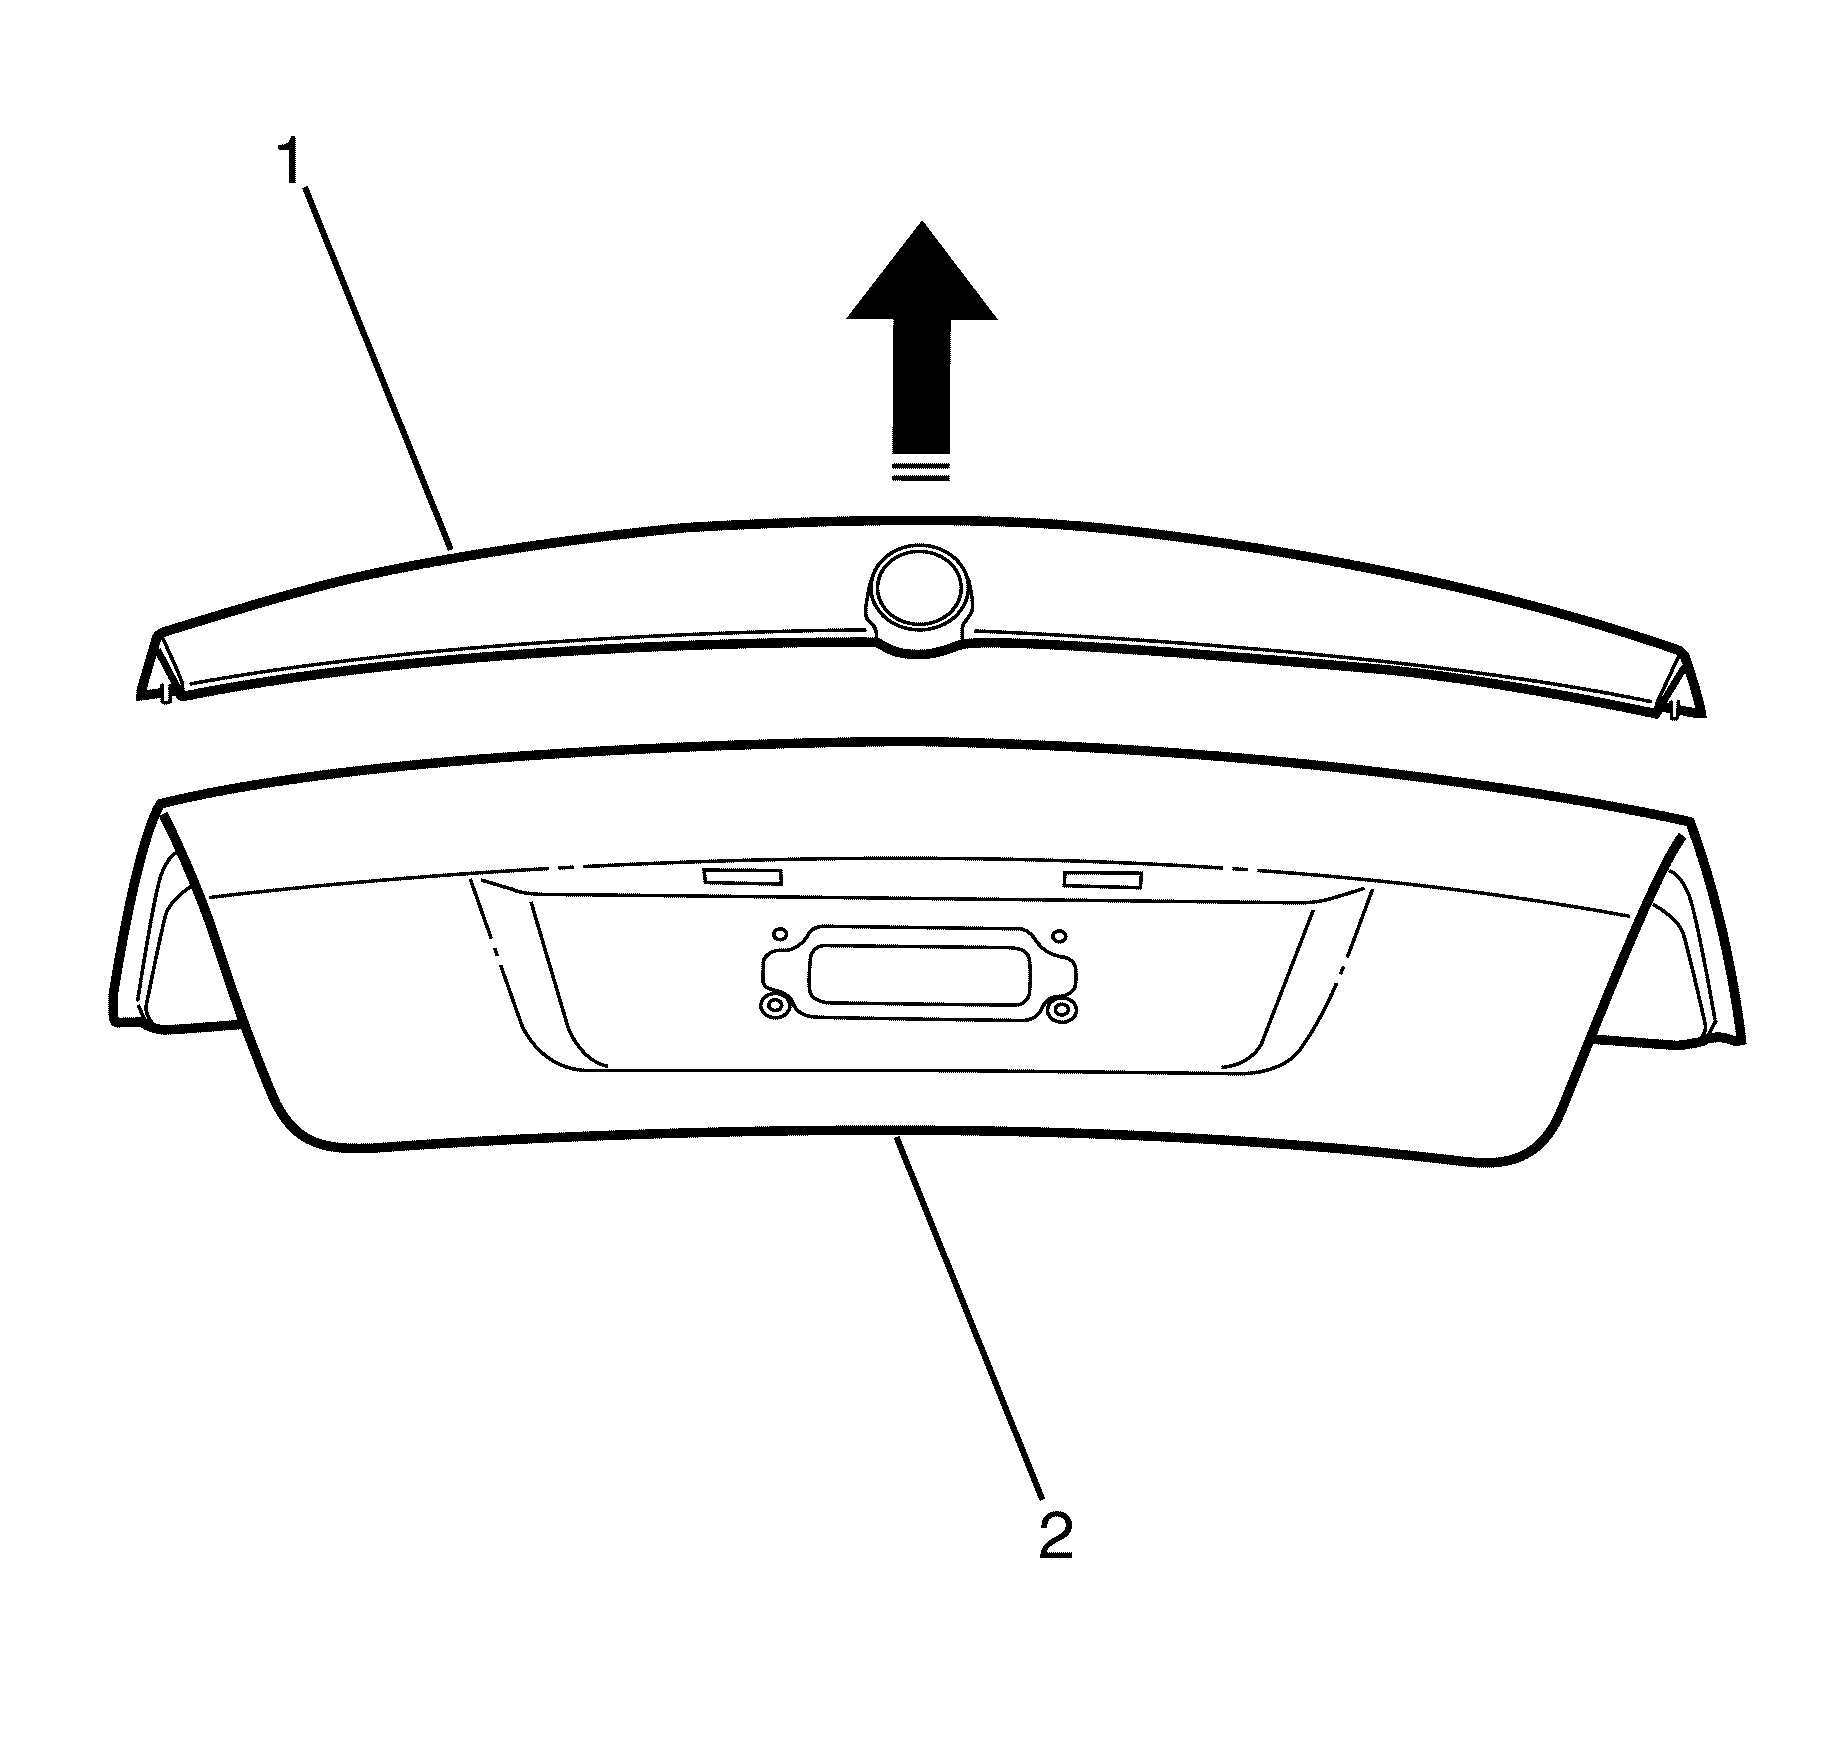
Important: Lift the rear spoiler in a centred upwards motion to remove it from the rear compartment lid.
Installation Procedure
Type D
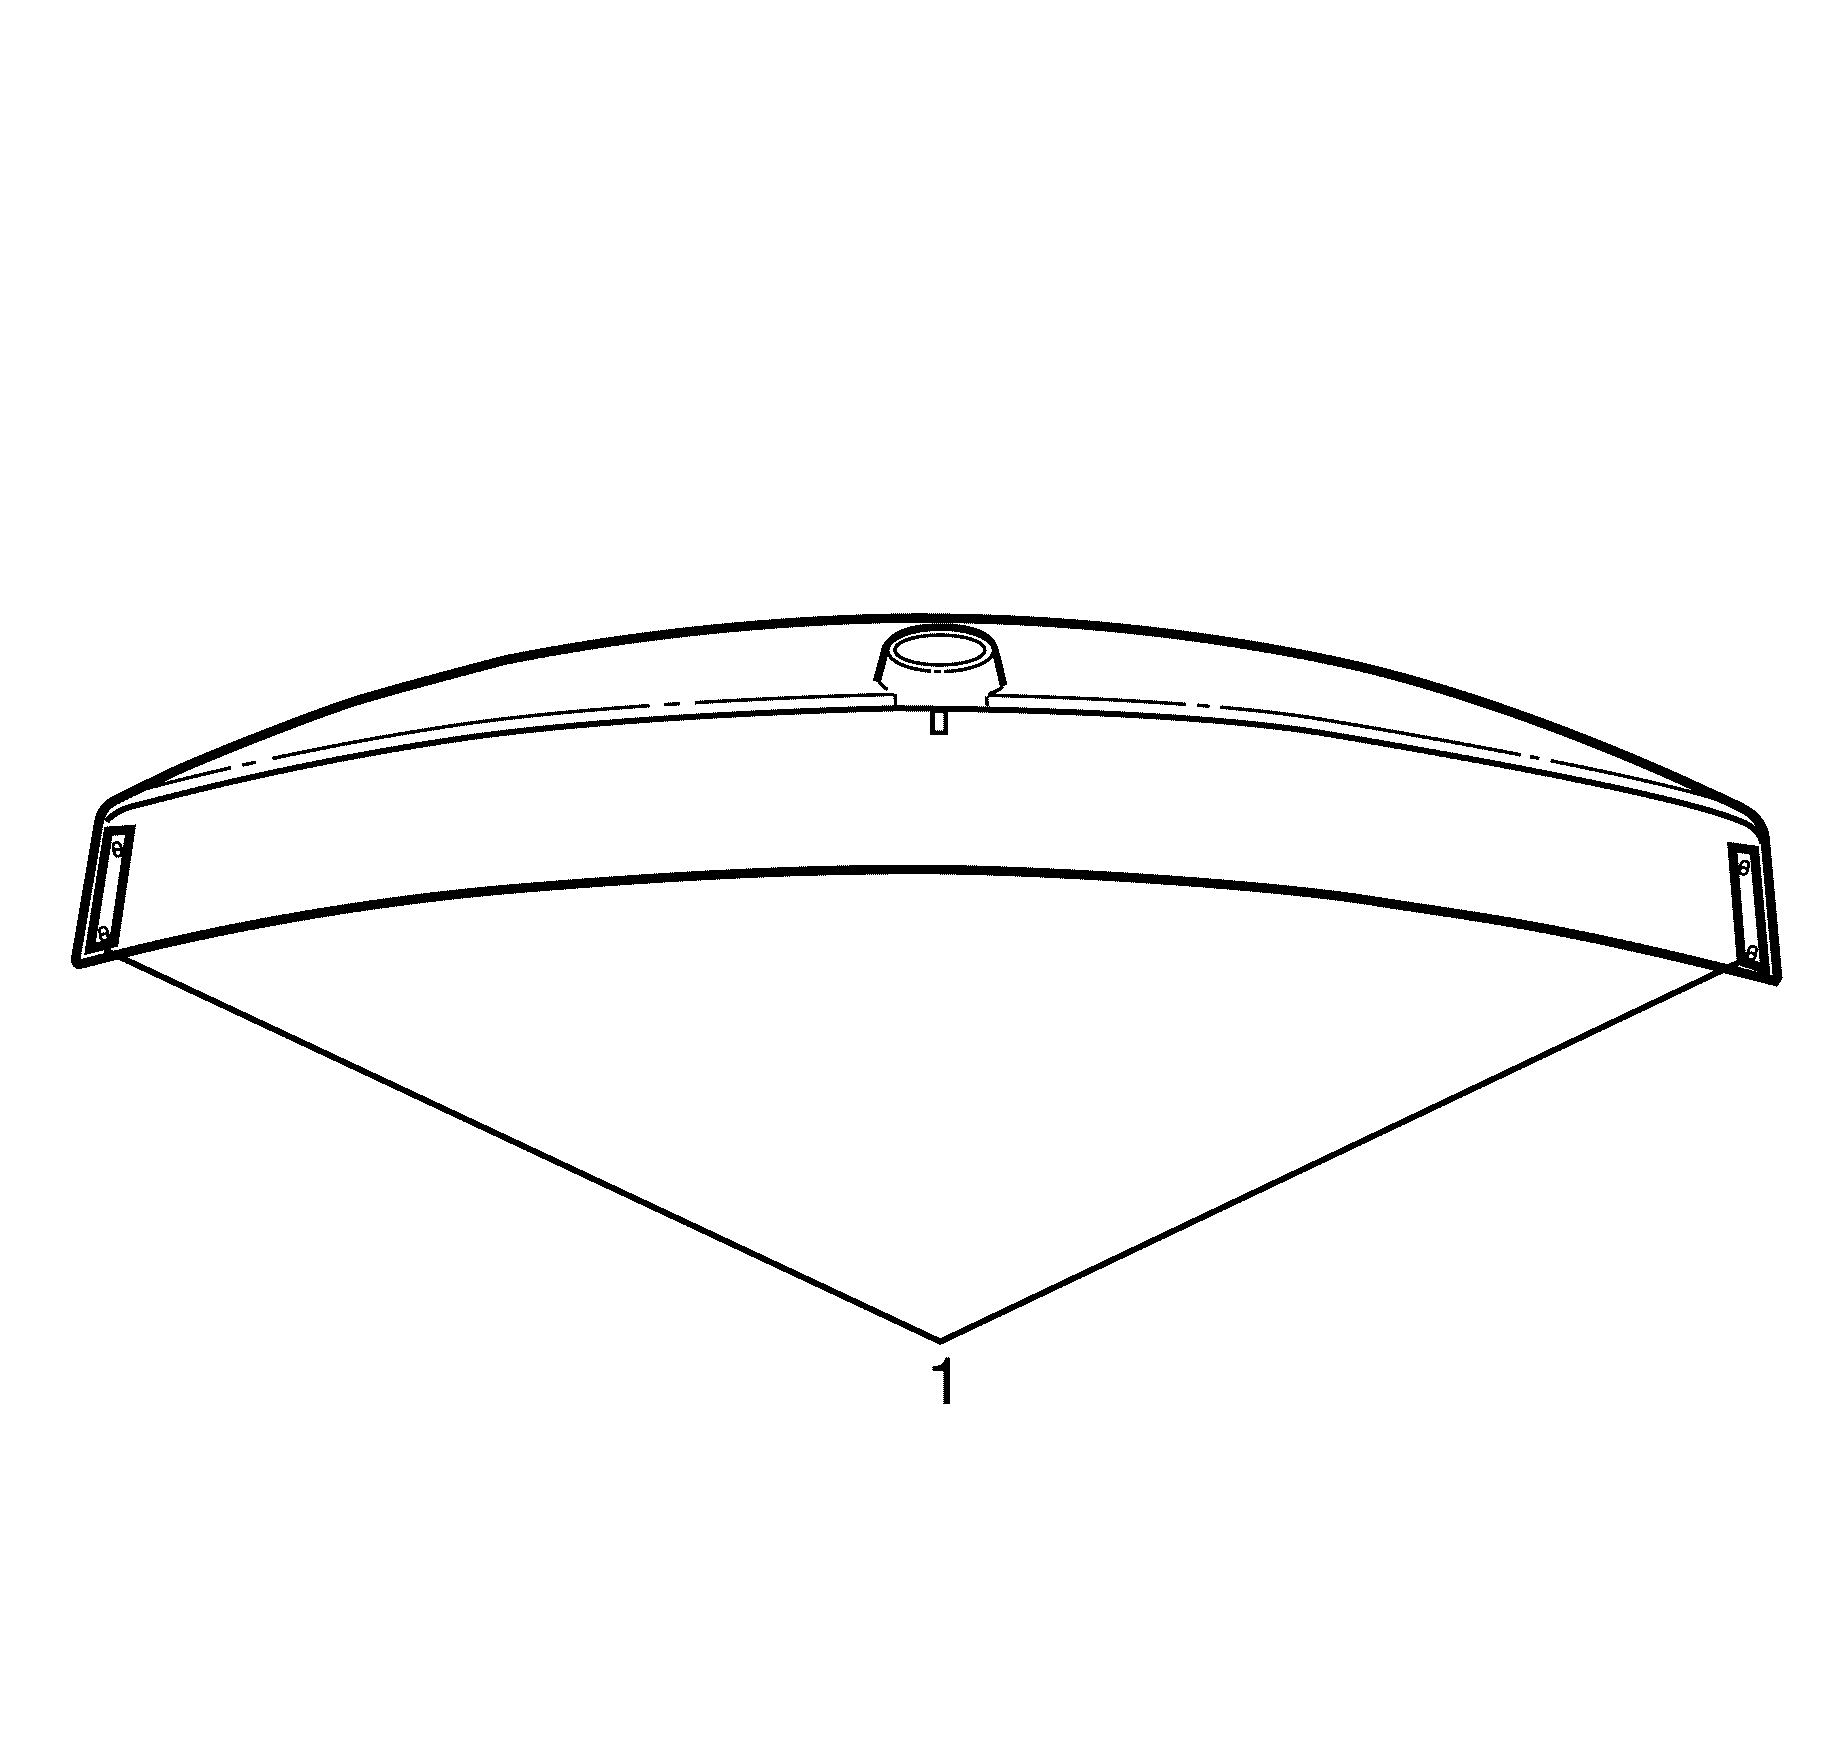
- Apply a suitable double sided tape to the outer edges of the rear spoiler (1).
- Trim back the tape to the outer edges of the rear spoiler.
- Open the rear compartment lid.
- Using a suitable tool, install the centre stud retaining nut (3), washer (2) and stud (1).
- Install the rear spoiler to rear compartment lid retaining nuts (4).
- Apply approved sealer over the two upper badge holes to form a watertight seal.
- Install the NEW badge to the NEW spoiler.
- Install rear compartment lid carpet.
- Close the rear compartment lid.
Caution: When a rear compartment lid hold open device is being removed or installed, provide alternate support to avoid the possibility of damage to the vehicle or personal injury.
Important: Do not allow the adhesive tape to come in contact with any dirt or foreign matter.
Notice: Refer to Fastener Notice in the Preface section.

Tighten
Tighten the stud to 4 Nm (27 lb. in).
Tighten
Tighten the nut to 4 Nm (27 lb. in).
Tighten
Tighten the nuts to 4 Nm (27 lb. in).
Installation Procedure when Replacing the 'Decklid with Badge Holes'
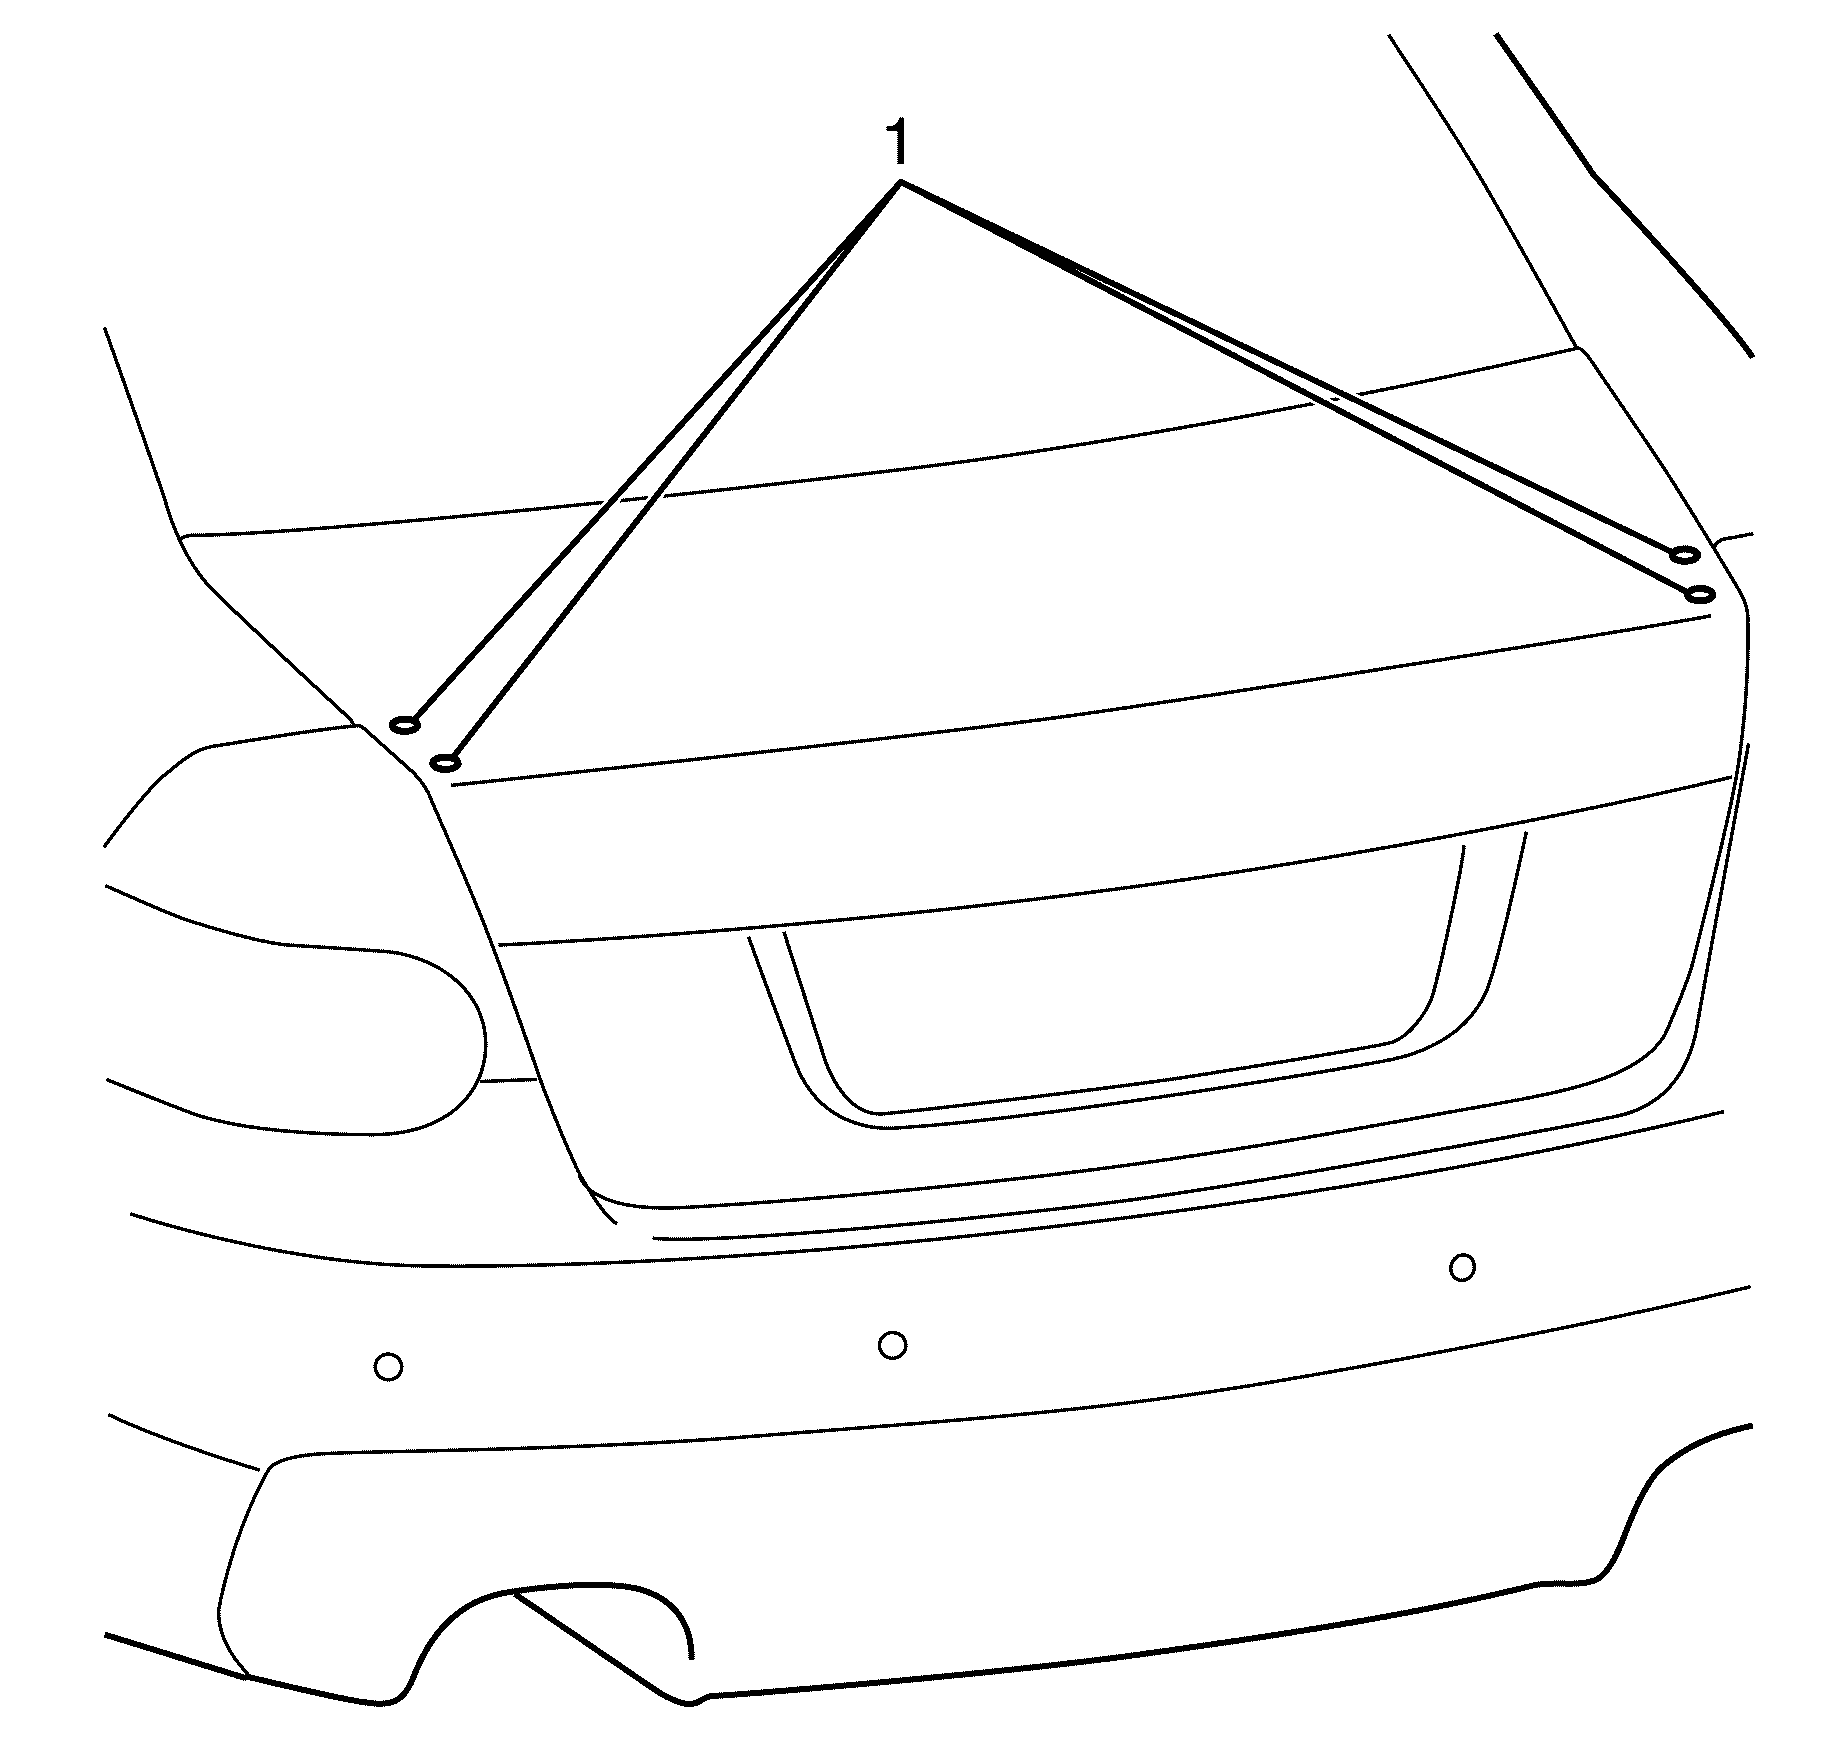
- Enlarge the four outer spoiler attachment holes (1) to 8 mm diameter using a suitable drill.
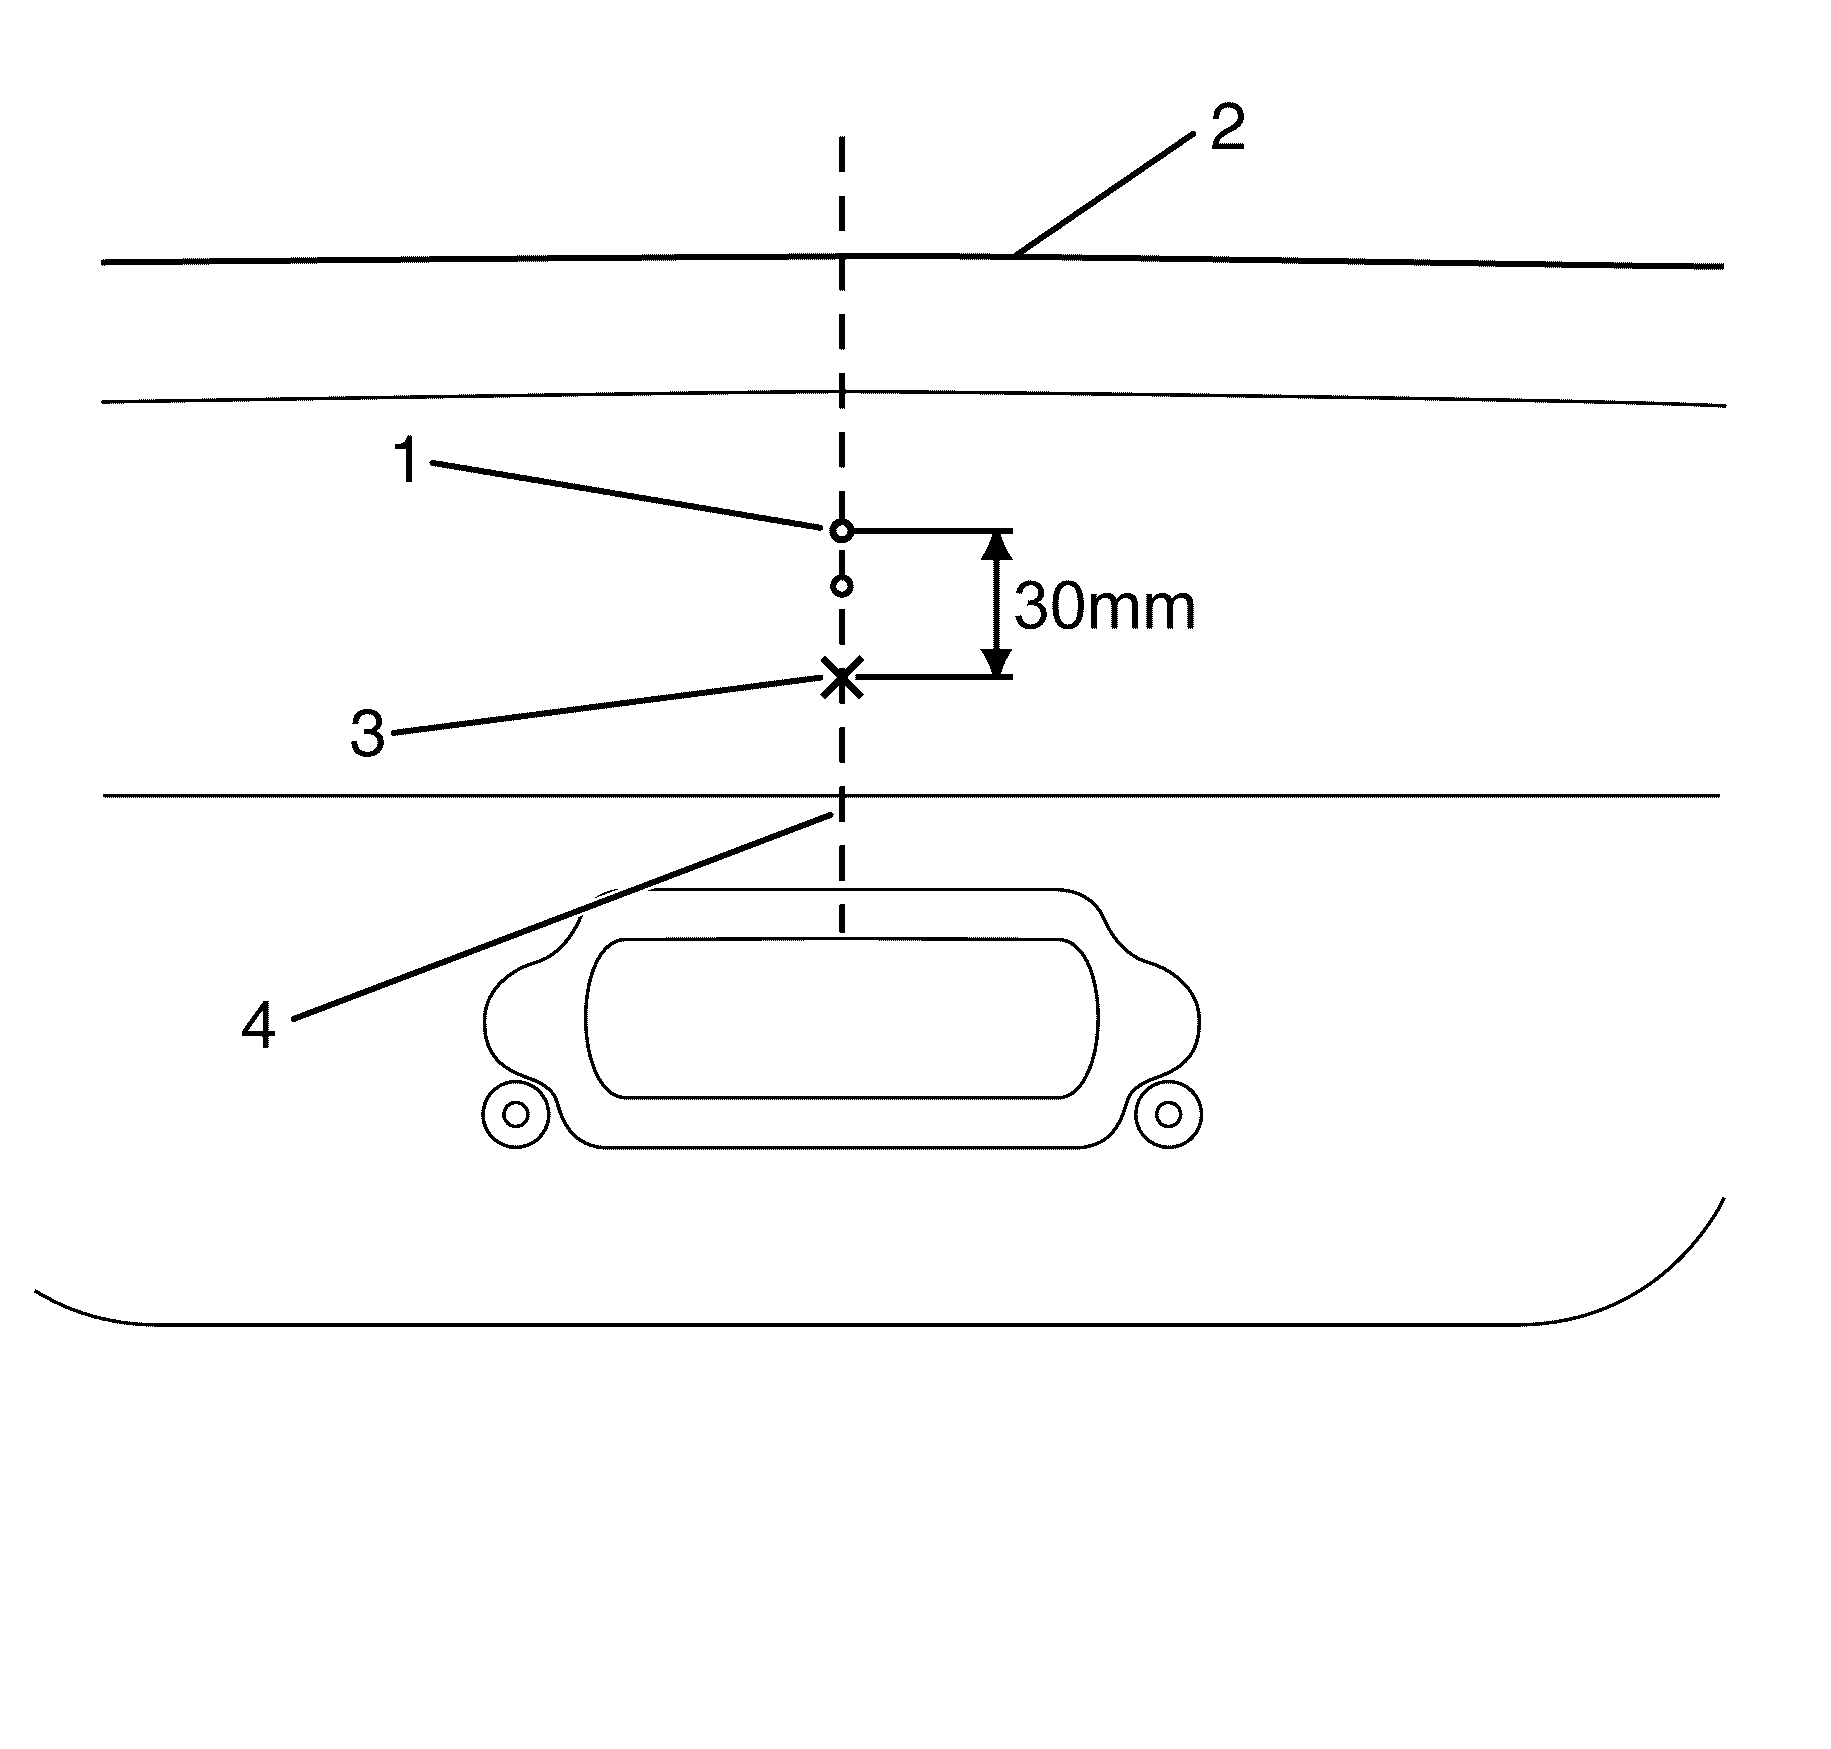
- Measure 30 mm directly downward from the top badge hole (1) in the deck lid (2) and carefully centre punch the hole position (3) on the decklidcentre line (4).
- Using a suitable drill, make a 2 mm pilot hole at the centre punch position (3).
- Using a suitable drill re-size the hole (3) to 8 mm diameter.
- Remove the protective masking tape and clean the deck lid outer panel in the areas where the double sided tape will contact the panel.
- Apply approved sealer over the two upper badge holes to form a water tight seal.
- Install the spoiler onto the deck lid and install the retaining nuts but do not tighten them.
- Access the centre retaining hole from inside the deck lid cavity and install the centre stud.
- Using a suitable allen key tighten the stud, but do not over tighten.
- Install the centre retaining nut onto the stud.
Important: Apply masking tape over the areas to be drilled prior to drilling to protect the paint finish.
Notice: Refer to Fastener Notice in the Preface section.
Tighten
Tighten the retaining stud to 4 N·m
(27 lb. in).
Tighten
Tighten the retaining nuts to 4 N·m
(27 lb. in).
Installation Procedure when Replacing the 'Deck Lid without Badge Holes'
- Enlarge the four outer spoiler attachment holes (1) to 8 mm diameter using a suitable drill.
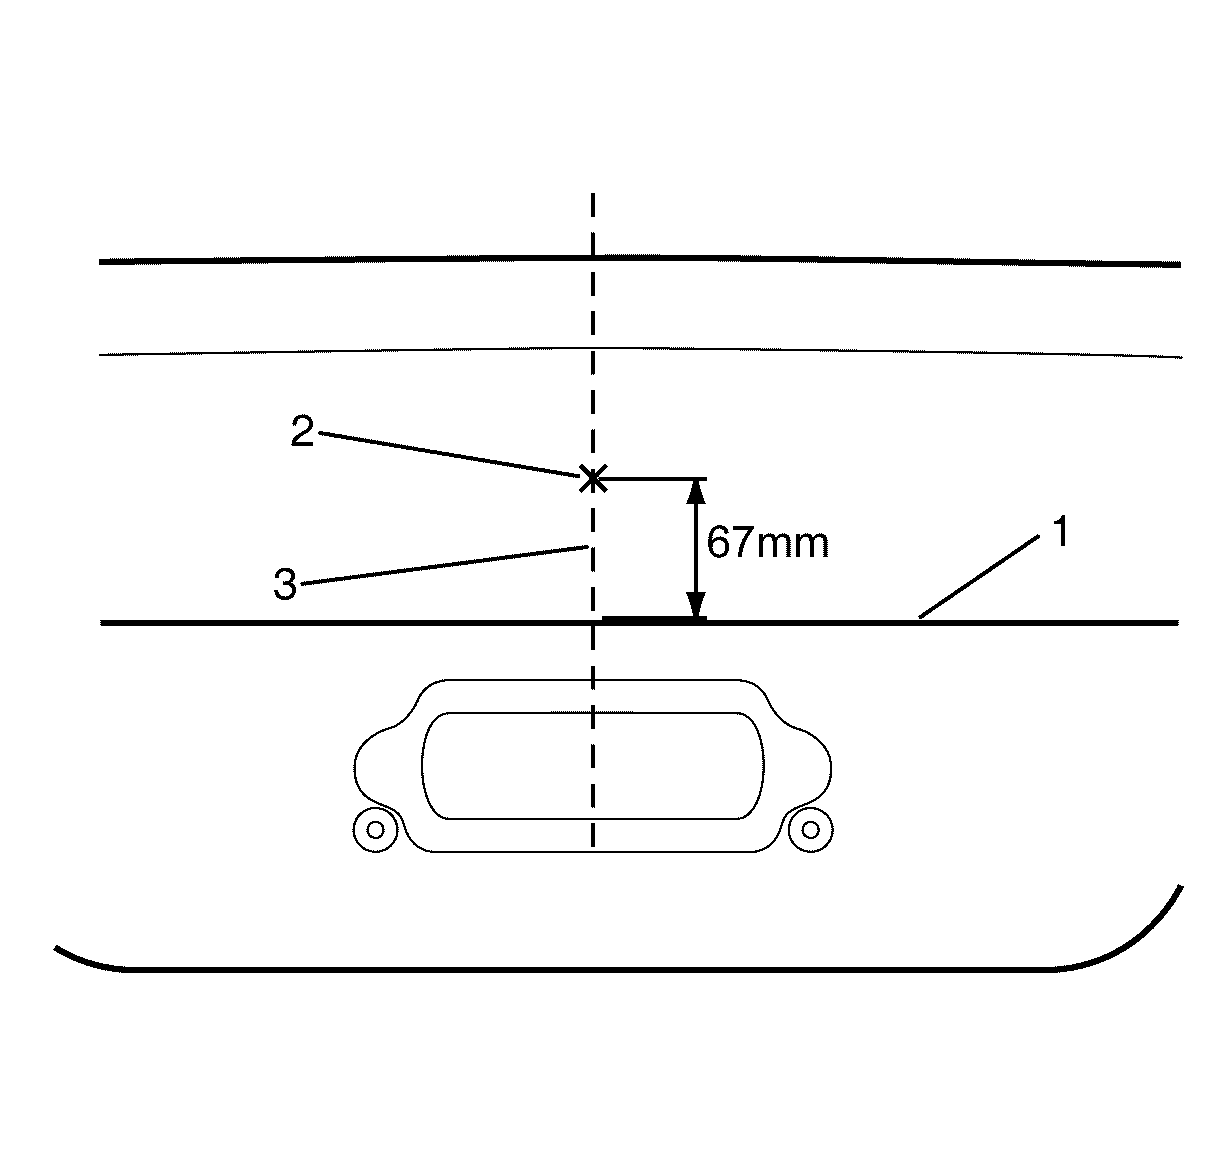
- Measure 67 mm directly upward from the lower edge of the decklid outer skin (1) and carefully centre punch the hole position (2) on the decklid centre line (3) as shown.
- Drill a 2 mm pilot hole at the centre punched position (2).
- Enlarge the 2 mm pilot hole to 8 mm diameter using a suitable drill.
- Remove the protective masking tape and clean the deck lid outer panel with denatured alcohol.
- Install the spoiler onto the deck lid and install the retaining nuts but do not tighten them.
- Access the centre retaining hole from inside the deck lid cavity and install the centre stud.
- Using a suitable allen key tighten the stud, but do not over tighten.
- Install the centre retaining nut onto the stud.
Important: Protect all painted surfaces prior to any drilling or reaming procedure by covering affected areas with masking tape.

Notice: Refer to Fastener Notice in the Preface section.
Tighten
Tighten the retaining stud to 4 N·m
(27 lb. in).
Tighten
Tighten the retaining nuts to 4 N·m
(27 lb. in).
Rear Spoiler Replacement LWBHSV
Removal Procedure
- Open the rear compartment lid and support with a suitable brace.
- Remove the rear compartment lid trim. Refer to Rear Compartment Lid Switch Replacement .
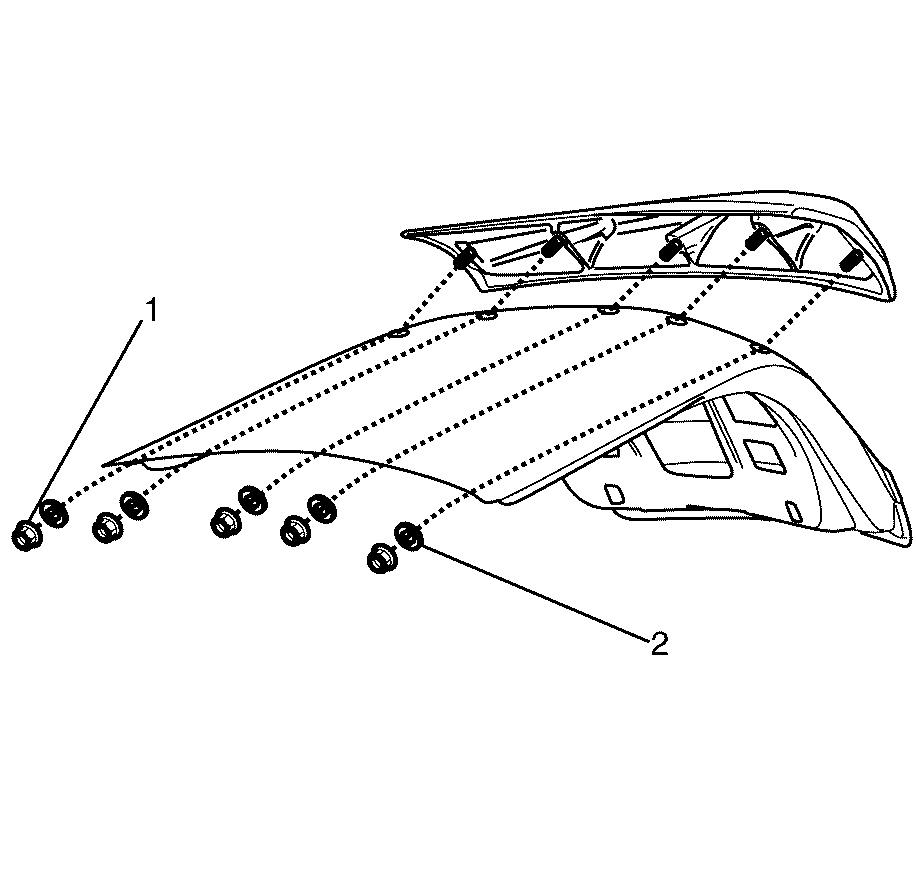
- Remove the rear spoiler retaining nuts (1) and washers (2).
- Remove suitable brace and lower the rear compartment lid.
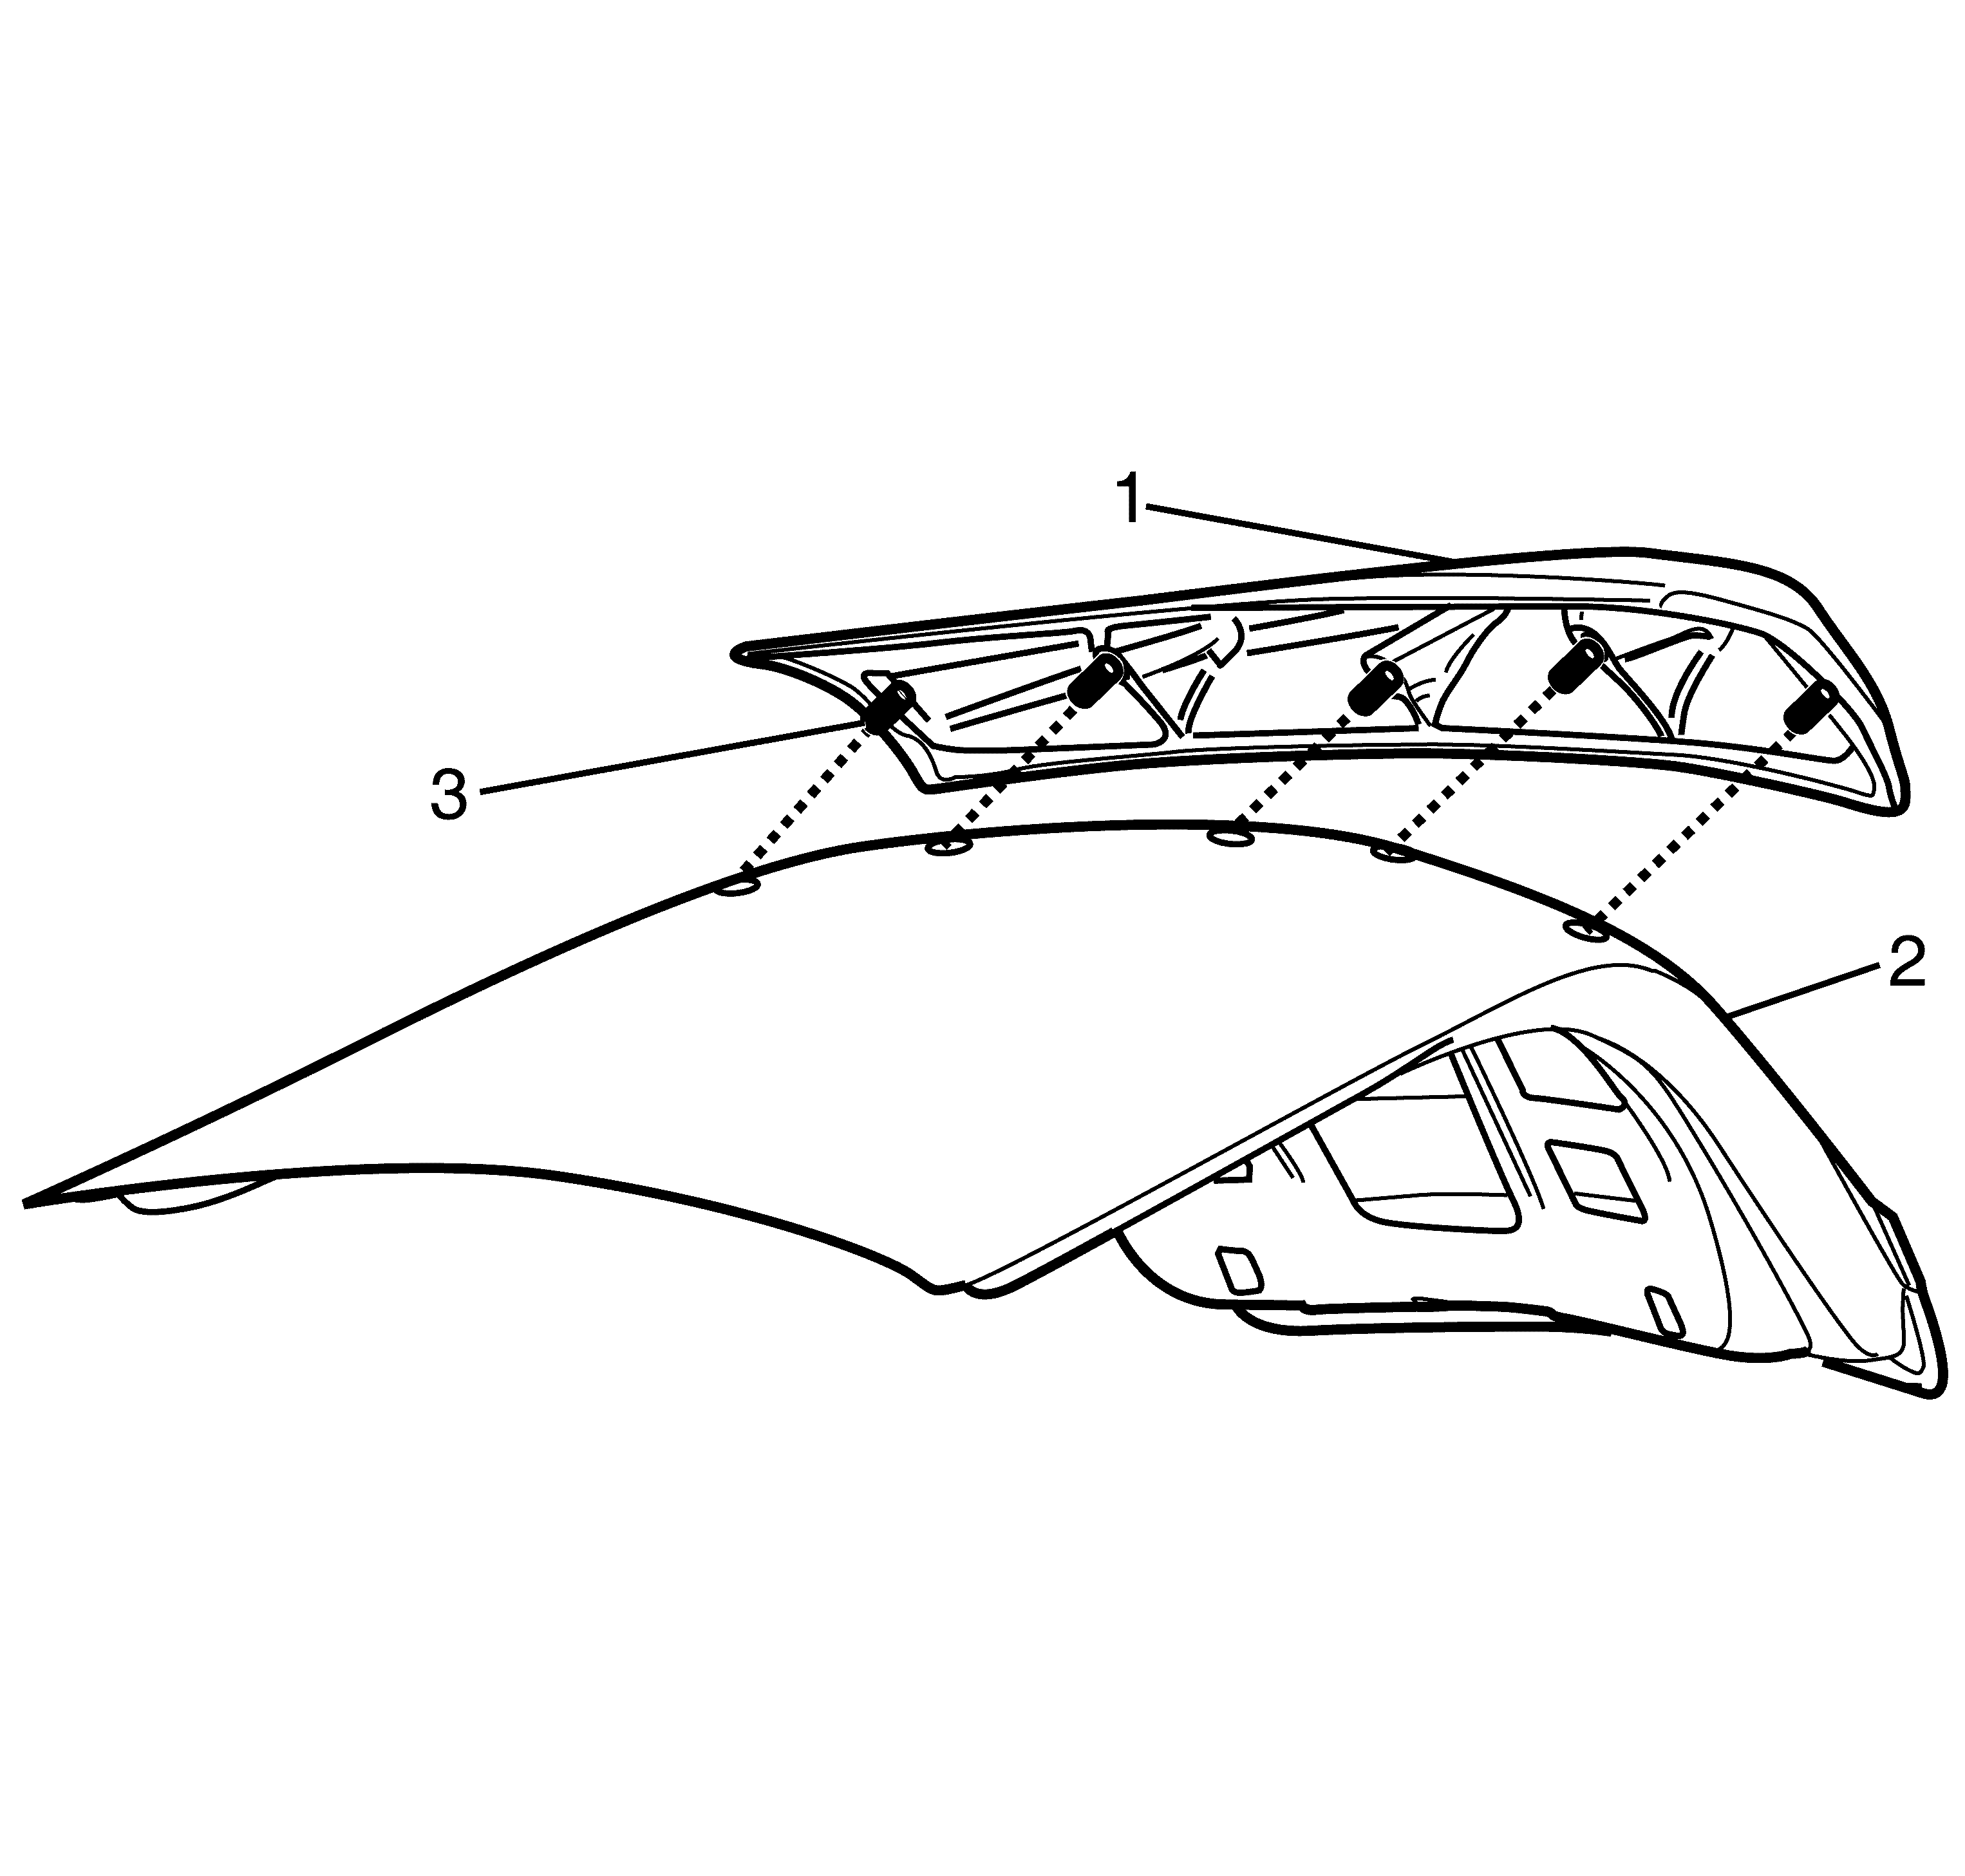
- Using a suitable sheet plastic tool, slice through the double sided tape (1) located under the contact surface of the rear spoiler (2).
- Remove the rear spoiler (1) from the rear compartment lid (2).
- Remove the five grub screws (3) from the rear spoiler (1).
- Remove the remaining double sided tape and clean the rear compartment lid (2) with a suitable cleaning solution, using a lint free cloth.
Important: When a suitable hold open device is being removed or installed, provide alternate support to avoid the possibility of damage to the vehicle or personal injury.
Important: Access is made from inside the rear compartment lid cavity.
Important: While lowering the rear compartment lid, carefully hold rear spoiler in position so as to not let it fall away from the vehicle.
Important: Lift the rear spoiler in a centred upwards motion to remove it from the rear compartment lid, to prevent the rear compartment lid from being damaged by the grub screws.
Installation Procedure
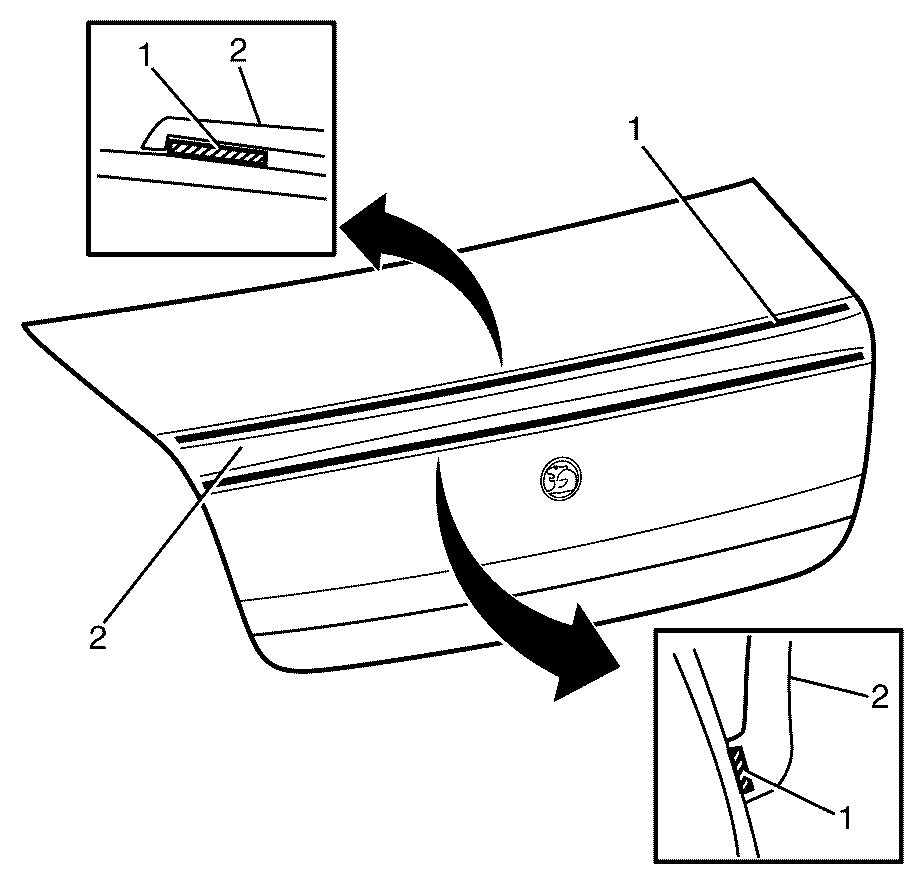
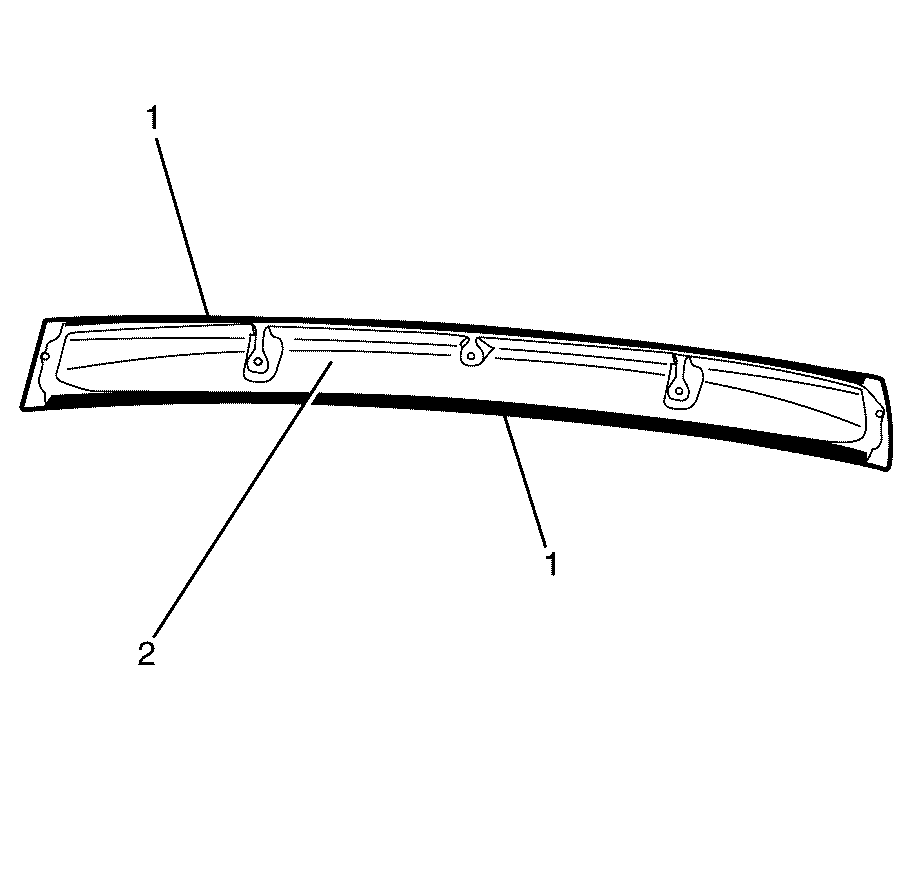
- Apply suitable double sided tape to the indicated areas (1) on the underside of the rear spoiler (2).
- Trim back the tape to a concealed (non visible) amount of overhang.
- Install the rear spoiler grub screws (3) into the rear spoiler (1) .
- Install the rear spoiler (1) onto the rear compartment lid (2).
- Open the rear compartment lid and support with a suitable brace.
- Install the rear spoiler retaining washers (2) and nuts (1) onto the rear spoiler grub screws.
- Install the rear compartment lid trim. Refer to Rear Compartment Lid Switch Replacement.
- Close the rear compartment lid.
- Trim off any excess double sided tape protruding from the rear spoiler, and clean all affected areas with an approved cleaning agent.
- The finished condition through section A of the rear compartment lid should be as indicated at points (1, 2 and 3).
Important: When a suitable hold open device is being removed or installed, provide alternate support to avoid the possibility of damage to the vehicle or personal injury.
Important: Do not allow the adhesive tape to come in contact with any dirt or foreign matter.
Notice: Refer to Fastener Notice in the Preface section.

Important: Apply approved sealer around the holes in the rear compartment lid to form a watertight seal.
Tighten
Tighten the rear spoiler grub screws to 4.0 Nm
(35 lb. in).
Important: Carefully install the rear spoiler onto the rear compartment lid, making sure not to damage any painted surfaces.

Important: When a suitable hold open device is being removed or installed, provide alternate support to avoid the possibility of damage to the vehicle or personal injury.
Tighten
Tighten the rear spoiler retaining nuts to 4.0 Nm
(35 lb. in).
