Spare Wheel Carrier Replacement Sedan
Removal Procedure
- Remove the rear compartment floor carpet. Refer to Rear Compartment Floor Panel Carpet Replacement.
- Remove the spare wheel and emergency kit from the rear compartment.
- Remove the rear bumper fascia. Refer to Rear Bumper Fascia Replacement.
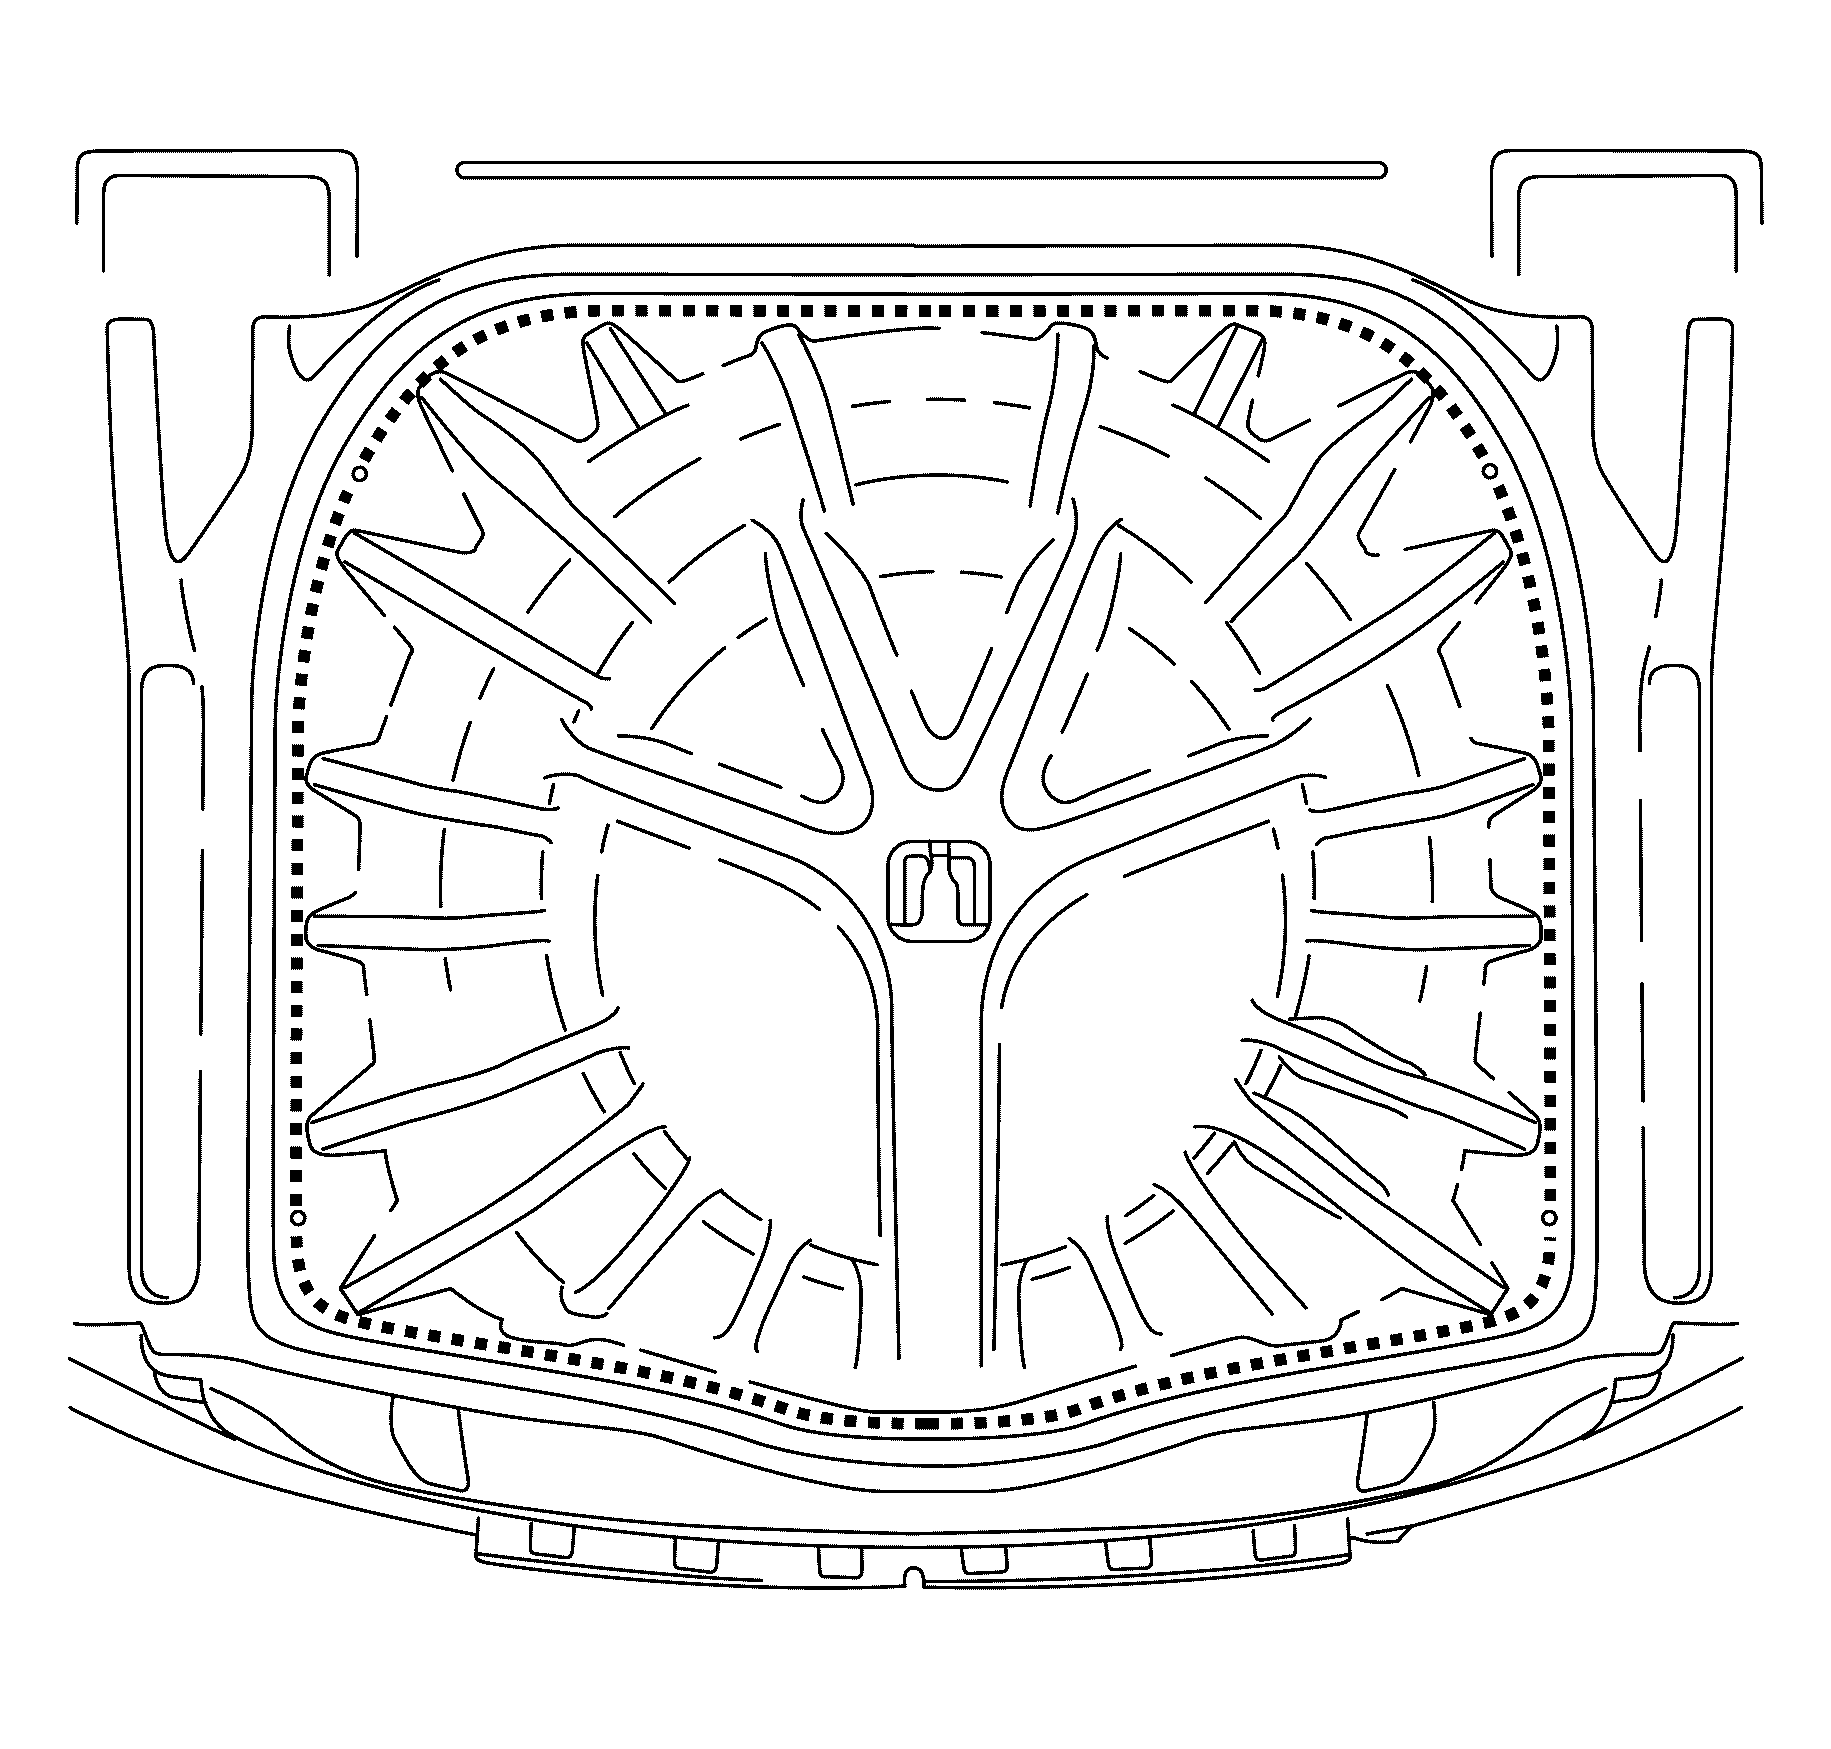
- Cut along the spare wheel panel component as shown with a suitable air saw.
- Remove the cut section of the spare wheel well panel component (1) from the vehicle.
- Install J-36020 (2) to the vehicle.
- Connect the end of the piano wire to the other handle of the J-36020 (2).
- Cut through the urethane bead around the spare wheel well compartment (4) to the rear compartment extension floor panel (3) with the aid of an assistant.
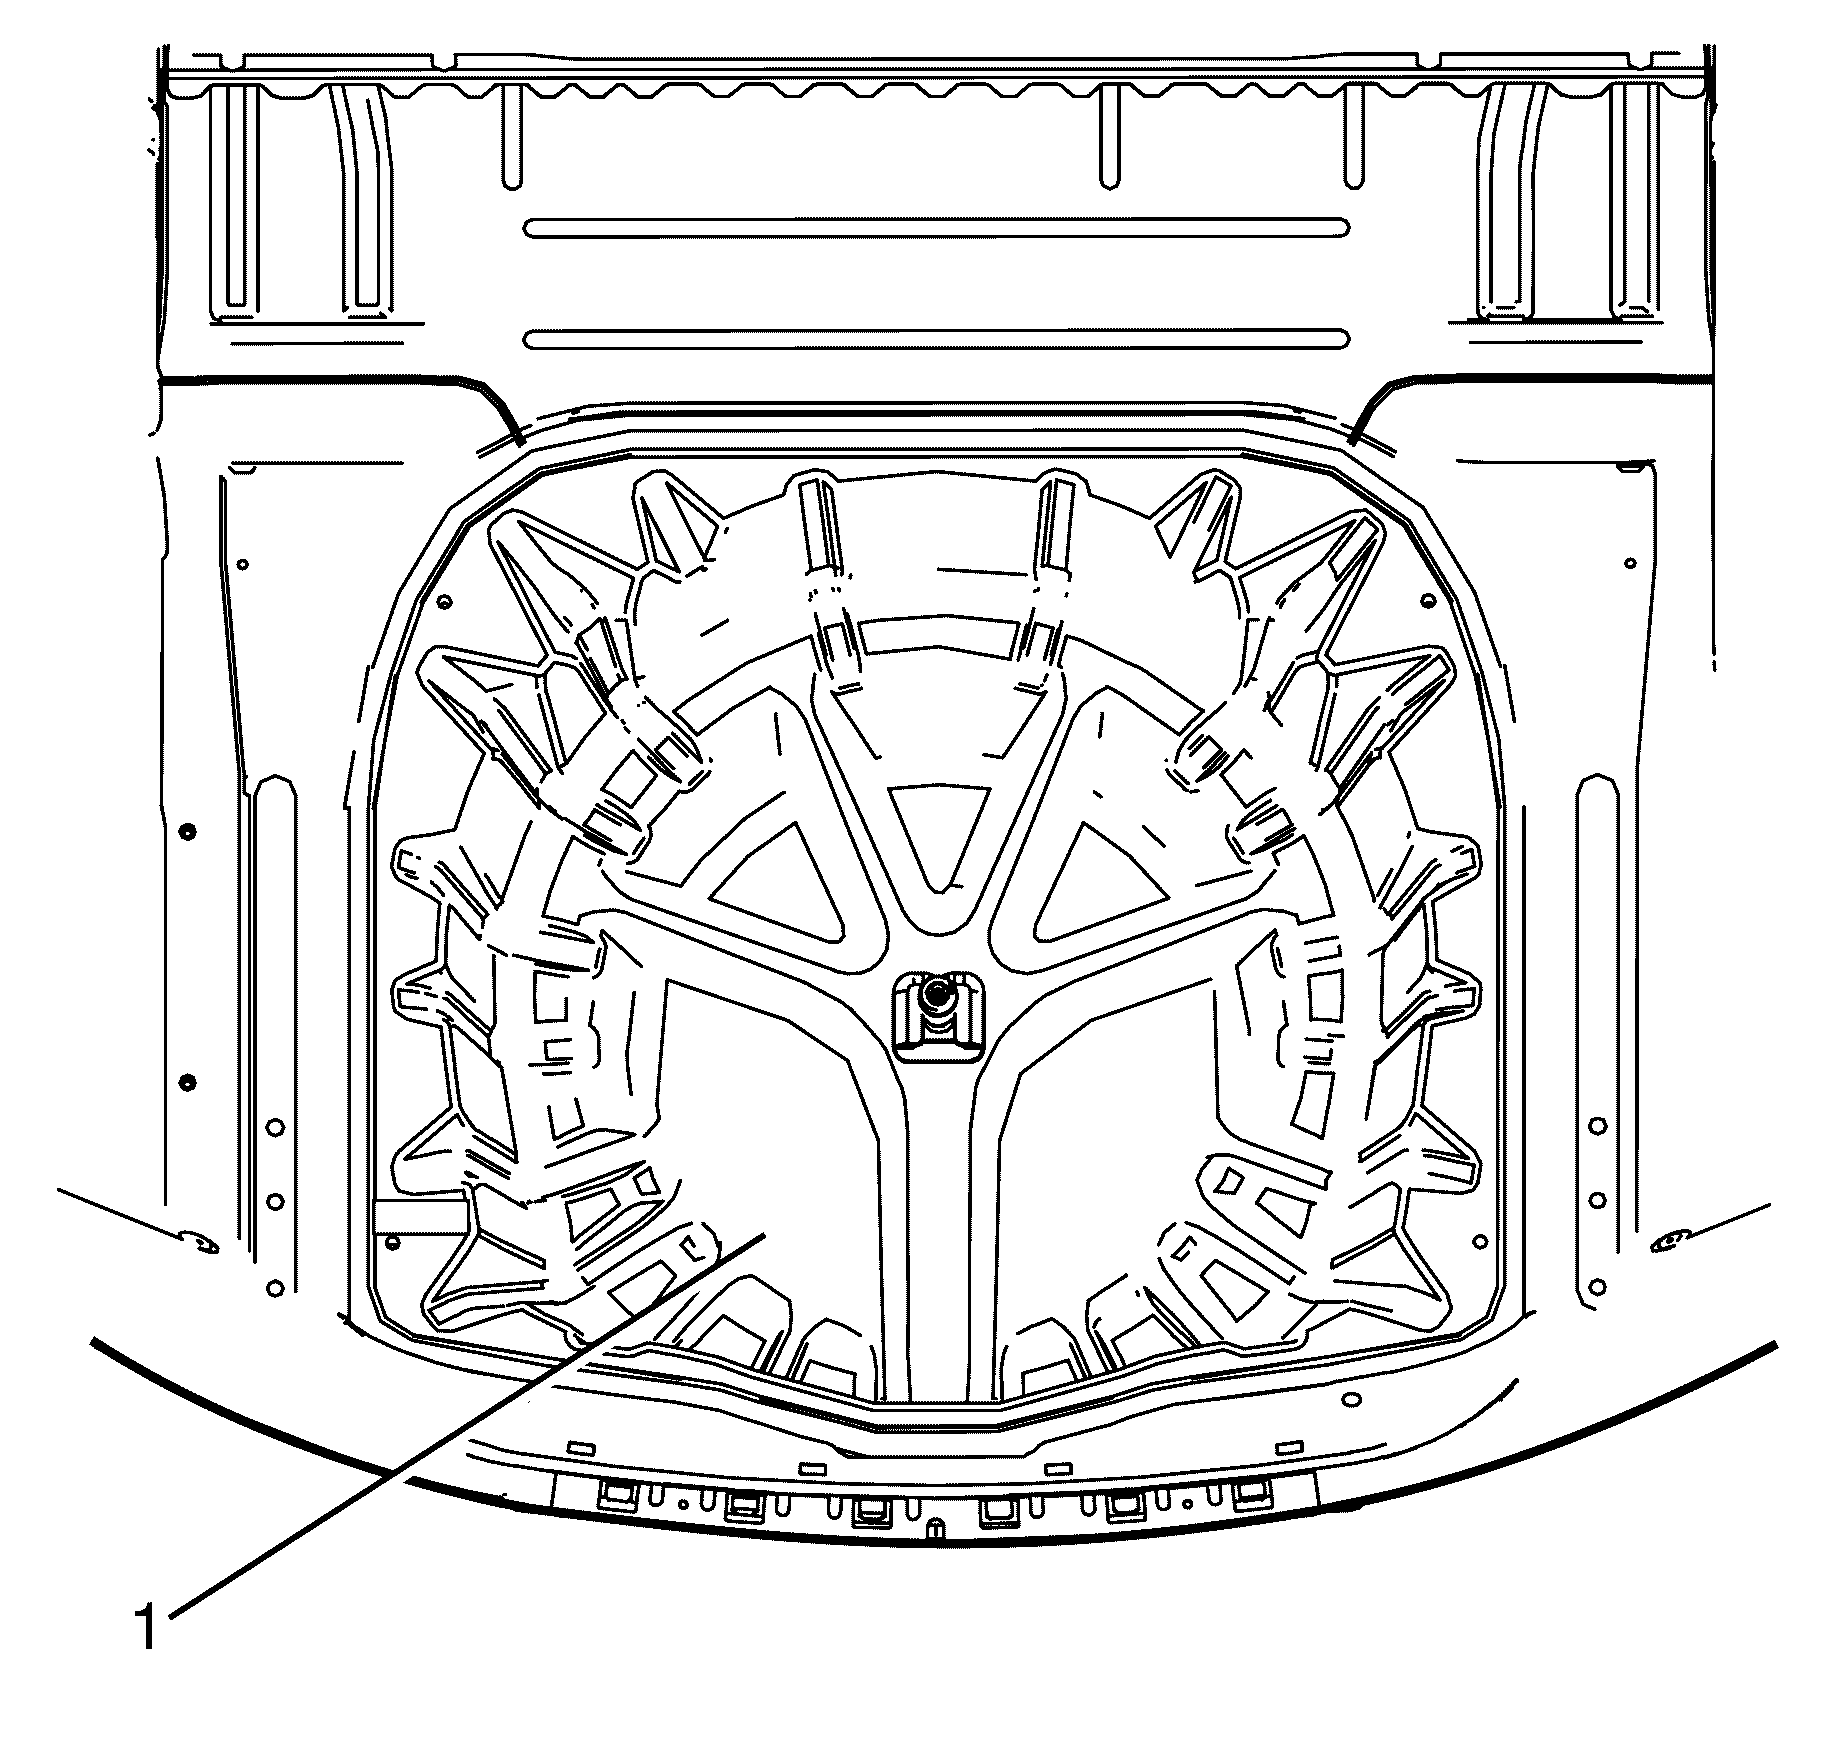
Important: The spare wheel well panel is a single use item. The spare wheel well panel must be discarded after use.
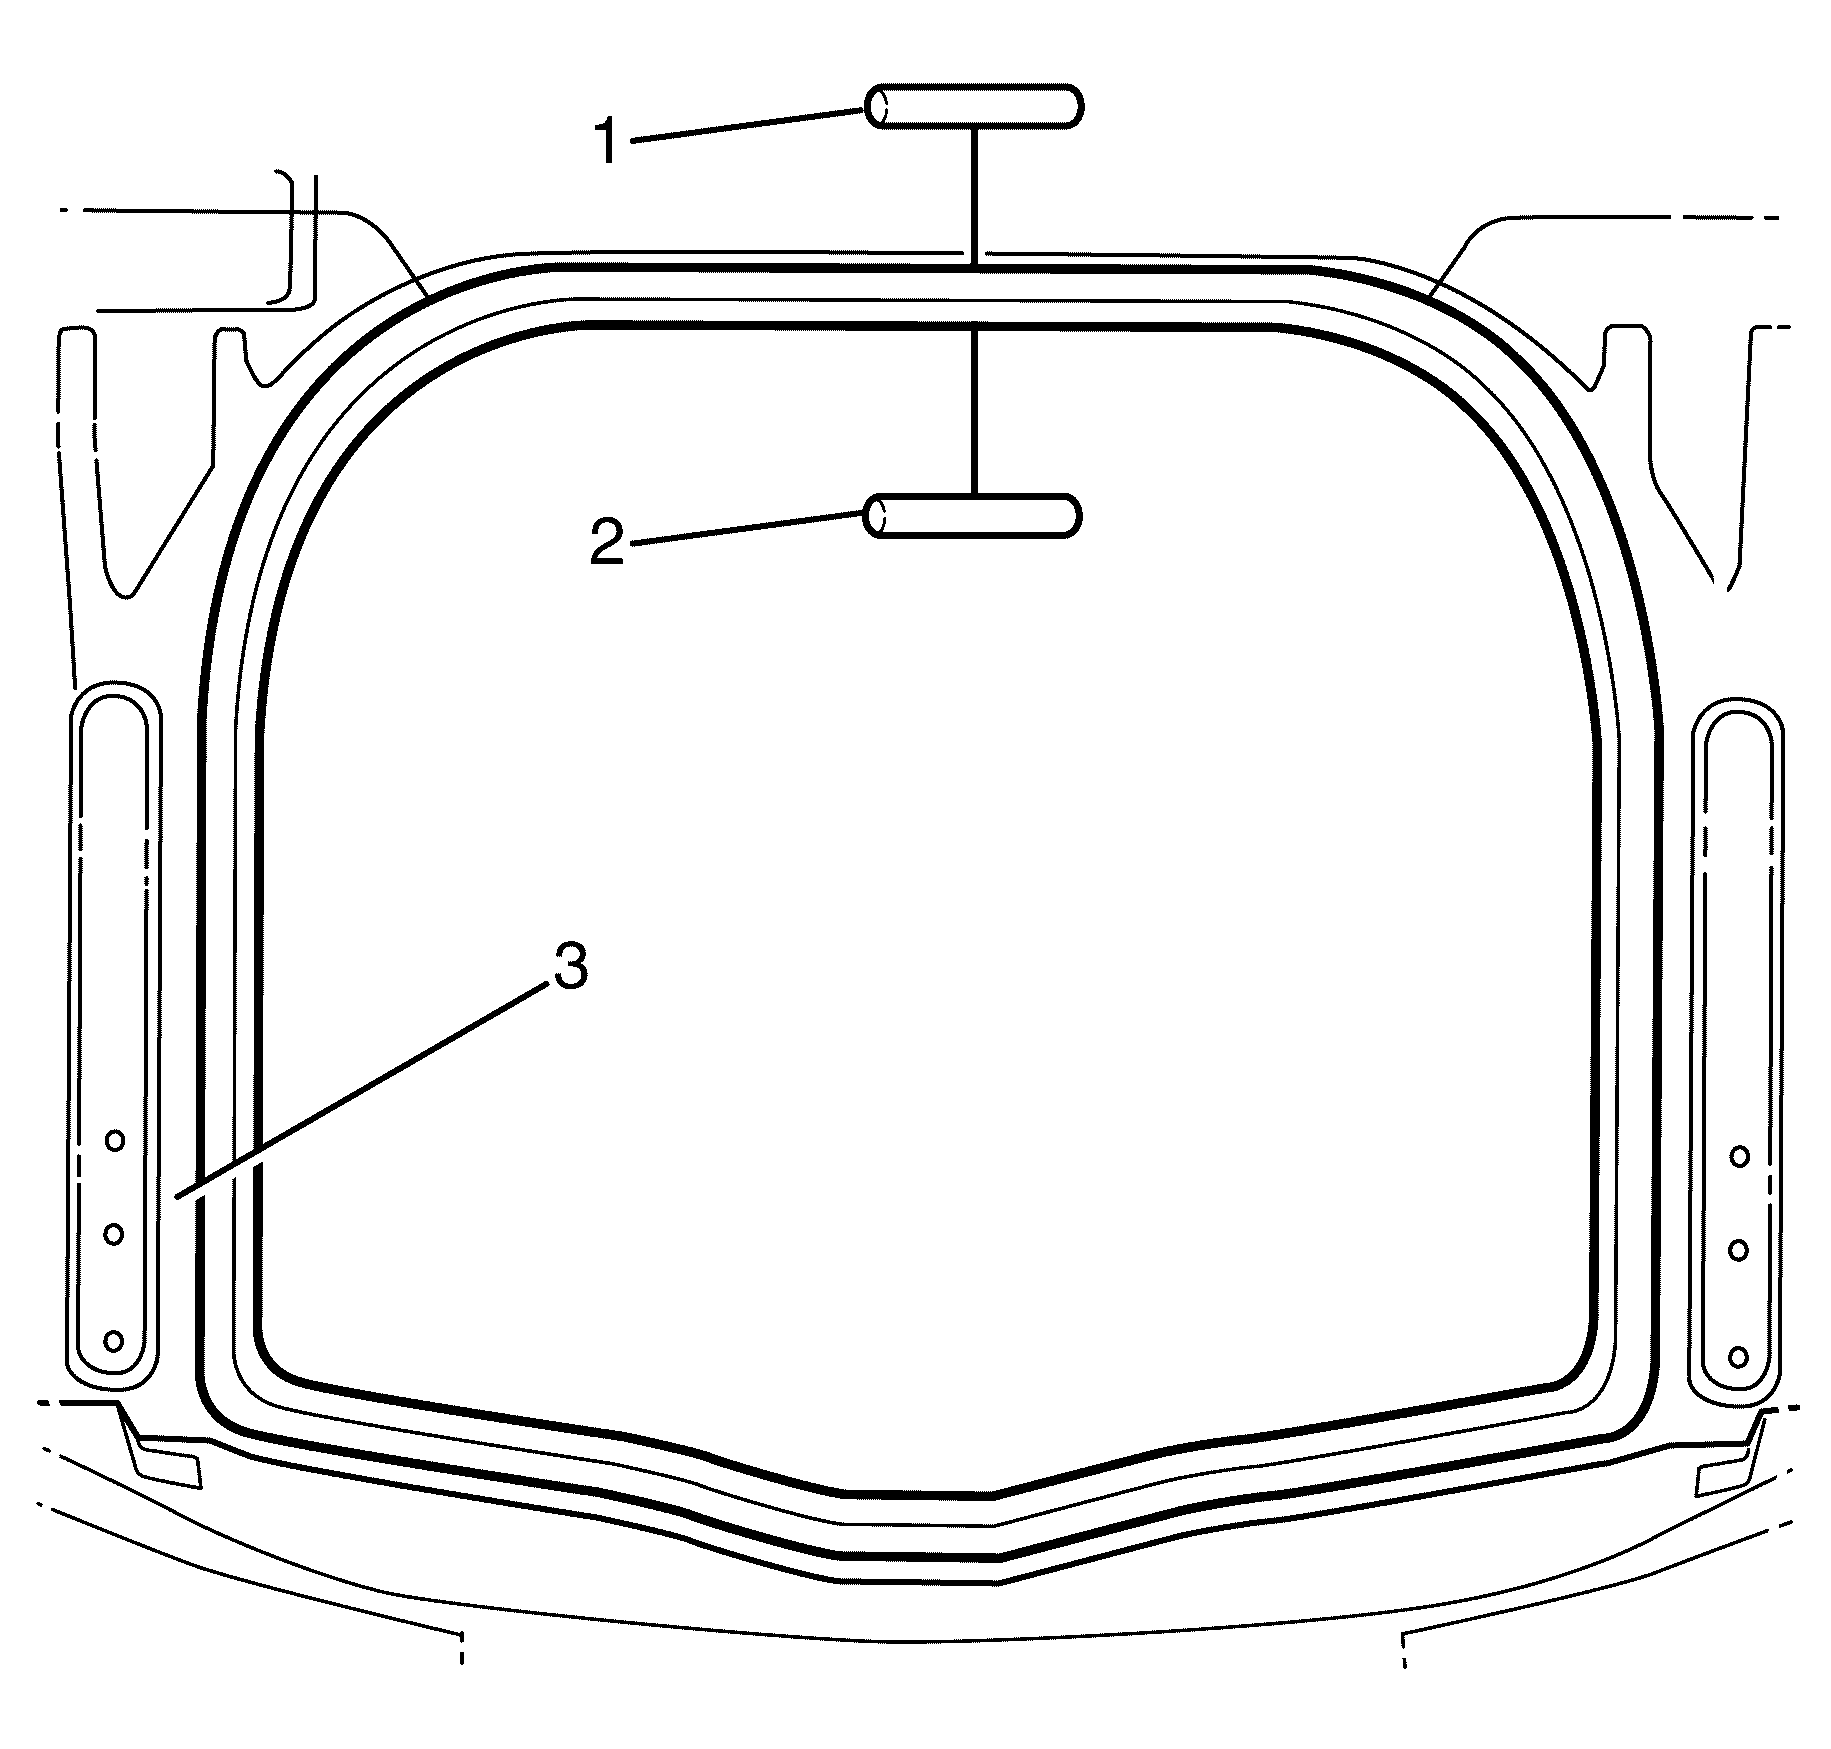
Important: Use a suitable tool to install the piano wire from J-36020 (2) through the urethane at the corner of the spare wheel well compartment (1).
Important: Keep the outside handle of J-36020 (1) against the rear compartment extension floor panel (3) and cycle the full length of the piano wire to prevent heat build up.
Discard the remaining section of the spare wheel well panel.
Installation Procedure
- Clean the rear compartment panels of all adhesive (1) using a suitable cleaning solution.
- Test fit the spare wheel well panel to the rear compartment panels to identify any gaps around the rear compartment panels.
- Apply a bead of urethane GMW3041 or equivalent approximately 10 millimetres in diameter to the rear compartment panels (1).
- If any gaps were identified in the test fitment, apply extra adhesive to the area.
- Carefully install the NEW spare wheel well panel (1) to the vehicle to avoid smearing of the urethane.
- Apply one kilogram weights (1) to the edges of the spare wheel well panel to aid in adhesion to the rear compartment panels
- Install the rear bumper fascia. Refer to Rear Bumper Fascia Replacement.
- Install the spare wheel and emergency kit to the rear compartment.
- Install the rear compartment floor carpet. Refer to Rear Compartment Floor Panel Carpet Replacement.
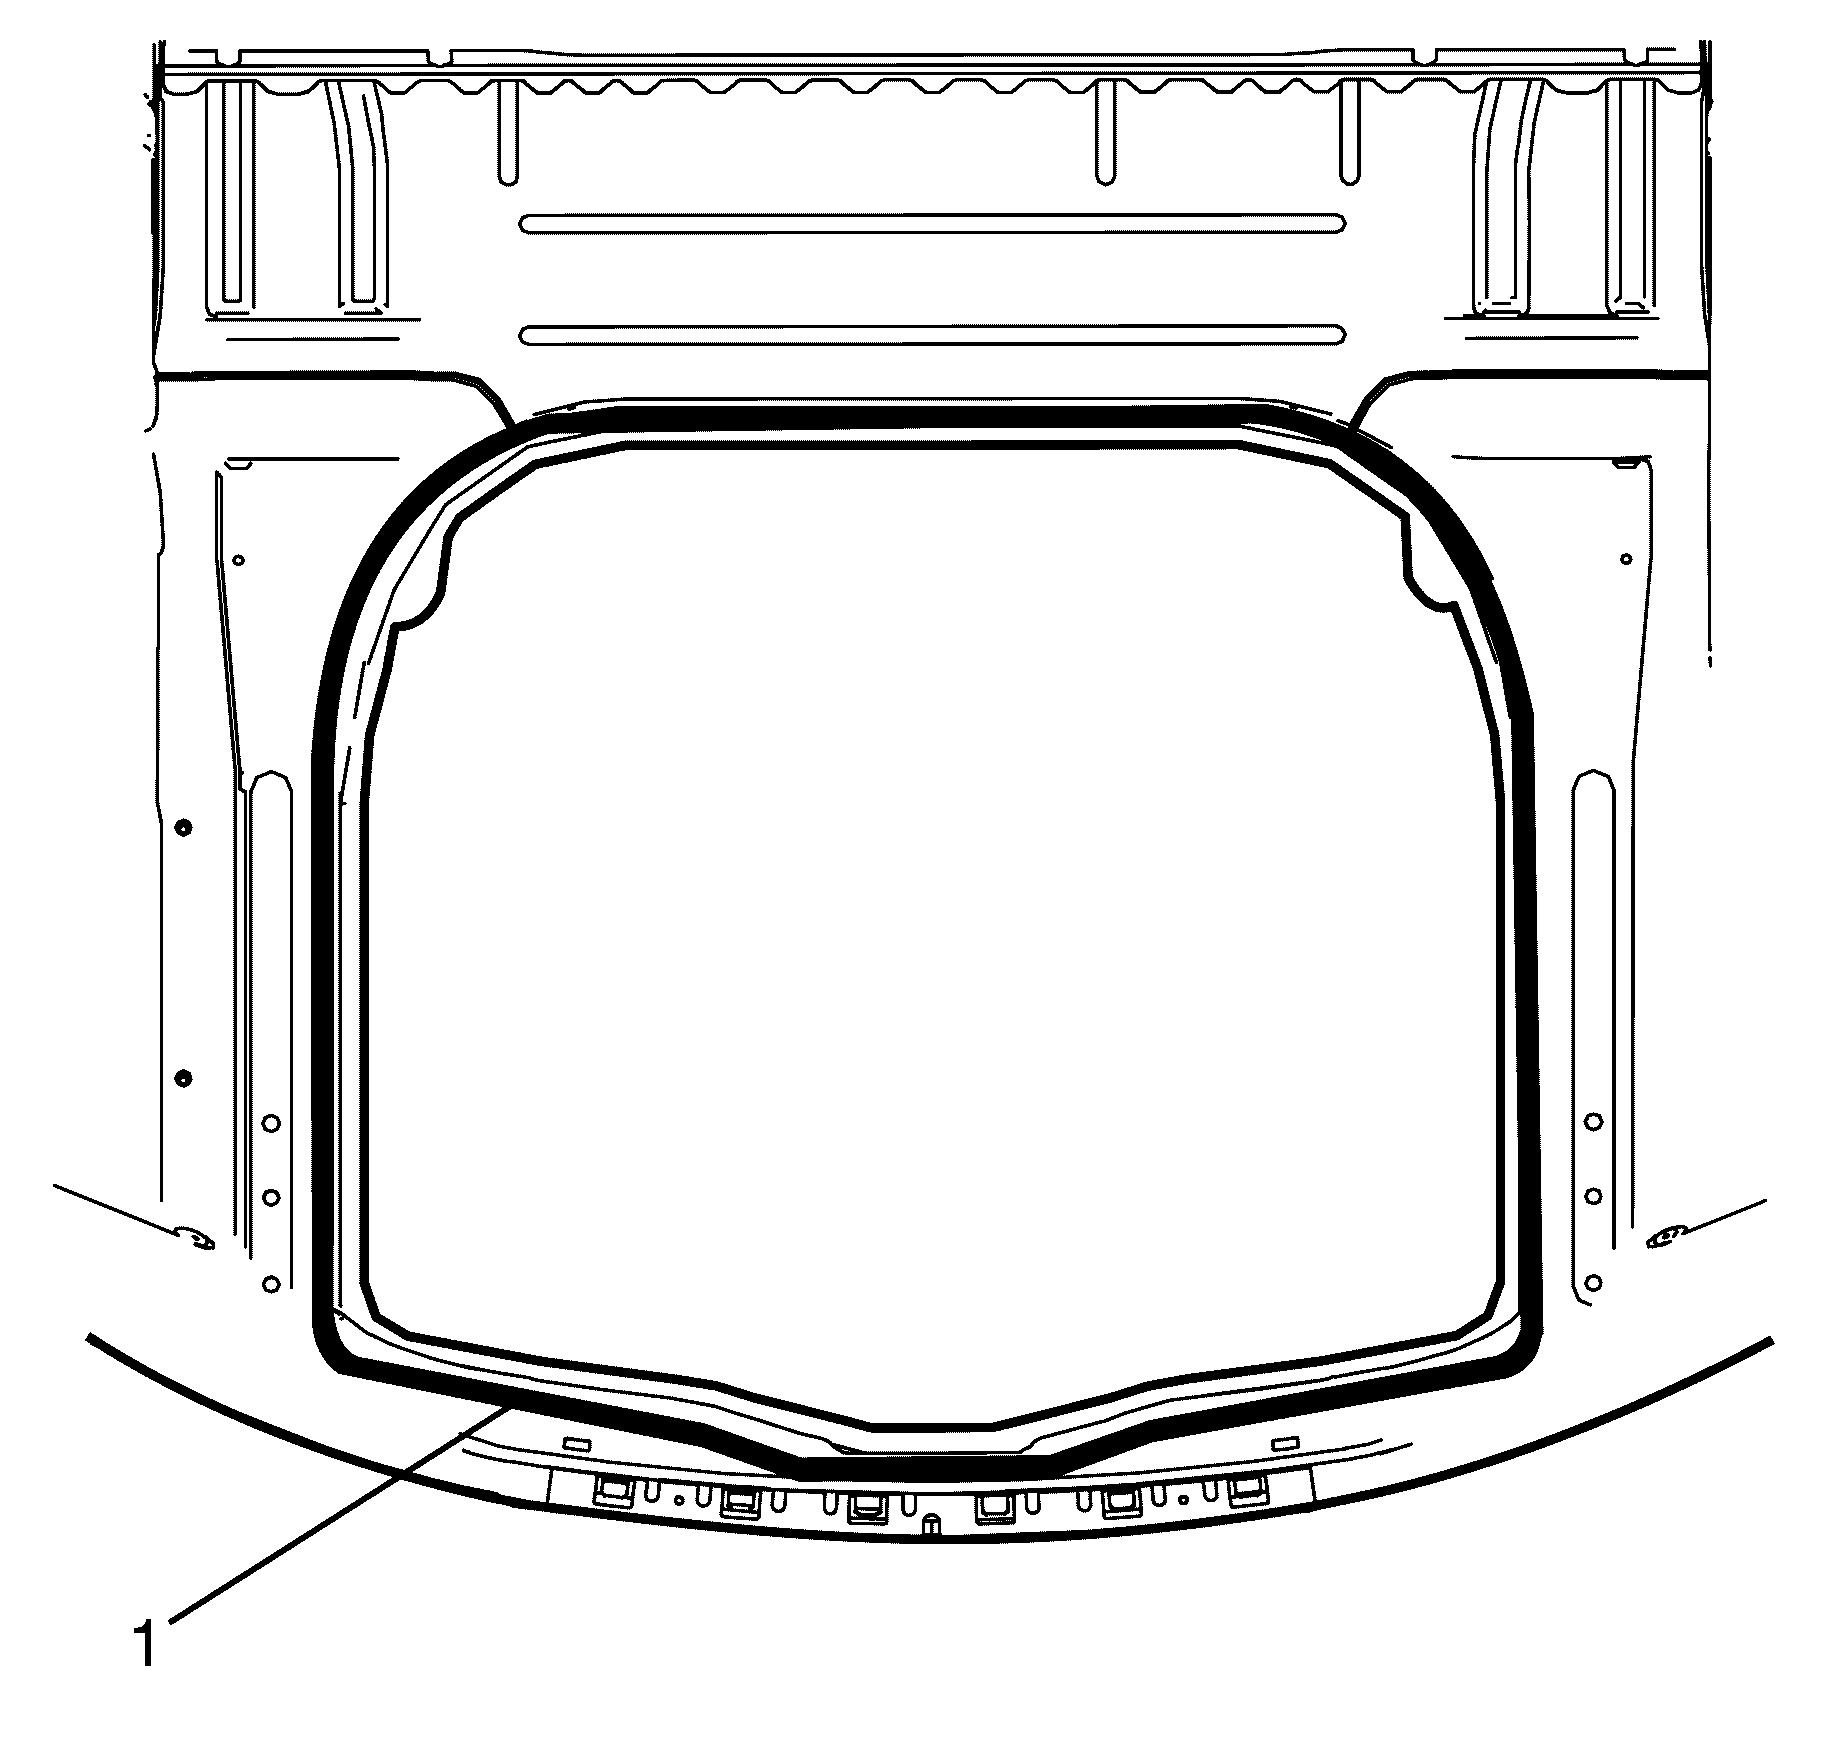
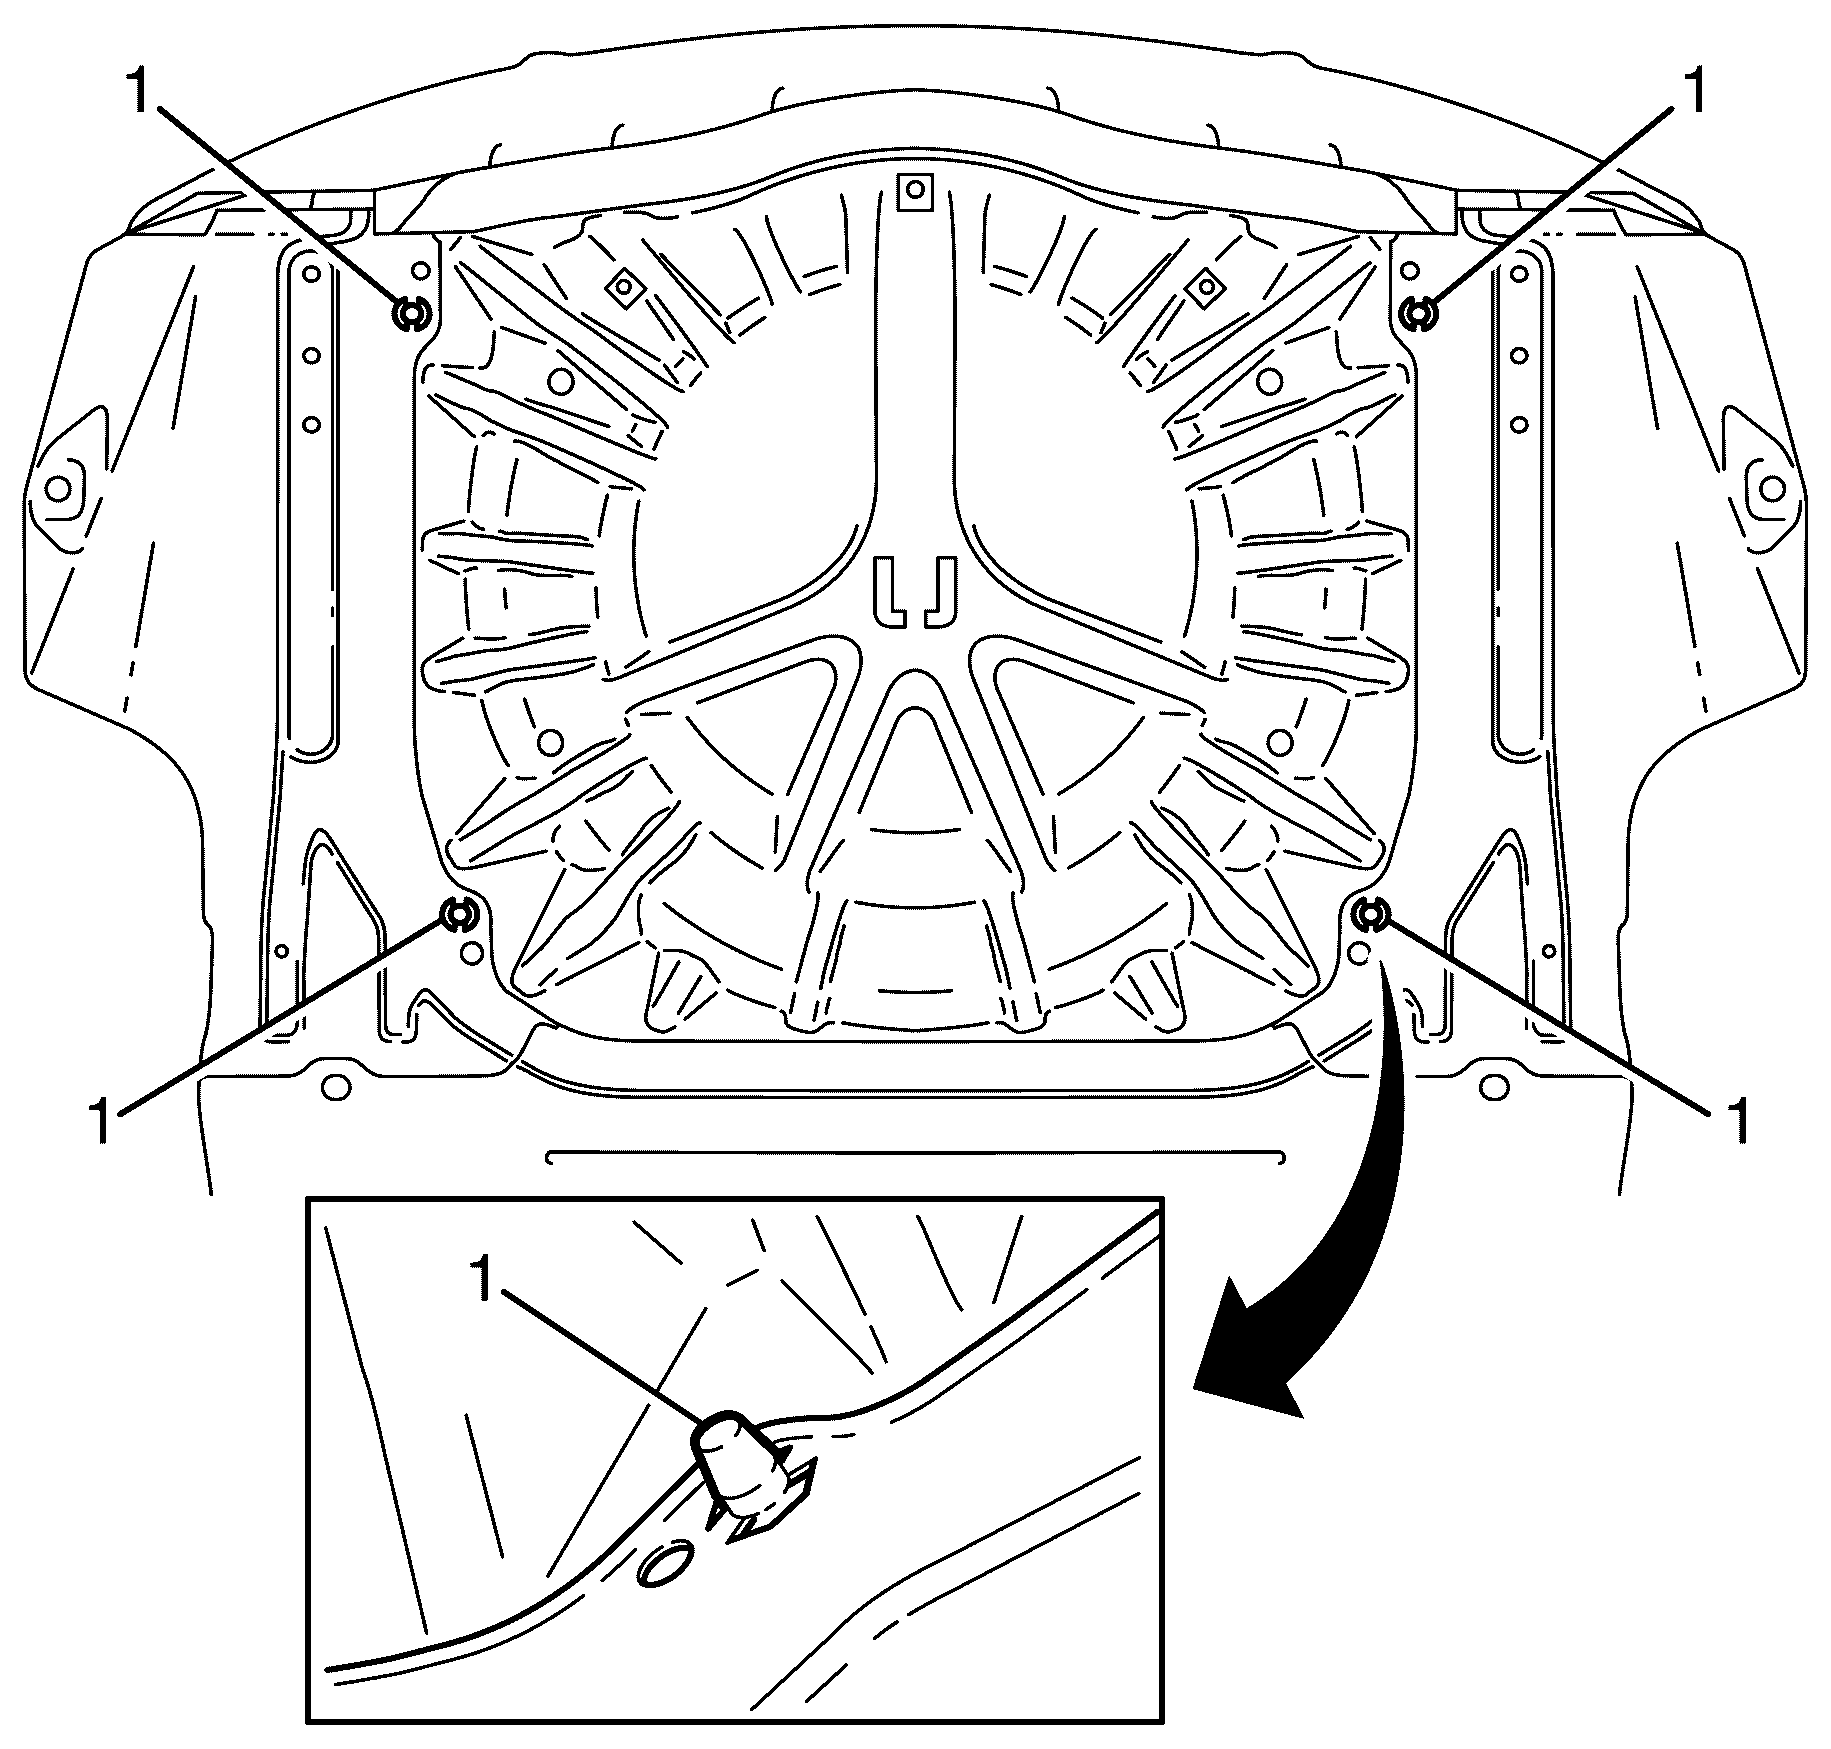
Important: The Adhesive flange on the spare wheel well panel must not be handled with bare hands. This could lead to contamination of the primer on the spare wheel well panel flange.
Important: Make sure that the spare wheel well panel datum pins (1) are properly located in the rear compartment panels.

Important: Make sure that the rear compartment panels and the spare wheel well panel are free of any contaminants
Important: The adhesive begins to bond after 30 minutes, during this time fitment of the spare wheel well panel must be fitted to the rear compartment panels

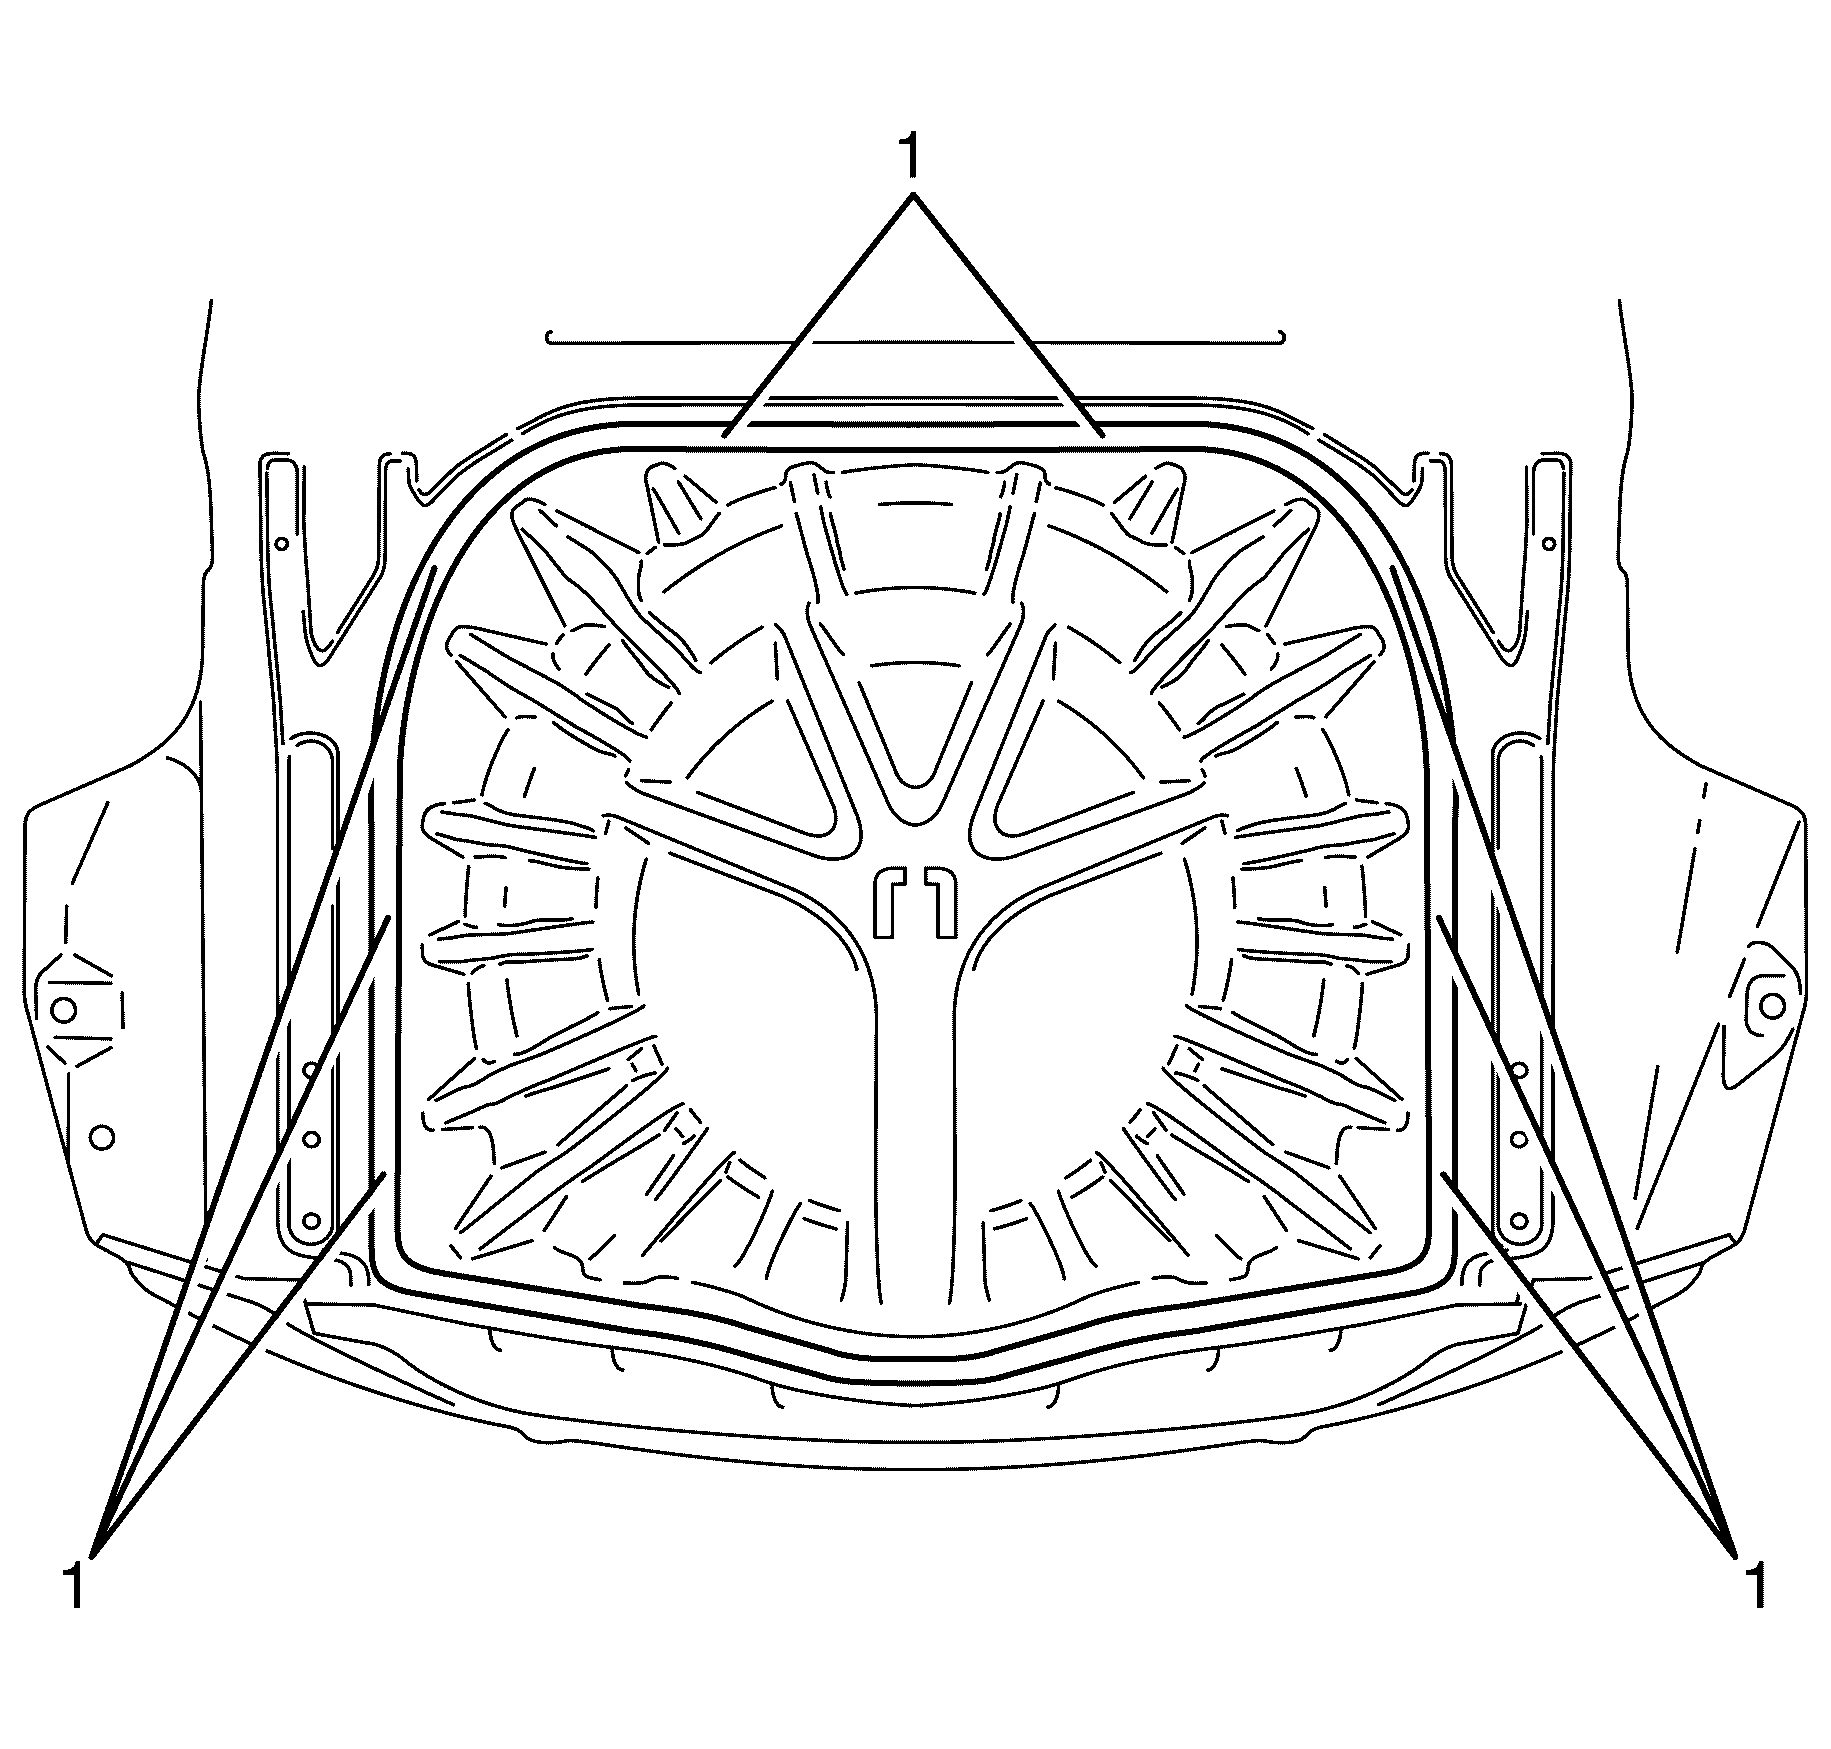
Important: Allow adhesive to cure for 8 hours before fitting any other components to the spare wheel well panel.
Important: Do NOT drive the vehicle for 24 hours after fitting the spare wheel well panel to allow the adhesive to fully cure.
Spare Wheel Carrier Replacement Sportwagon
Tools Required
J-36020 Stationary Glass Removal Tool.
Removal Procedure
- Remove the rear compartment floor panel carpet. Refer to Rear Compartment Floor Panel Carpet Replacement.
- Remove the load floor stationary panel carpet. Refer to Load Floor Stationary Panel Carpet Replacement.
- Remove the load floor front panel carpet. Refer to Load Floor Front Panel Carpet Replacement.
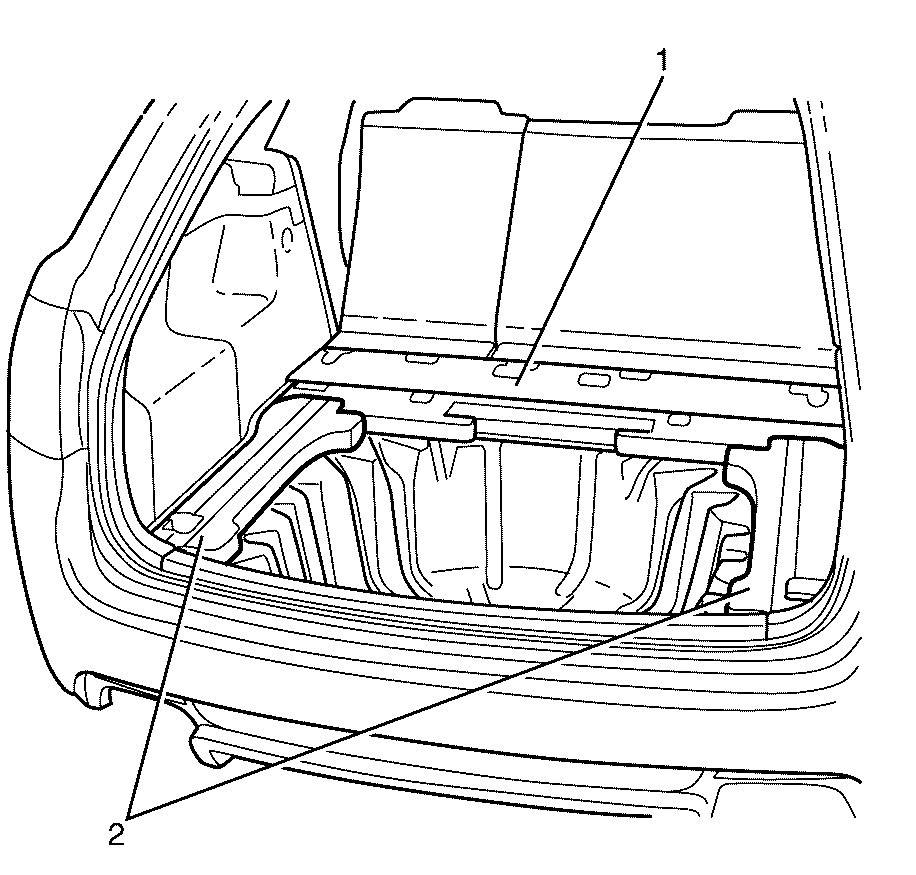
- Remove the rear compartment floor panel carpet exterior support foams (2).
- Remove the rear compartment floor panel centre support foam (1).
- Remove the spare wheel and emergency kit from the rear compartment.
- Remove the rear bumper fascia. Refer to Rear Bumper Fascia Replacement.
- Cut along the spare wheel panel component as shown with a suitable air saw.
- Remove the cut section of the spare wheel well panel component (1) from the vehicle.
- Install J-36020 (2) to the vehicle.
- Connect the end of the piano wire to the other handle of the J-36020 (2).
- Cut through the urethane bead around the spare wheel well panel (4) to the rear compartment floor panel (3) with the aid of an assistant.
Caution: In order to reduce
the risk of personal injury when exposed to toxic fumes while grinding, cutting, or
applying repair material on any type of sheet molded compound or RIM rigid plastic,
observe the following guidelines:
• Work in a properly ventilated area • Apply protective cream to any exposed skin • Remove any mixture that comes into contact with skin • Wash skin with cold water to remove glass and resin dust • Use a sander with a vacuum attachment • Follow the repair material manufacturer's instructions • An approved respirator, or air supplied respirator • Eye protection • Rubber gloves • Earplugs • Protective clothing

Important: Take care when cutting to avoid damage to adjacent panels and other parts of the vehicle.

Important: The spare wheel well panel is a single use item. The spare wheel well panel must be discarded after use.

Important: Stationary glass removal tool J-36020 (2) is used to cut the urethane adhesive between the remaining part of the spare wheel carrier and the vehicle body. Use a suitable tool to install the piano wire from J-36020 (2) through the urethane at the corner of the spare wheel well compartment (1).
Important: Keep the outside handle of the J-36020 (1) against the rear compartment floor panel (3) and cycle the full length of the piano wire to prevent heat build up.
Discard the remaining section of the spare wheel well panel.
Installation Procedure
- Clean the rear compartment panels of all adhesive (1) using a suitable cleaning solution.
- Test fit the spare wheel well panel to the rear compartment panels to identify and rectify any gaps around the rear compartment panels.
- Apply a continuous bead of urethane GMW3041 (1) or equivalent approximately 10 millimetres in diameter to the underside of the flange on the spare wheel carrier (2). The adhesive bead should follow the centre of the channel on this flange.
- Carefully install the NEW spare wheel well panel (1) to the vehicle to avoid smearing of the urethane. Ensure that there are no gaps between the spare wheel carrier and rear compartment panels.
- Apply one kilogram weights (1) to the edges of the spare wheel well panel to aid in adhesion to the rear compartment panels.
- Install the rear bumper fascia. Refer to Rear Bumper Fascia Replacement.
- Install the spare wheel and emergency kit to the rear compartment.
- Install the rear compartment floor panel centre support foam (1).
- Install the rear compartment floor panel carpet exterior support foams (2).
- Install the load floor front panel carpet. Refer to Load Floor Front Panel Carpet Replacement.
- Install the load floor stationary panel carpet. Refer to Load Floor Stationary Panel Carpet Replacement.
- Install the rear compartment floor panel carpet. Refer to Rear Compartment Floor Panel Carpet Replacement.


Important: The Adhesive flange on the spare wheel well panel must not be handled with bare hands. This could lead to contamination of the primer on the spare wheel well panel flange.
Important: Make sure that the spare wheel well panel datum pins (1) are properly located in the rear compartment panels.
Important: Make sure that the rear compartment panels and the spare wheel well panel are free of any contaminants.

Important: The adhesive begins to bond after 30 minutes. The spare wheel well panel must be fitted within this time.

Important: Allow adhesive to cure for 8 hours before fitting any other components to the spare wheel well panel.
Important: DO NOT drive the vehicle for 24 hours after fitting the spare wheel well panel to allow the adhesive to fully cure.

