Battery Tray Replacement Sportwagon
Removal Procedure
- Open the liftgate.
- Install a suitable liftgate brace to the vehicle.
- Remove the rear compartment side trim panel access hole cover. Refer to Rear Compartment Side Trim Panel Access Hole Cover Replacement.
- Disconnect the battery negative cable. Refer to Battery Negative Cable Disconnection and Connection.
- Remove the battery. Refer to Battery Replacement.
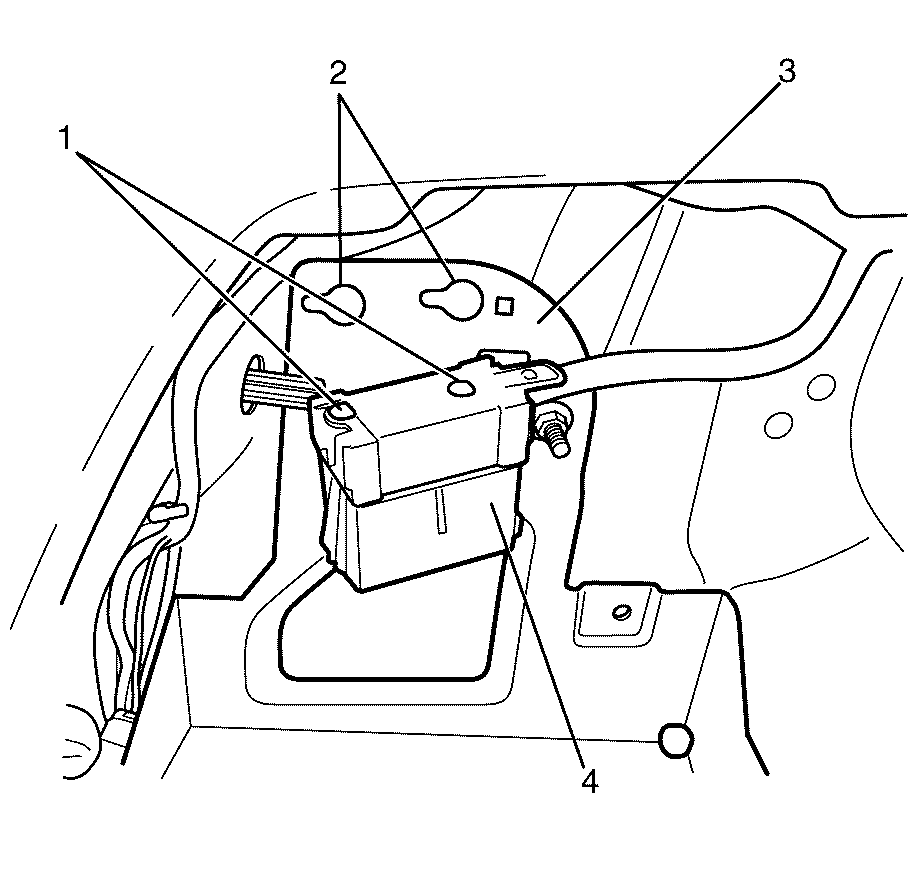
- Detach the fuse box (4) from the battery tray (3).
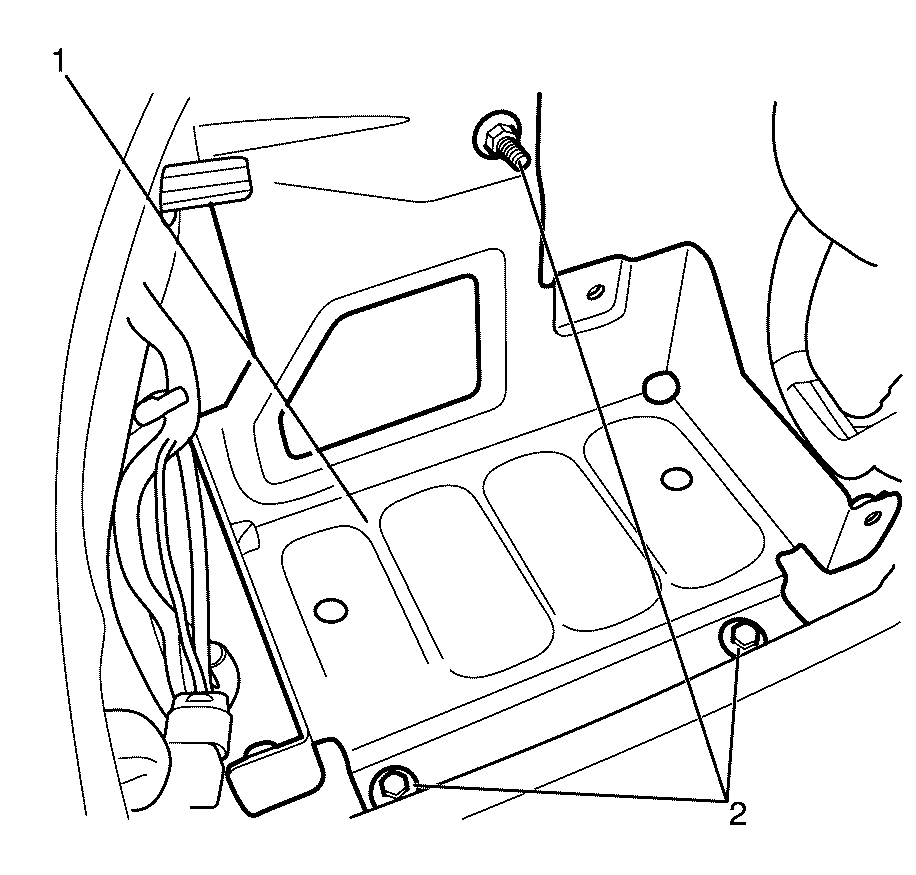
- Remove the battery tray to chassis retaining bolts (2).
- Remove the battery tray (1) from the vehicle.
Important: When a suitable hold open device is being removed or installed, provide alternate support to avoid the possibility of damage to the vehicle or personal injury.

Important: To detach the fuse box, the locking tabs (1) must be released, push the fuse box (4) towards the front of the vehicle to detach from the battery tray (3).

Installation Procedure
- Install the battery tray (1) to the vehicle.
- Install the battery tray to chassis retaining bolts (2).
- Attach the fuse box (4) to the battery tray (3).
- Install the battery. Refer to Battery Replacement.
- Install the rear compartment side trim panel access hole cover. Refer to Rear Compartment Side Trim Panel Access Hole Cover Replacement.
- Remove the suitable liftgate brace to the vehicle.
- Close the liftgate.

Notice: Refer to Fastener Notice in the Preface section.
Tighten
Tighten the nut to 25 N·m (18 lb ft).

Important: The fuse box locking tabs (1) must be located correctly into the battery tray (3), push the fuse box towards the rear of the vehicle to lock the fuse box (4) into place.
Important: When a suitable hold open device is being removed or installed, provide alternate support to avoid the possibility of damage to the vehicle or personal injury.
Battery Tray Replacement Sedan
Removal Procedure
- Remove the cargo area centre carpet. Refer to Rear Compartment Floor Panel Carpet Replacement
- Remove the left-hand side cargo area trim. Refer to Rear Compartment Side Trim Panel Replacement
- Disconnect the battery negative cable. Refer to Battery Negative Cable Disconnection and Connection.
- Remove the battery refer to Battery Replacement.
- Remove the fuse box from the battery tray to allow access to the retaining bolts.
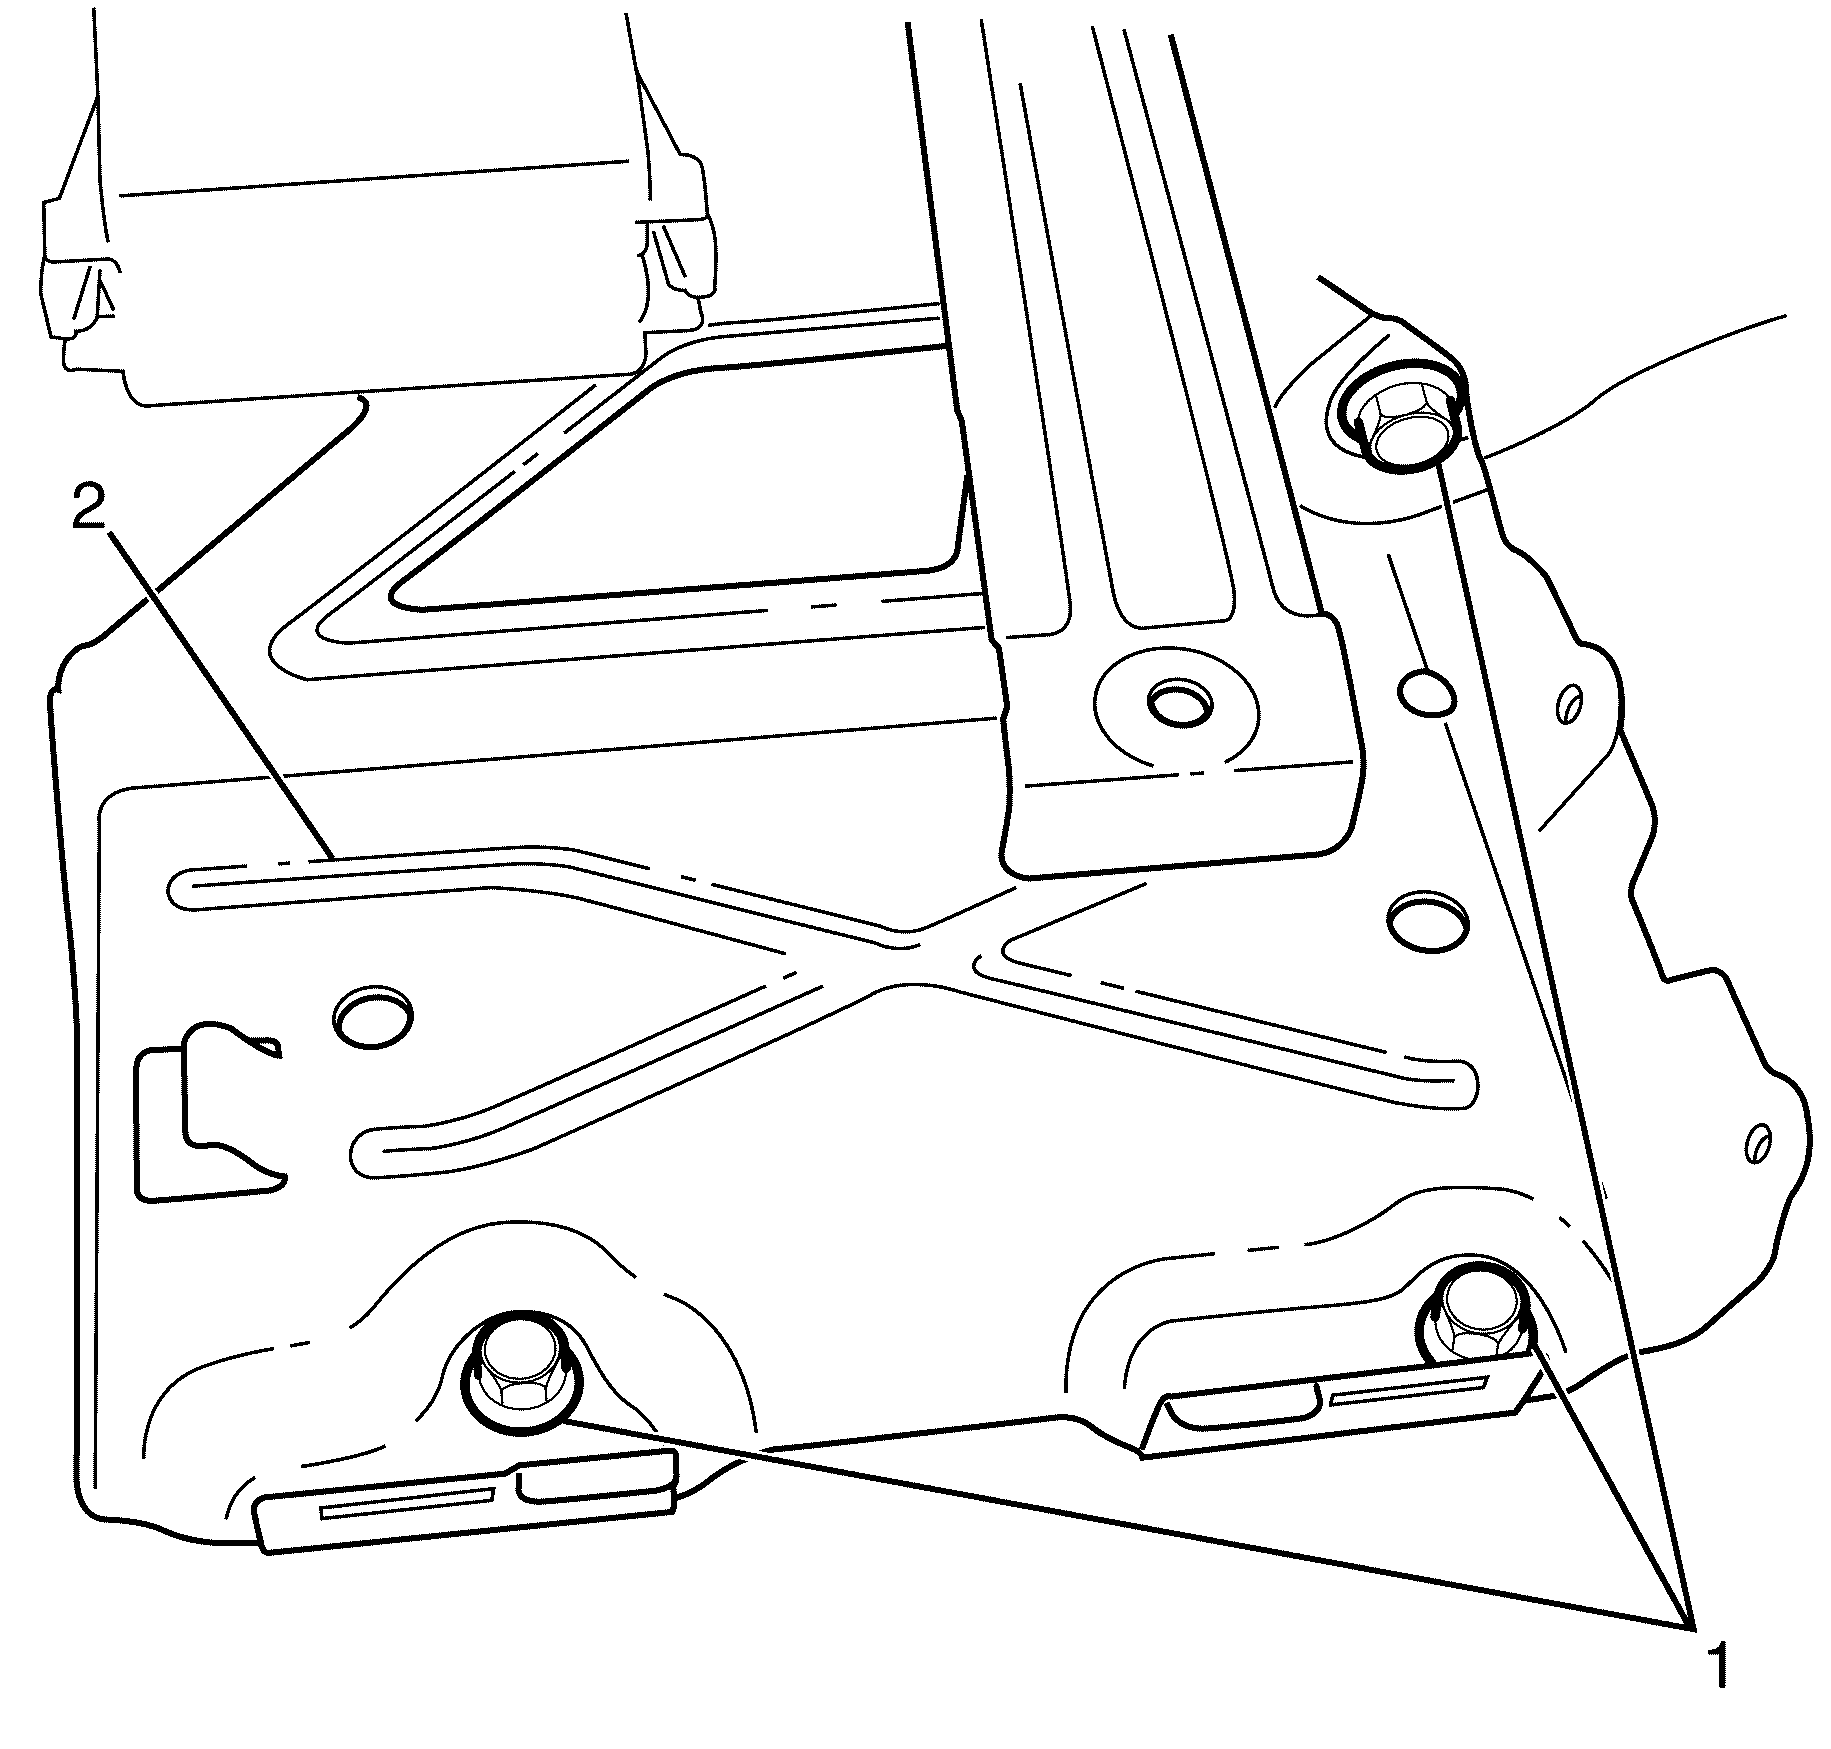
- Remove the battery tray to chassis mounting bolts (1).
- Remove the battery tray from the vehicle (2).
Caution: Refer to Battery Disconnect Caution in the Preface section.

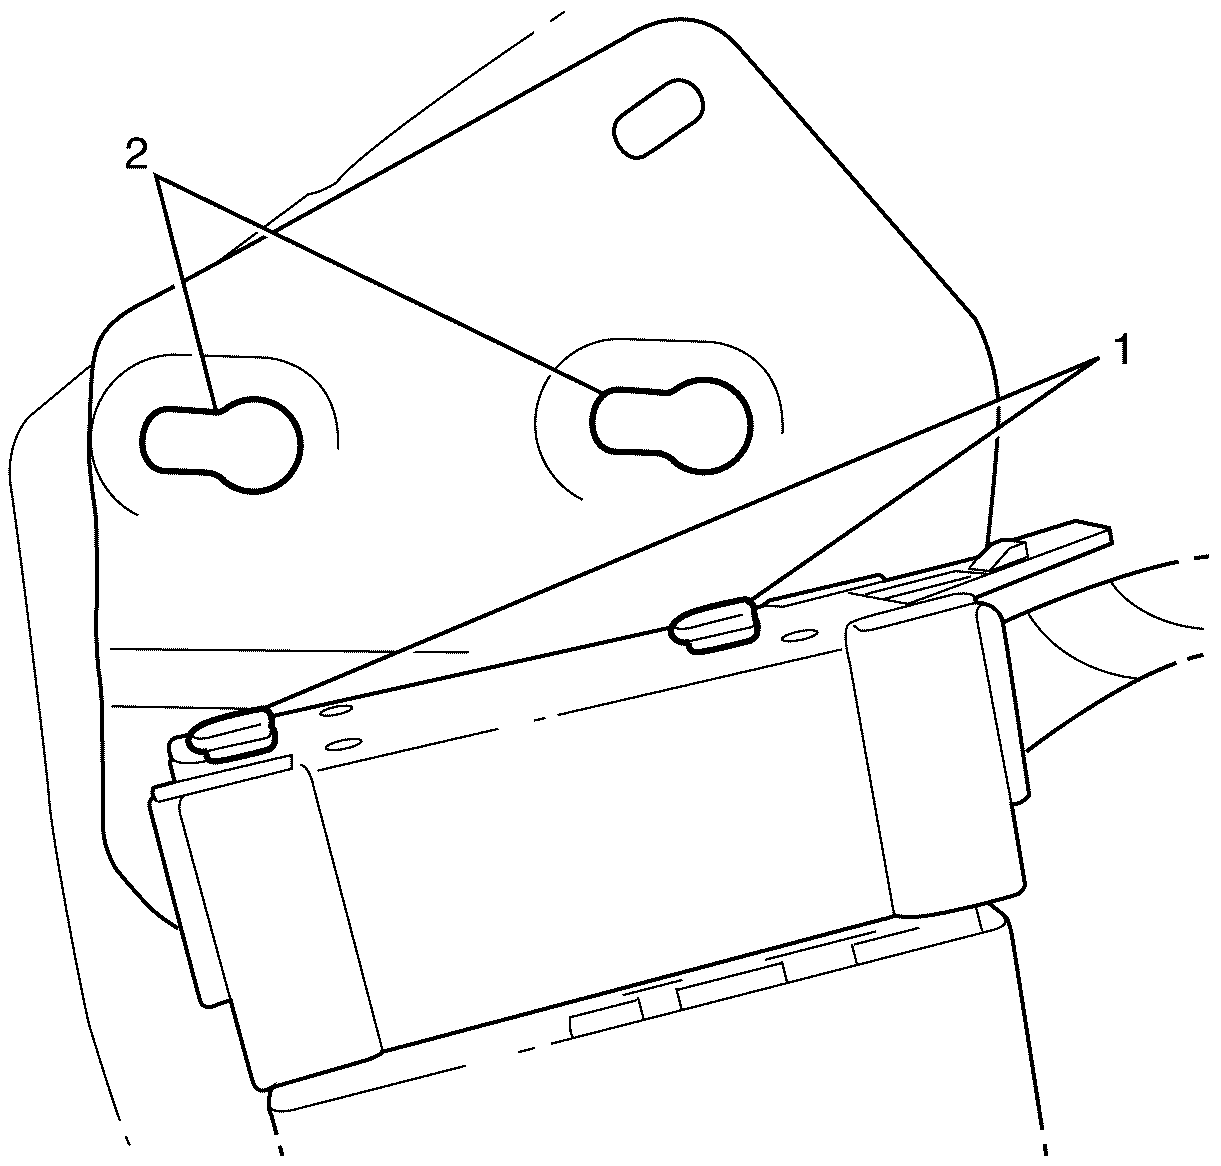
Important: To remove the fuse box, the locking tabs (1) must be released, push the fuse box towards the front of the vehicle to allow the fuse box to be released from the battery tray (2).

Installation Procedure
- Fit the battery tray to the vehicle (2).
- Fit the battery tray to chassis retaining bolts (1).
- Install the fuse box to the battery tray.
- Install the battery refer to Battery Replacement.
- Install the left-hand side cargo area trim. Refer to Rear Compartment Side Trim Panel Replacement
- Install the cargo area centre carpet.. Refer to Rear Compartment Floor Panel Carpet Replacement

Notice: Refer to Fastener Notice in the Preface section.
Tighten
Tighten the bolts to 25 N·m (18 lb ft).

Important: The fuse box locking tabs (1) must be located correctly into the battery tray (2), push the fuse box towards the rear of the vehicle to lock the fuse box into place.
Caution: Refer to Battery Disconnect Caution in the Preface section.
