For 1990-2009 cars only
Removal Procedure
- Open the liftgate.
- Install a suitable liftgate brace to the vehicle.
- Remove the liftgate window side garnish moulding. Refer to Liftgate Window Side Garnish Molding Replacement.
- Remove the liftgate window upper garnish moulding. Refer to Liftgate Window Upper Garnish Molding Replacement.
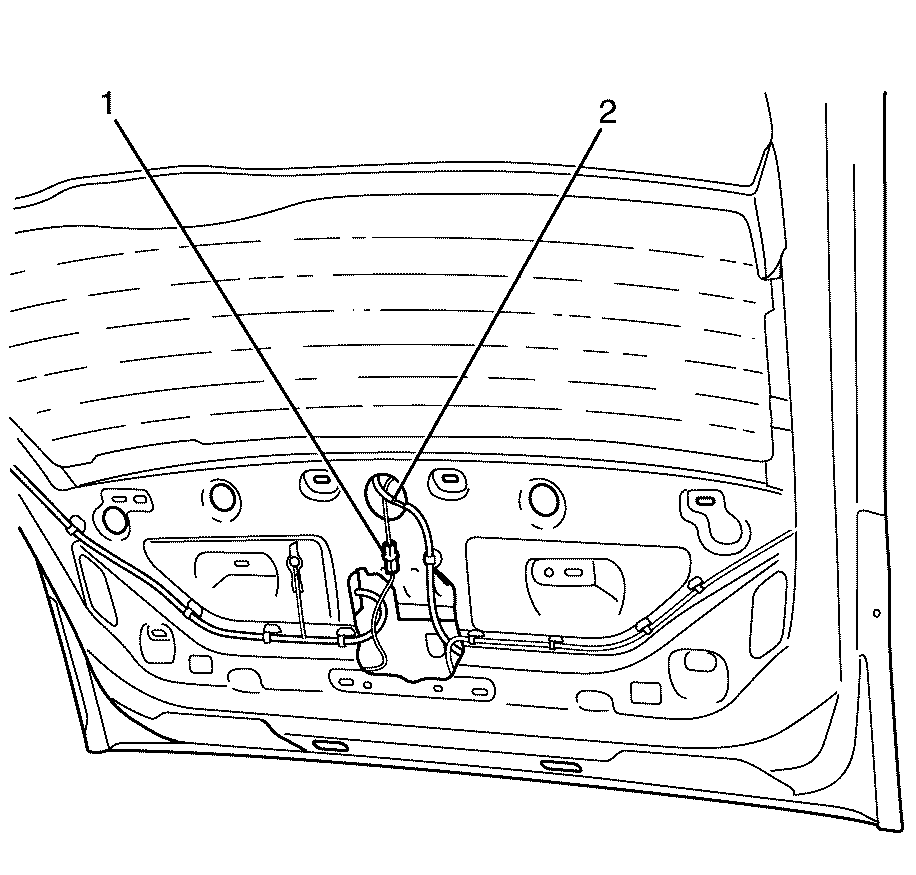
- Disconnect the high mounted stop lamp electrical connector (1) and detach from liftgate.
- Disconnect the rear window washer hose (2).
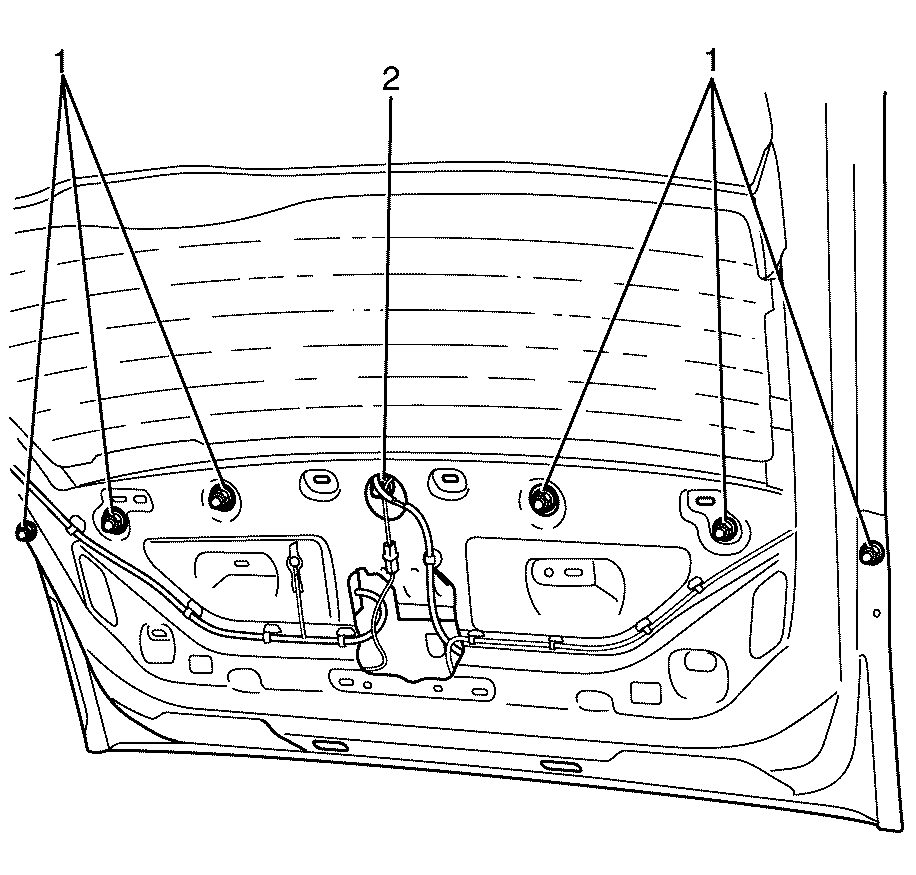
- Remove the liftgate upper moulding to body grommet (2).
- Remove the liftgate upper moulding to body retaining nuts (1).
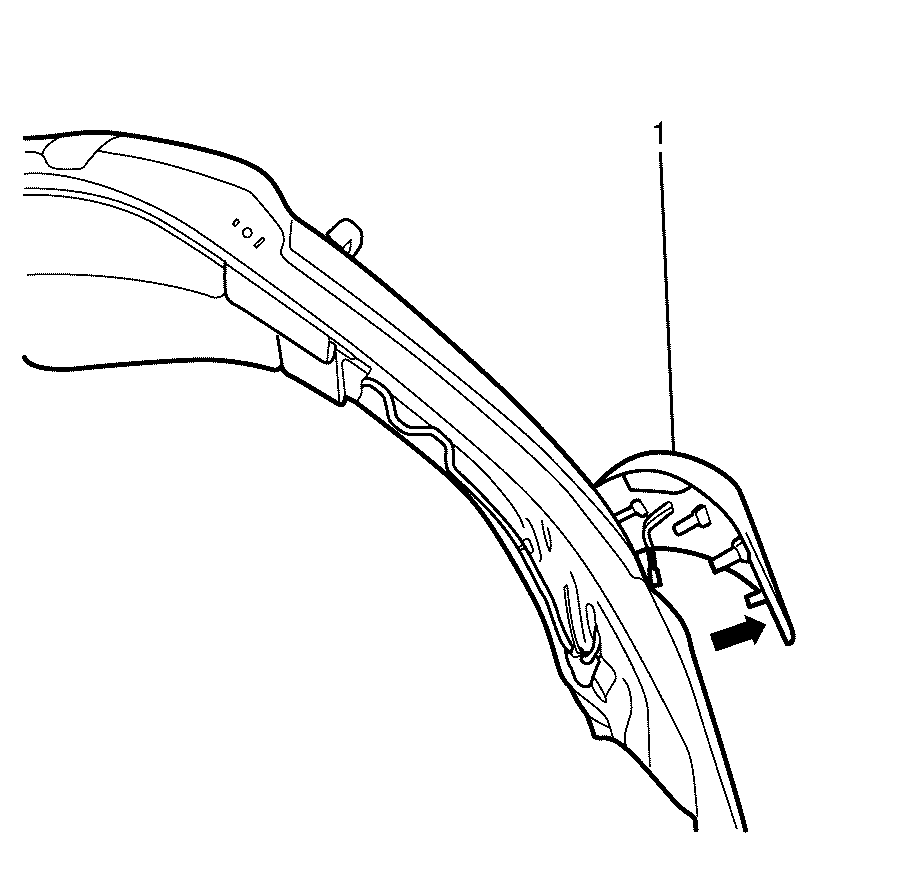
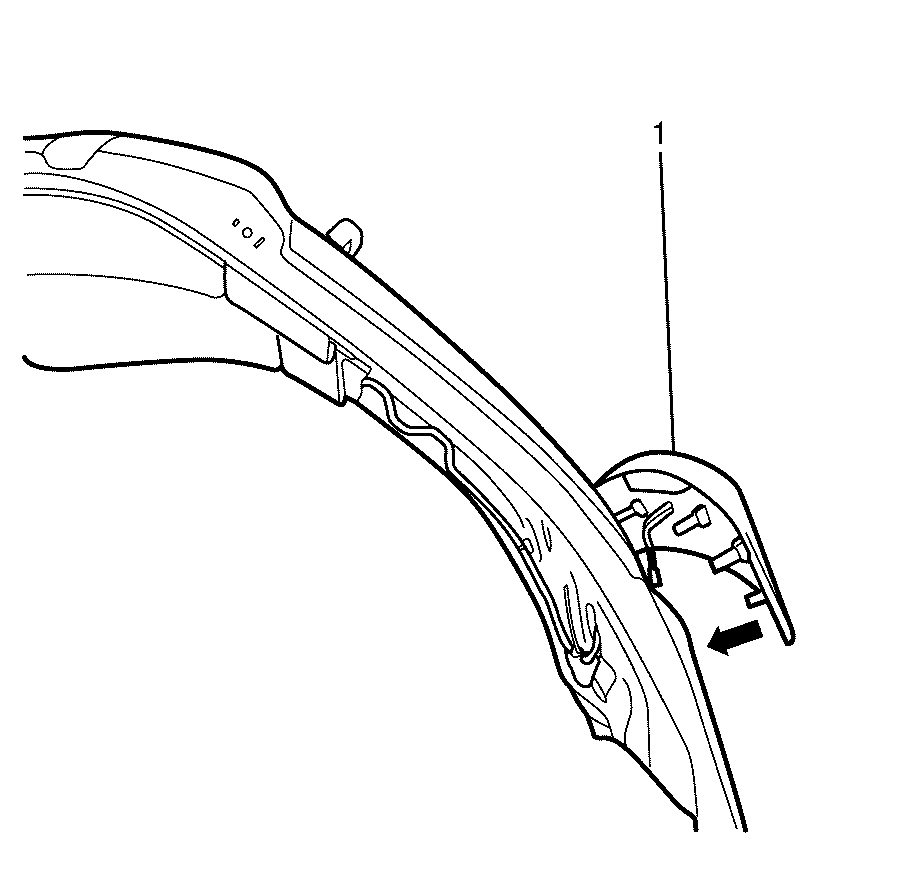
- Remove the liftgate upper moulding (1) from the vehicle
Important: When a suitable hold open device is being removed or installed, provide alternate support to avoid the possibility of damage to the vehicle or personal injury.


Important: Take care to feed the high mounted stop lamp wiring connector and rear window washer hose through the grommet hole.
Installation Procedure
- Position the liftgate upper moulding to the vehicle.
- Install the liftgate upper moulding to body retaining nuts (1).
- Install the liftgate upper moulding to body grommet (2).
- Connect the rear window washer hose (2).
- Connect the high mounted stop lamp electrical connector (1) and attach to liftgate.
- Install the liftgate window upper garnish moulding. Refer to Liftgate Window Upper Garnish Molding Replacement.
- Install the liftgate window side garnish moulding. Refer to Liftgate Window Side Garnish Molding Replacement.
- Remove the suitable liftgate brace from the vehicle.

Important: Take care to feed the high mounted stop lamp wiring connector and rear window washer hose through the grommet hole.
Notice: Refer to Fastener Notice in the Preface section.

Tighten
Tighten the nuts to 3 N·m (26 lb in).

Important: When a suitable hold open device is being removed or installed, provide alternate support to avoid the possibility of damage to the vehicle or personal injury.
