For 1990-2009 cars only
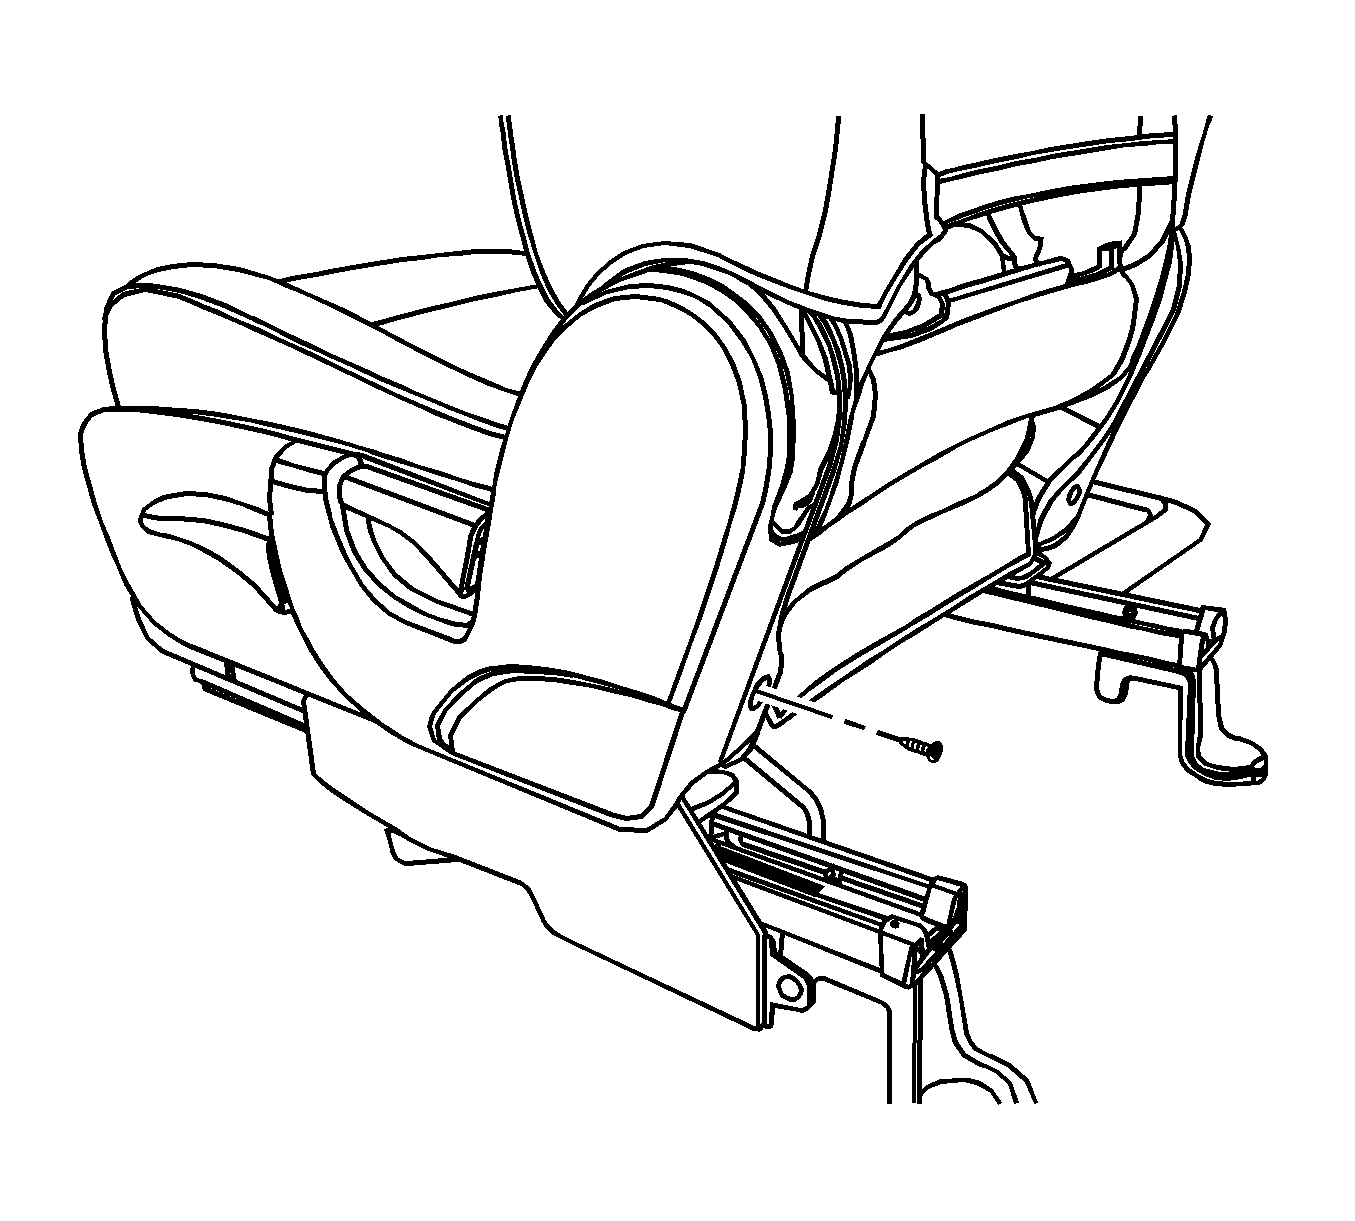
Removal Procedure
- Remove the front seat from the vehicle. Refer to Bucket Seat Replacement .
- Remove the screw and the recliner lever.
- Remove the screws and the front seat trim.
Installation Procedure
- Install the front seat trim with the screws.
- Install the recliner lever.
- Install the front seat in the vehicle. Refer to Bucket Seat Replacement .
Notice: Refer to Fastener Notice in the Preface section.
Tighten
Tighten the front seat trim screws to 12 N·m (9 lb ft).
Front Seat Trim Panel Replacement Manual Seat
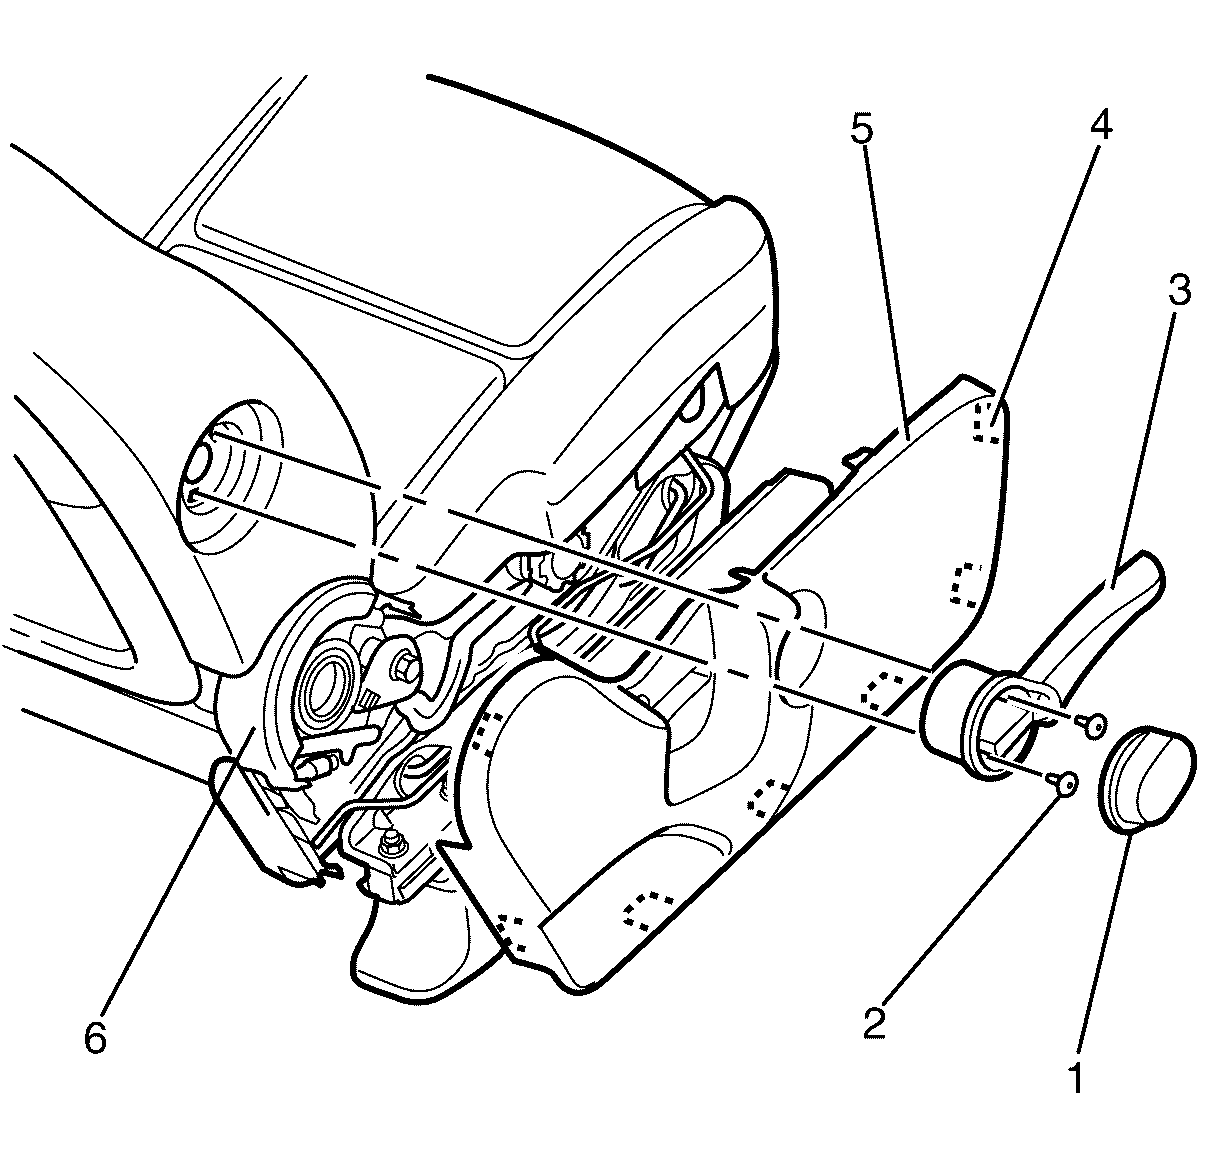
Removal Procedure
- Remove the front seat from the vehicle. Refer to Bucket Seat Replacement.
- Remove the seat recliner lever. Refer to Front Seat Recliner Knob Replacement.
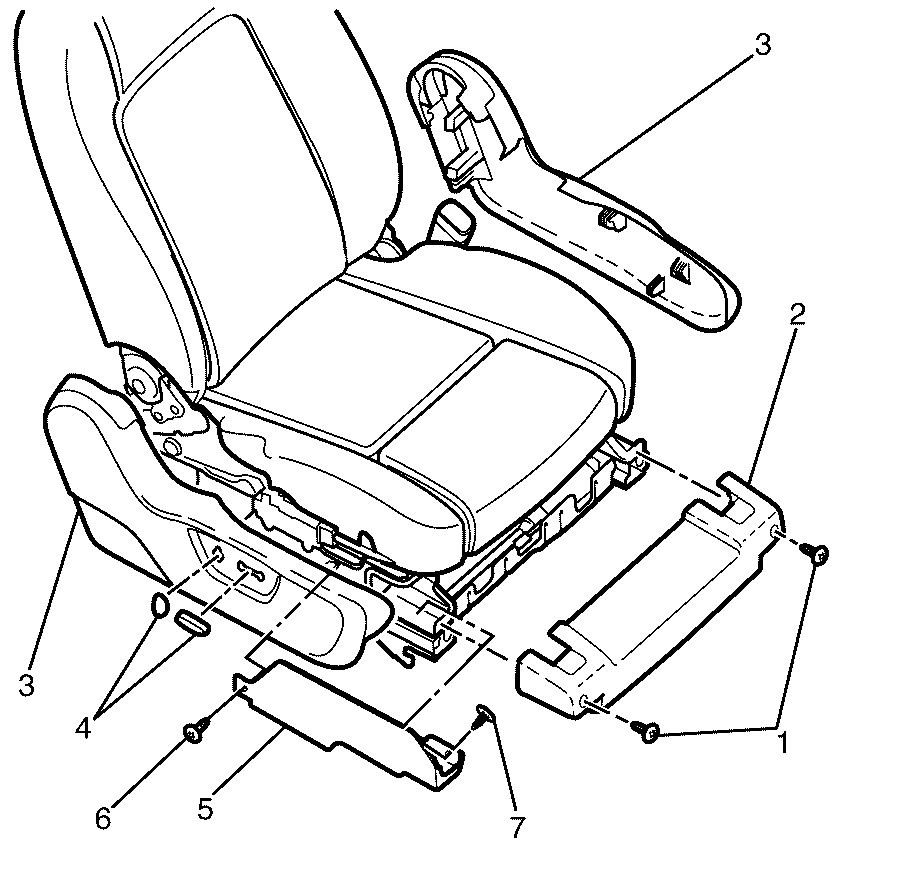
- Remove the seat height adjust lever cap (1).
- Remove the front seat height adjust lever retainer screws (2) and remove the seat height adjust lever (3).
- Using a suitable tool, disengage the clips (4) on the front seat trim panel (5).
- Remove the front seat trim panel (5) from the seat assembly (6).
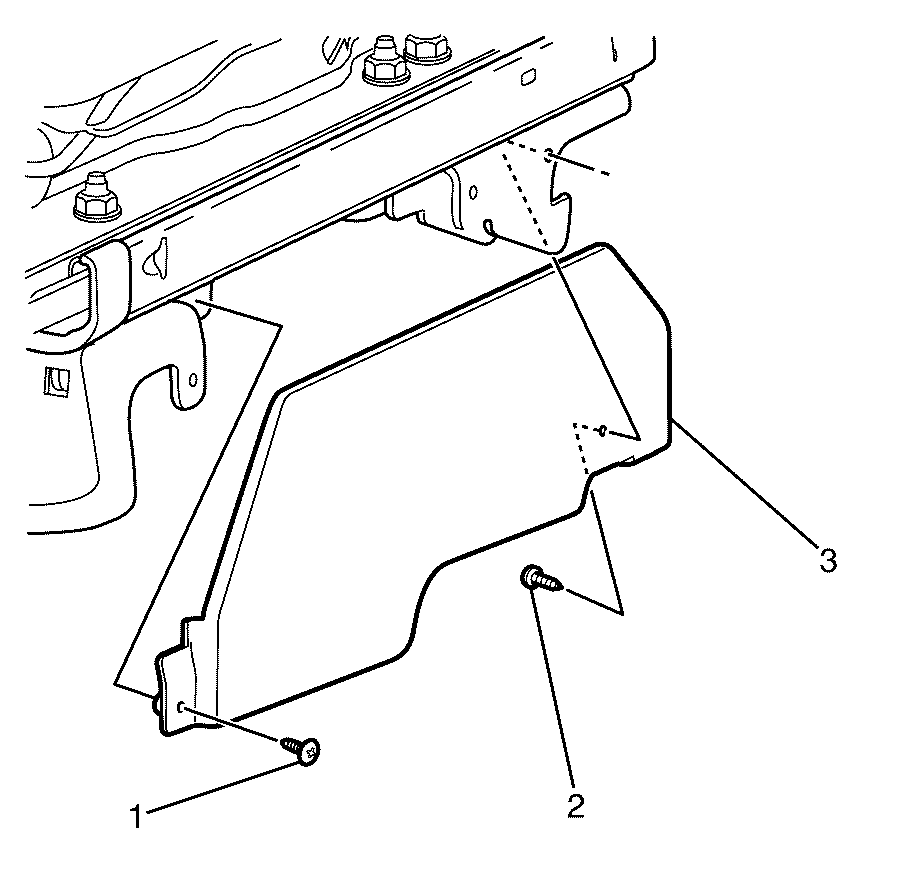
- Remove the front seat lower trim panel screw (1), retainer (2) and lower trim panel (3).
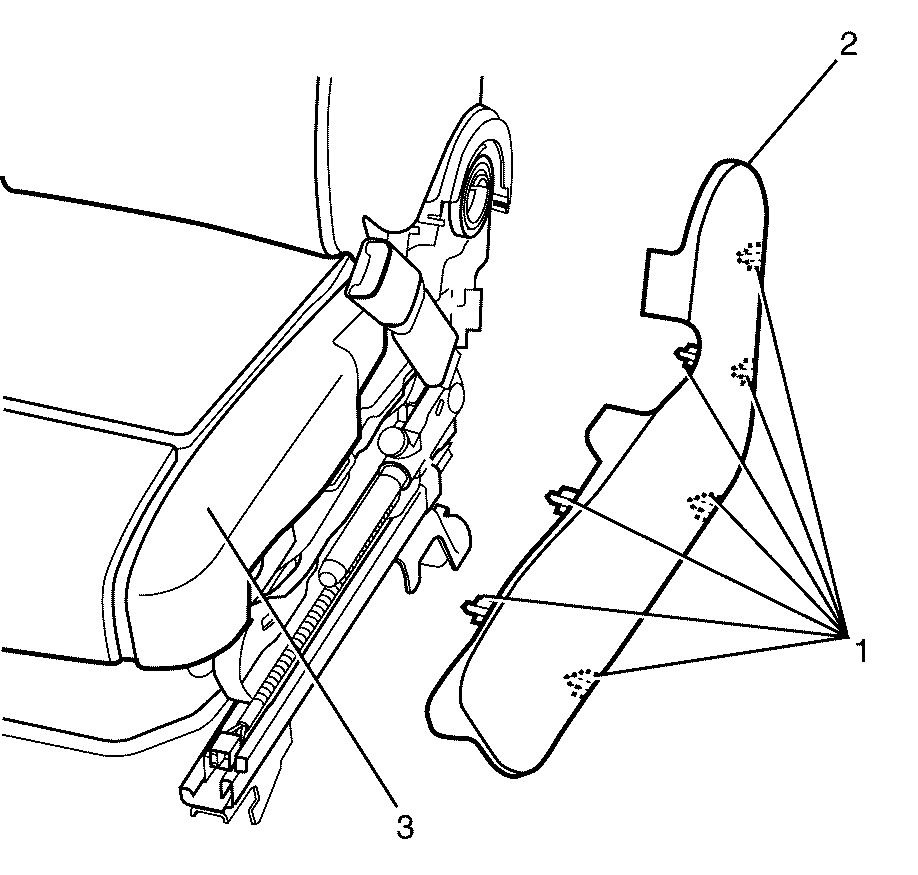
- Using a suitable tool disengage the clips (1) and remove the inner side front seat trim panel (2) from the seat assembly (3).
- Remove the front seat back. Refer to Front Seat Back Replacement.
- Remove the front seat rear trim panels (1) from the seat assembly (2).
Installation Procedure
- Install the front seat rear trim panels (1) onto the seat assembly (2).
- Install the front seat back. Refer to Front Seat Back Replacement.
- Install the front seat lower trim panel (3), retainer (2) and lower trim panel screw (1).
- Install the inner side front seat trim panel (2) onto the seat assembly (3) engaging the clips (1).
- Install the front seat trim panel (5) onto the seat assembly (6) engaging the clips (4).
- Install the seat height adjust lever (3) and front seat height adjust lever retainer screws (2).
- Install the seat height adjust lever cap (1) making sure it audibly engages.
- Install the seat recliner lever. Refer to Front Seat Recliner Knob Replacement.
- Install the front seat into the vehicle. Refer to Bucket Seat Replacement.
Notice: Refer to Fastener Notice in the Preface section.
Tighten
Tighten the lower trim panel screw to 3 N·m
(26 lb in).
Tighten
Tighten the front seat height adjust lever retainer
screws 3 N·m (26 lb in).
Front Seat Trim Panel Replacement Power Seat
Removal Procedure
- Remove the front seat from the vehicle. Refer to Bucket Seat Replacement.
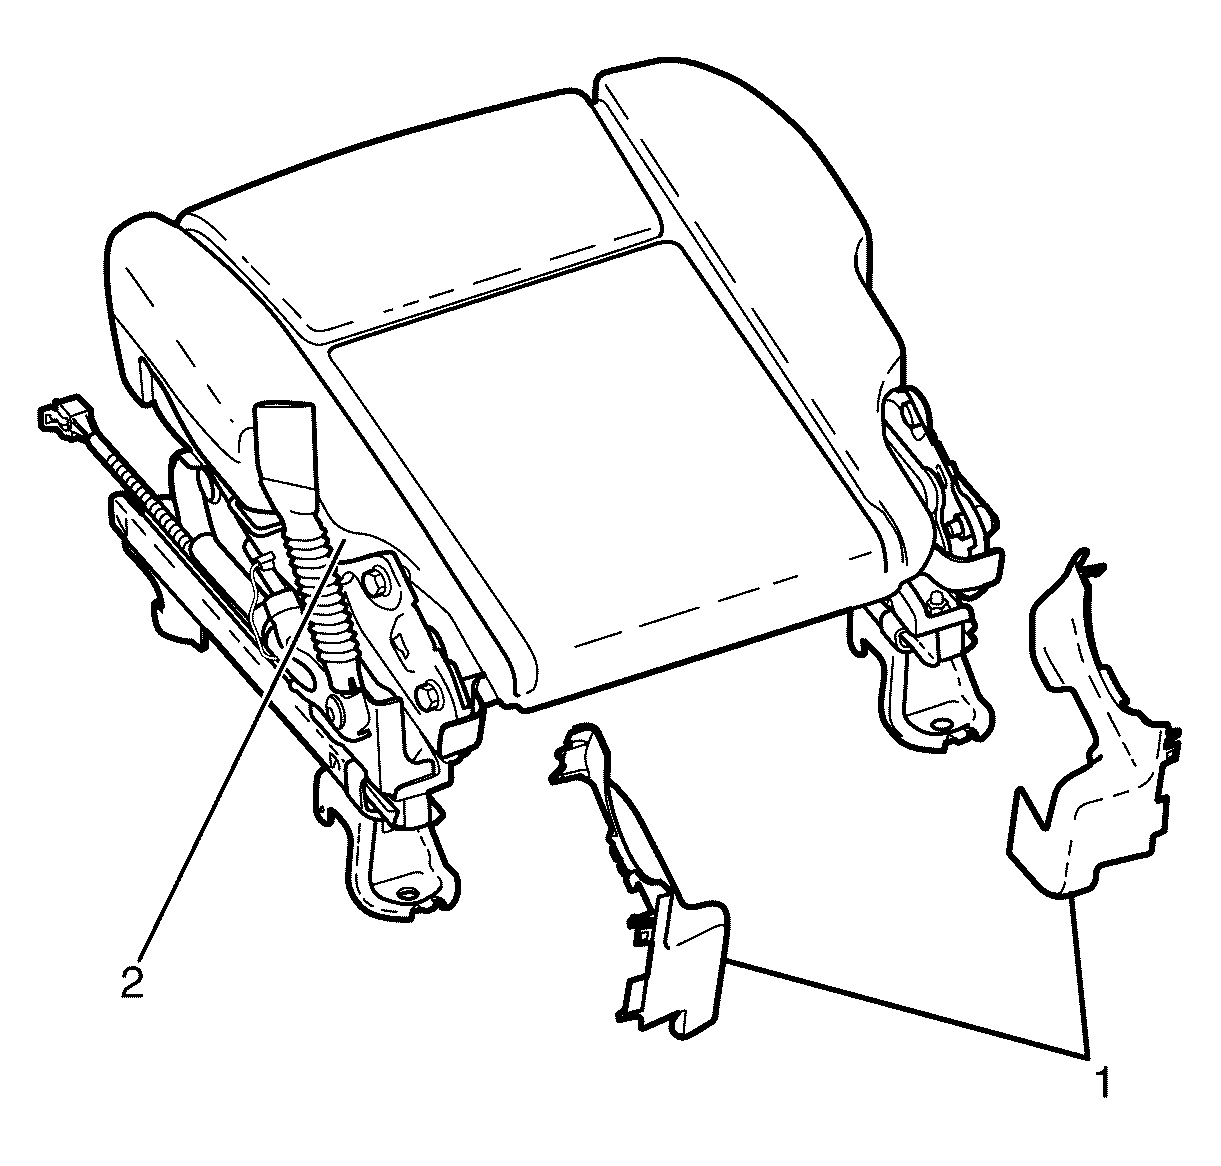
- Remove the front seat trim screws (1), the front trim panel (2), and power seat switch caps (4).
- Using a suitable tool, disengage and remove the outer side trims (3).
- Remove the lower side trim screw (6) and retainer (7) and remove the lower side trim (5)
- Remove the power seat switch module. Refer to Driver Seat Control Module Replacement.
- Remove the front seat back. Refer to Front Seat Back Replacement.
- Remove the front seat rear trim panels (1) from the seat assembly (2).
Installation Procedure
- Install the front seat rear trim panels (1) onto the seat assembly (2).
- Install the front seat back. Refer to Front Seat Back Replacement.
- Install the front trim panel (2) front seat trim screws (1).
- Install the power seat switch module. Refer to Driver Seat Control Module Replacement.
- Install the outer side trims (3).
- Install the lower side trim (5), the lower side trim screw (6) and the lower side trim retainer (7).
- Install the power seat switch caps (4).
- Install the front seat into the vehicle. Refer to Bucket Seat Replacement.
Notice: Refer to Fastener Notice in the Preface section.
Tighten
Tighten the front seat trim screws to 3 N·m
(26 lb in).
Tighten
Tighten the lower side trim screw to 3 N·m
(26 lb in).
