For 1990-2009 cars only
Removal Procedure
- Raise the vehicle. Refer to Lifting and Jacking the Vehicle.
- Remove the rear tire and wheel assembly. Refer to Tire and Wheel Removal and Installation.
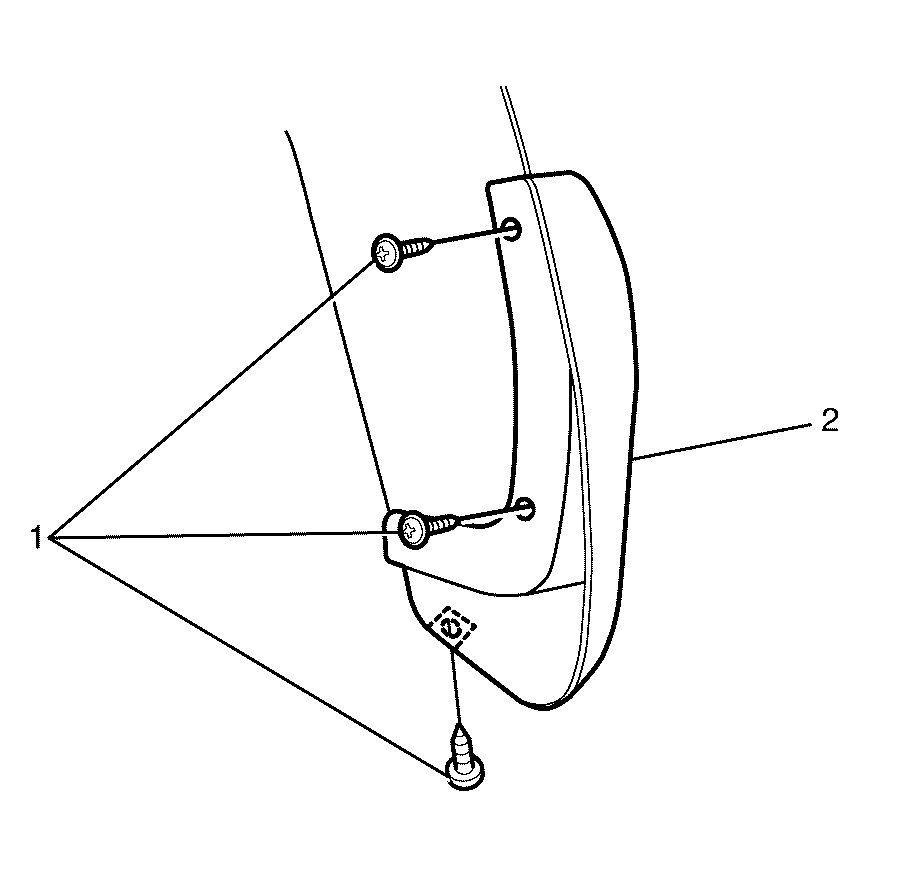
- Remove the rear mudflap fasteners (1) and remove the rear mudflap (2).
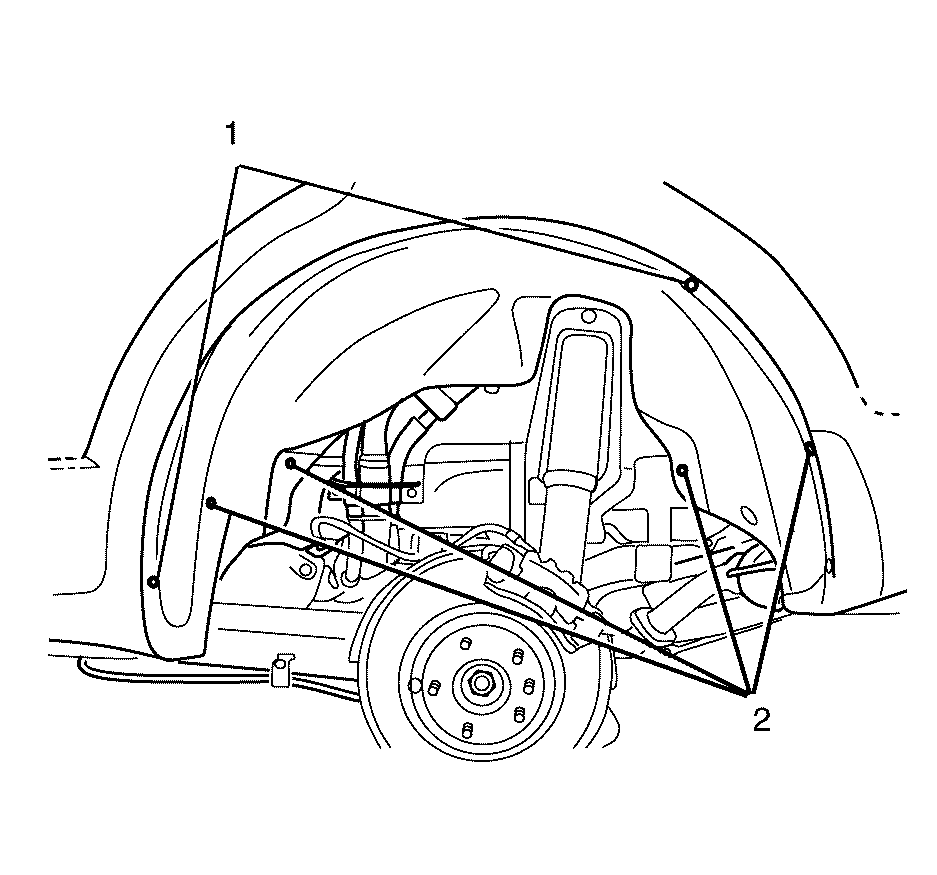
- Remove the rear wheelhouse fasteners (1) and rear wheelhouse retainers (2).
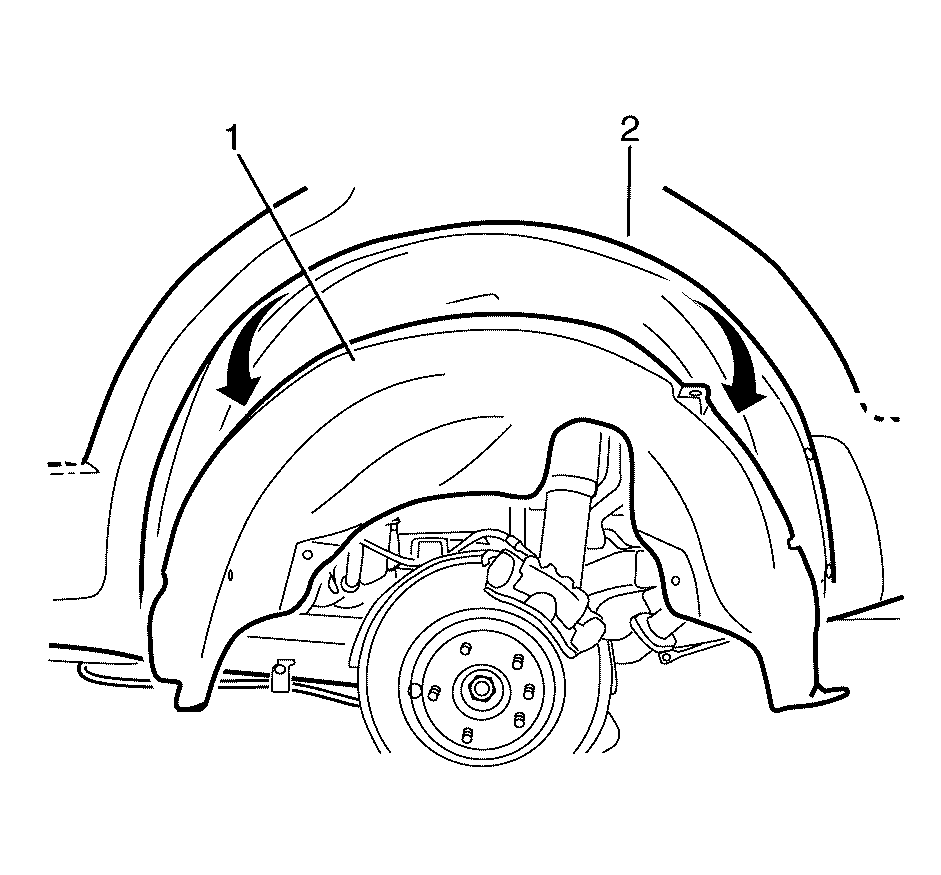
- Disengage and remove the rear wheelhouse liner (1) from the vehicle body (2).


Modification Procedure -- Rear Left Wheel House Liner
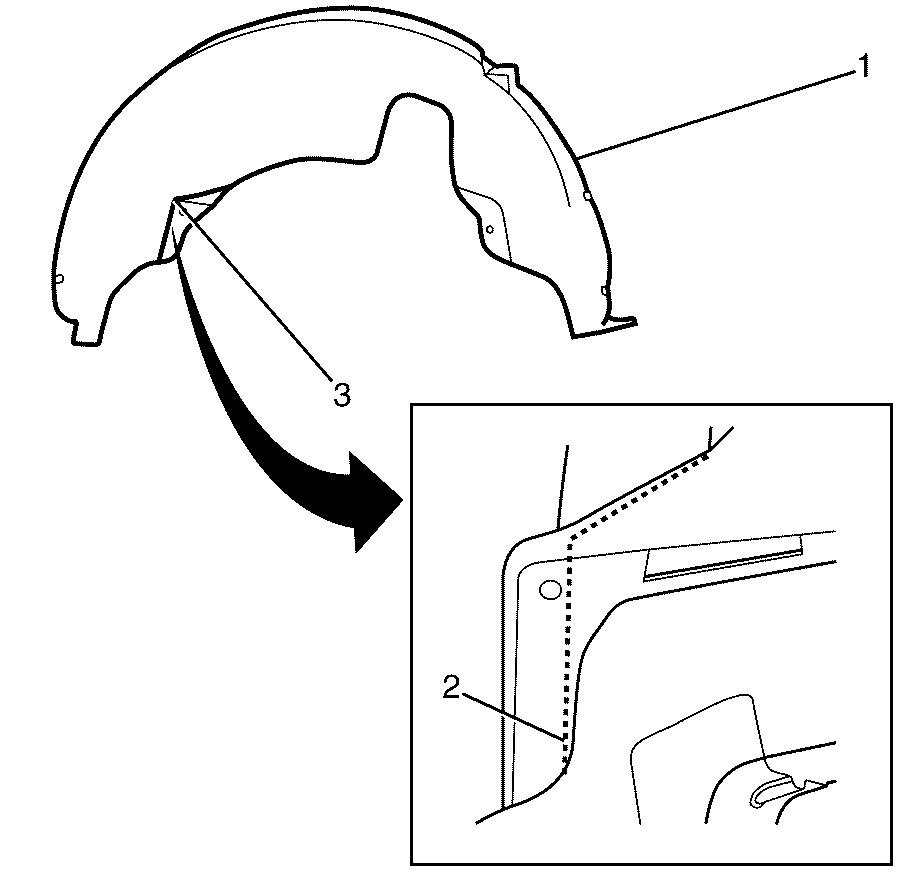
- Mount the new or replacement rear left wheelhouse liner (1) in a secured suitable position.
- Using a suitable tool, follow the indicated cut line (2), removing the indicated section of material (3).

Important: When replacing the rear left wheelhouse liner with a new or replacement part, it must be modified to avoid rub-through or interference with the Auxiliary HVAC evaporator lines.
Installation Procedure
- Install the rear wheelhouse liner (1) into the vehicle body (2).
- Install the rear wheelhouse fasteners (1) and rear wheelhouse retainers (2).
- Install the rear mudflap (2) and rear mudflap fasteners (1).
- Install the rear tire and wheel assembly. Refer to Tire and Wheel Removal and Installation.
- Lower the vehicle. Refer to Lifting and Jacking the Vehicle.

Notice: Refer to Fastener Tightening Specifications in the Preface section.

Tighten
Tighten the rear wheelhouse fasteners to 4.0 N·m
(35 lb in)

Tighten
Tighten the rear mudflap fasteners to 2.0 N·m
(18 lb in)
