For 1990-2009 cars only
Exhaust Manifold Replacement 3.2L
Removal Procedure
- Disconnect the negative battery cable.
- Remove the front exhaust pipe. Refer to Front Pipe Replacement.
- Remove the pup converter. Refer to Catalytic Converter Replacement.
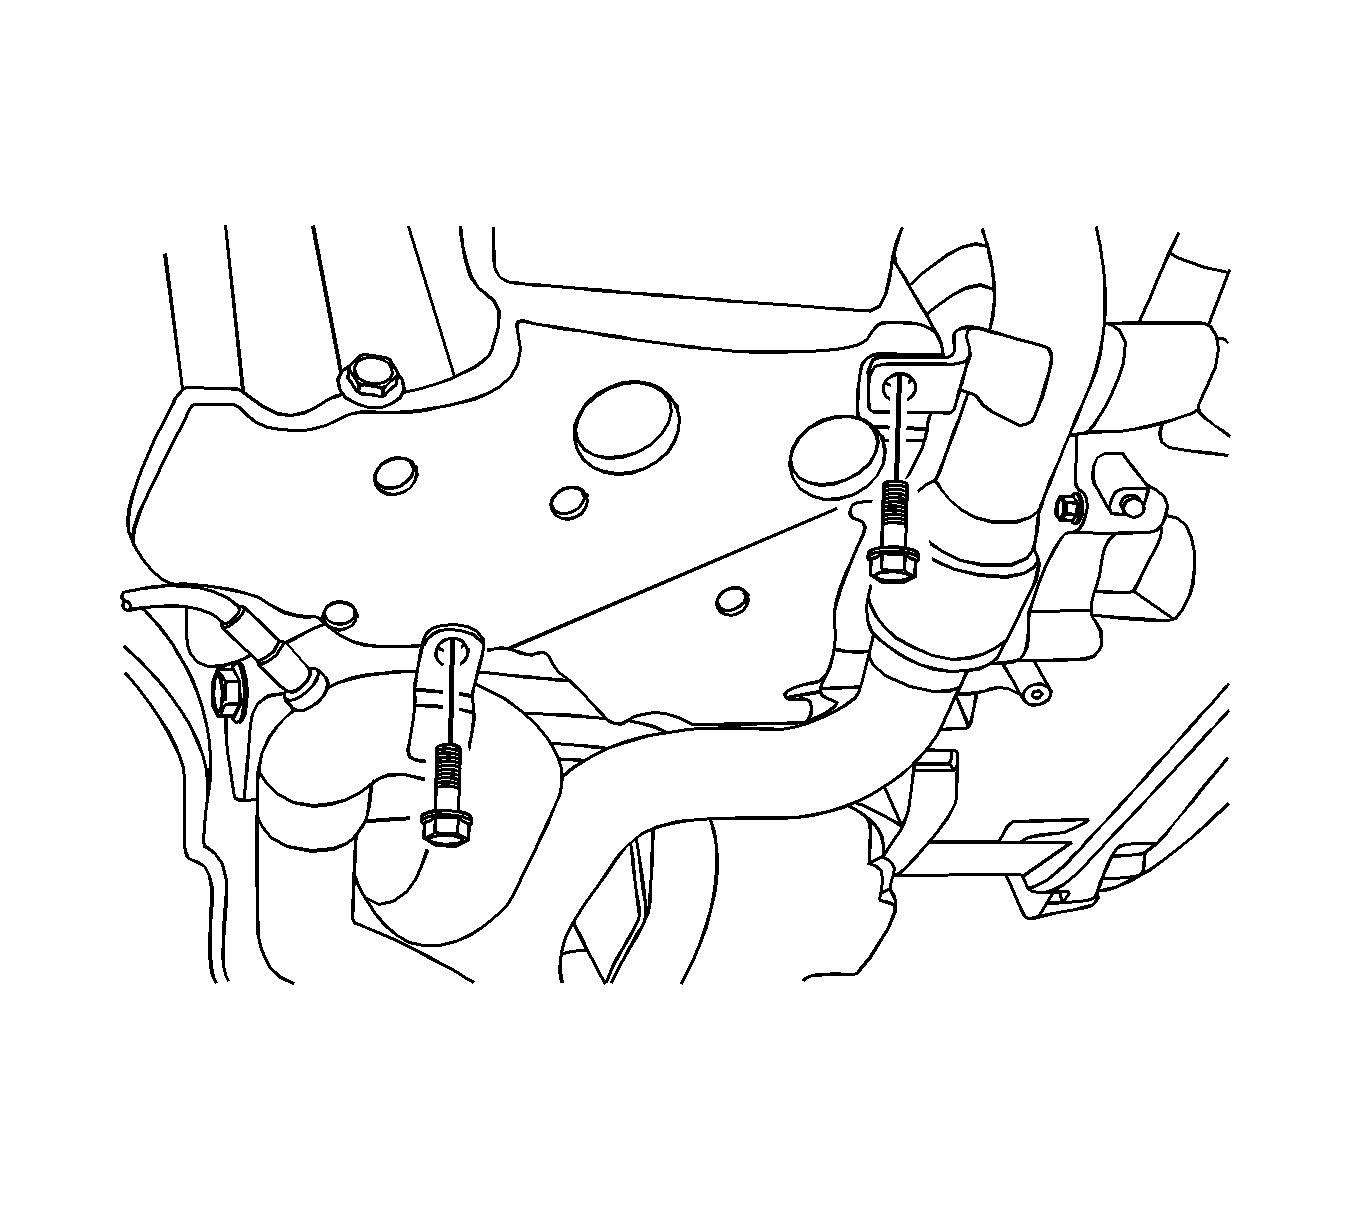
- For the bank 1 exhaust manifold, remove the transfer case. Refer to Transfer Case Assembly Replacement.
- For the bank 1 exhaust manifold, remove the transaxle rear mount assembly. Refer to Transmission Rear Mount Replacement.
- Disconnect the upper heated oxygen sensor connector.
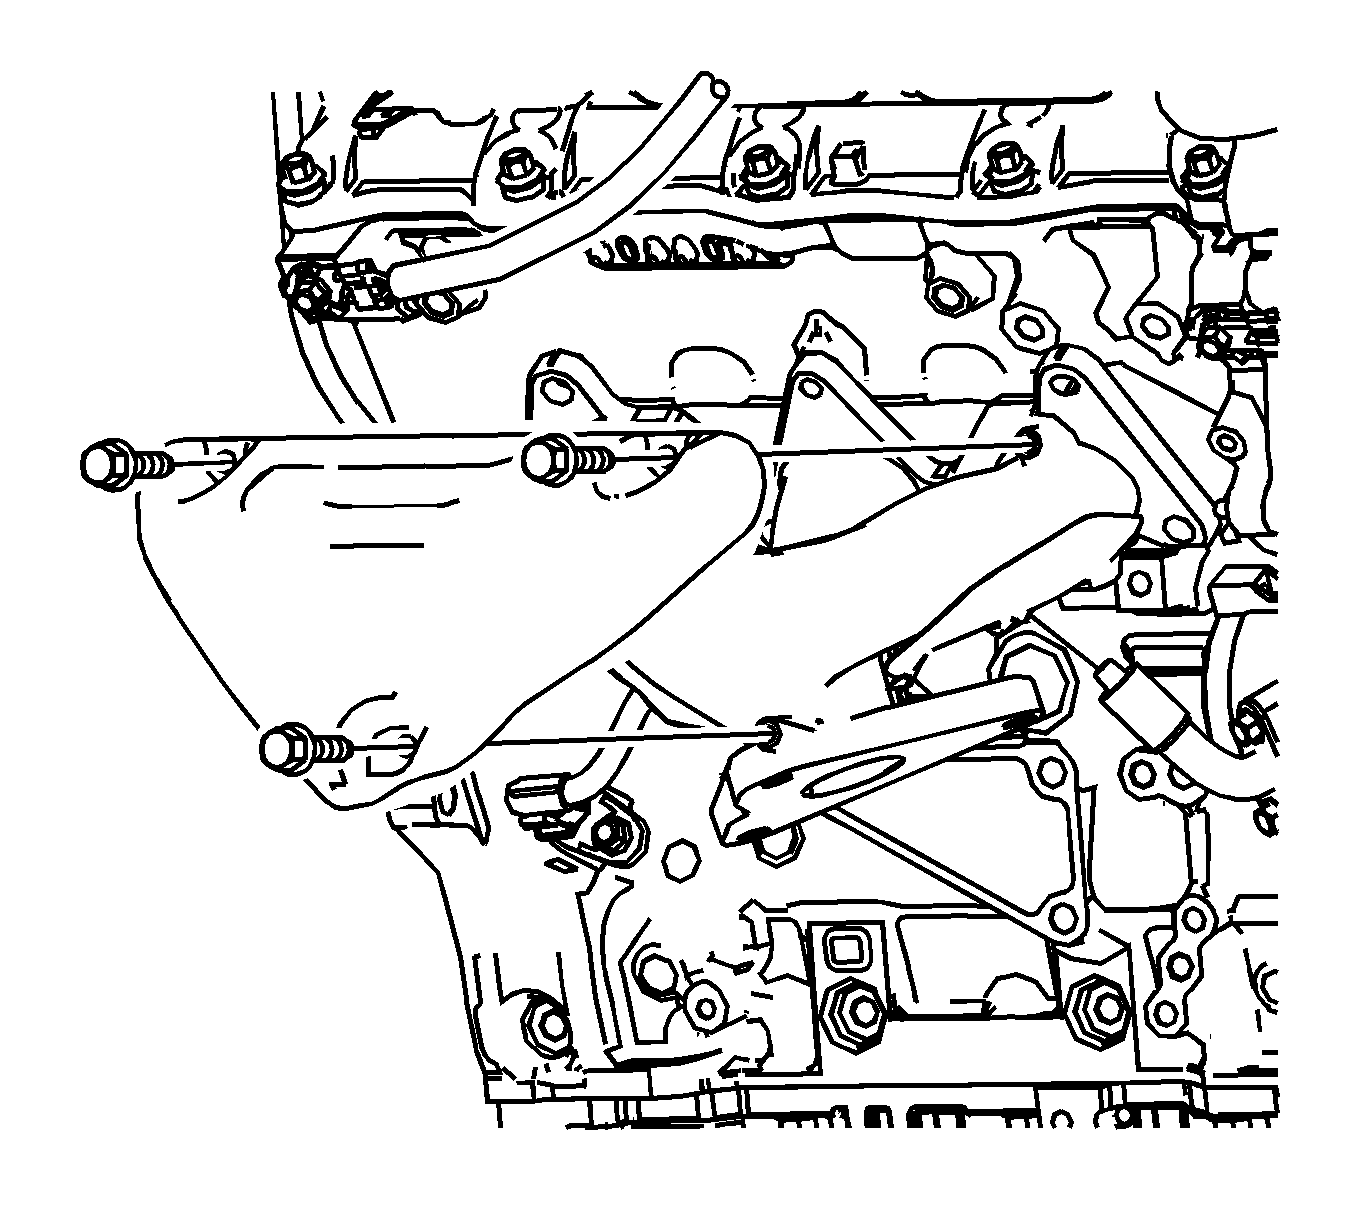
- Remove the three bolts (1) attaching the exhaust manifold outer heat shield (2) to the exhaust manifold.
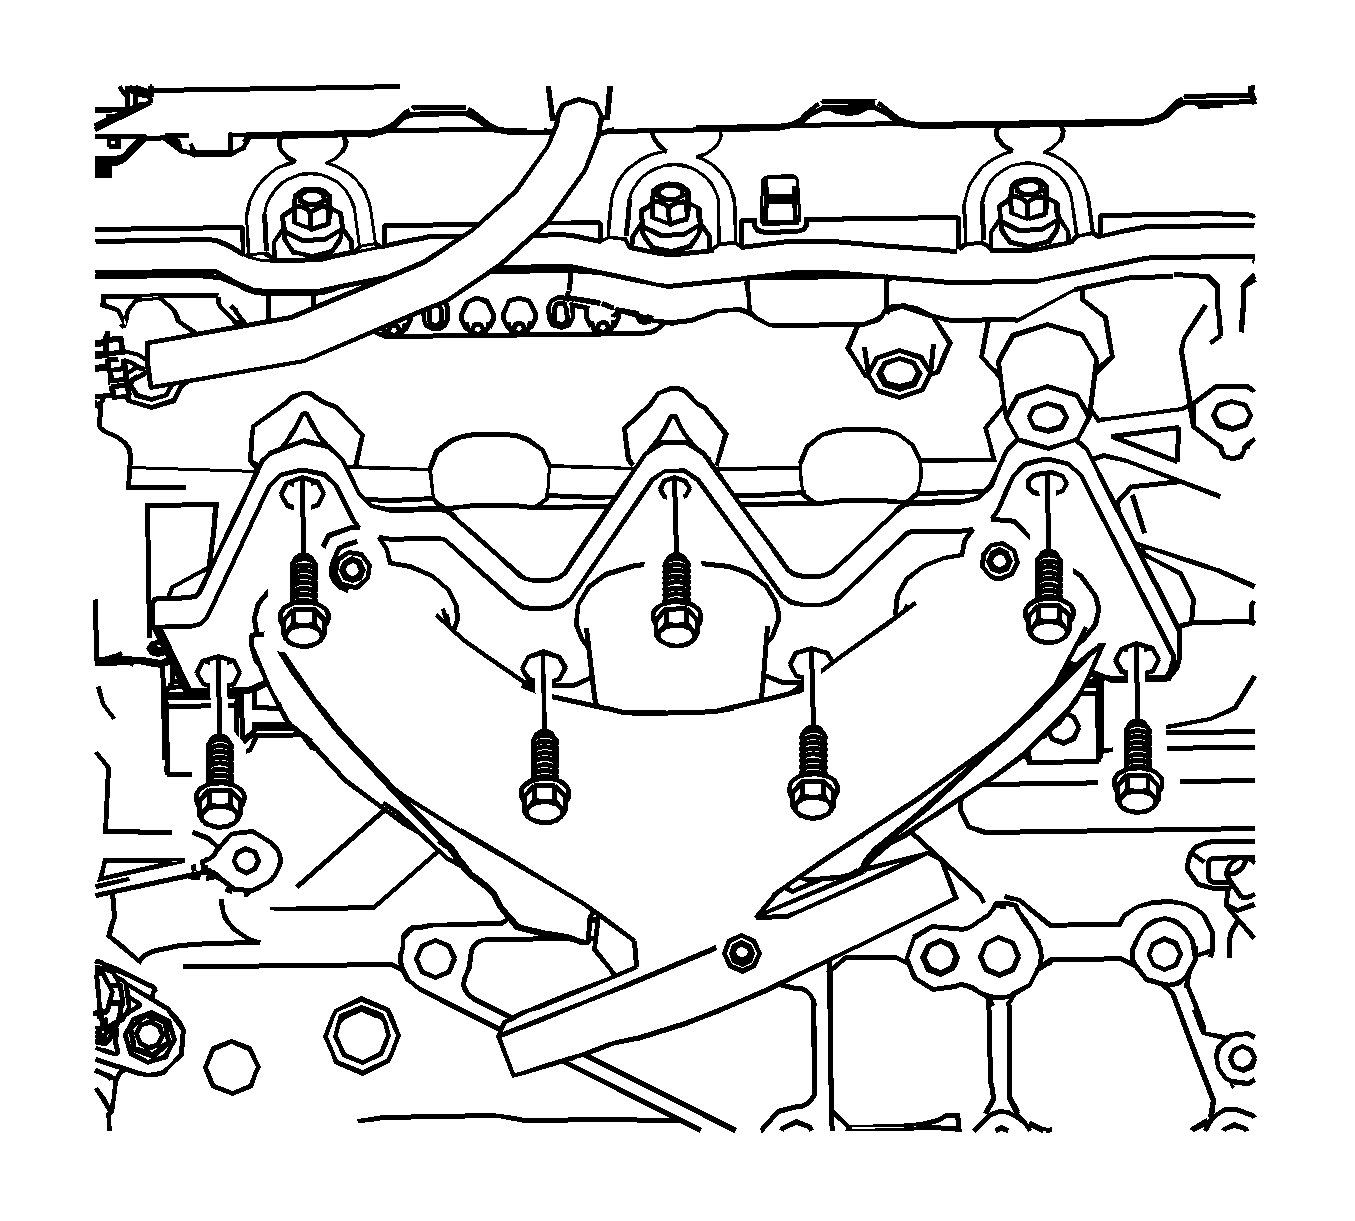
- Progressively loosen the seven exhaust manifold attaching bolts, working from the outside to the center and then remove the bolts.
- Remove and discard the exhaust manifold to cylinder head gasket.
- Remove the three bolts attaching the exhaust manifold inner heat shield from the exhaust manifold, if necessary.
Warning: Refer to Battery Disconnect Warning in the Preface section.
Cleaning Procedure
- Using a suitable commercially available non-corrosive cleaning solvent and a soft bristled parts cleaning brush, thoroughly clean the exhaust manifold.
- Dry the exhaust manifold using compressed air.
Inspection Procedure
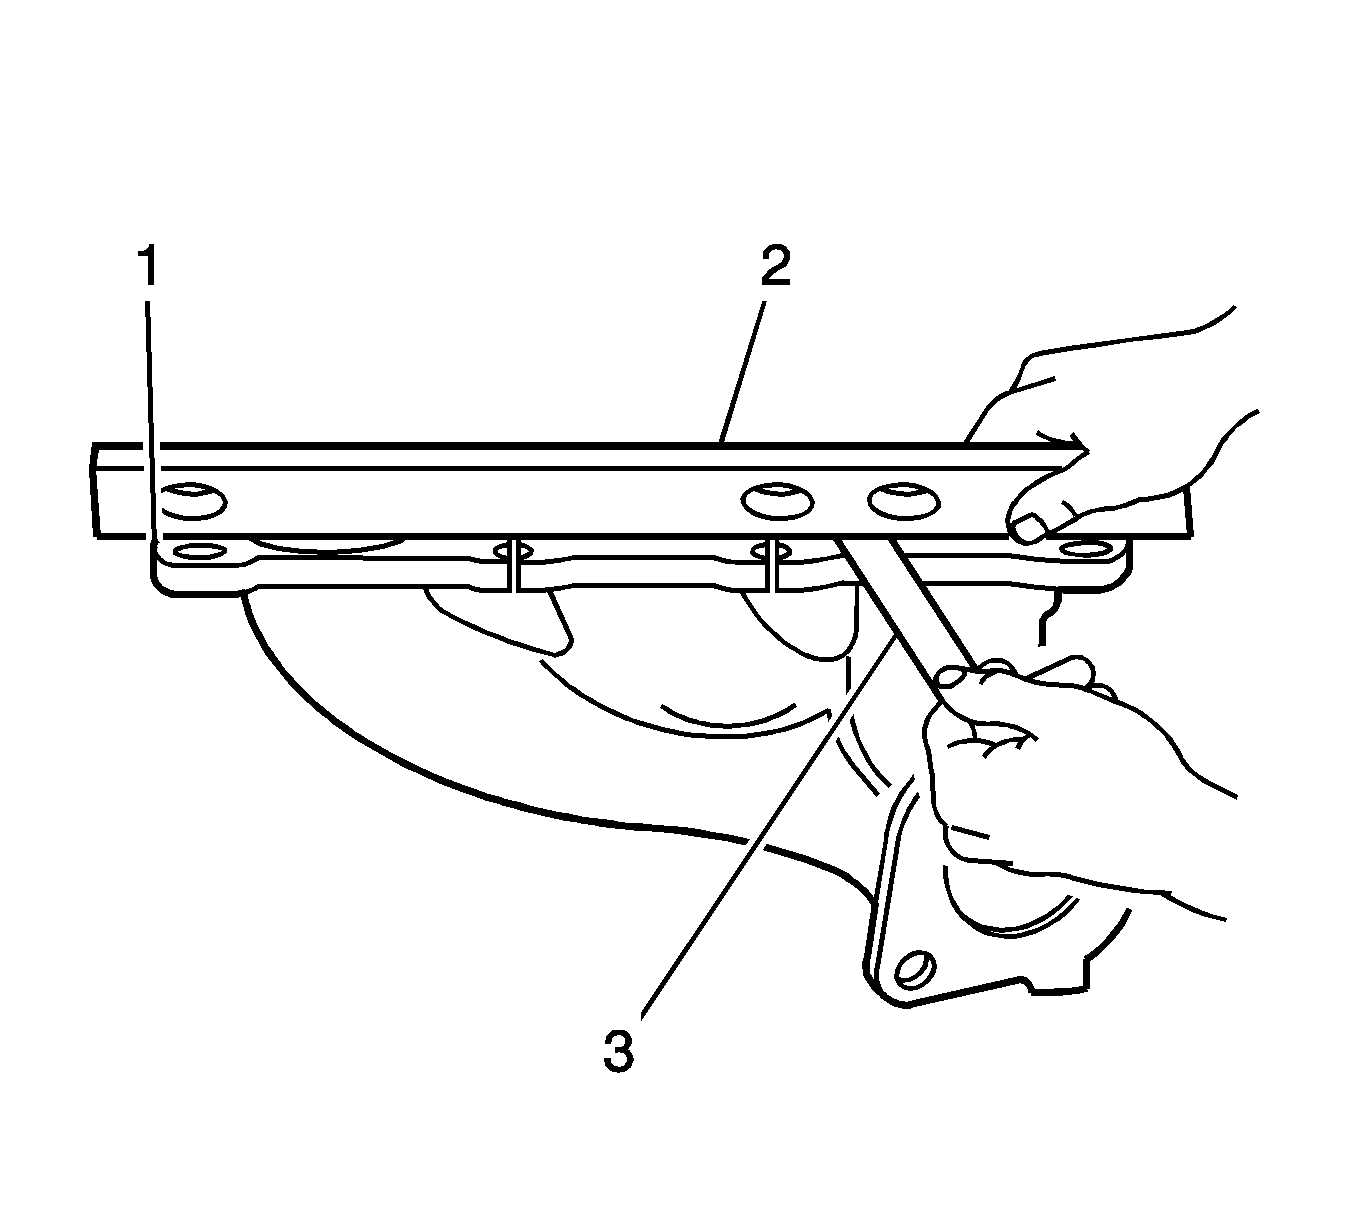
- Inspect the exhaust manifold (1) for the following:
- Using a straight edge (2) and feeler gages (3), check the cylinder head mounting face of the exhaust manifold does not exceed the maximum distortion specification of 0.25 mm.
| • | Damage to the threaded holes for the heat shield mounting. |
| • | Damage to the exhaust manifold mounting holes. |
| • | Damage to the threads of the exhaust manifold to exhaust pipe flange studs. |
| • | Damage to the gasket sealing surfaces. |
Note: If the surface flatness is not within specifications, the exhaust manifold is warped and must be replaced.
Installation Procedure
- Install the exhaust manifold inner heat shield to the exhaust manifold, if necessary and tighten the bolt to 10 N·m (89 lb in).
- Position a new exhaust manifold gasket onto the exhaust manifold.
- Apply LOCTITE 272 thread sealant (or equivalent) to the threads of the exhaust manifold bolts.
- Maneuver the exhaust manifold into position and install the exhaust manifold bolts. Tighten the bolts to 20 N·m (15 lb ft).
- Install the exhaust manifold heat shield and tighten the outer bolts to 10 N·m (89 lb in).
- Install the other parts that were previously removed.
- Lower the vehicle and inspect for exhaust leaks.
Caution: Refer to Fastener Caution in the Preface section.

Note: When tightening the exhaust manifold to cylinder head bolts, begin with the center bolts, then alternate from side to side moving to the outer bolts.

Exhaust Manifold Replacement 2.0L Diesel
Removal Procedure
- Disconnect the negative battery cable.
- Remove the engine cover. Refer to Engine Cover Replacement.
- Remove the charge air system hoses and ducts. Refer to Charge Air Cooler Inlet Pipe and Outlet Pipe Replacement.
- Remove the PCV valve and adapter. Refer to Positive Crankcase Ventilation Valve Replacement and Positive Crankcase Ventilation Hose/Pipe/Tube Replacement.
- Remove the exhaust heat shield.
- Remove the pre-catalyst. Refer to Catalytic Converter Replacement.
- Remove the turbocharger from the exhaust manifold. Refer to Turbocharger Replacement.
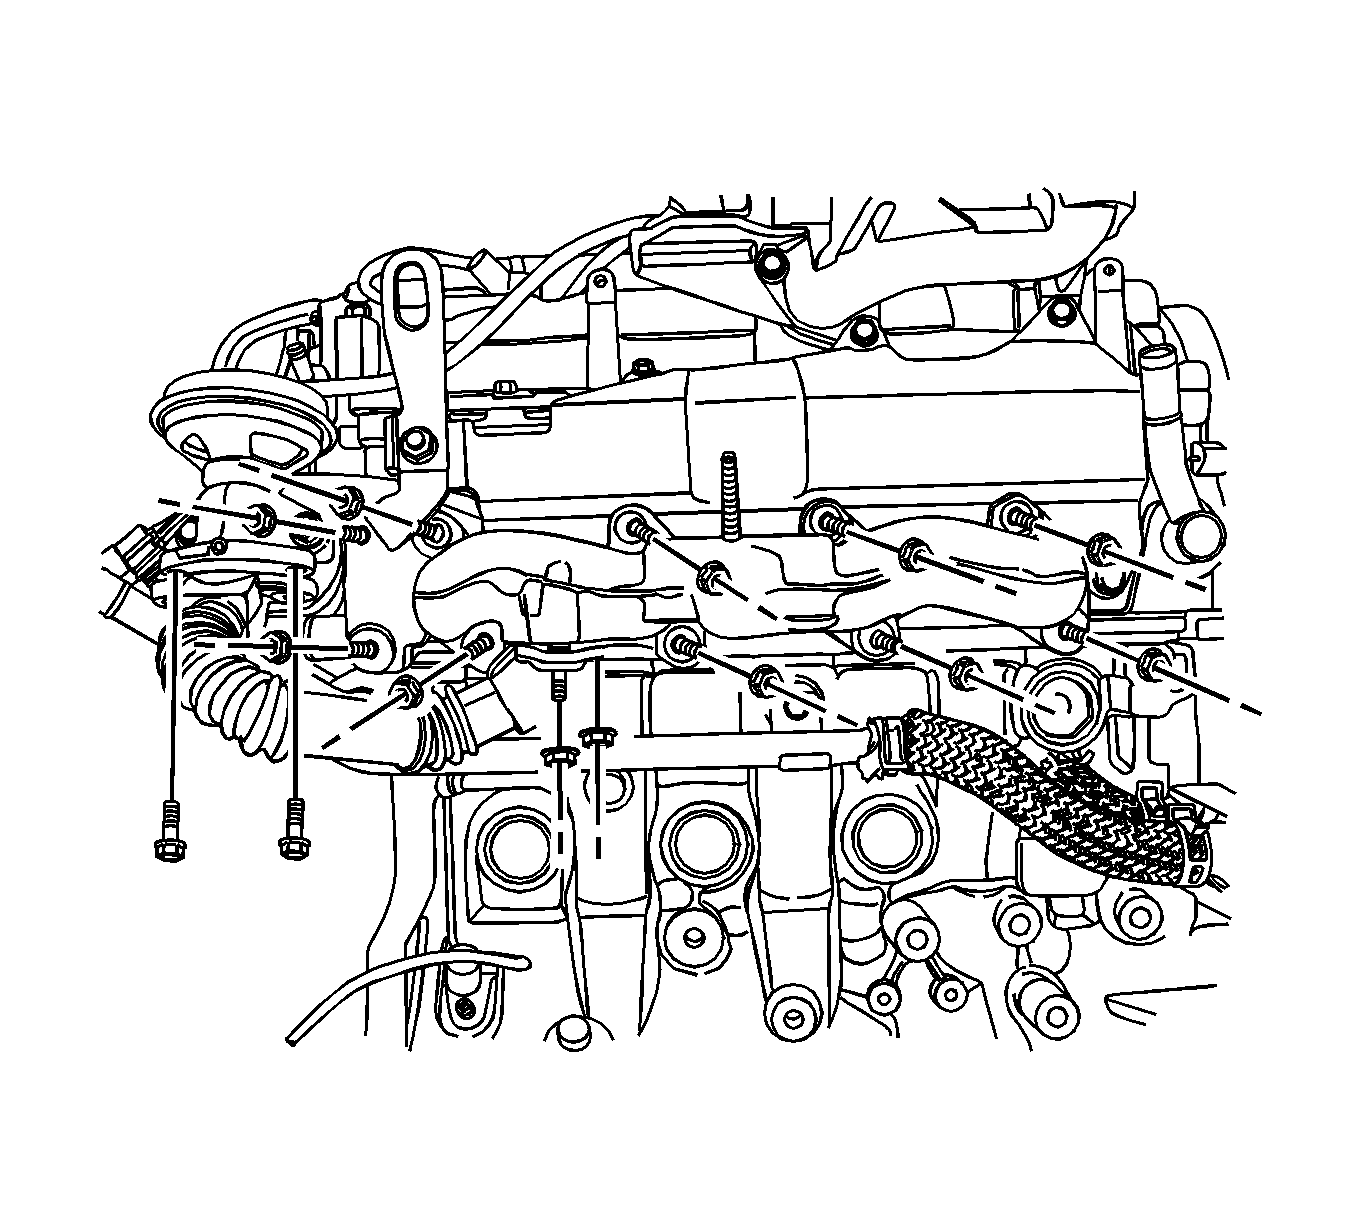
- Remove the EGR cooler inlet pipe from the EGR valve with the gasket.
- Remove the exhaust manifold with the EGR cooler inlet pipe.
- Remove the EGR cooler inlet pipe from the exhaust manifold.
Warning: Refer to Battery Disconnect Warning in the Preface section.
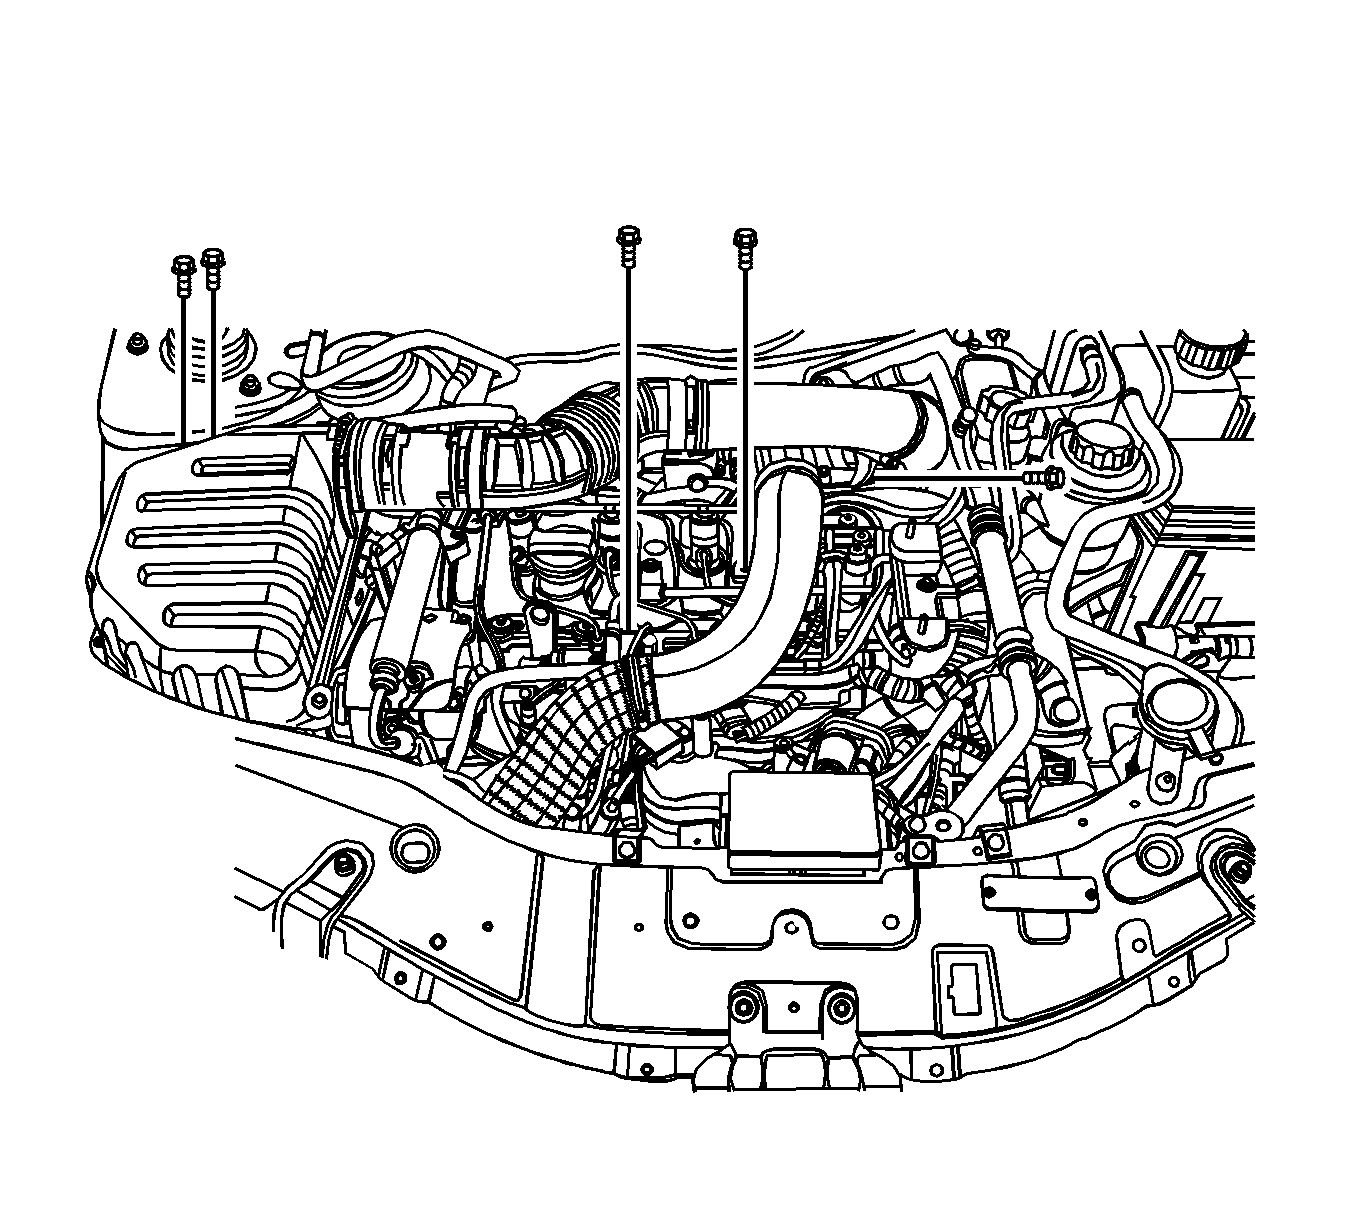
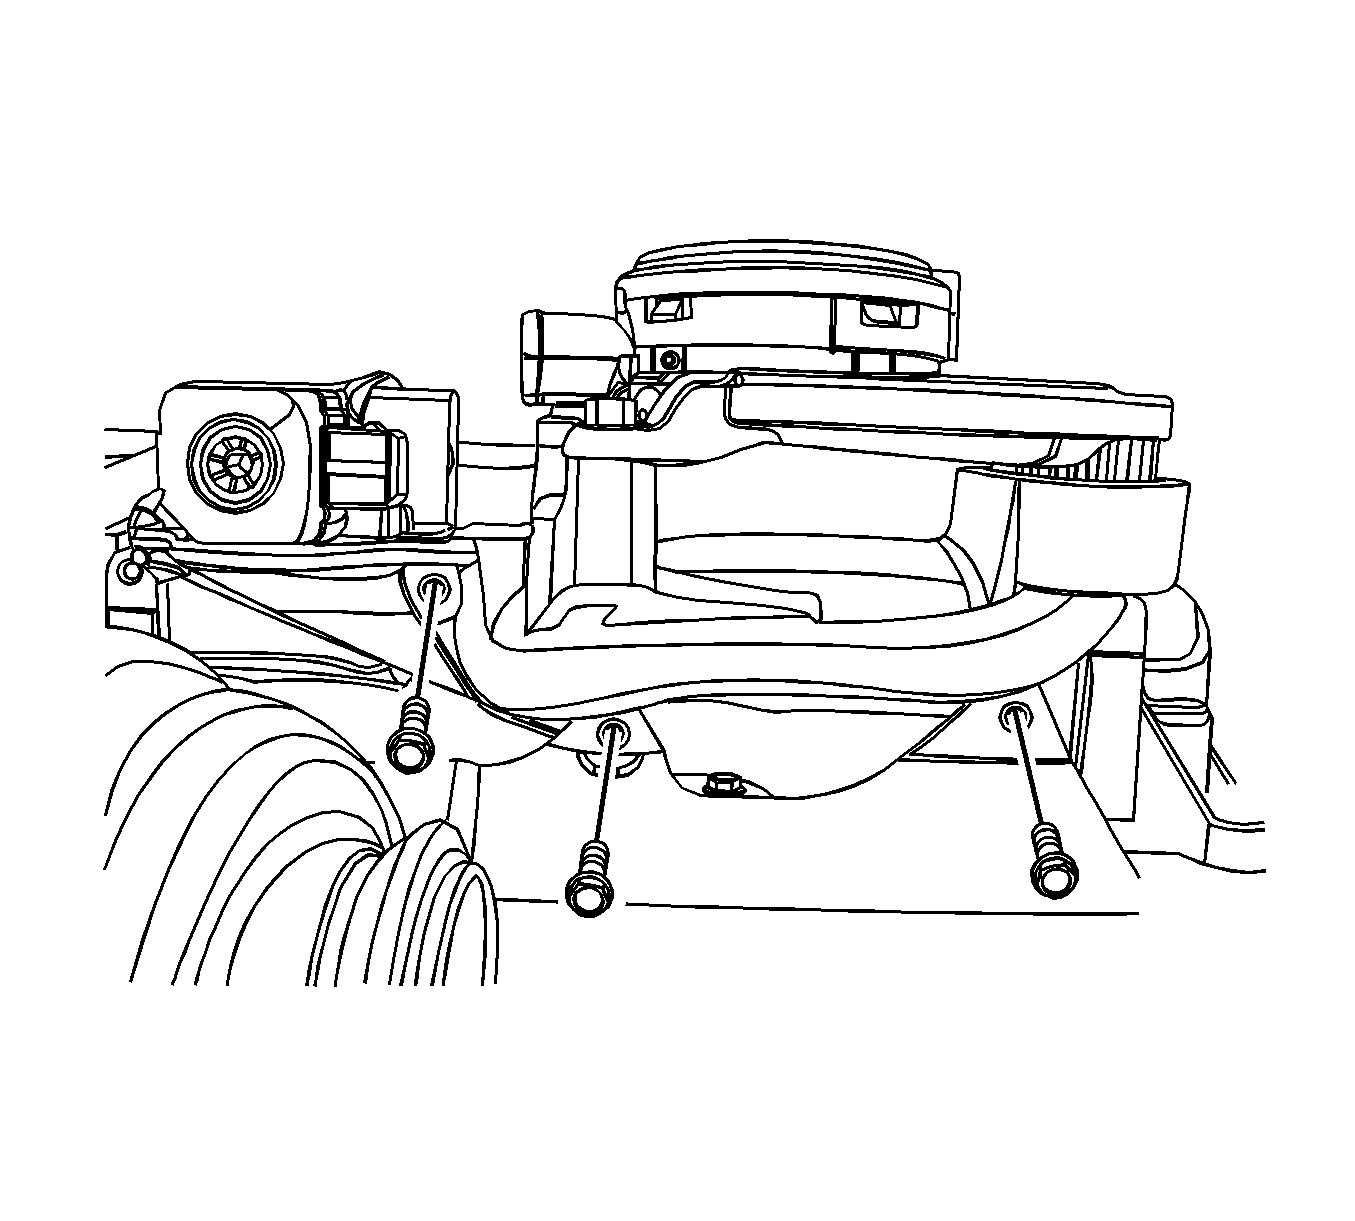
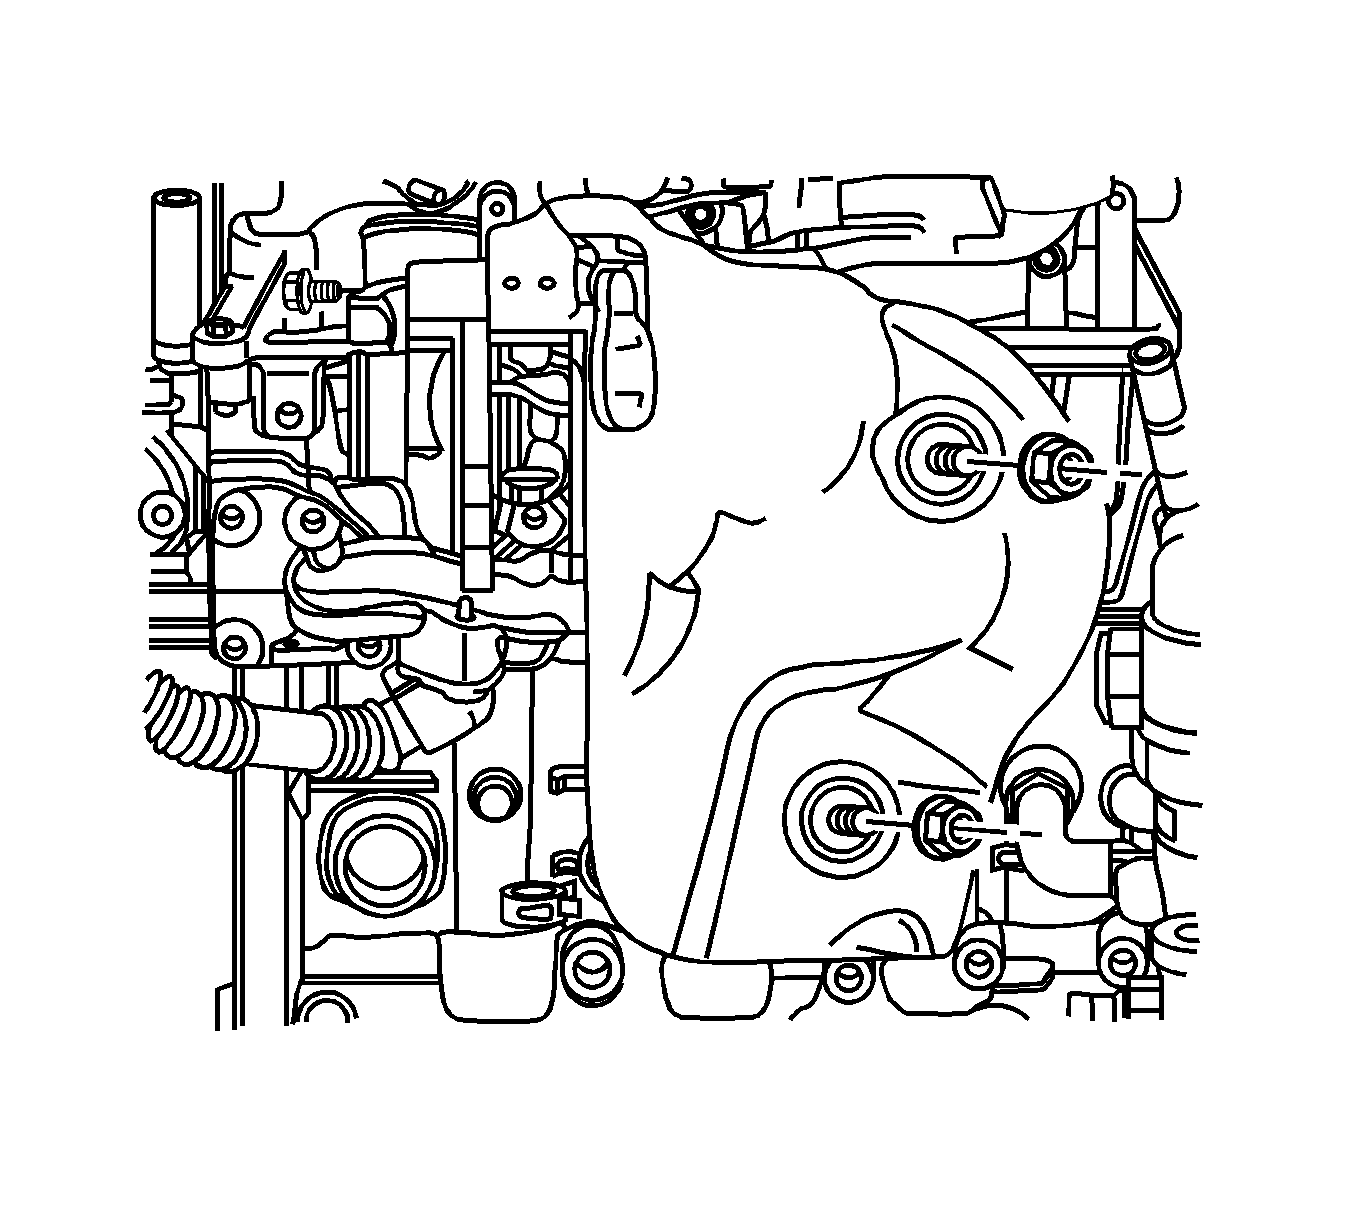
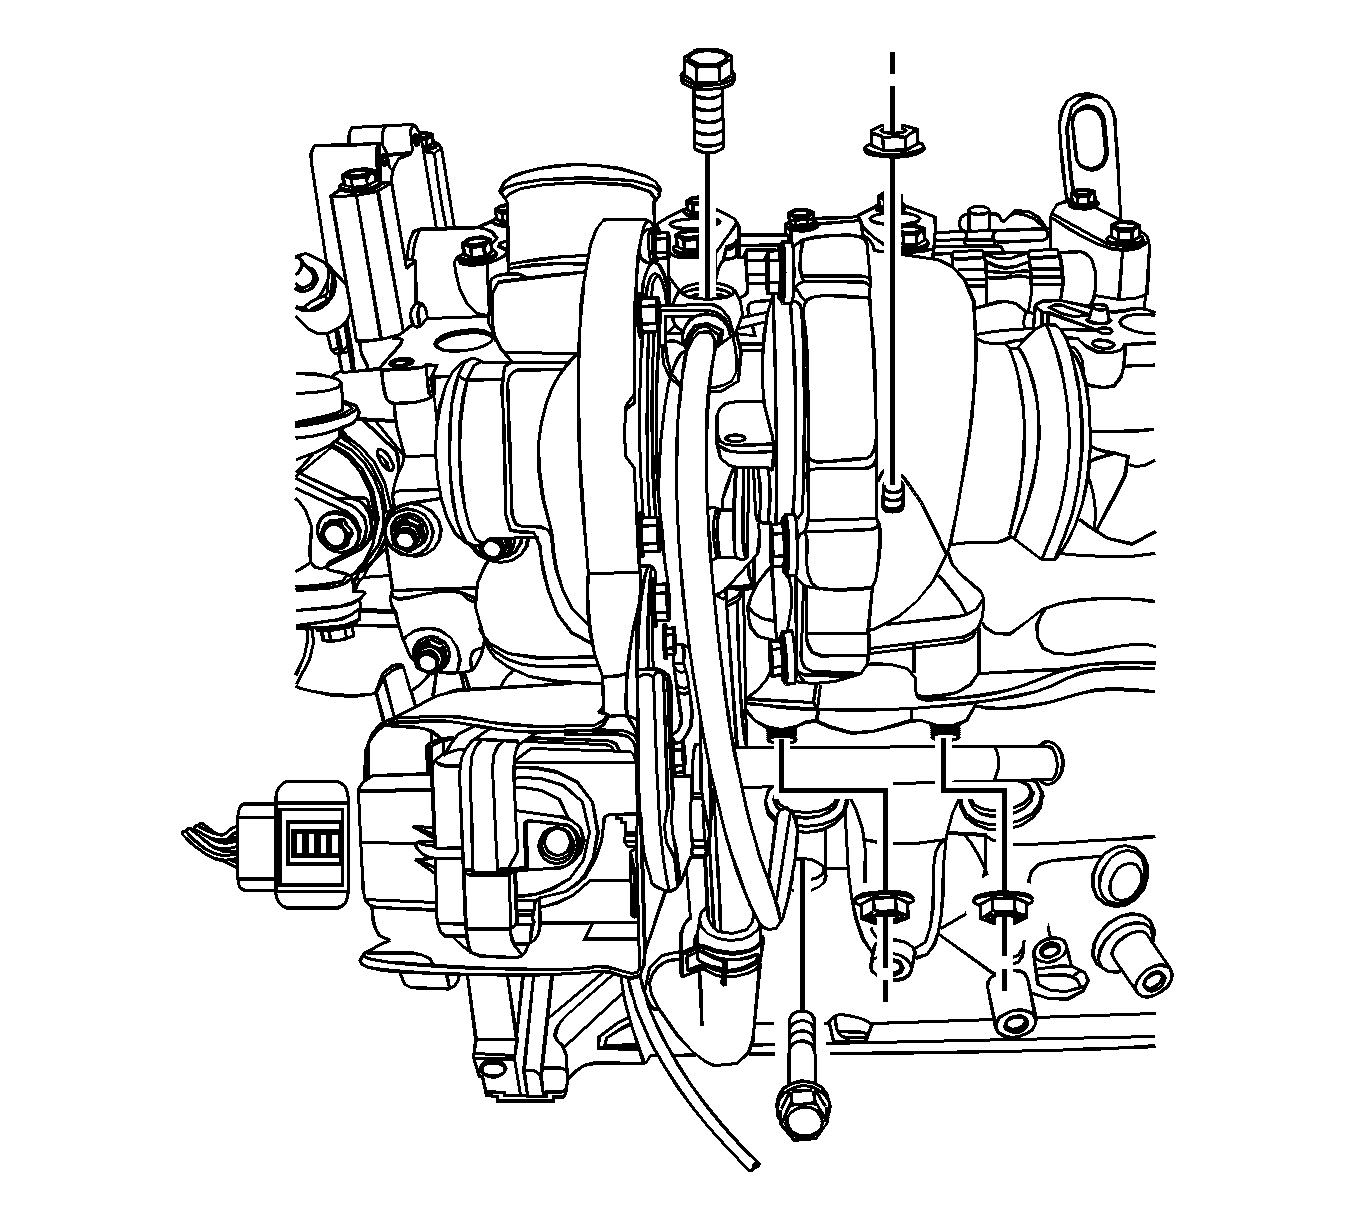
Installation Procedure
- Install the EGR cooler inlet pipe to the exhaust manifold.
- Install the exhaust manifold to the cylinder head with a new gasket.
- Install the EGR cooler inlet pipe to the EGR valve with a new gasket and tighten.
- Install the exhaust manifold heat shield and tighten nuts and bolt to 20 N·m (14.8 lb ft).

Caution: Refer to Fastener Caution in the Preface section.
| • | The EGR cooler inlet pipe nuts (to exhaust manifold) to 33 N·m (24.3 lb ft). |
| • | The exhaust manifold nuts to 33 N·m (24.3 lb ft). |
| • | The EGR cooler inlet pipe bolts (to EGR valve) to 20 N·m (14.8 lb ft). |

Exhaust Manifold Replacement 2.4L
Removal Procedure
- Disconnect the negative battery cable.
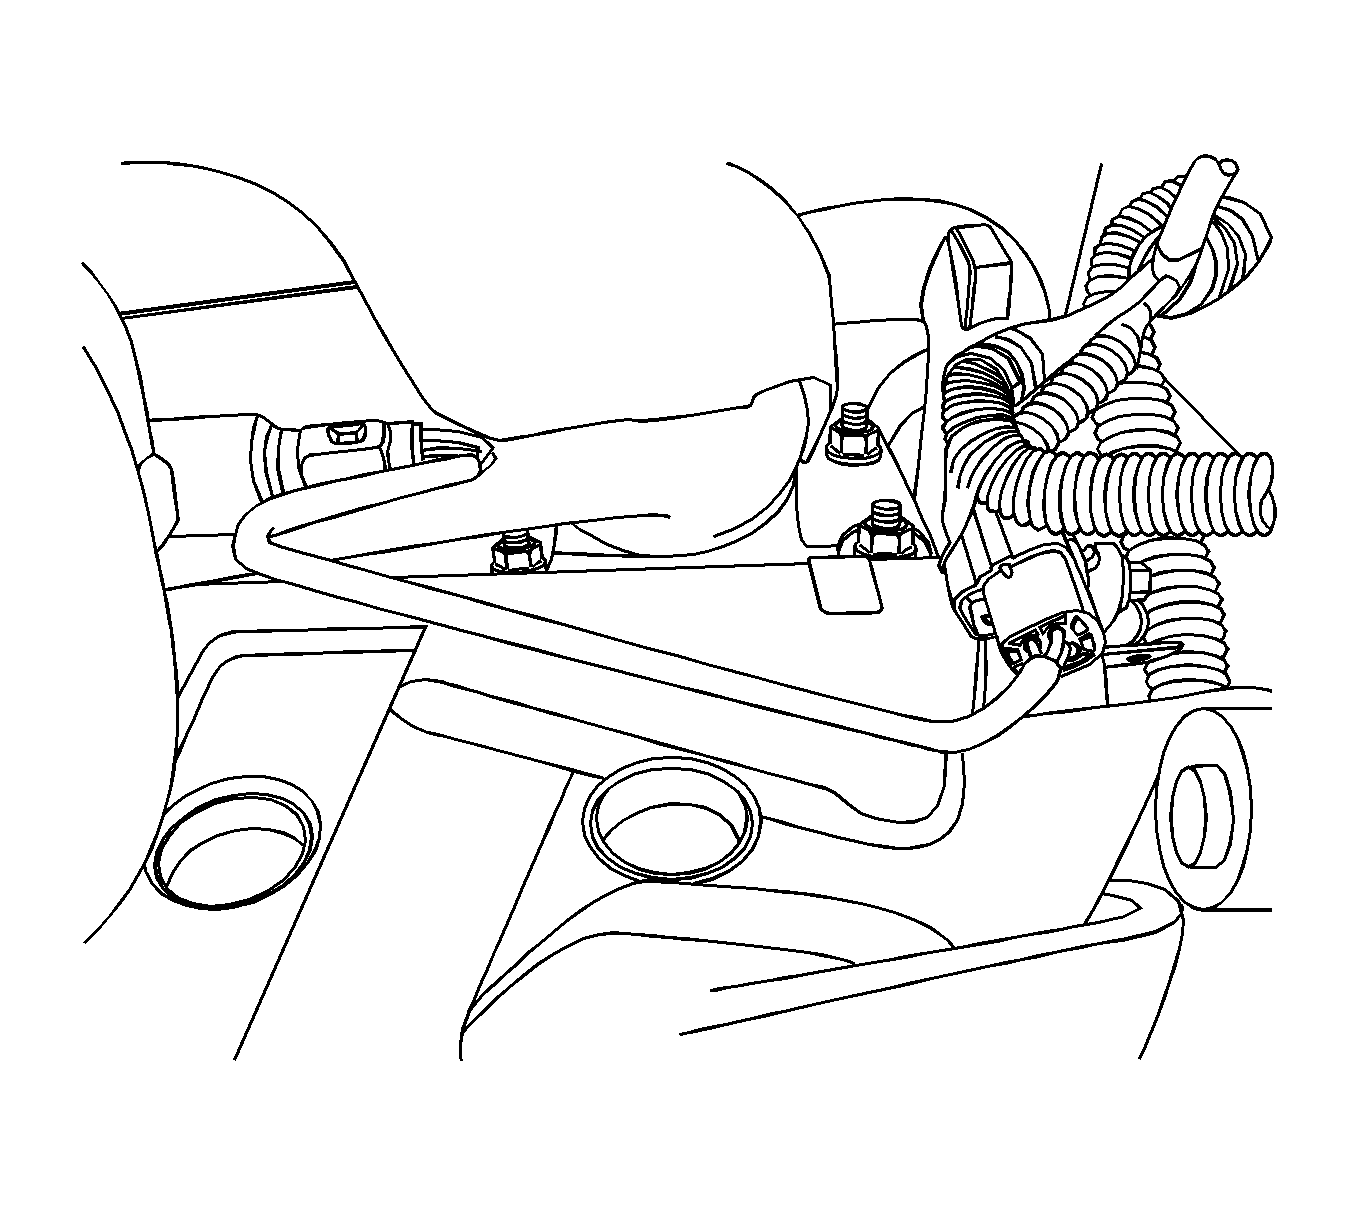
- Disconnect the front heated oxygen sensor connector.
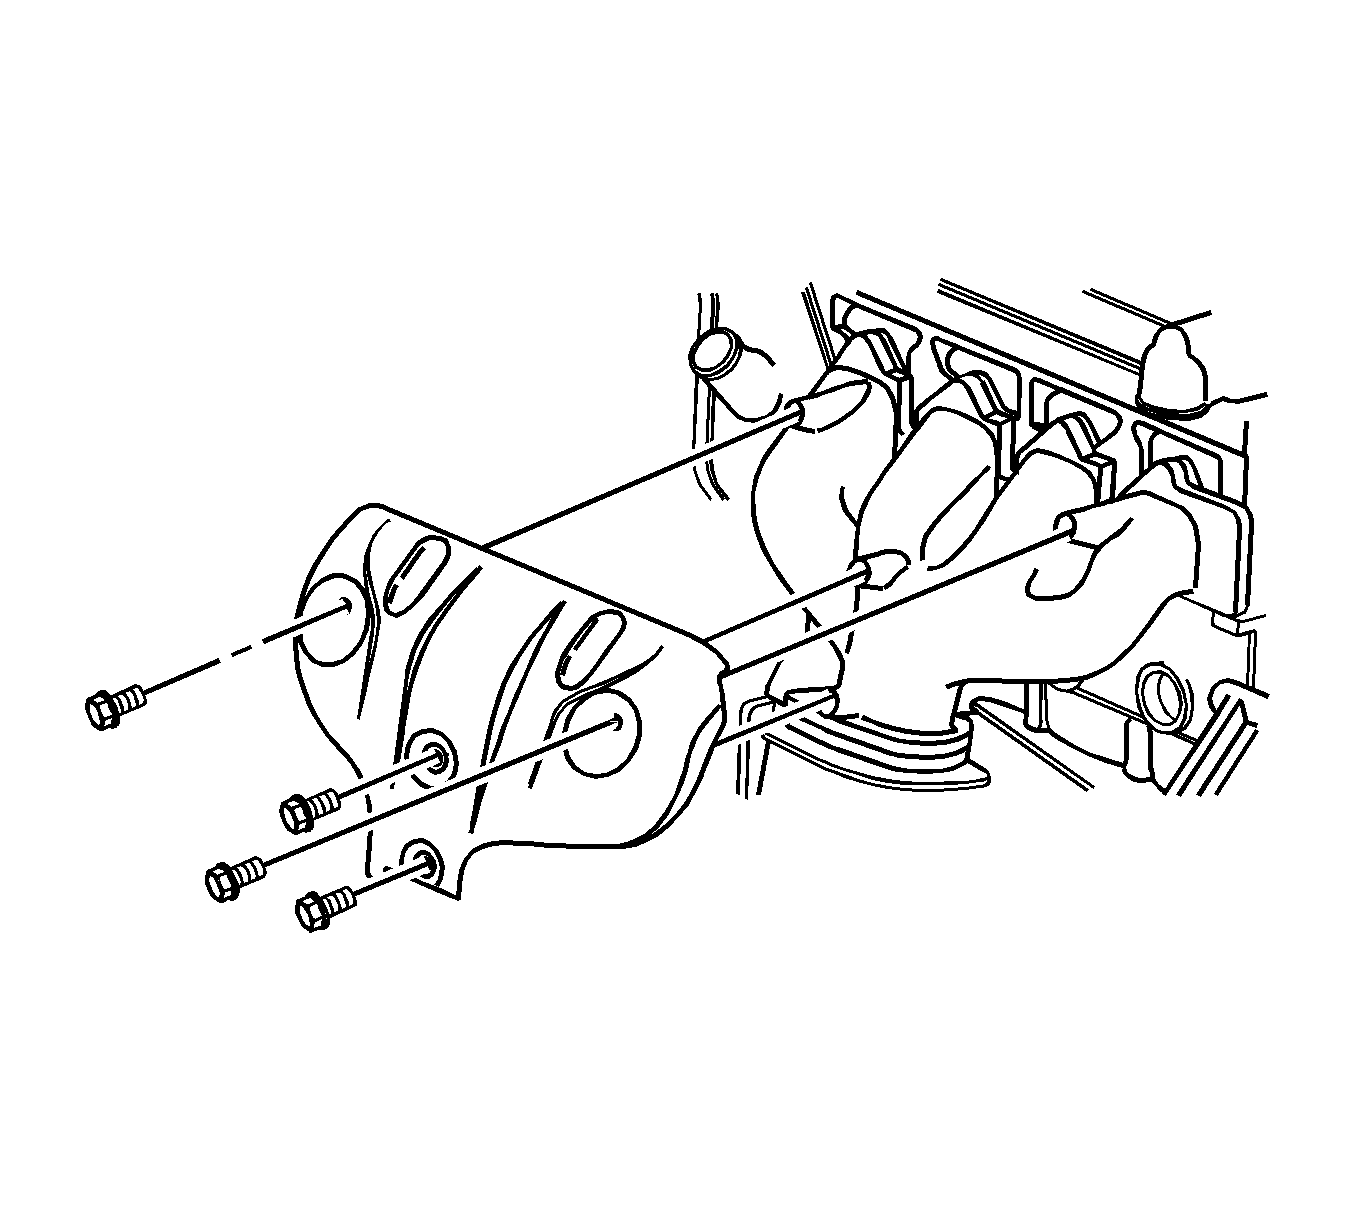
- Remove the exhaust manifold heat shield retaining bolts.
- Remove the exhaust manifold heat shield retaining bolts.
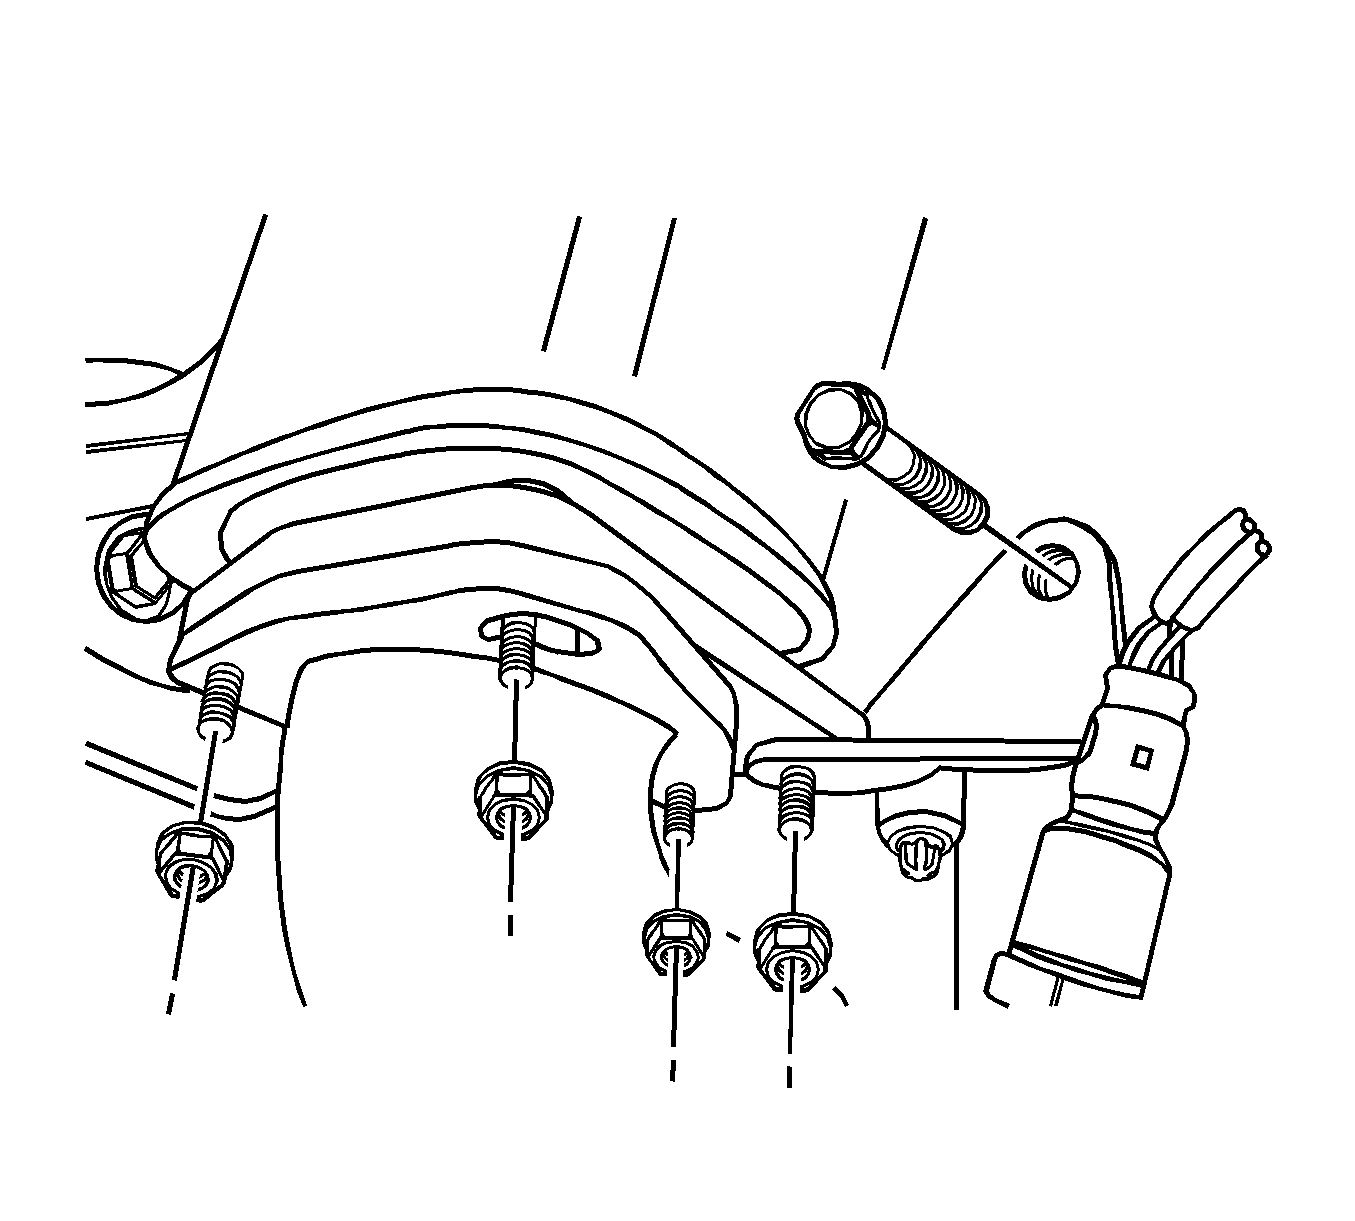
- Remove the pup converter-to-exhaust front pipe retaining nuts.
- Remove the exhaust front pipe mounting bracket bolt and nut.
- Remove the exhaust manifold retaining nuts in the sequence shown.
- Remove the exhaust manifold.
- Remove the exhaust manifold gasket.
- Clean the sealing surfaces of the exhaust manifold and the cylinder head.
Warning: Refer to Battery Disconnect Warning in the Preface section.
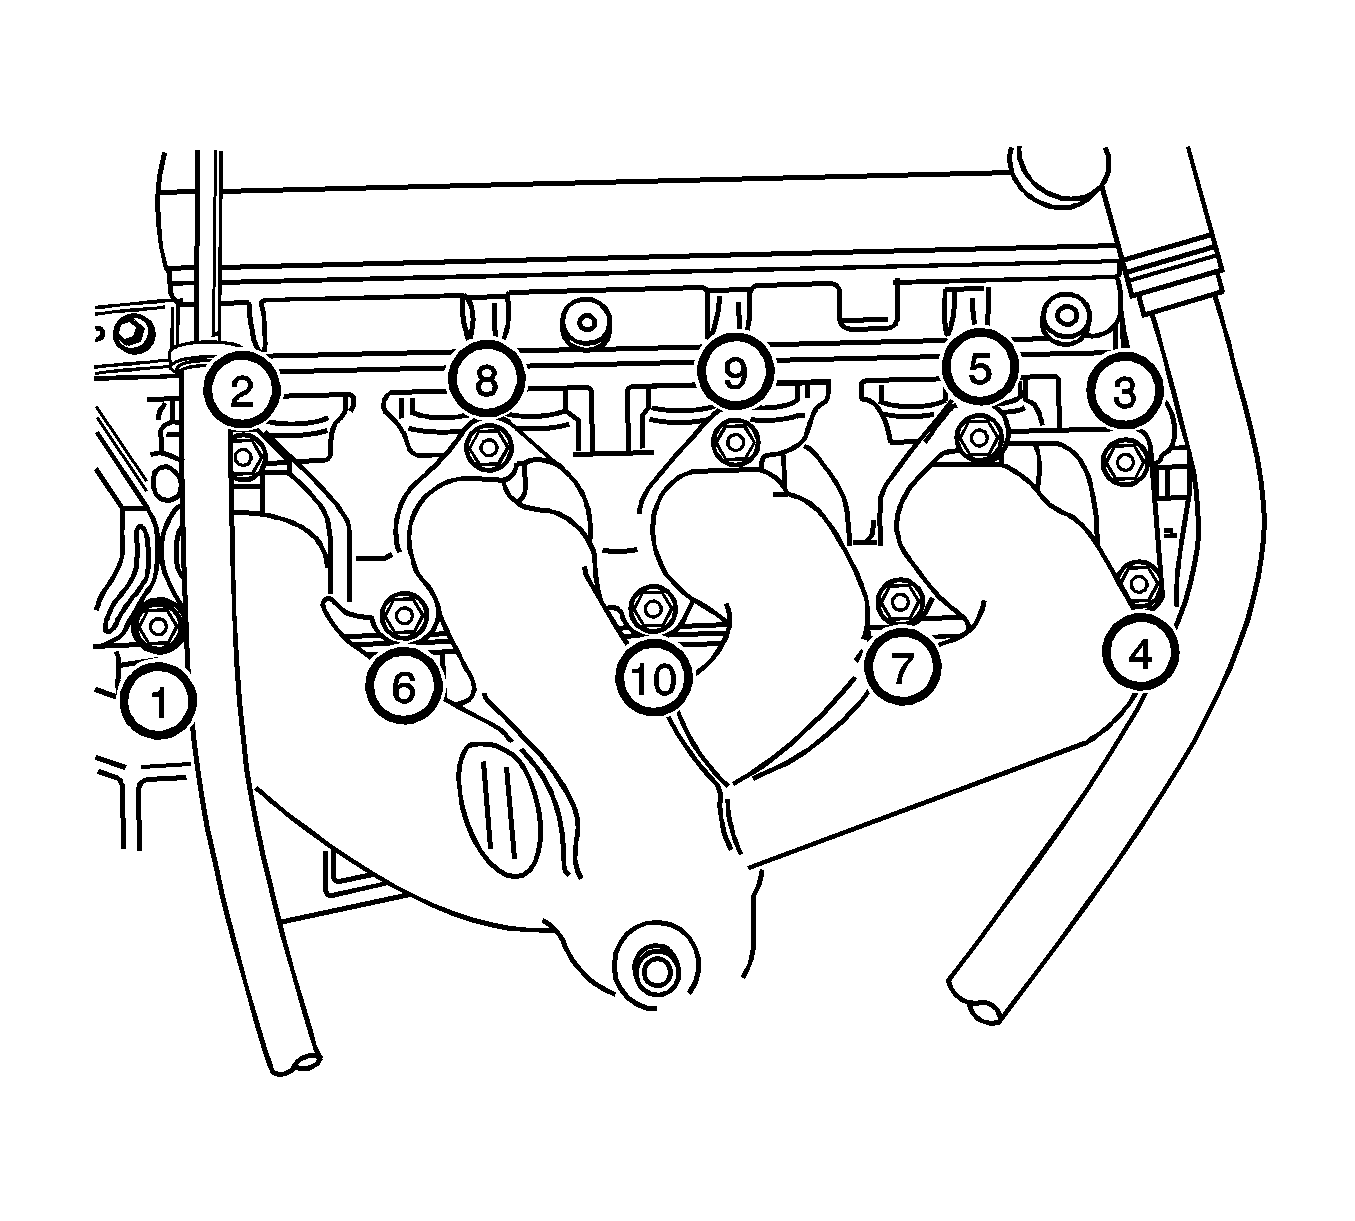
Installation Procedure
- Install a new exhaust manifold gasket.
- Install the exhaust manifold.
- Install the exhaust manifold retaining nuts and tighten in the sequence shown to 22 N·m (16 lb ft).
- Install the exhaust front pipe-to-pup converter and tighten. Refer to Front Pipe Replacement.
- Install the exhaust manifold heat shield and tighten bolts to 15 N·m (11 lb ft).
- Connect the front heated oxygen sensor connector.
- Connect the negative battery cable.
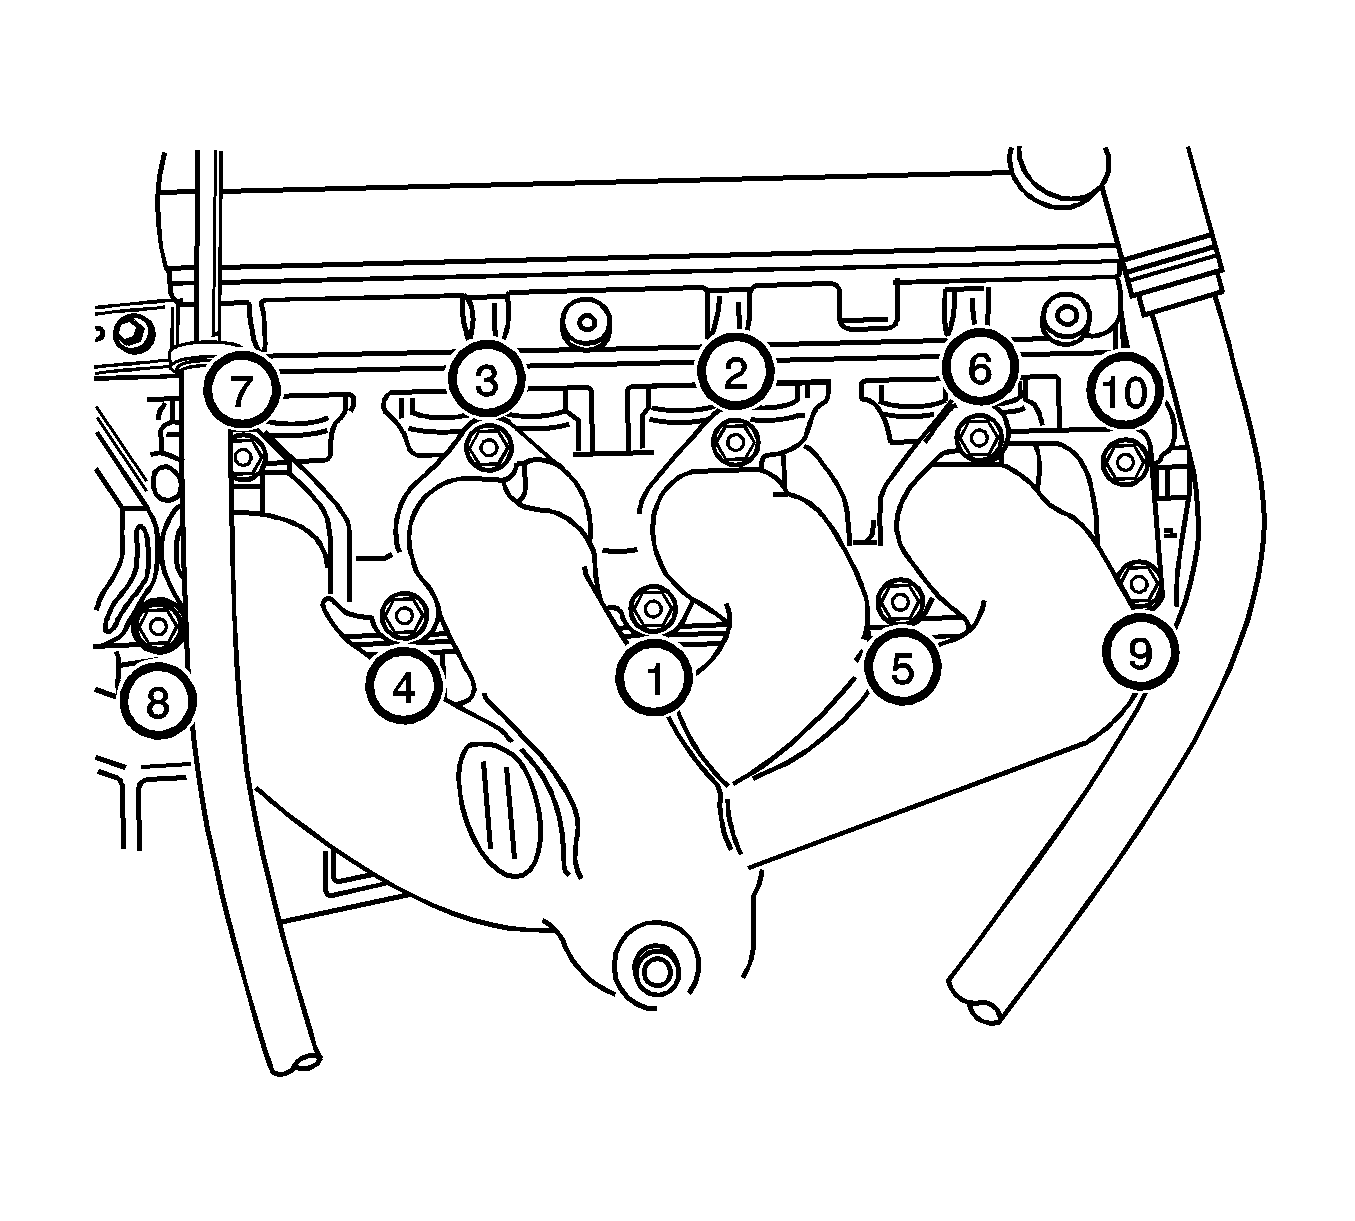
Caution: Refer to Fastener Caution in the Preface section.

| • | The pup converter-to-exhaust front pipe retaining nuts to 40 N·m (30 lb ft). |
| • | The exhaust front pipe mounting bracket bolt and nut to 40 N·m (30 lb ft). |


