Special Tools
| • | EN-46103 Camshaft Actuator Valve Seal Remover/Installer |
| • | EN-46109 Engine Front Cover Installation Guide Pins |
| • | J-29184 Oil Seal Installer |
Removal Procedure
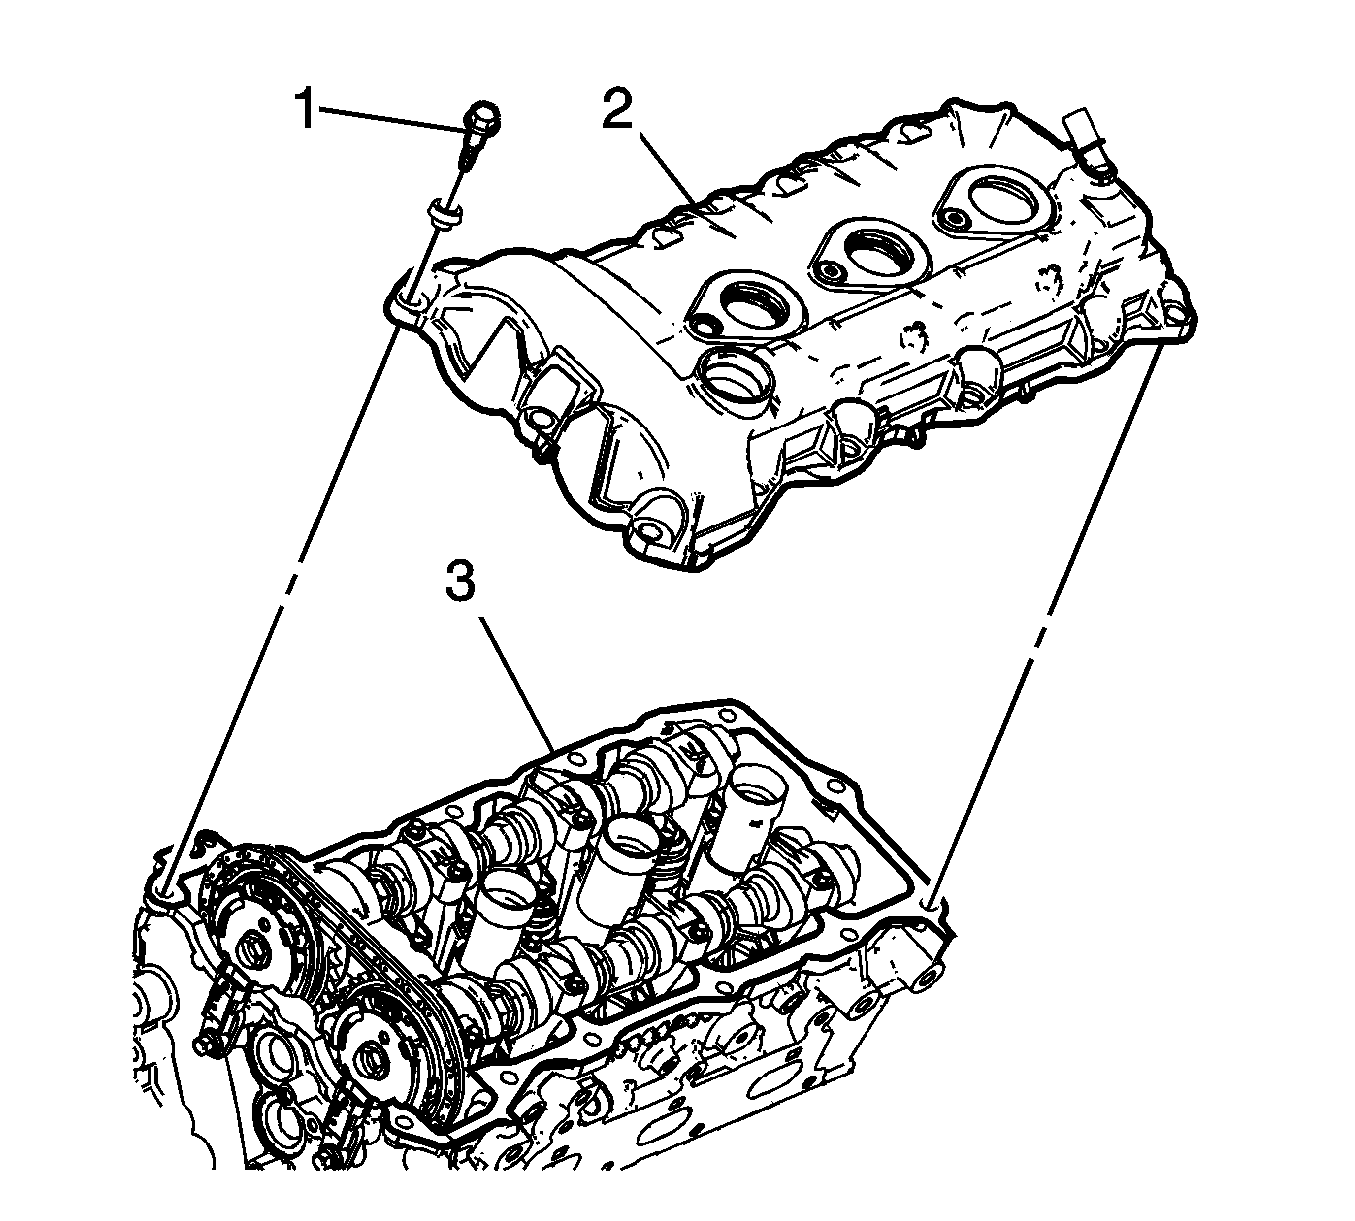
- Remove the engine assembly. Refer to
Engine Replacement
- Remove the cylinder head covers. Refer to
Camshaft Cover Replacement - Left Side and
Camshaft Cover Replacement - Right Side.
- Remove the crankshaft pulley assembly. Refer to
Crankshaft Balancer Replacement
- Remove the camshaft position sensors. Refer to
Camshaft Position Sensor Replacement - Bank 2 (Left Side) Exhaust,
Camshaft Position Sensor Replacement - Bank 2 (Left Side) Intake,
Camshaft Position Sensor Replacement - Bank 1 (Right Side) Exhaust and
Camshaft Position Sensor Replacement - Bank 1 (Right Side) Intake.
- Remove the camshaft position actuator solenoid valves. Refer to
Camshaft Position Actuator Solenoid Valve Solenoid Replacement - Bank 1 (Right Side) Intake,
Camshaft Position Actuator Solenoid Valve Solenoid Replacement - Bank 1 (Right Side) Exhaust,
Camshaft Position Actuator Solenoid Valve Solenoid Replacement - Bank 2 (Left Side) Intake and
Camshaft Position Actuator Solenoid Valve Solenoid Replacement - Bank 2 (Left Side) Exhaust.
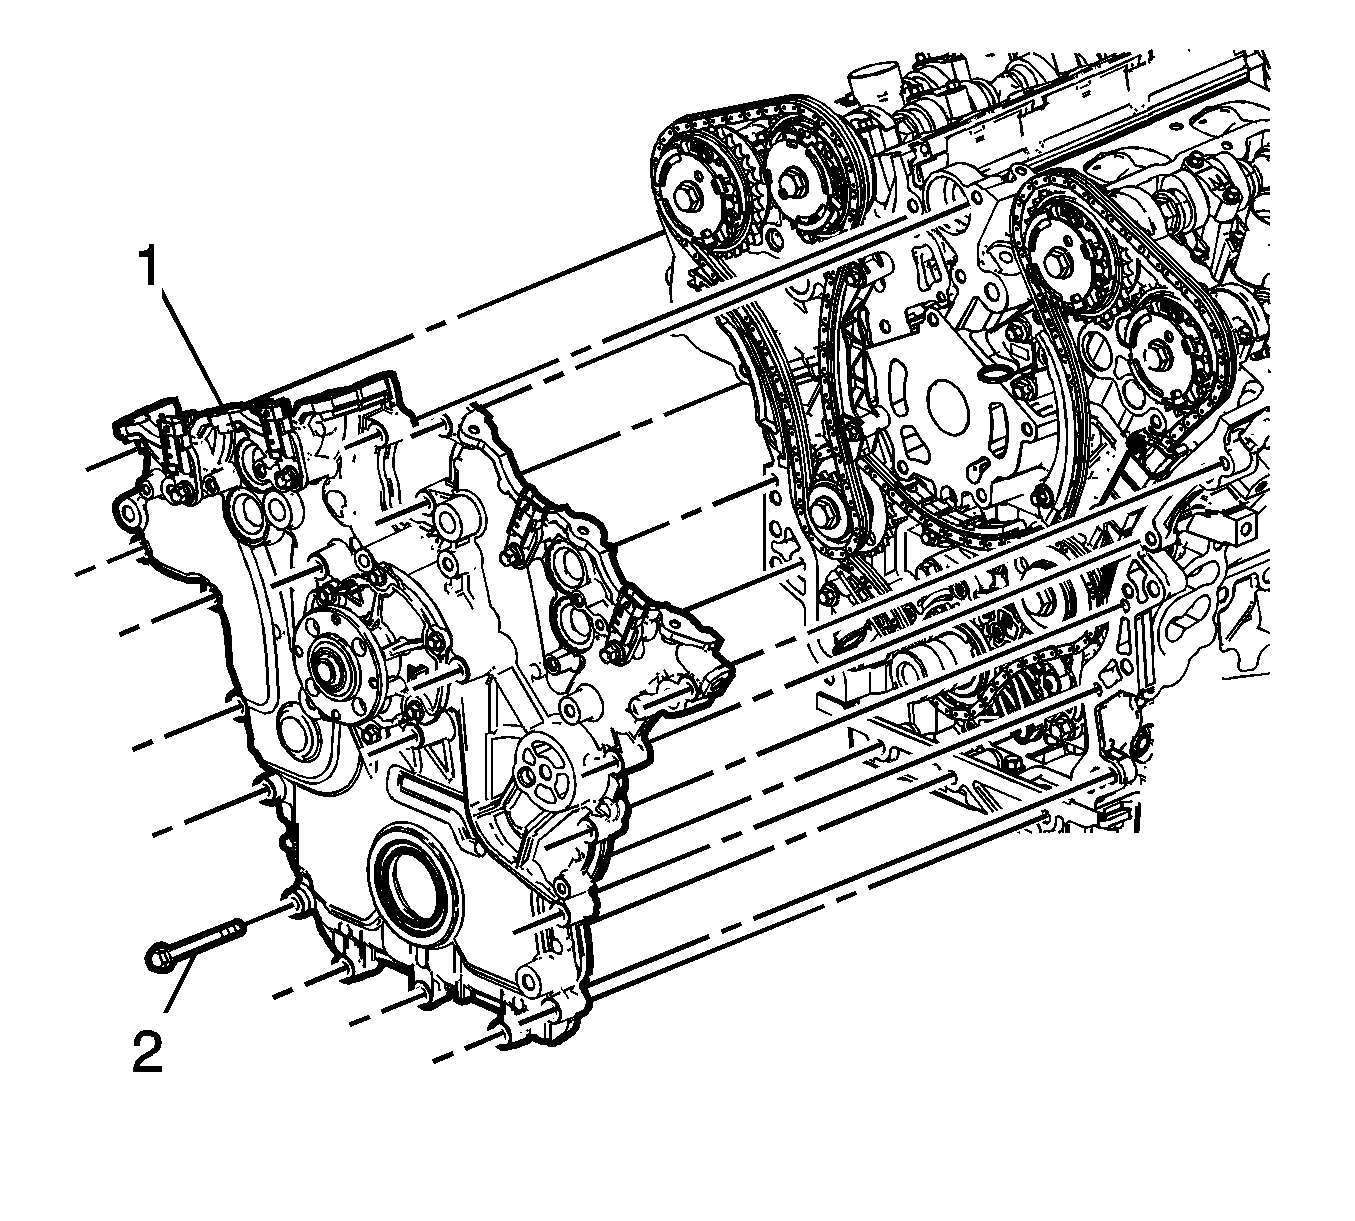
- Remove the bolt (2), 22 places, attaching the front cover assembly (1).
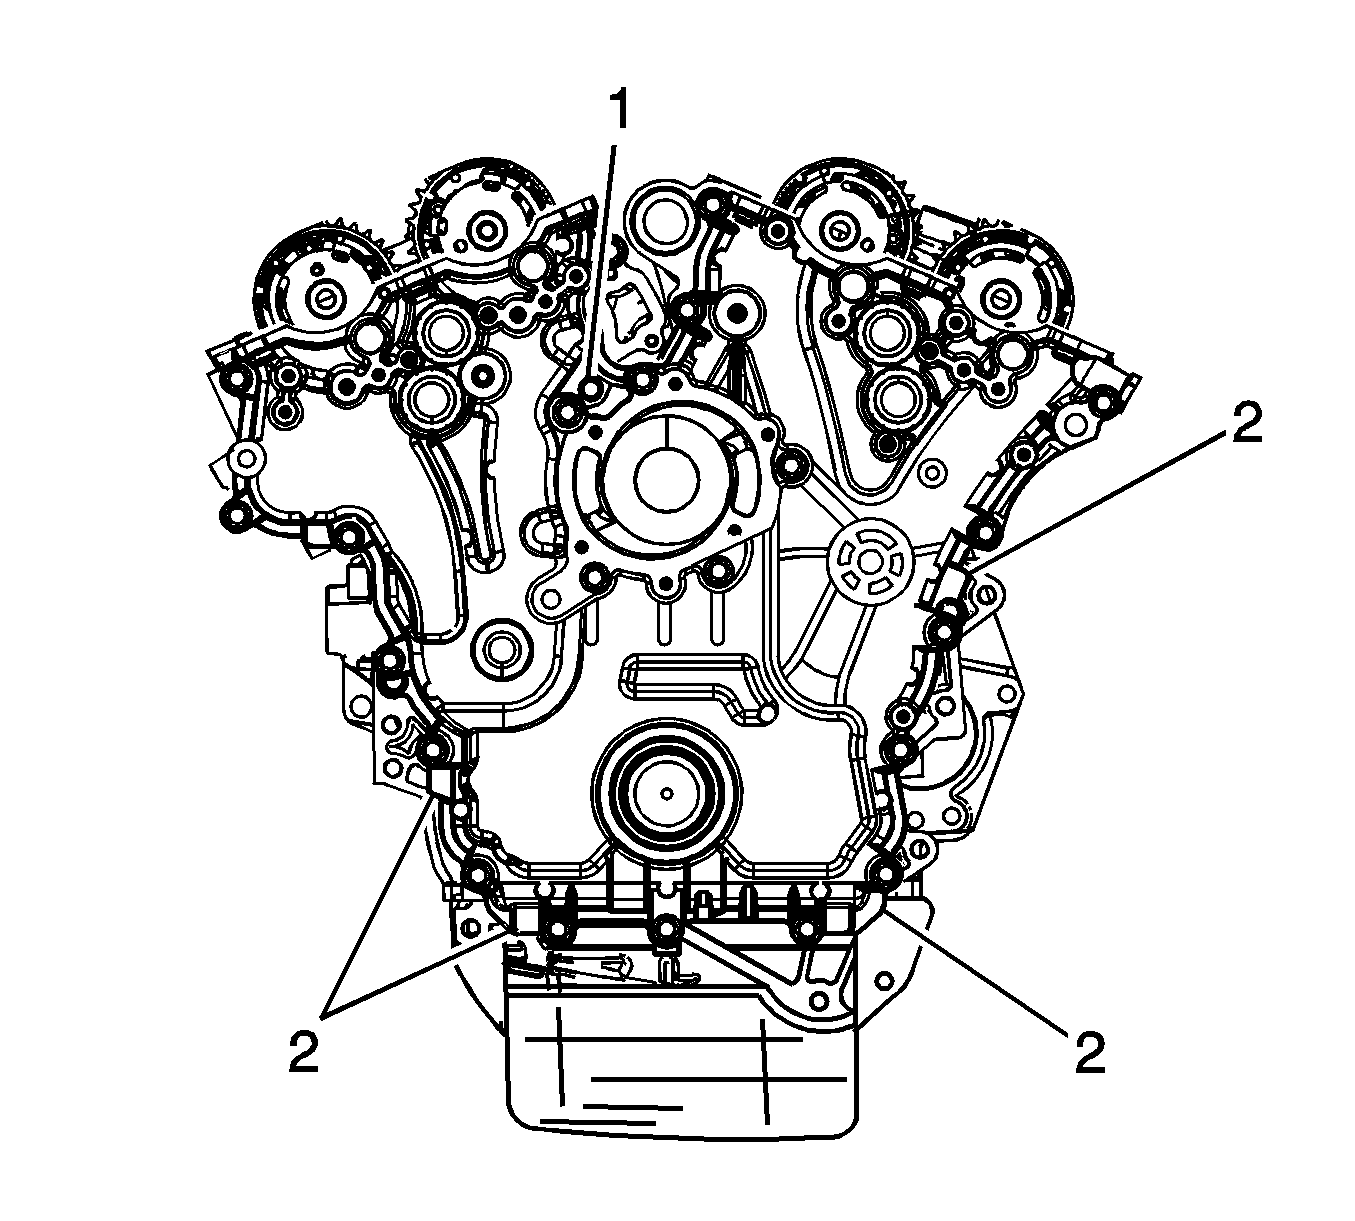
Note: Only use the pry points and a bolt in the jackscrew hole to remove the engine front cover.
- Loosely install a proper bolt in the jackscrew hole (1).
- Using the pry points (2) located at the edge of the front cover and the jackscrew, shear the RTV sealant.
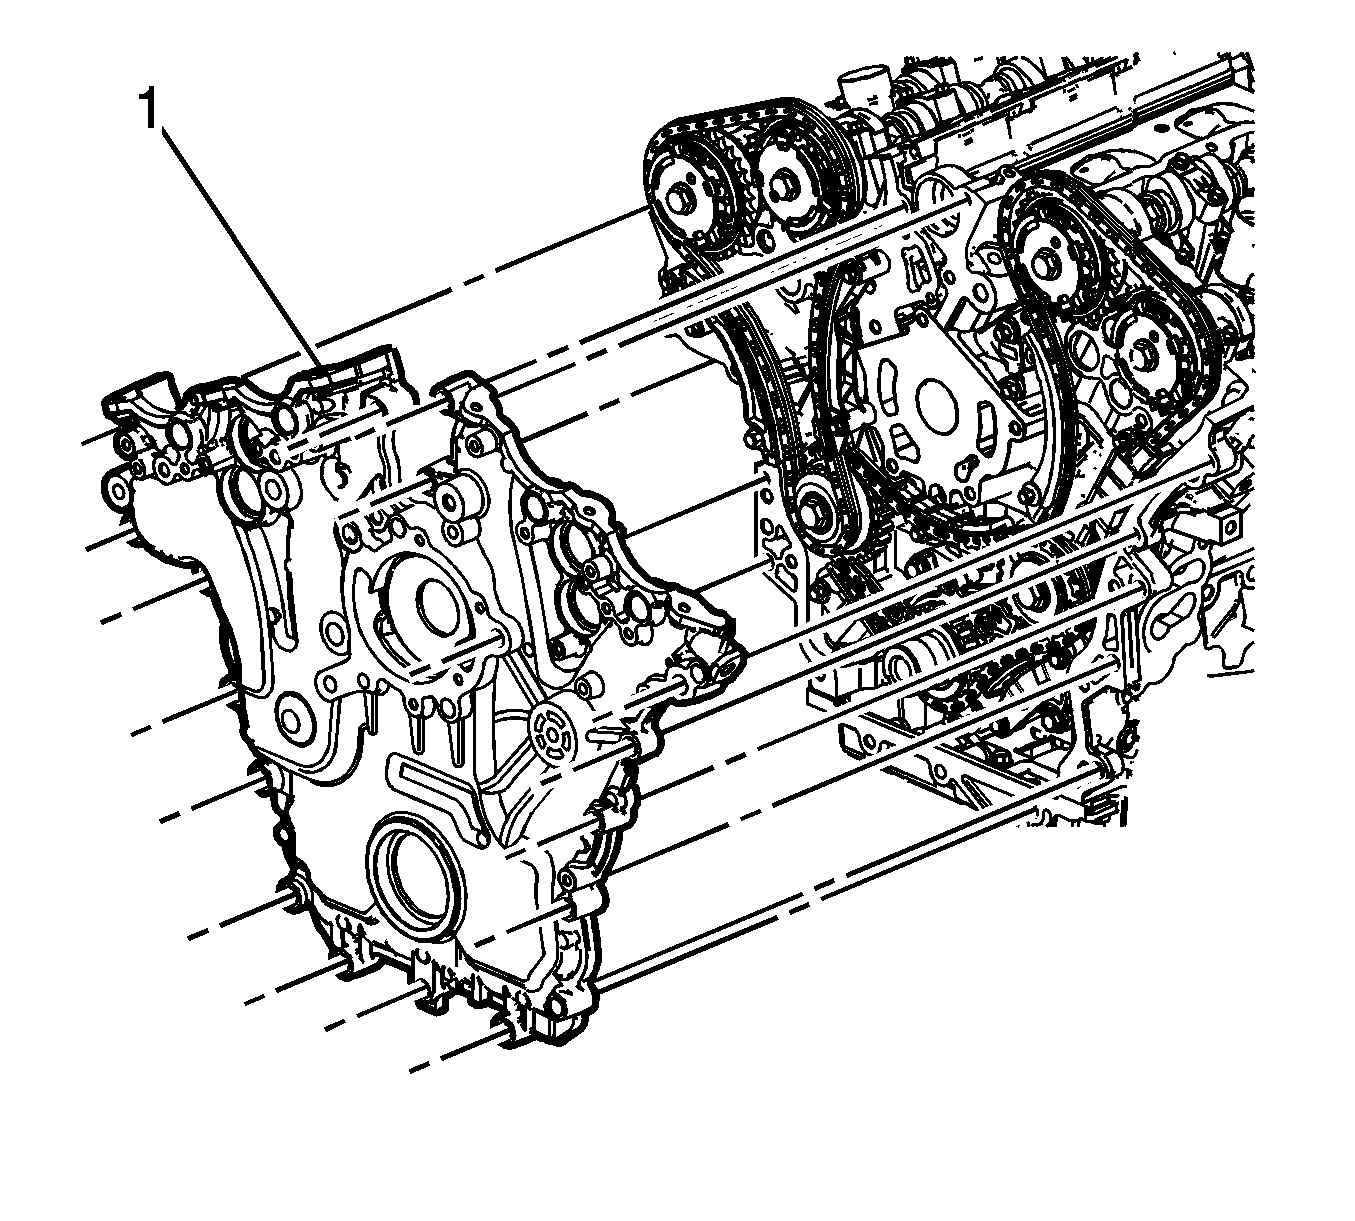
- Remove the front cover assembly (1).
Disassembly Procedure
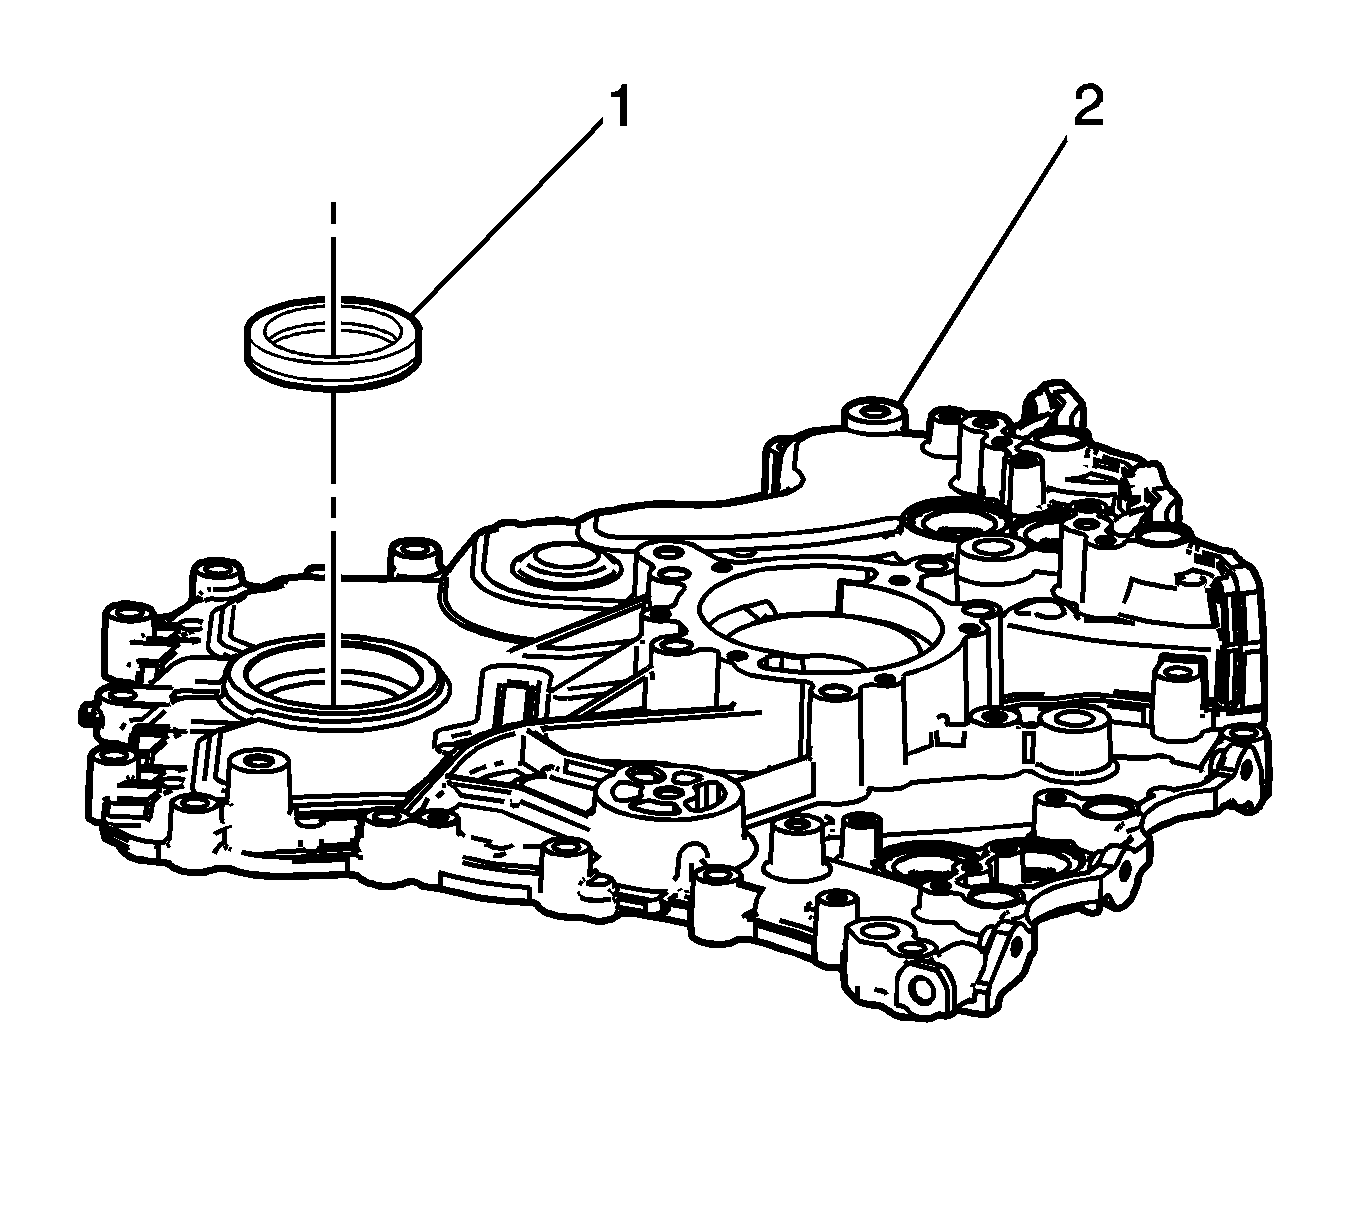
- Remove the crankshaft front oil seal (1) from the engine front cover (2) using a flat-bladed tool. Discard the seals.
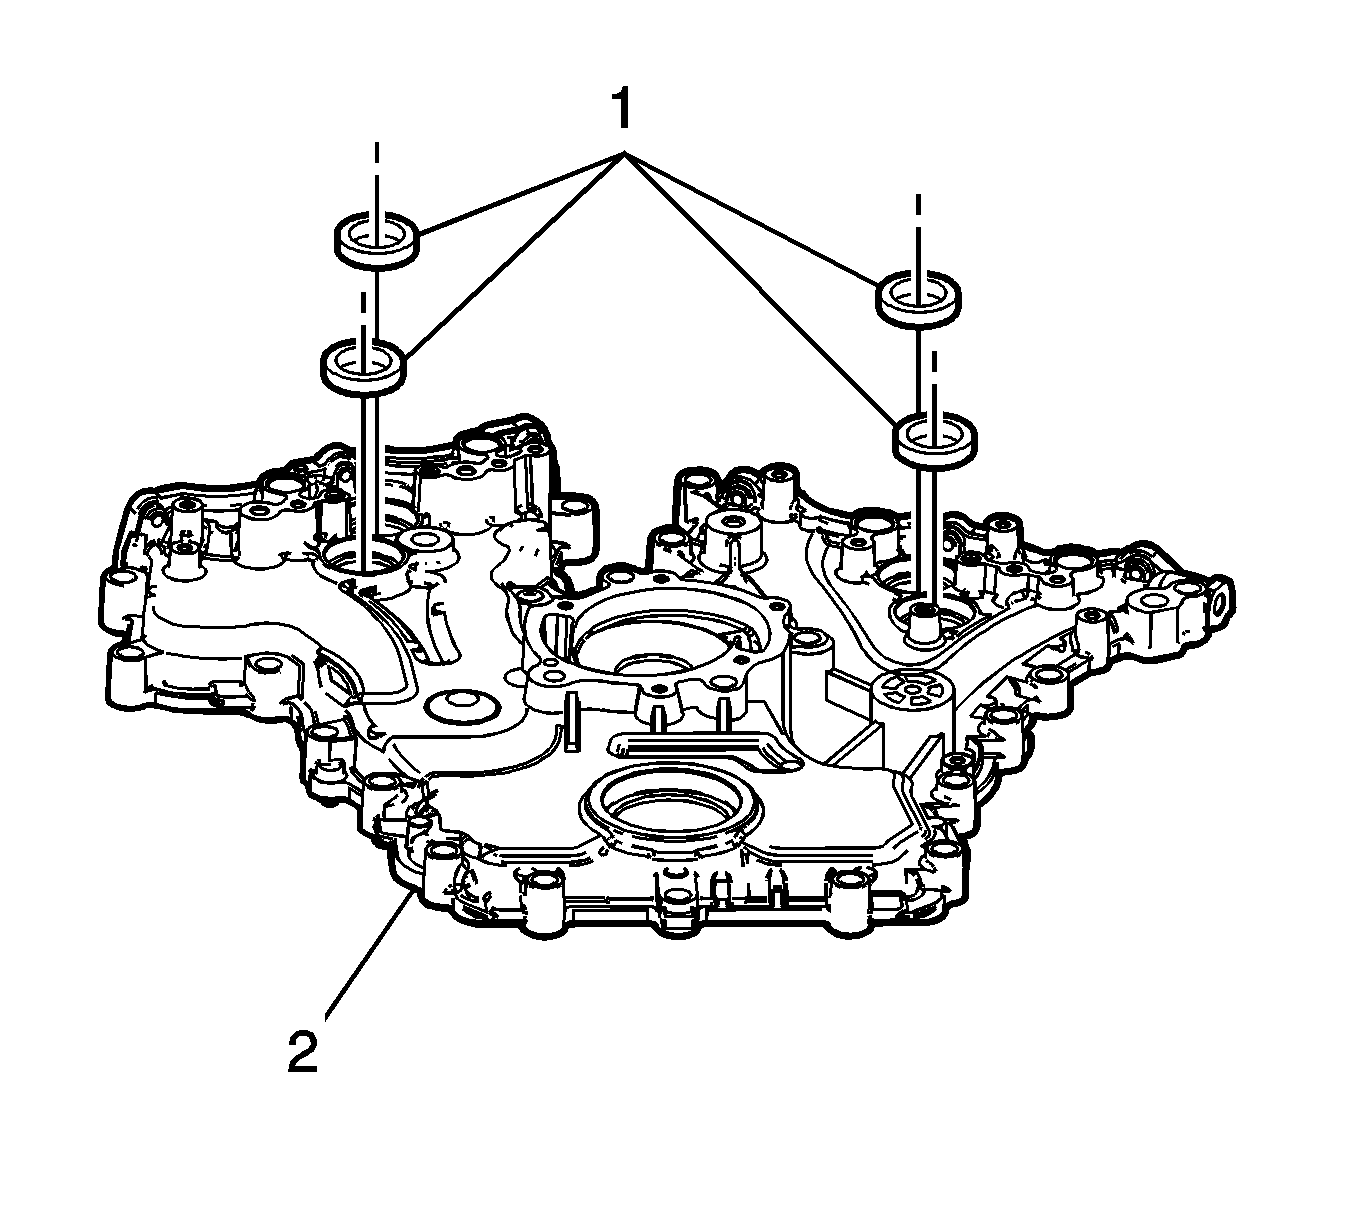
- Remove the camshaft position actuator valve oil seals (1) from the engine front cover (2). Discard the seals.
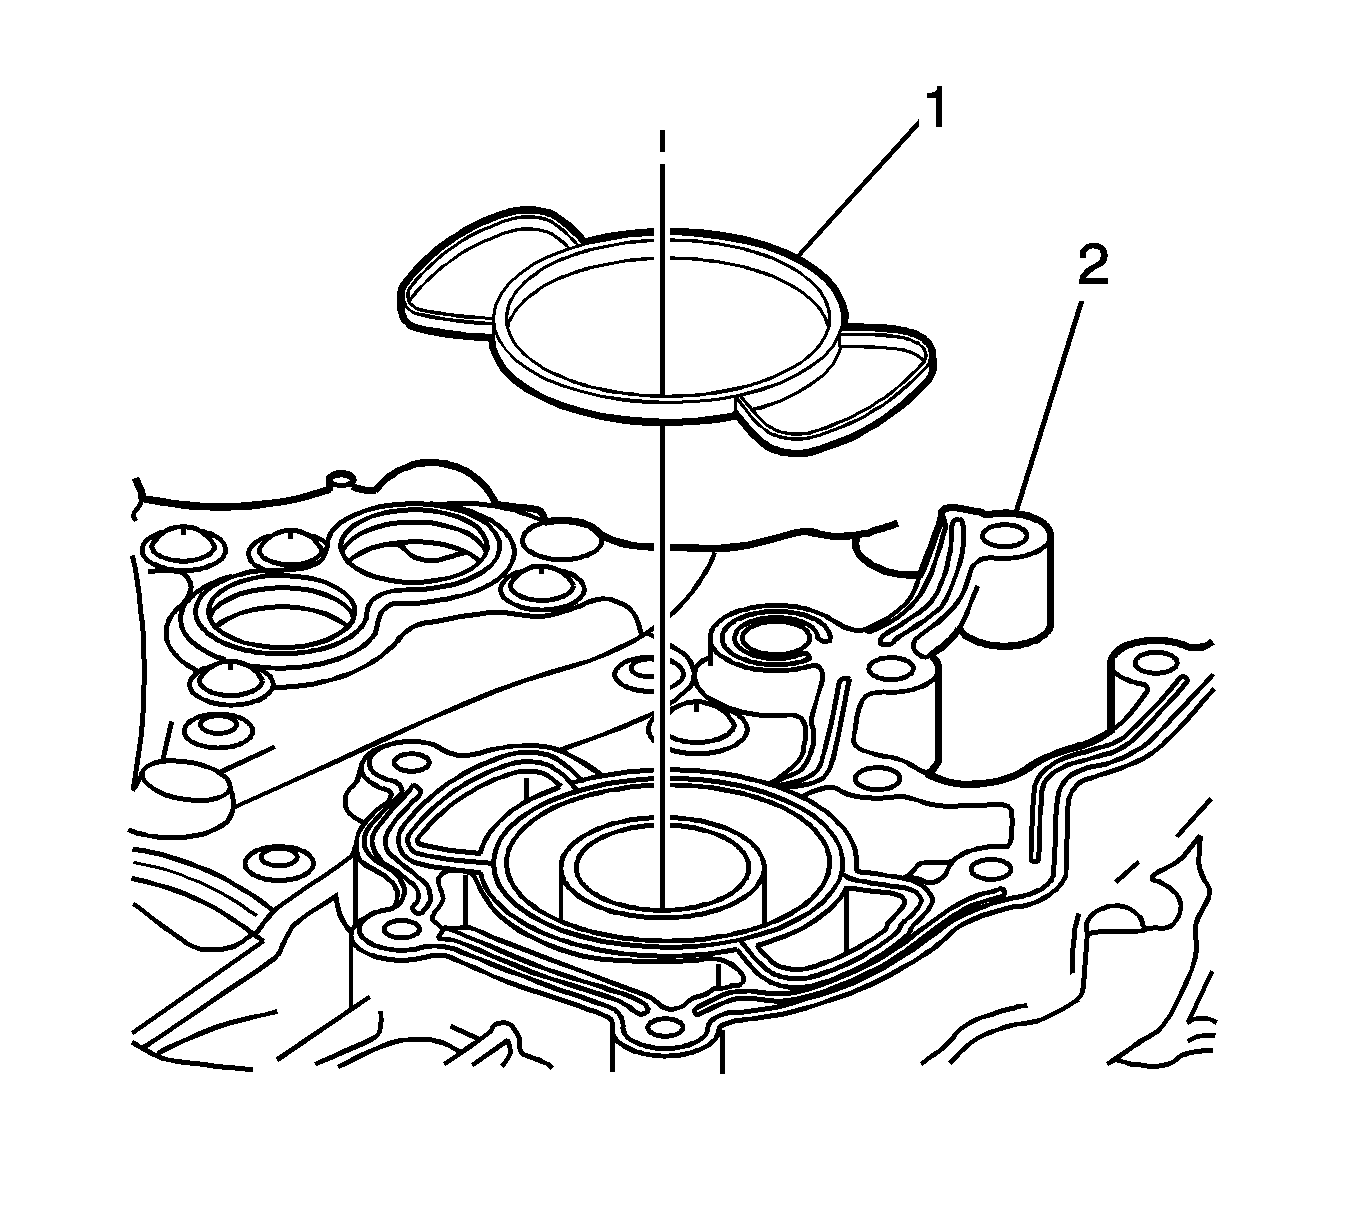
- Remove the coolant pump seal (1) from the engine front cover (2) and discard the seal.
Cleaning Procedure
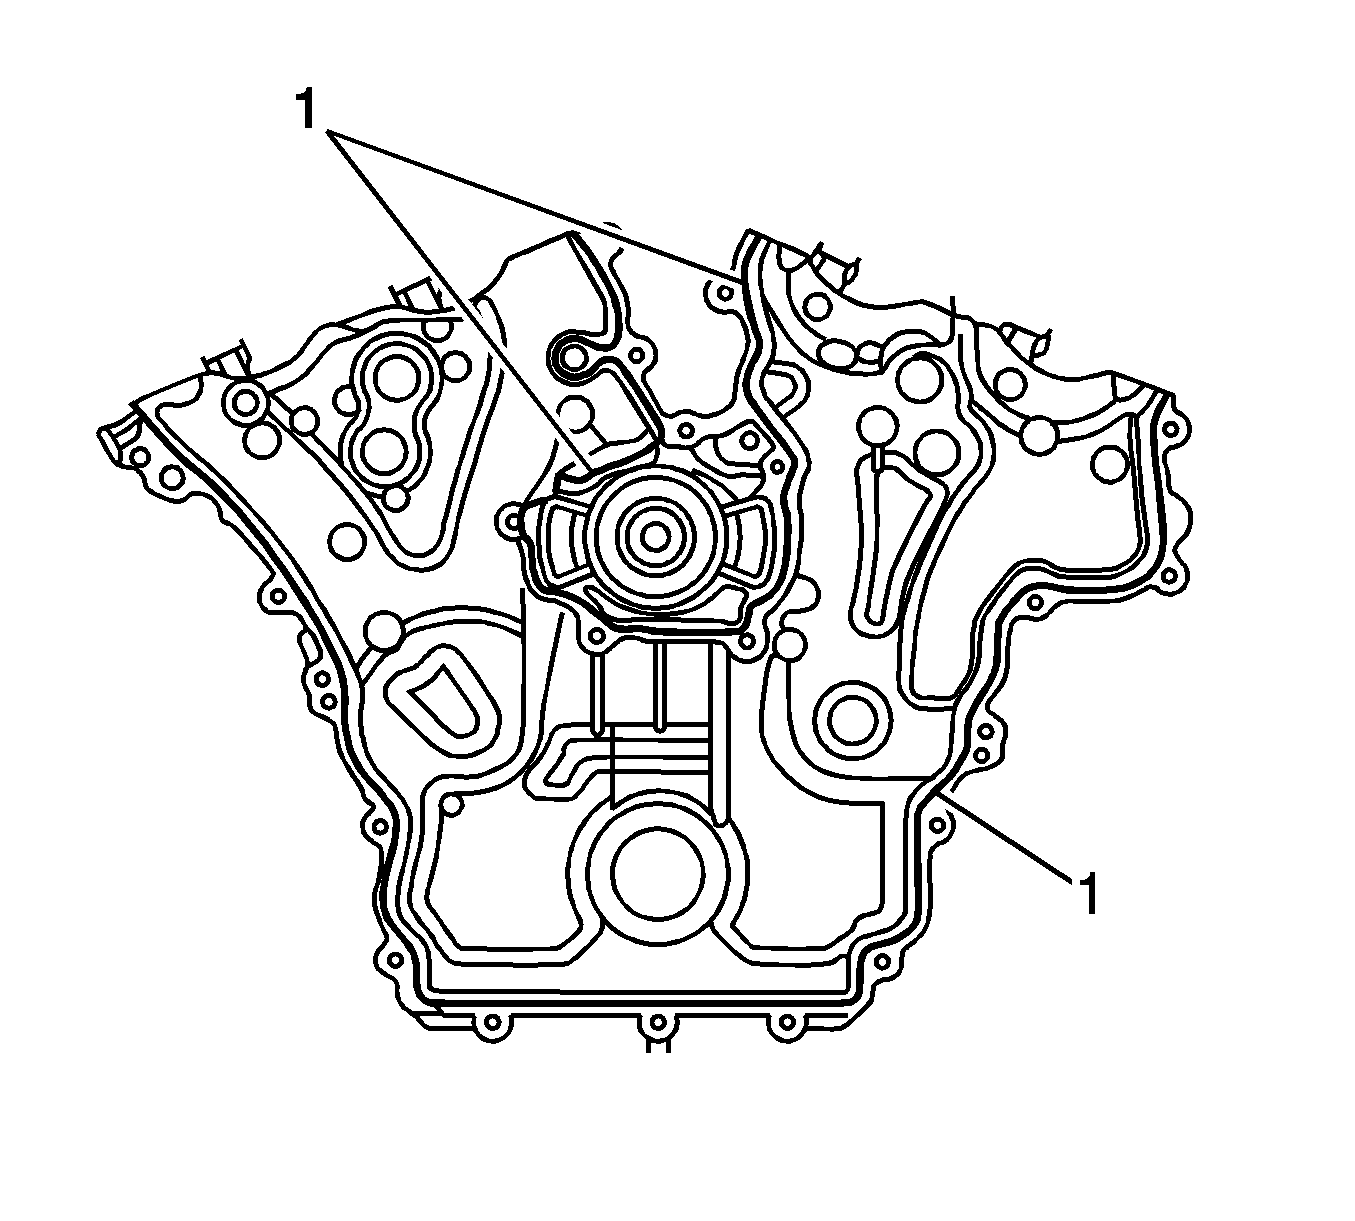
Note: Do not use a sharp or metal gasket scraper to clean the sealing surfaces.
- Remove any RTV sealant (1) from the engine front cover using a plastic or wood scraper.
- Clean out any debris from the bolt holes.
- Clean the front cover with a suitable cleaning solvent.
- Dry the front cover with compressed air.
Inspection Procedure
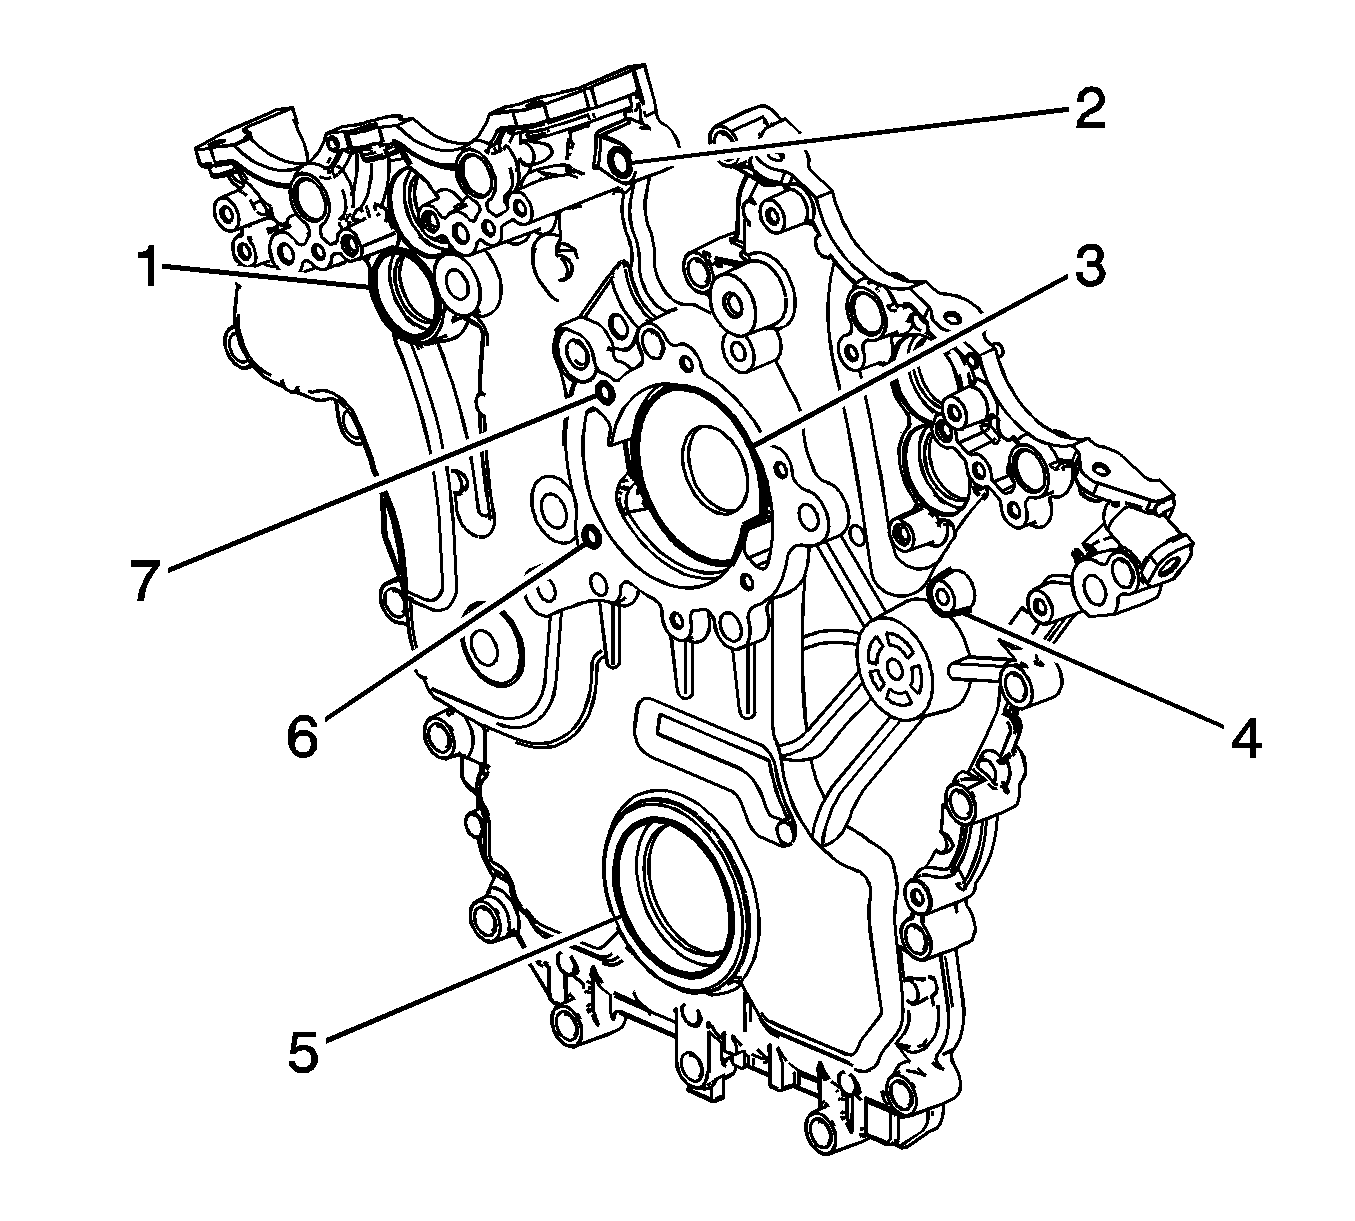
- Inspect both sides of the engine front cover for the following conditions:
| • | Damage to the camshaft position actuator valve oil seal bores (1) |
| • | Damage and/or corrosion to the engine coolant passage (3) |
| • | Dents or damage to the exterior (4) |
| • | Damage to the crankshaft front oil seal bore (5) |
| • | Gouges or damage to the coolant pump sealing surfaces (6) |
| • | Damage to the coolant pump bolt hole threads (7) |
- Repair or replace the front cover as required.
Assembly Procedure
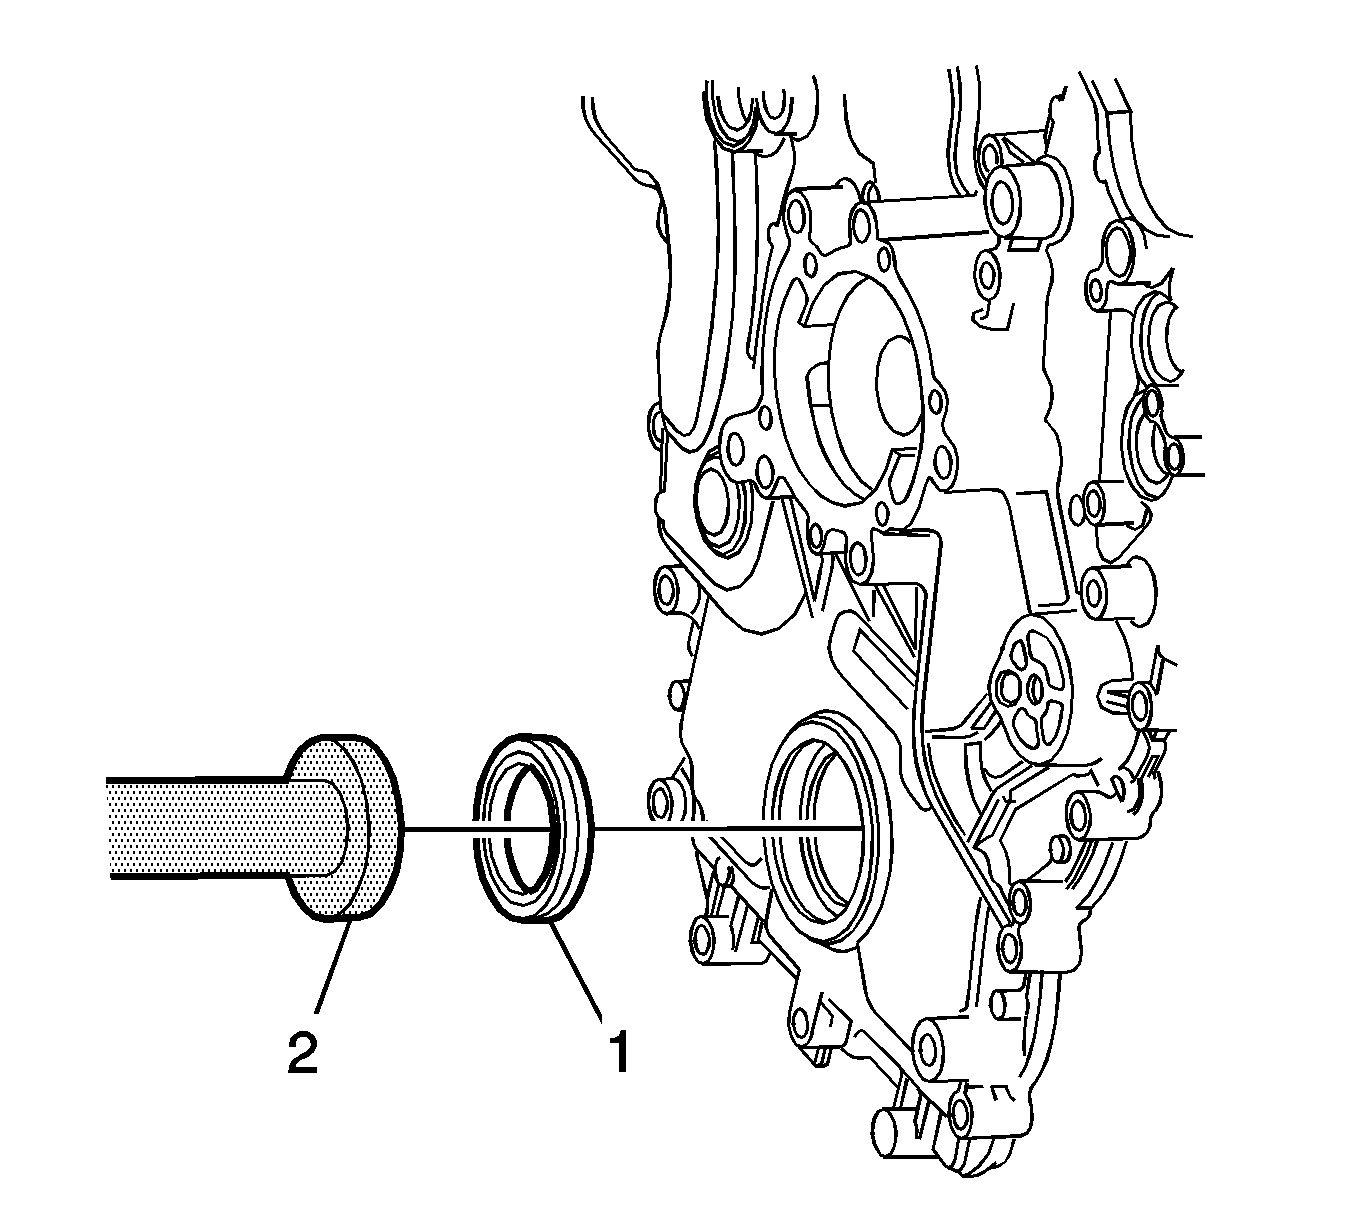
Note: Do not lubricate the crankshaft front oil seal or crankshaft pulley sealing surfaces. The crankshaft pulley is installed into a dry seal.
- Install a new crankshaft front oil seal (1) into the front cover (2) using the crankshaft front seal installer,
J-29184 installer
(3) and a suitable hammer.
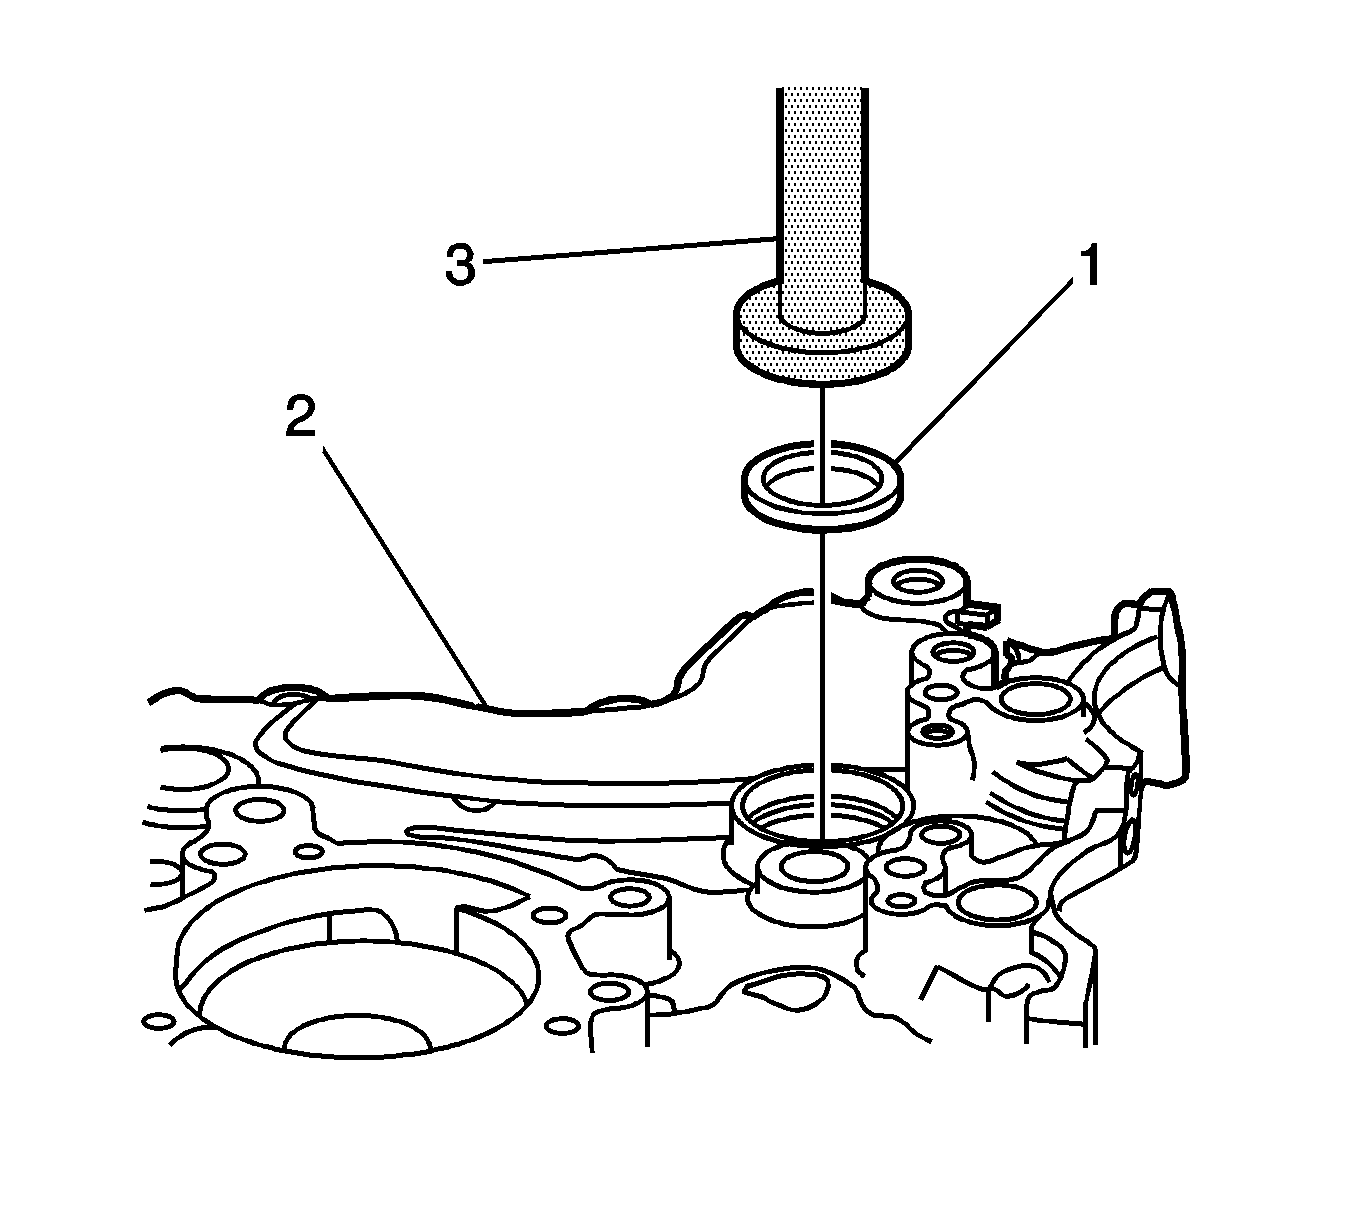
- Install a new camshaft position actuator valve oil seal (1) into the front cover (2) using
EN-46103 remover/installer
(3) and a suitable
hammer.
Installation Procedure
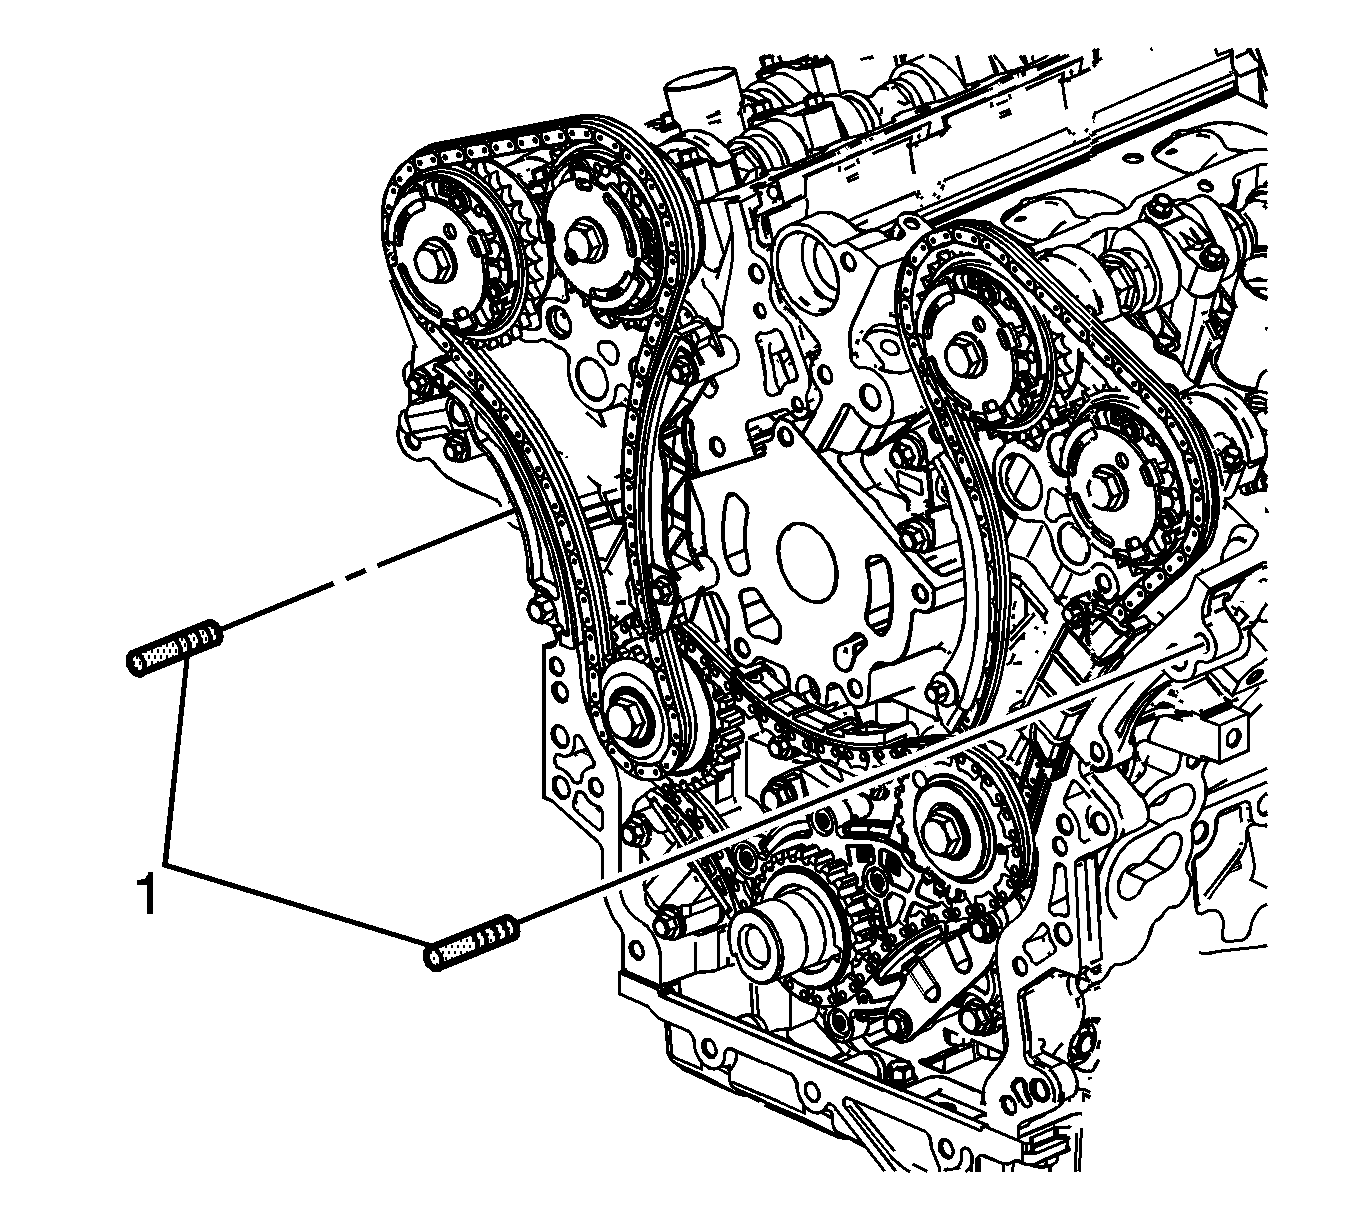
- Install the guide pins,
EN-46109 pins
(1) into the engine block, 2 places.
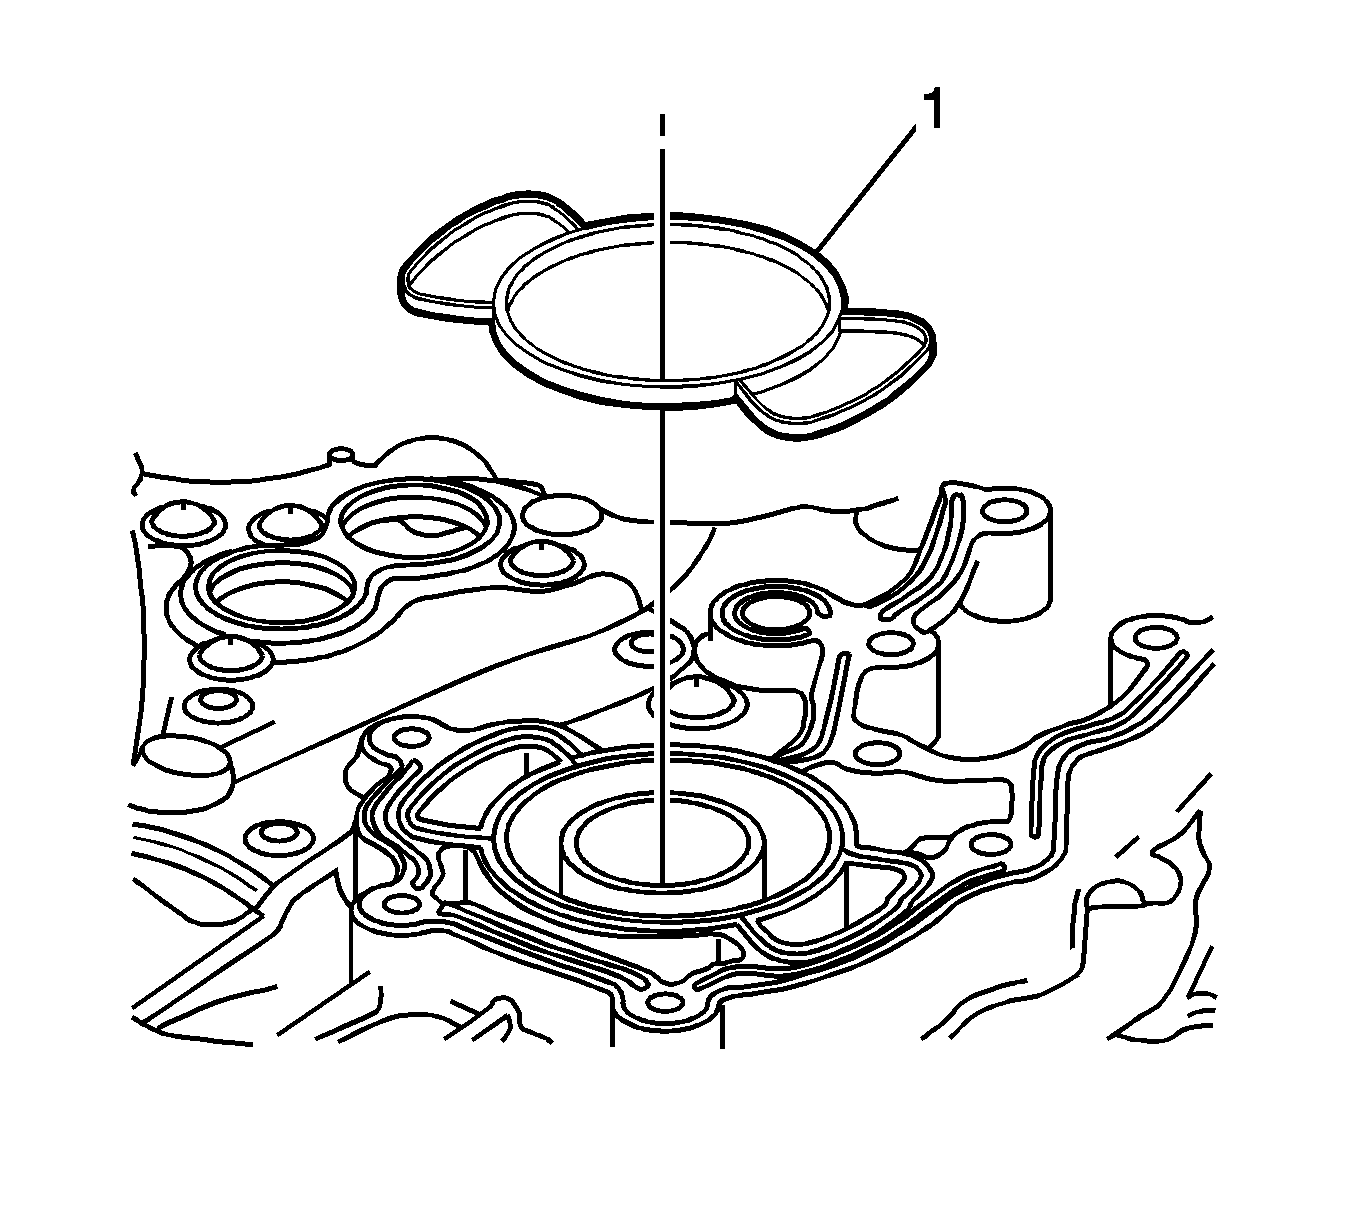
- Install a new engine front cover to cylinder block seal (1).

- Apply the RTV sealant (1) to the front cover.

- Place the front cover onto the special tools and slide into position.
- Remove the special tools from the cylinder block.
Caution: Refer to Fastener Caution in the Preface section.
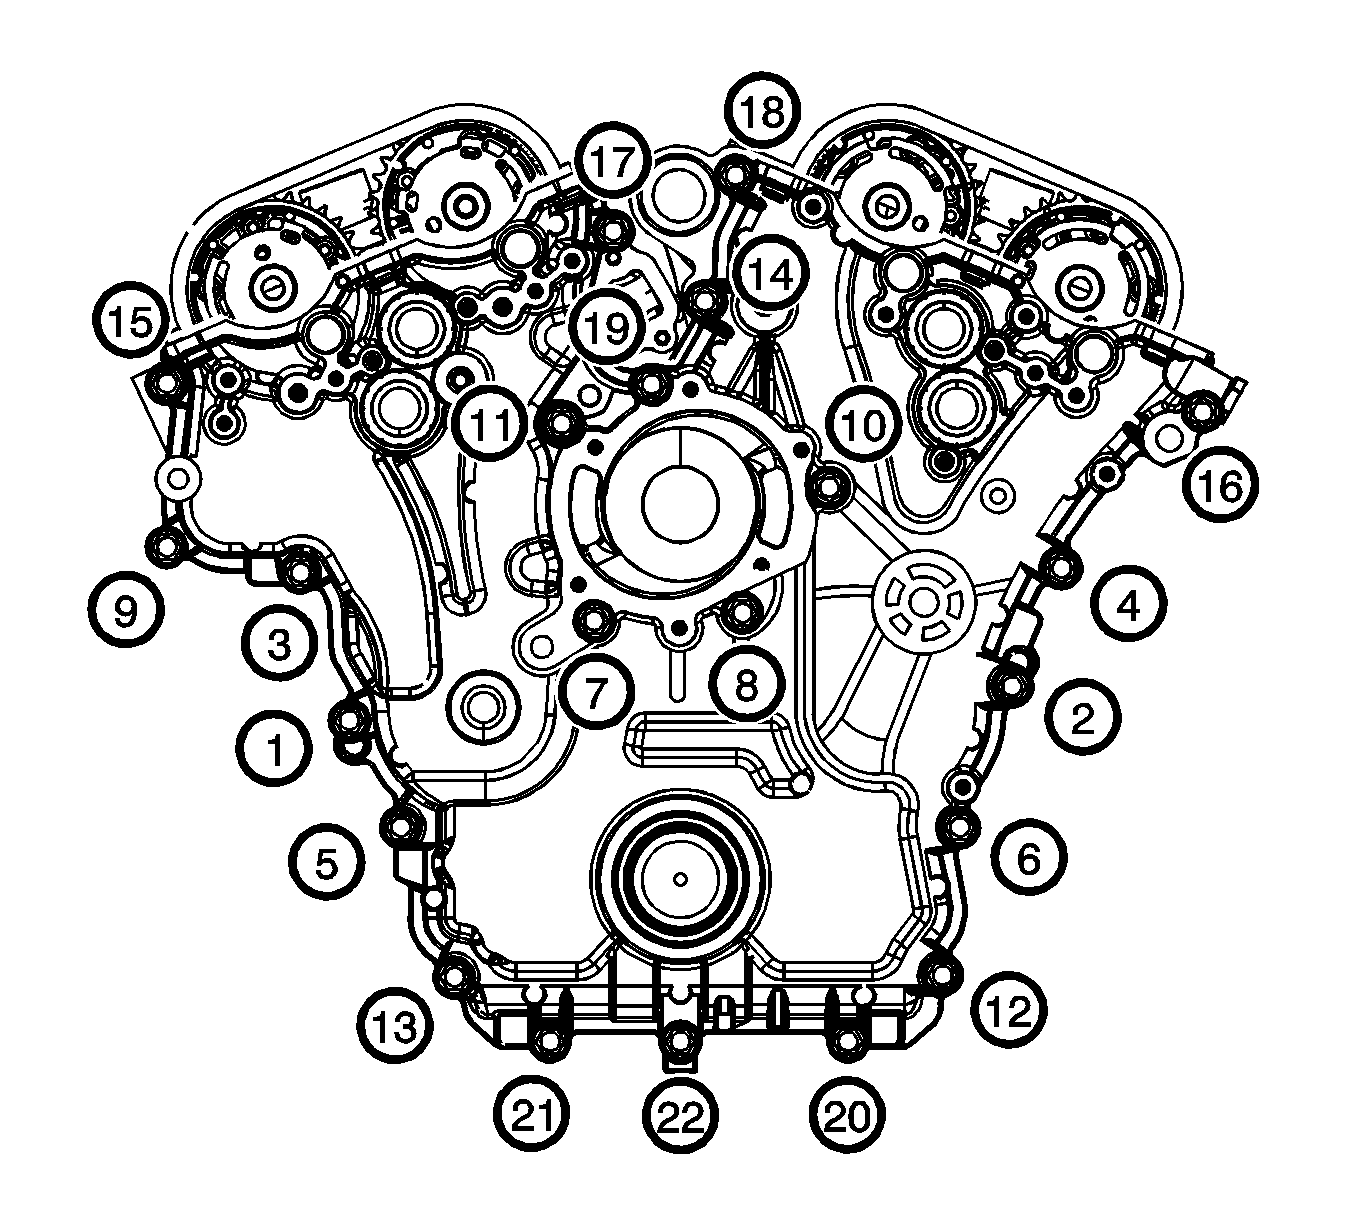
- Tighten the engine front cover bolts in the sequence shown to
23 N·m (17 lb ft).
- Install any other parts that were previously removed.
- Install the engine assembly. Refer to
Engine Replacement


