For 1990-2009 cars only
Auxiliary Catalytic Converter Replacement 2.0L Diesel
Removal Procedure
- Disconnect the negative battery cable.
- Remove the engine under cover.
- Remove the exhaust manifold heat shield with the bolts.
- Remove the pup converter upper flange-to-exhaust manifold retaining nuts.
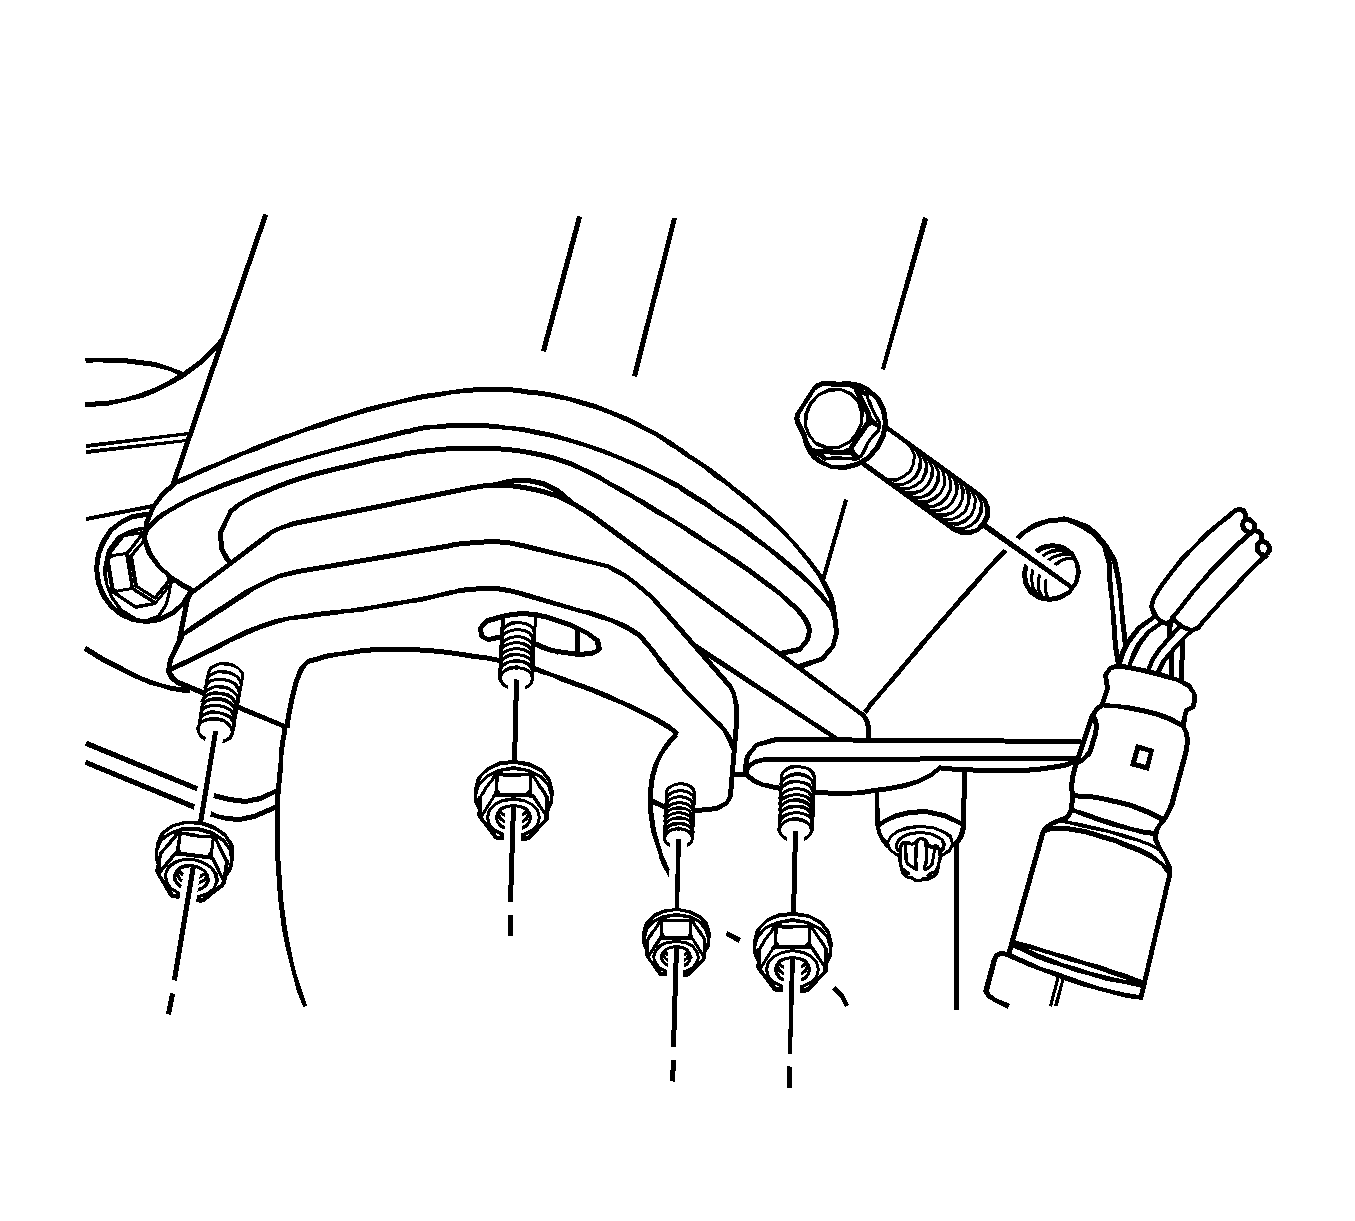
- Remove the pup converter-to-exhaust front pipe retaining nuts.
- Remove the exhaust front pipe mounting bracket bolt and nut.
- Remove the pup converter and the gasket.
- Clean the sealing surfaces on the exhaust front pipe flange and the exhaust manifold.
- Check the exhaust front pipe and the exhaust manifold for holes, damage, open seams or other deterioration which could permit exhaust fumes to seep into the passenger compartment.
Warning: Refer to Battery Disconnect Warning in the Preface section.
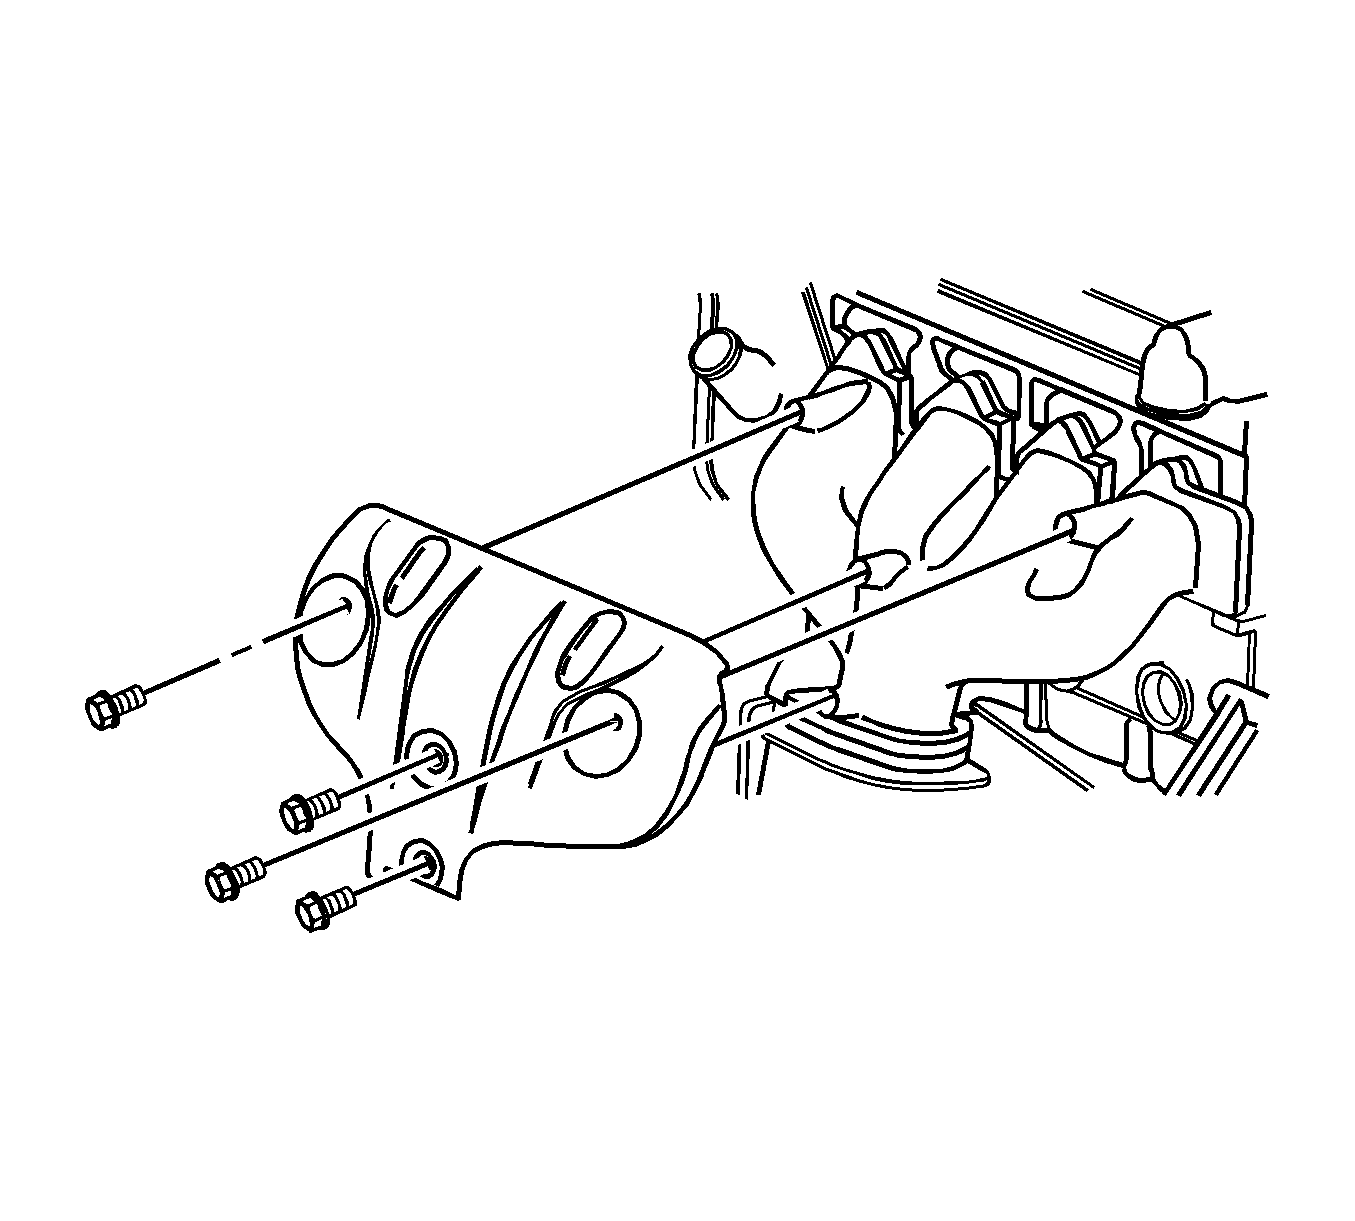
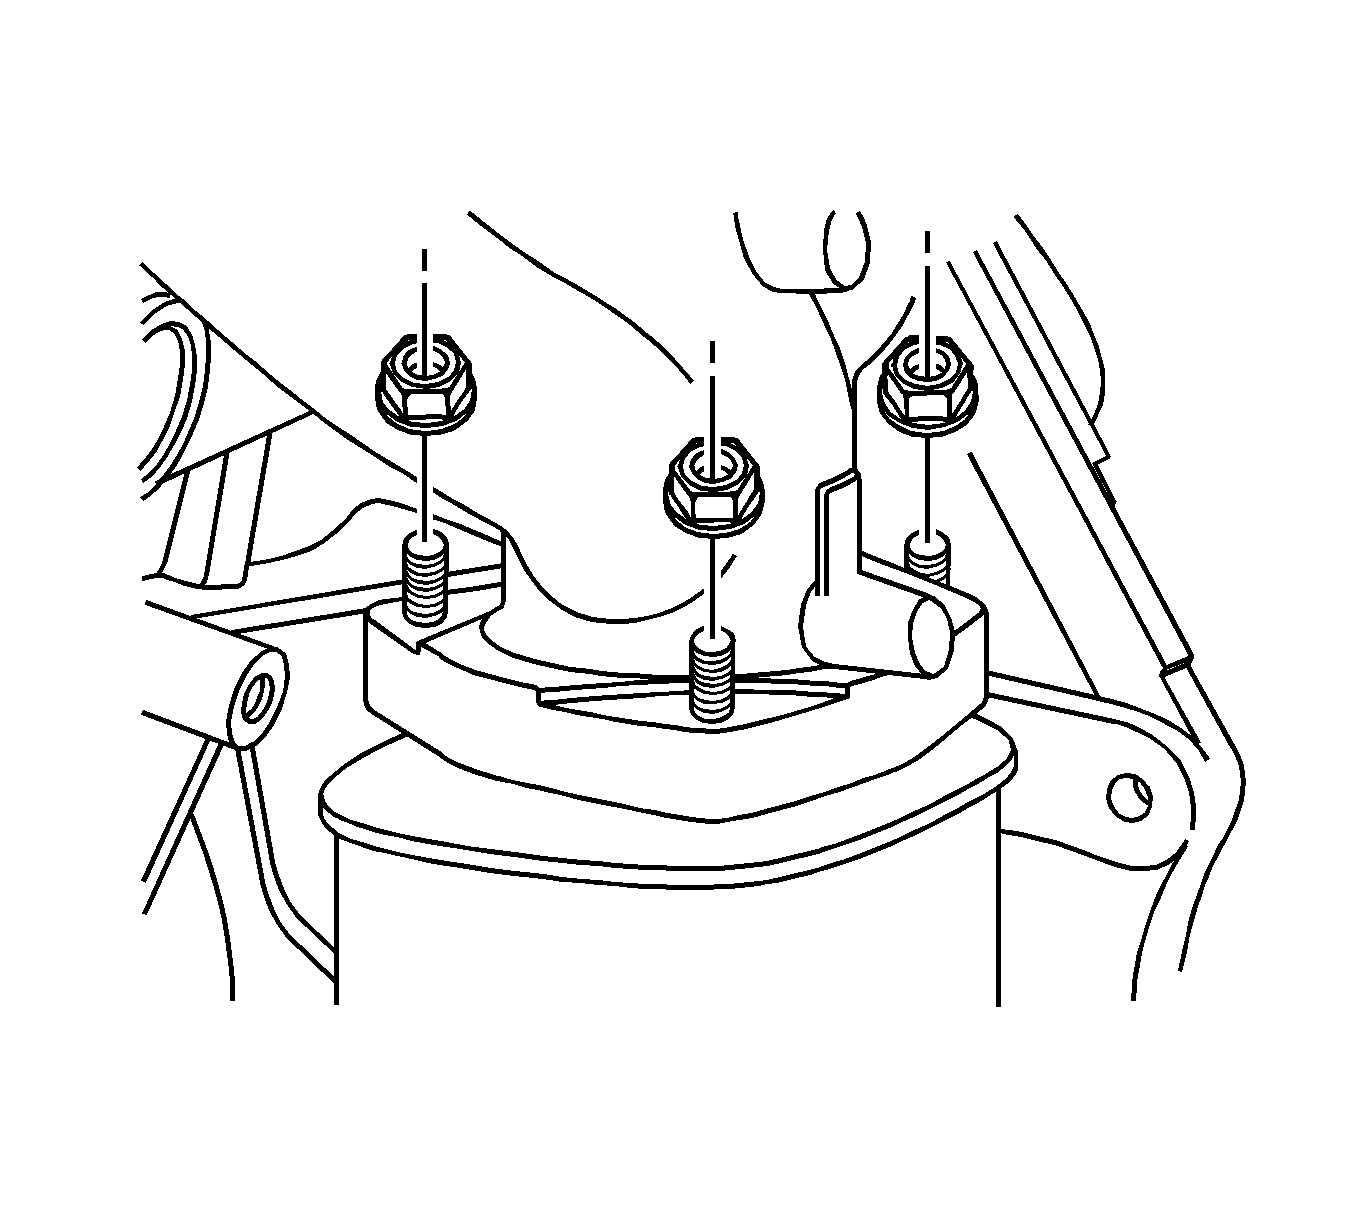
Note: The nuts and the stud may unscrew as a unit because of the high temperature associated with the exhaust manifold, but they can be re-used as such.
Installation Procedure
- Install the pup converter upper flange nuts and the gasket to exhaust manifold and tighten to 40 N·m (30 lb ft).
- Install the pup converter and the gasket to the exhaust front pipe flange and tighten.
- Install the exhaust manifold heat shield and tighten bolts to 15 N·m (11 lb ft).
- Install the engine under cover.
- Connect the negative battery cable.
Caution: Refer to Fastener Caution in the Preface section.


| • | The pup converter-to-exhaust front pipe retaining nuts to 40 N·m (30 lb ft). |
| • | The exhaust front pipe mounting bracket bolt and nut to 40 N·m (30 lb ft). |

Auxiliary Catalytic Converter Replacement 3.2L
Removal Procedure
- Disconnect the negative battery cable.
- Remove the exhaust front pipe. Refer to Front Pipe Replacement.
- Remove the bank 2 pup converter upper flange-to-bank 2 exhaust manifold retaining nuts, 3 places.
- Remove the bank 2 pup converter and gasket.
- Remove the bank 1 pup converter upper flange-to-bank 1 exhaust manifold retaining nuts, 2 places.
- Remove the bank 1 pup converter and the gasket.
- Clean the ceiling surfaces on the exhaust front pipe and both of the exhaust manifolds.
- Check the exhaust front pipe and both of the exhaust manifolds for holes, damage, open seams or other deterioration which could permit exhaust fumes to seep into the passenger compartment.
Warning: Refer to Battery Disconnect Warning in the Preface section.
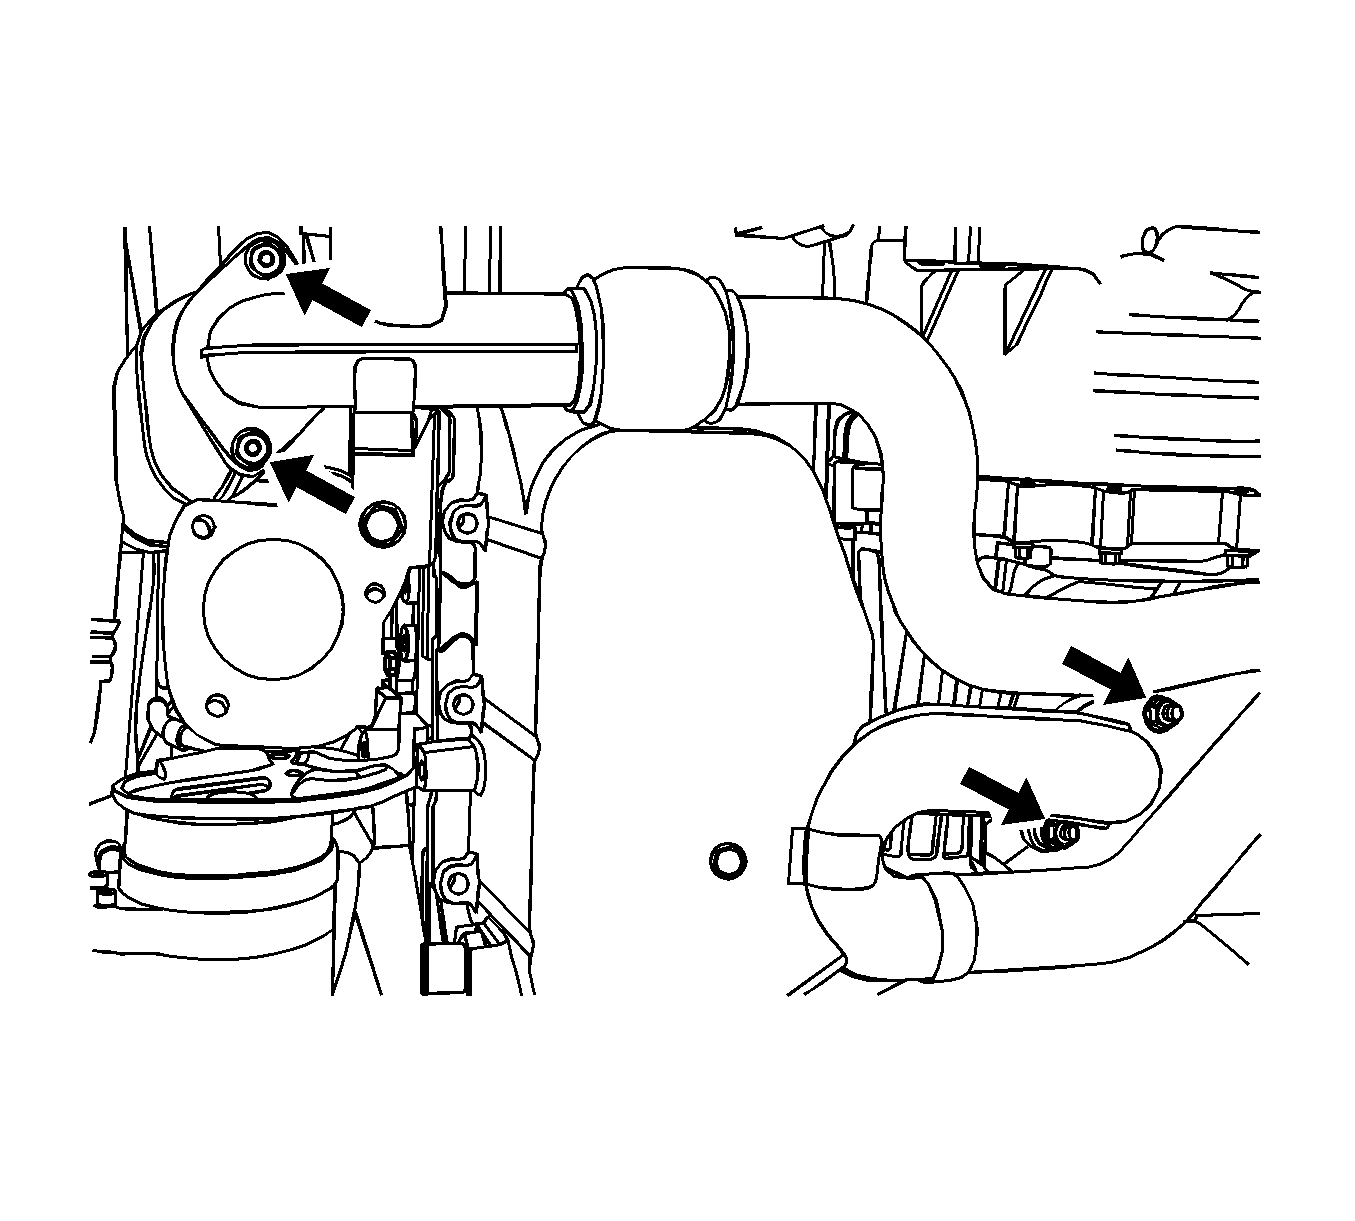
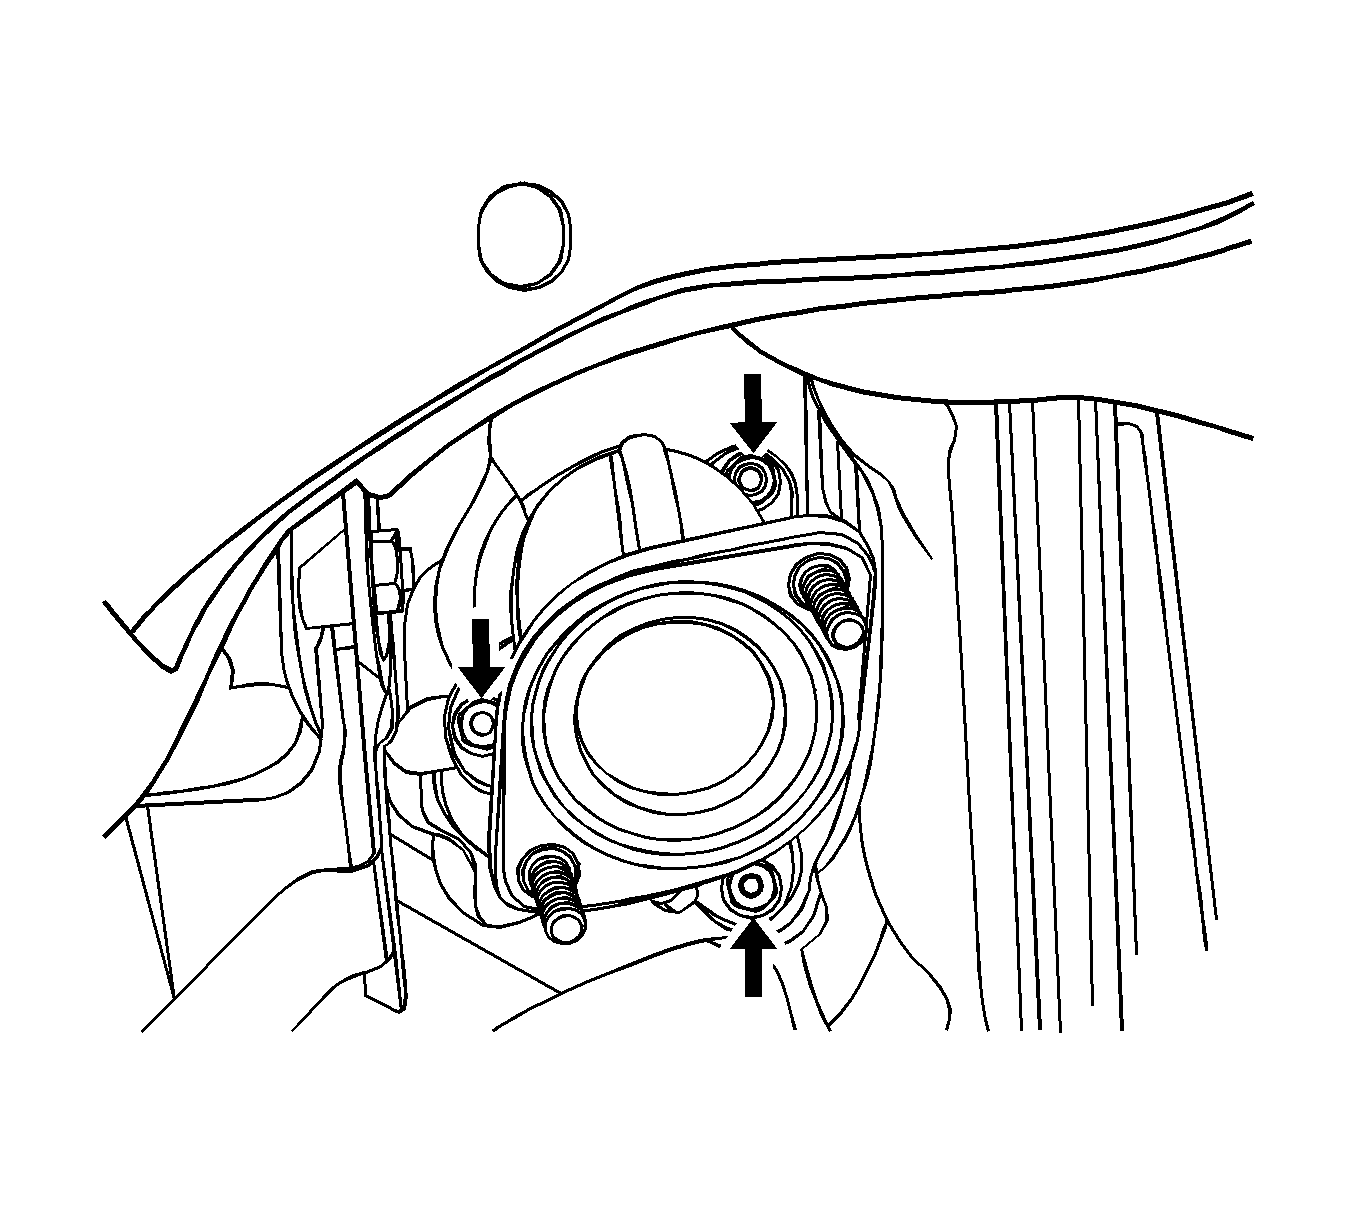
Note: The nuts and the stud may unscrew as a unit because of the high temperature associated with the exhaust manifold, but they can be reused as such.
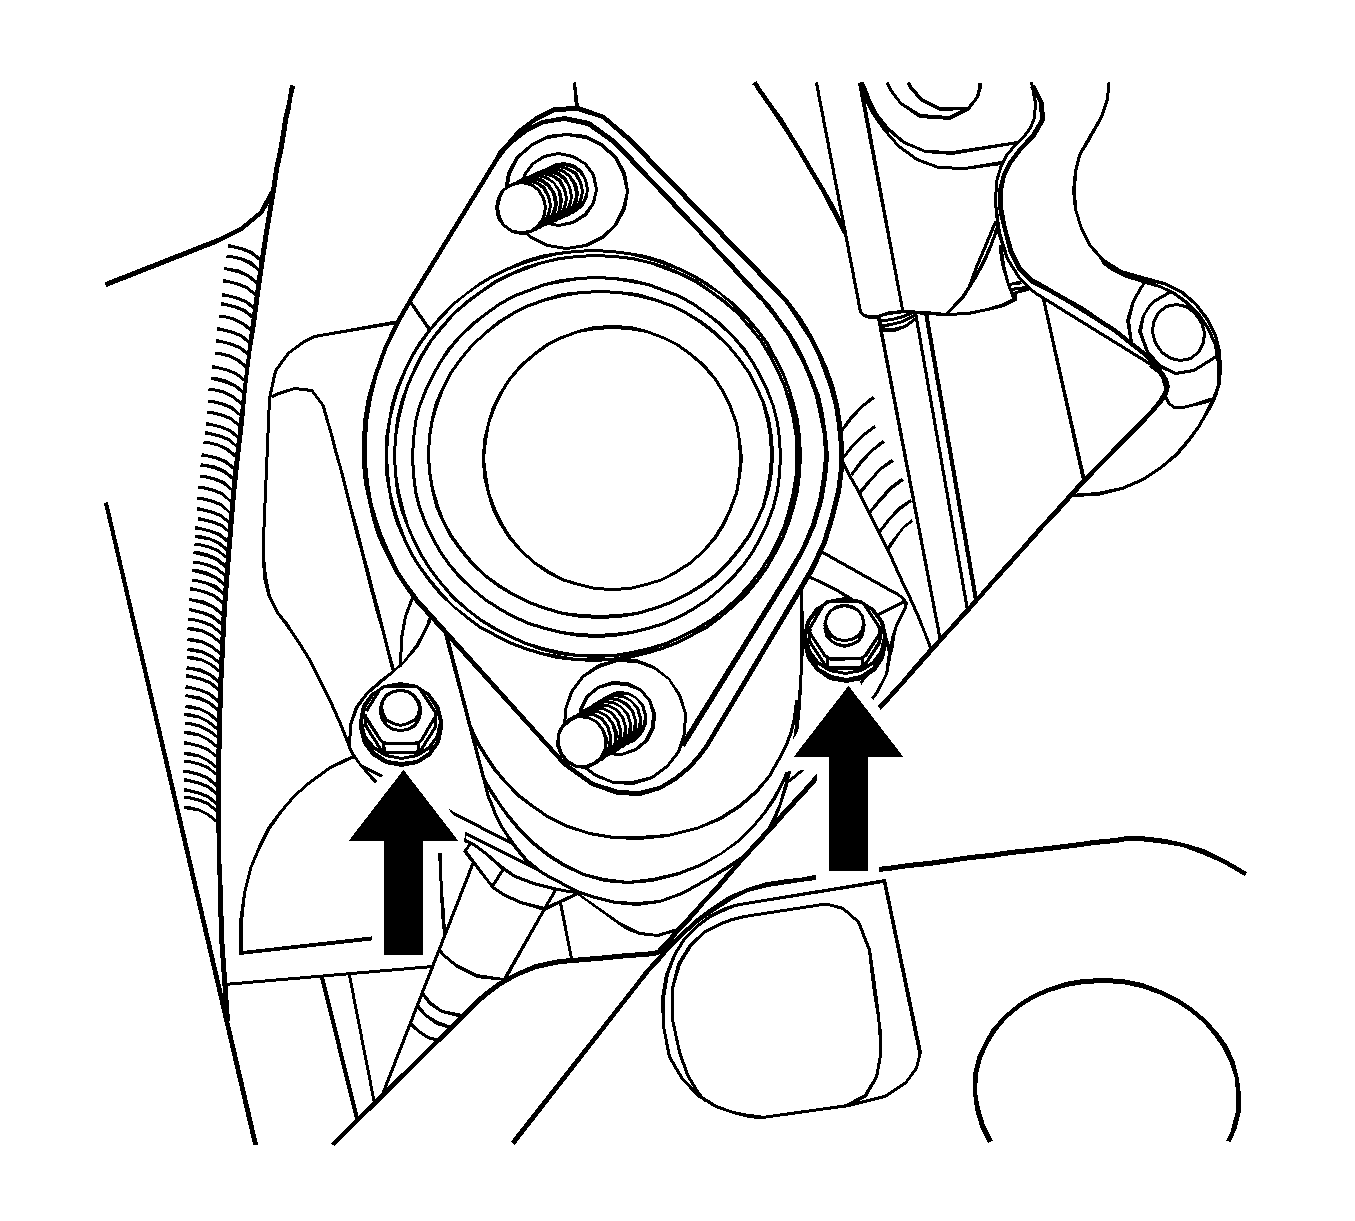
Note: The nuts and the stud may unscrew as a unit because of the high temperature associated with the exhaust manifold, but they can be reused as such.
Installation Procedure
- Install the gasket and the bank 2 pup converter upper flange-to-bank 2 exhaust manifold retaining nuts, 3 places. Tighten the bank 2 pup converter upper flange nuts to 40 N·m (30 lb ft).
- Install the gasket and the bank 1 pup converter upper flange-to-bank 1 exhaust manifold retaining nuts, 2 places. Tighten the bank 2 pup converter upper flange nuts to 40 N·m (30 lb ft).
- Install the exhaust front pipe and tighten to 40 N·m (30 lb ft). Refer to Front Pipe Replacement.
Caution: Refer to Fastener Caution in the Preface section.


