For 1990-2009 cars only
Special Tools
| • | EN-48303 Fuel Filter Housing Holder |
| • | EN-48304 Fuel Filter Locker Installer/Remover |
Removal Procedure
- Disconnect the negative battery cable. Refer to Battery Negative Cable Disconnection and Connection.
- Remove the beauty cover. Refer to Engine Cover Replacement.
- Remove the battery. Refer to Battery Replacement.
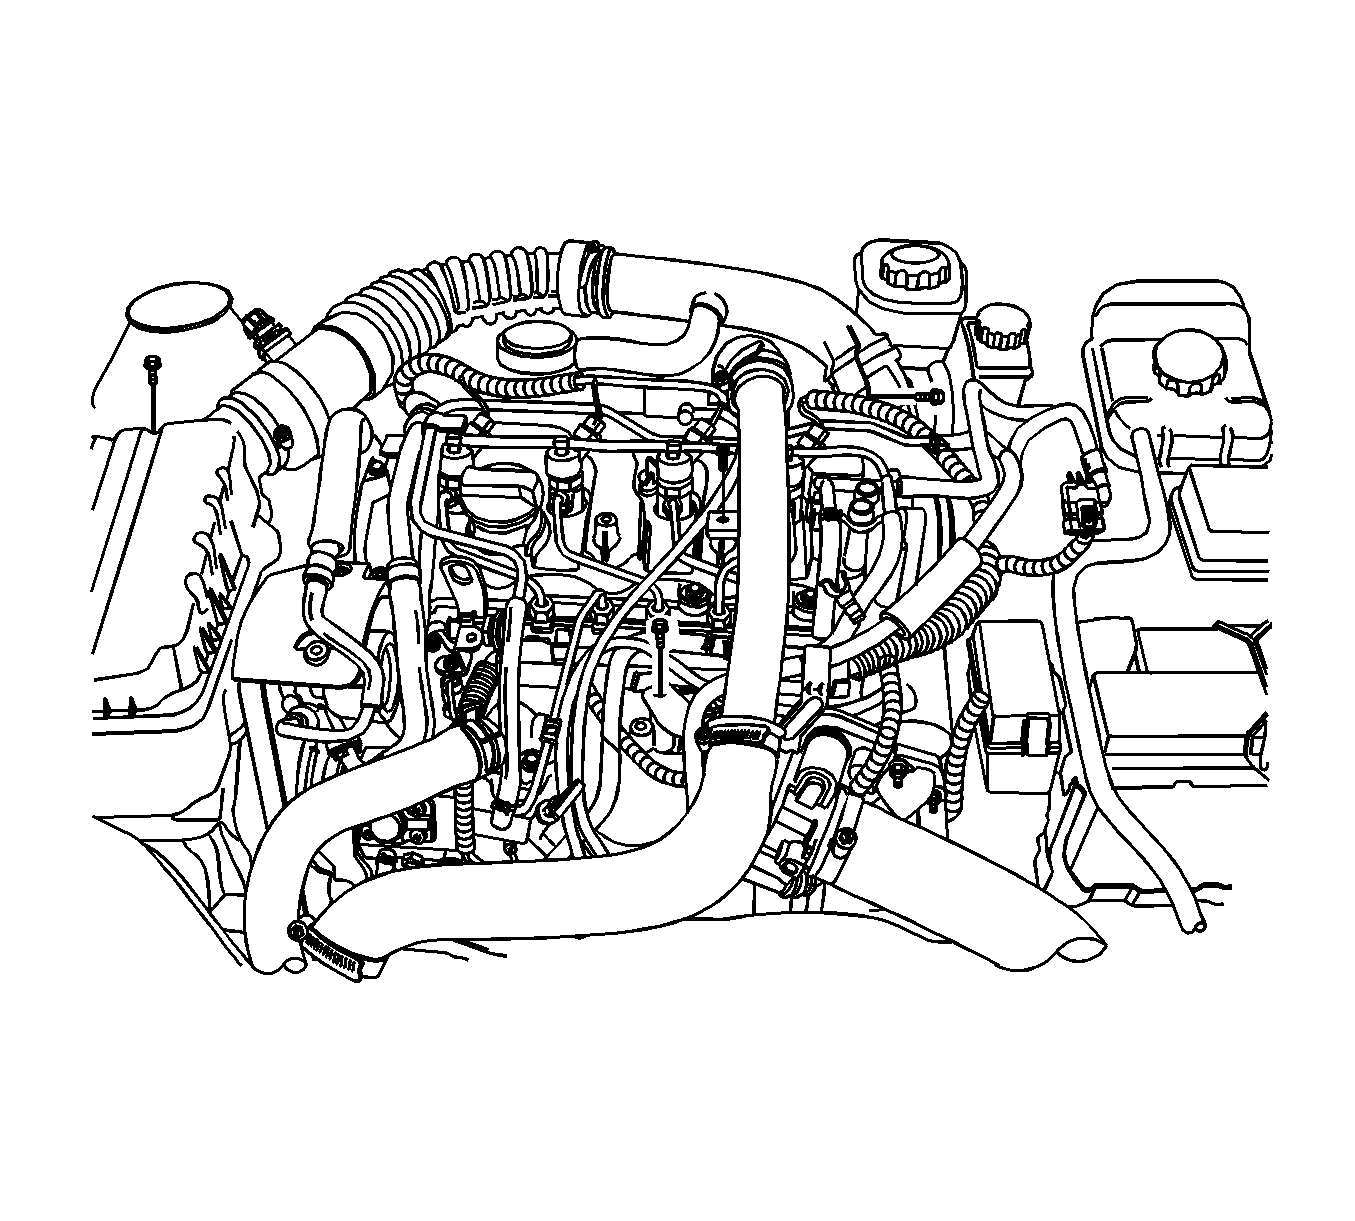
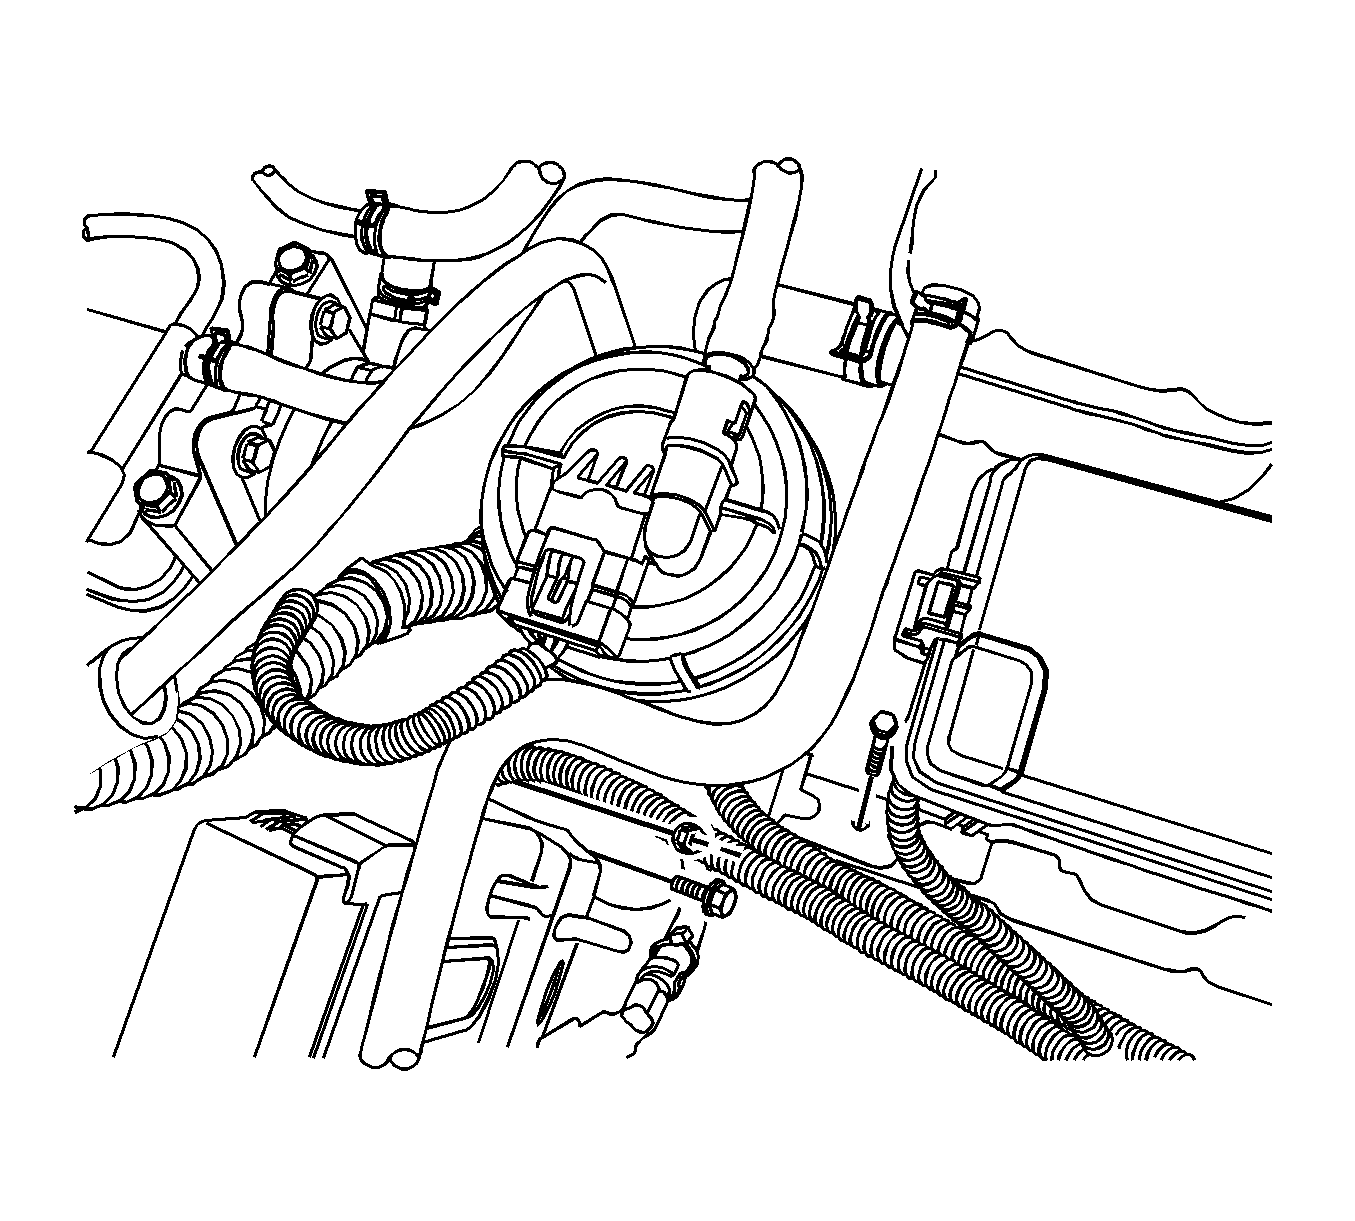
- Disconnect the fuel inlet/outlet line from the fuel filter.
- Disconnect the fuel heater and temperature sensor connector (1).
- Disconnect the water in fuel sensor connector (2).
- Remove the fuel filter assembly from the bracket by lifting upward.
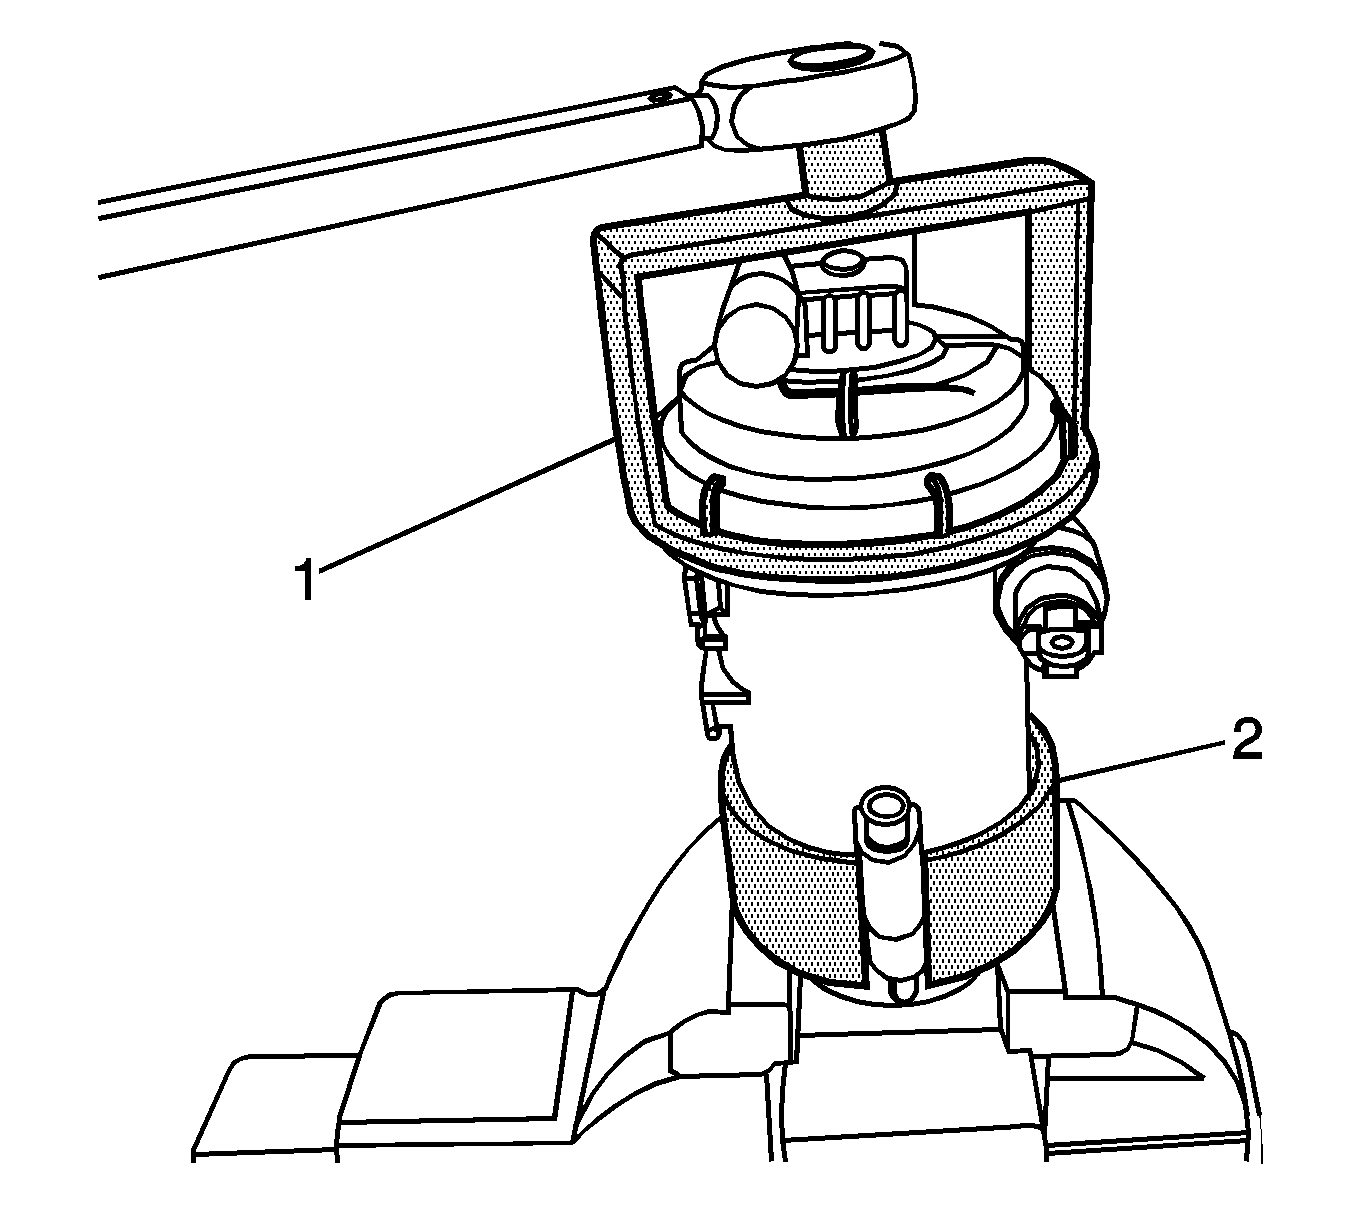
- Install EN-48303 and EN-48304 (2) to the fuel filter assembly.
- Turn EN-48304 (1) counterclockwise.
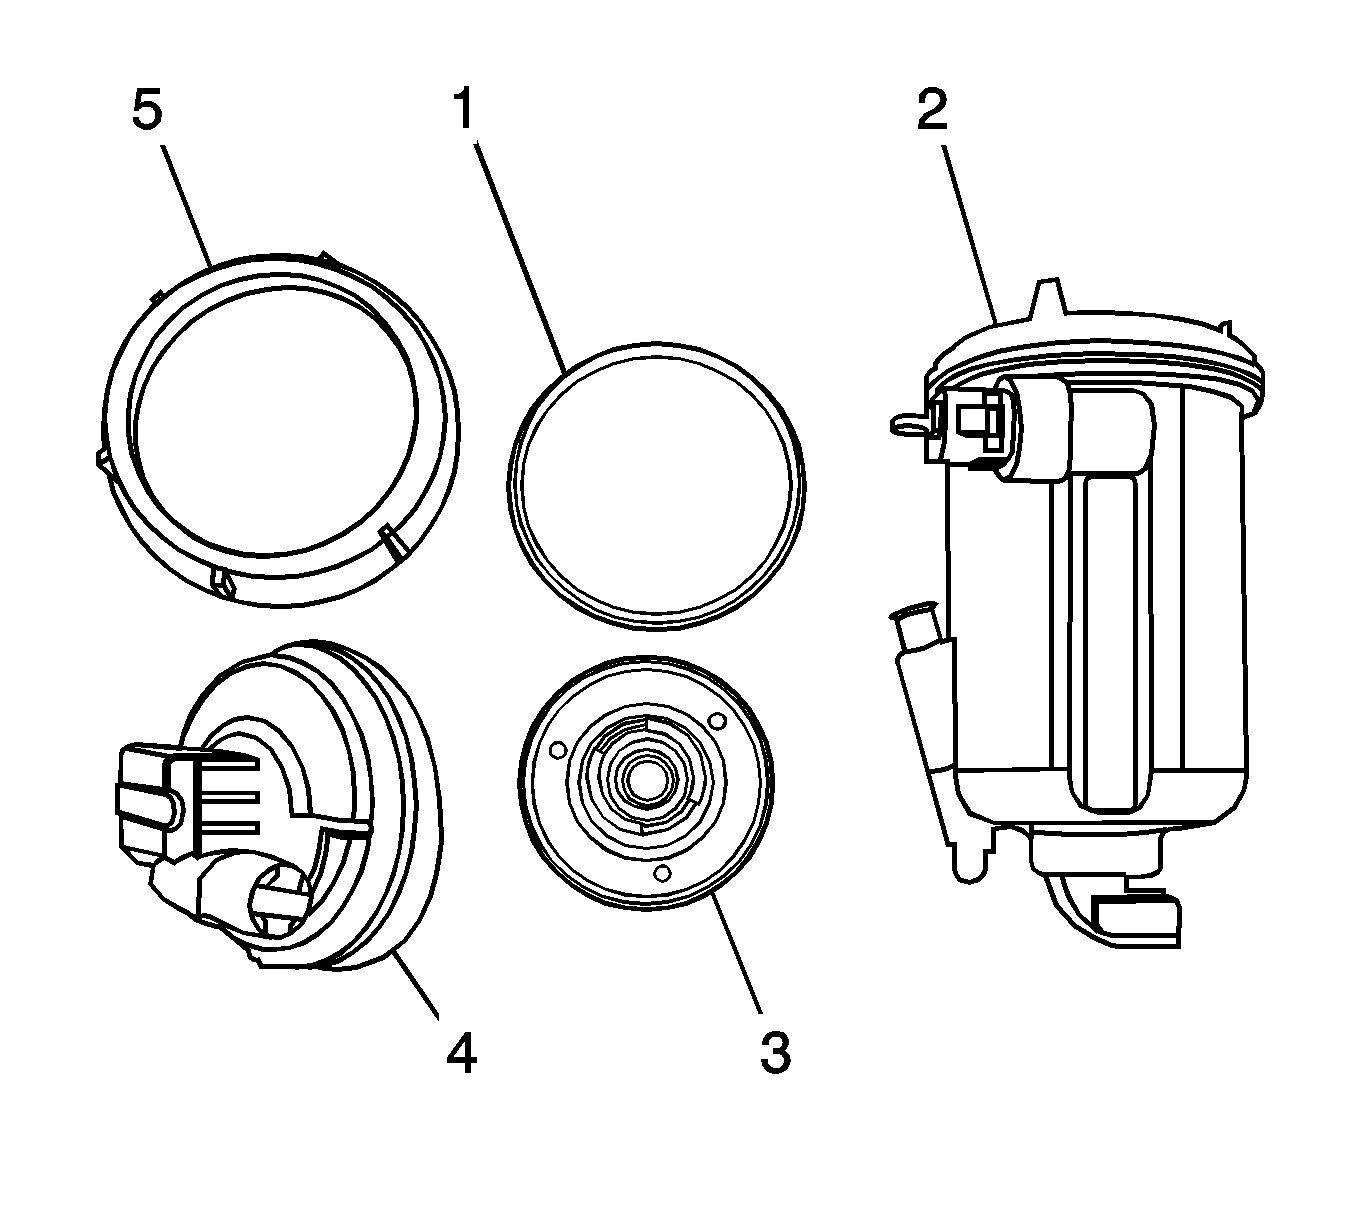
- Remove the fuel filter locker (5).
- Remove the fuel filter cap (4) with the O-ring (1).
- Remove the fuel filter in the fuel filter housing (2).

Warning: Gasoline or gasoline vapors are highly flammable. A fire could occur if an ignition source is present. Never drain or store gasoline or diesel fuel in an open container, due to the possibility of fire or explosion. Have a dry chemical (Class B) fire extinguisher nearby.


Note: Do not reuse the fuel filter element if the element is exposed to the air over a minute.
Note: The fuel filter cap contains the fuel heater and temperature sensor. Also, the fuel filter housing contains the water in fuel sensor.
Installation Procedure
- Install the fuel filter into the fuel filter housing (2).
- Install the fuel filter cap (4) with a new O-ring (1).
- Install the fuel filter locker (5) by using EN-48303 and EN-48304 . Tighten the fuel filter locker to 30 N·m (22.1 lb ft).
- Install the fuel filter to the bracket.
- Install the fuel filter bracket to the body and tighten the retaining nut to 10 N·m (88.5 lb ft).
- Install the battery. Refer to Battery Replacement.
- Install the beauty cover. Refer to Engine Cover Replacement.
- Connect the negative battery cable.

Note: Do not touch the fuel filter element by hand to prevent fuel contamination.
Caution: Refer to Fastener Caution in the Preface section.


