For 1990-2009 cars only
Removal Procedure
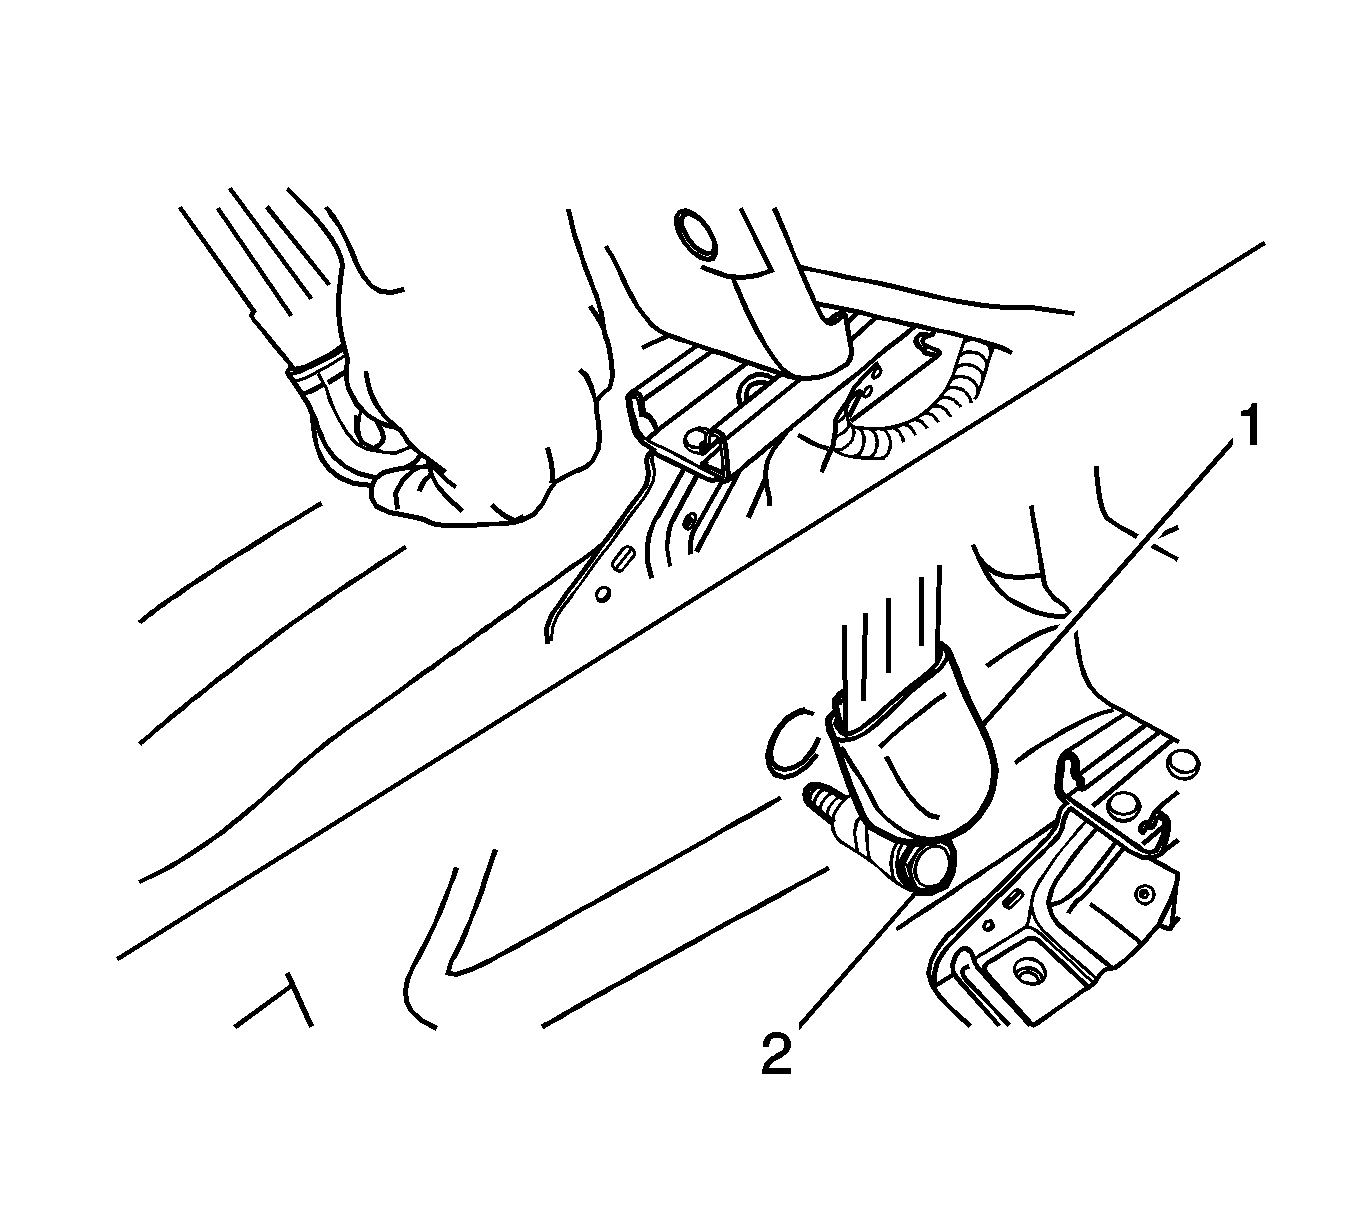
- Remove the bolt (2) and the lower seat belt anchor (1).
- Remove the lower center pillar trim panel. Refer to Center Pillar Lower Garnish Molding Replacement.
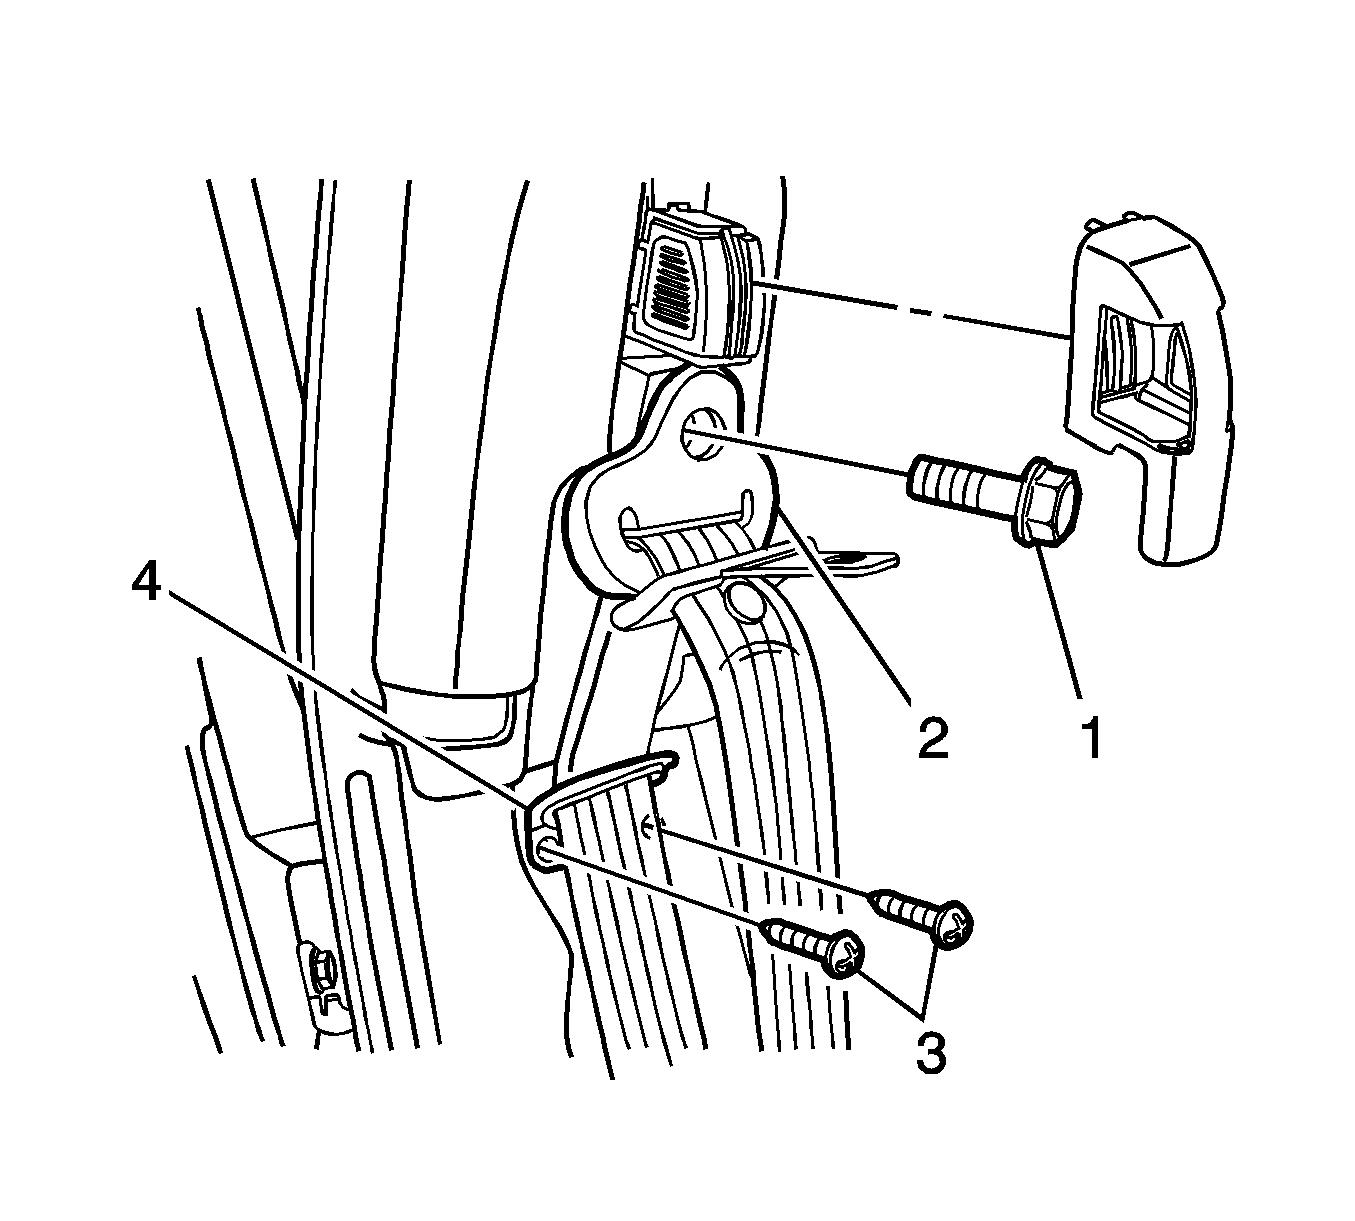
- Remove the cap to reveal the upper seat belt anchor (2).
- Remove the screws (3) and the seat belt guide (4).
- Remove the bolt (1) and the upper seat belt anchor (2).
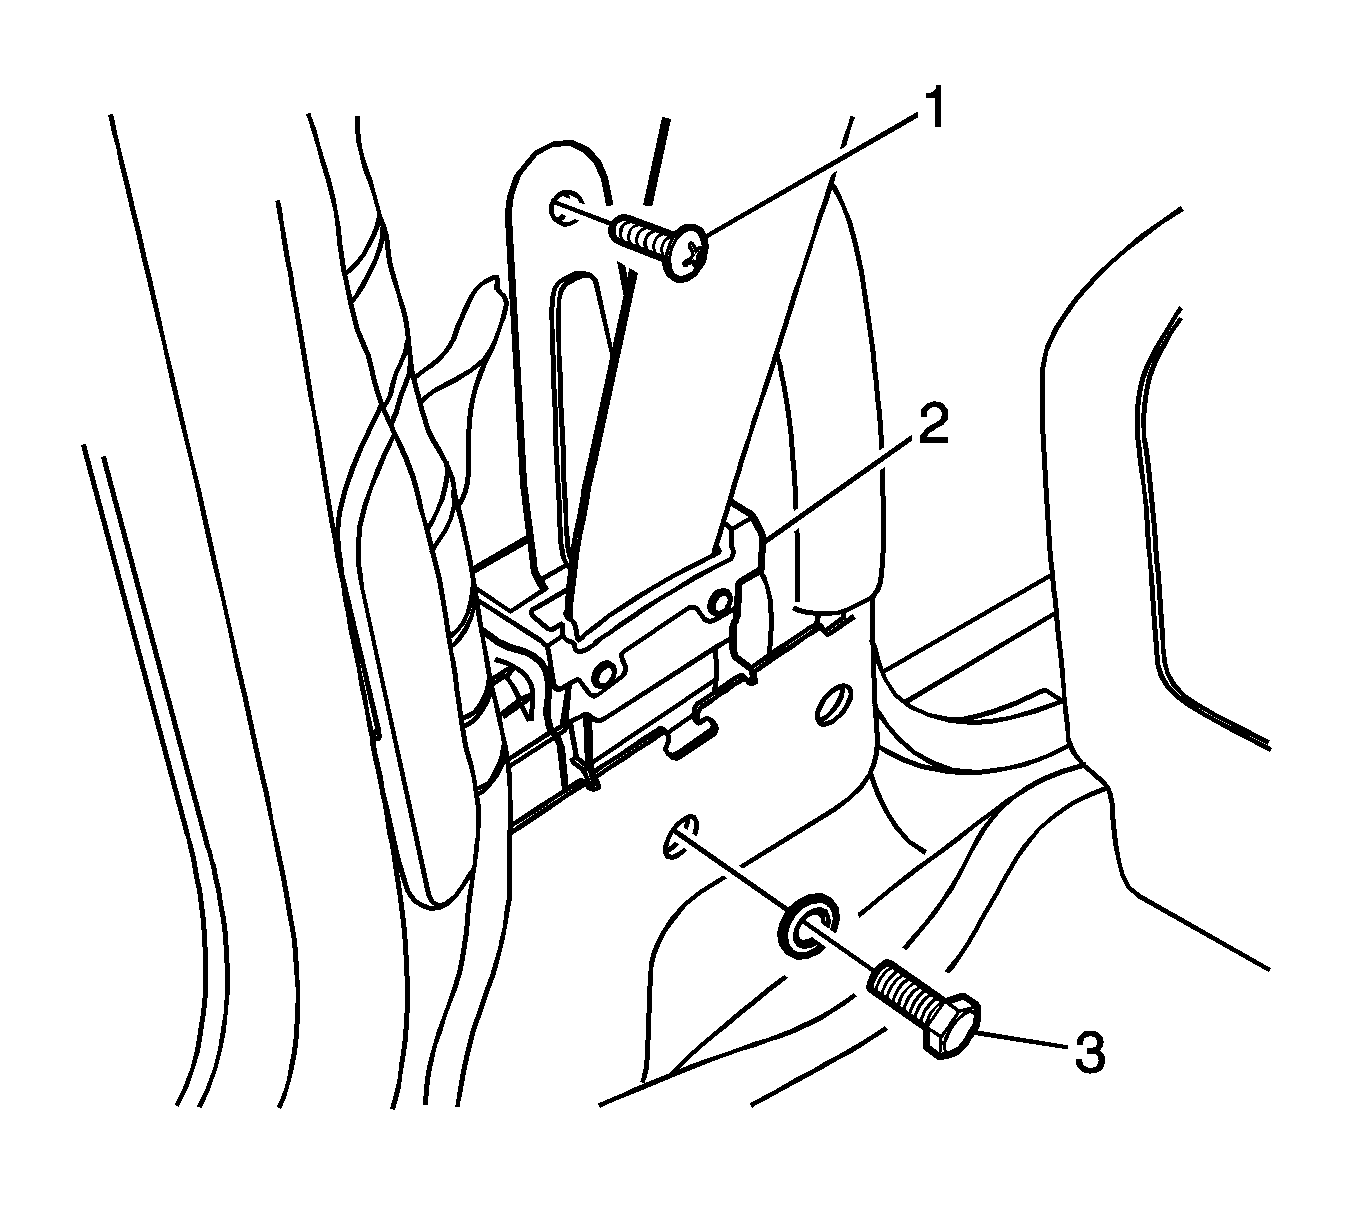
- Remove the screw (1) from the seat belt retractor bracket.
- Remove the bolt (3) and the seat belt retractor (2).


Installation Procedure
- Install the seat belt retractor (2) with the bolt (3) and tighten to 38 N·m (28 lb ft).
- Install the seat belt retractor bracket screw (1) and tighten to 10 N·m (7 lb ft).
- Install the upper seat belt anchor (2) with the bolt (1) and tighten to 38 N·m (28 lb ft).
- Install the seat belt guide (4) with the screws (3) and tighten to 3 N·m (27 lb in).
- Install the seat belt guide anchor cap.
- Install the lower center pillar trim panel. Refer to Center Pillar Lower Garnish Molding Replacement.
- Install the lower seat belt anchor (1) with the bolt (2) and tighten to 38 N·m (28 lb ft).
Caution: Refer to Fastener Caution in the Preface section.


