Removal Procedure
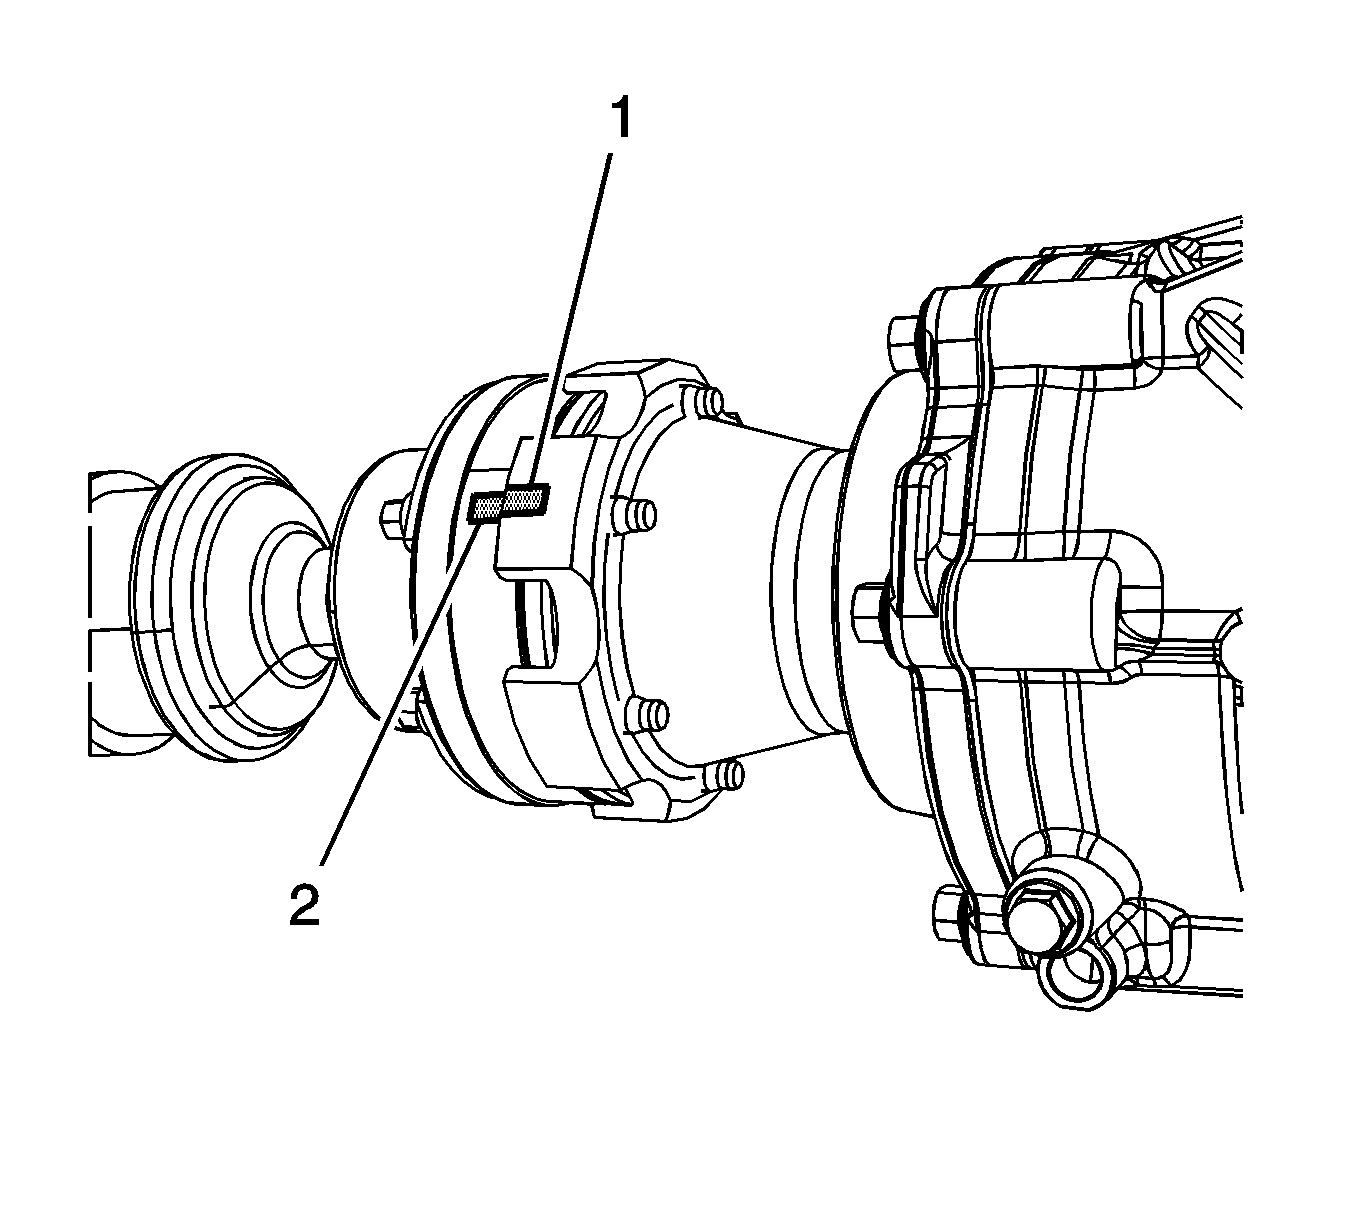
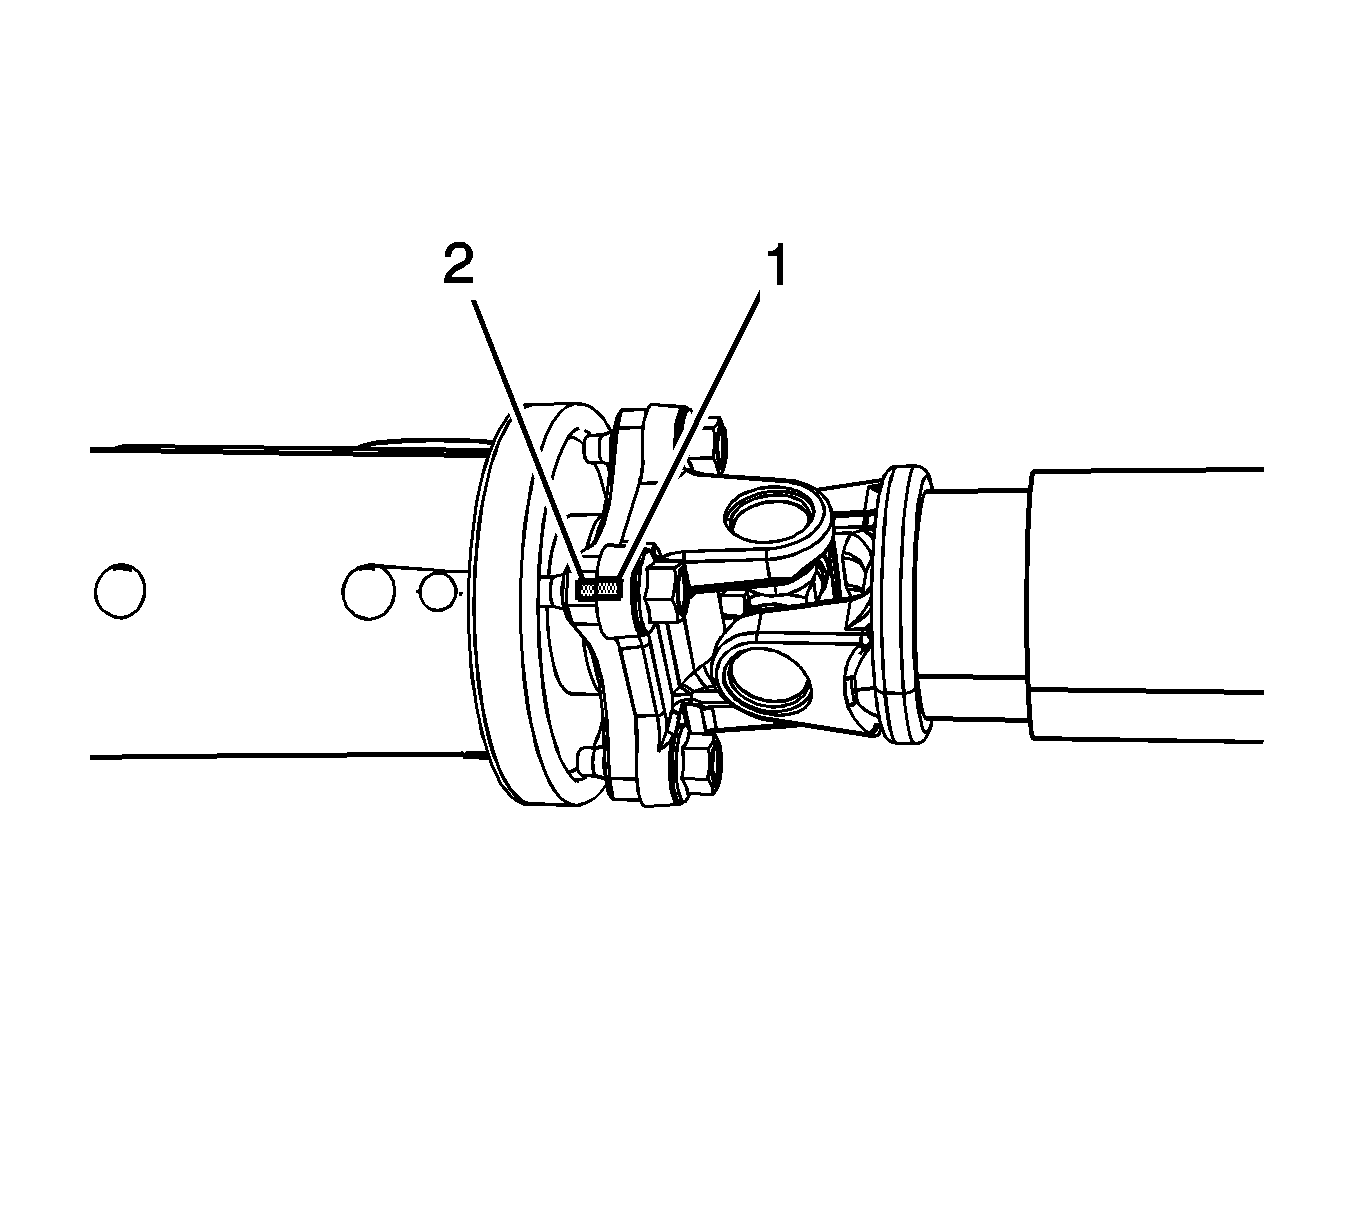
Note: Before removing the propeller shaft from the vehicle, paint or scribe reference marks on the transfer case flange to the propeller shaft flange and the rear differential drive flange to ensure minimal driveline system imbalance.
- Raise and support the vehicle. Refer to Lifting and Jacking the Vehicle.
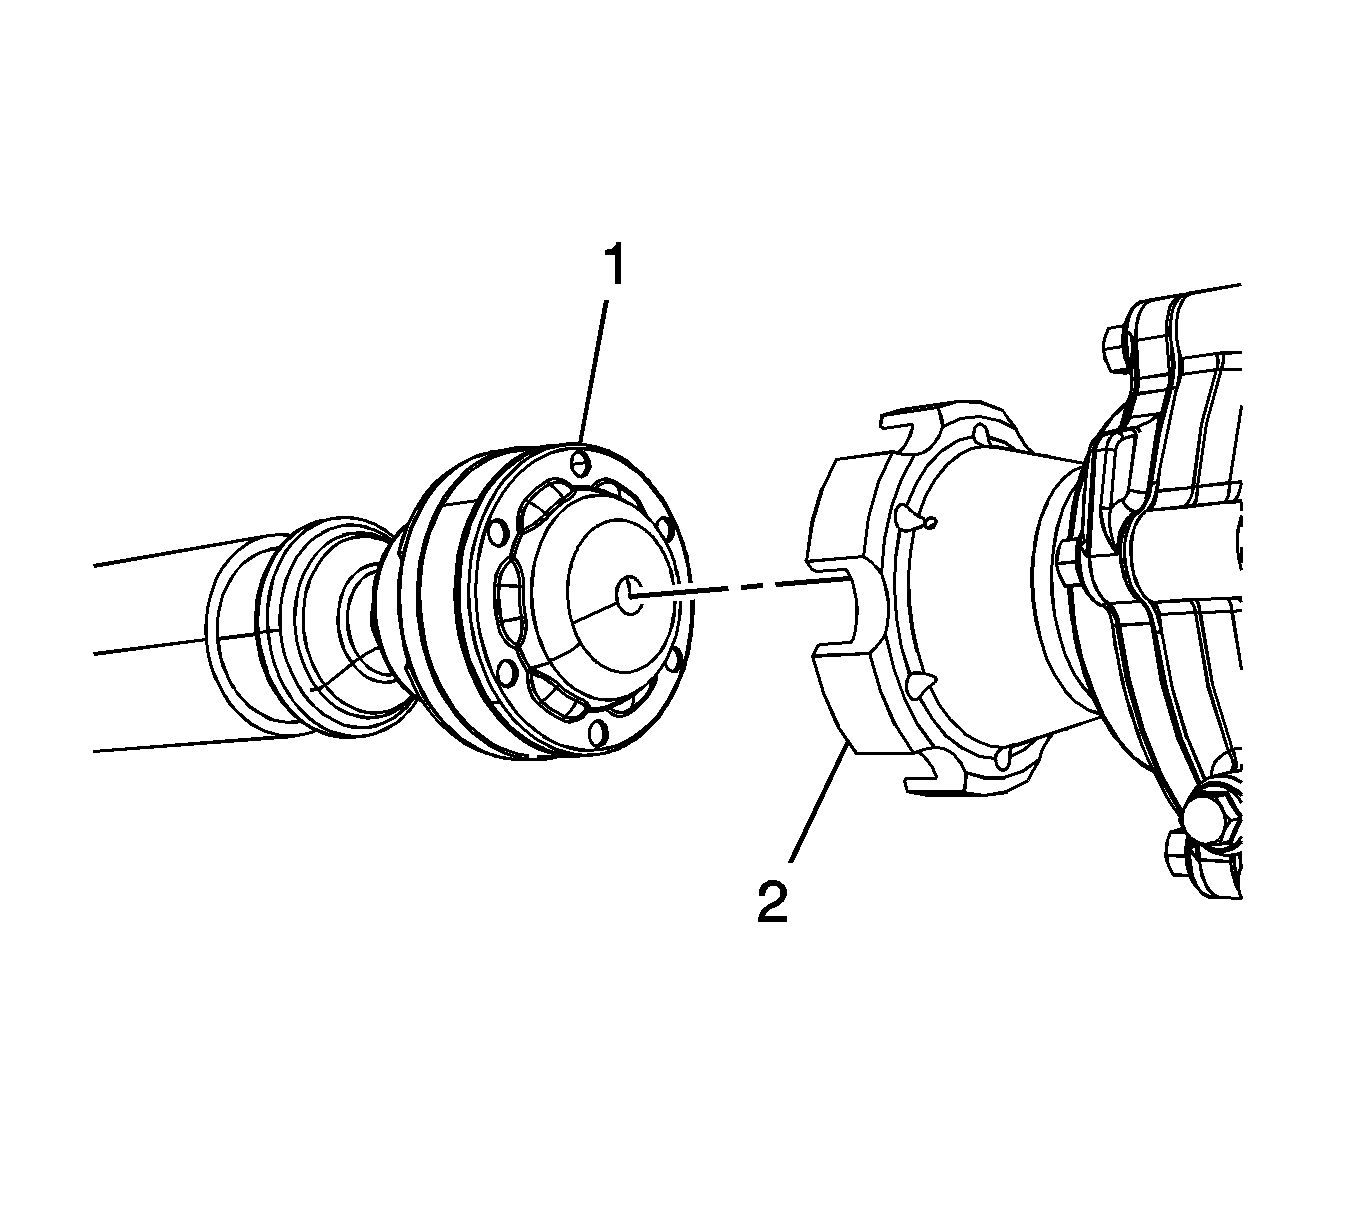
- Mark the relationship of the front propeller shaft (1) to the transfer case drive flange (2).
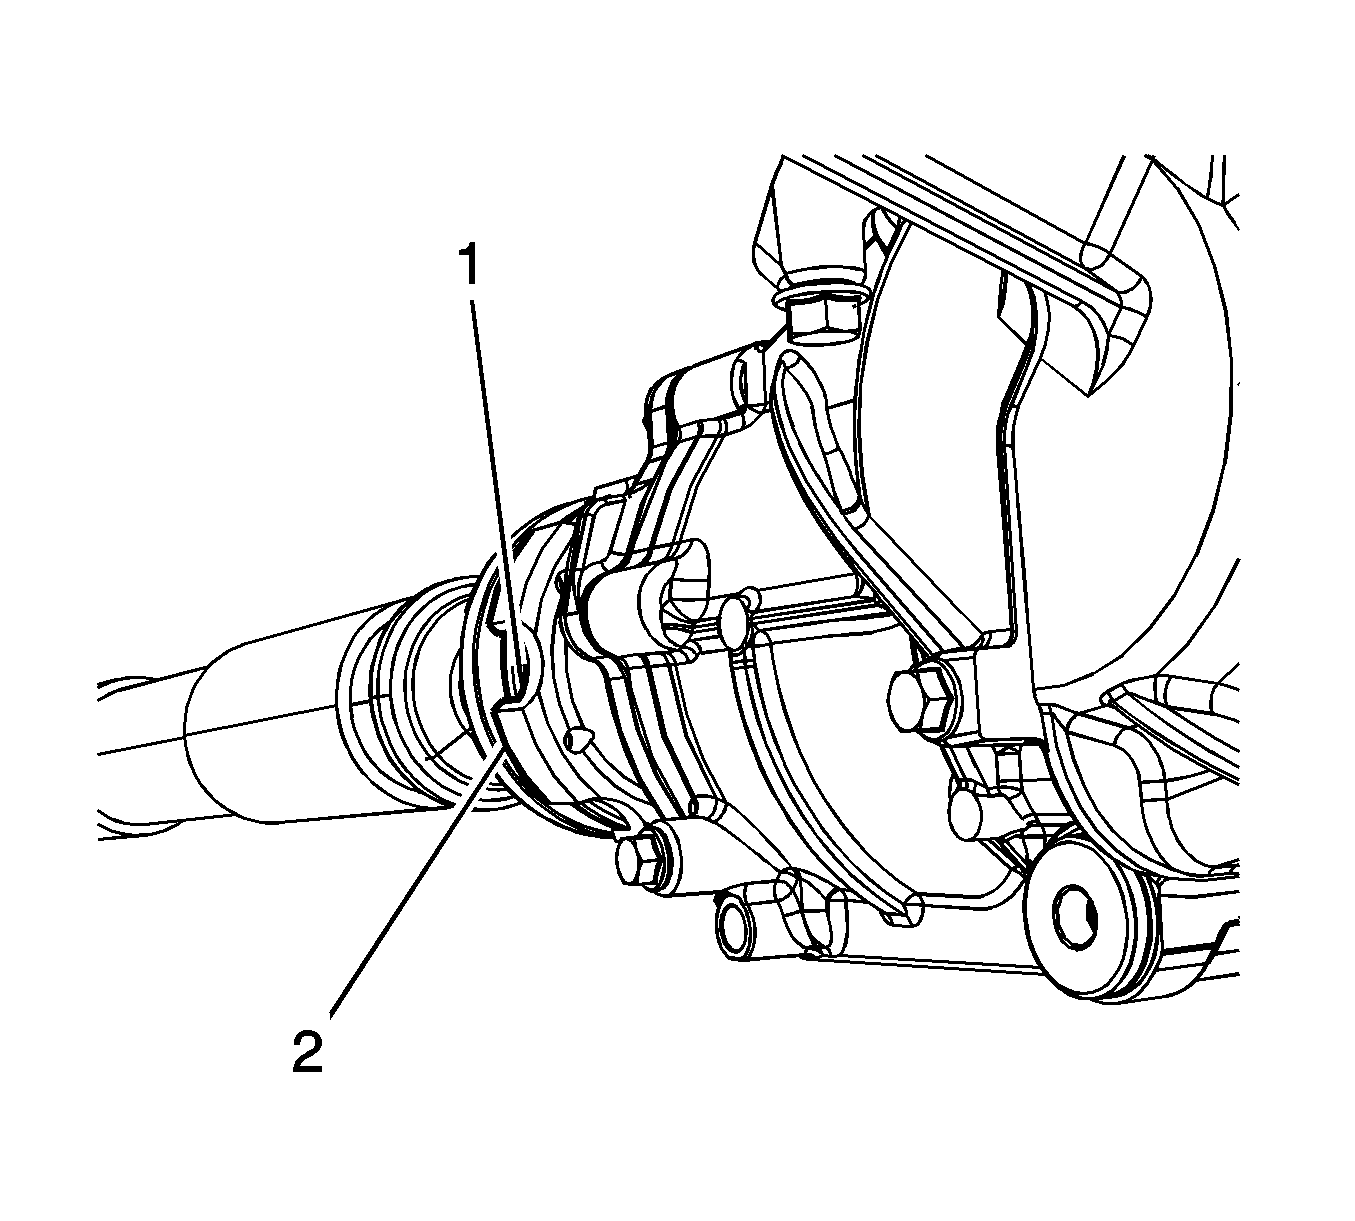
- Mark the relationship of the rear propeller shaft (1) to the rear differential yoke (2).
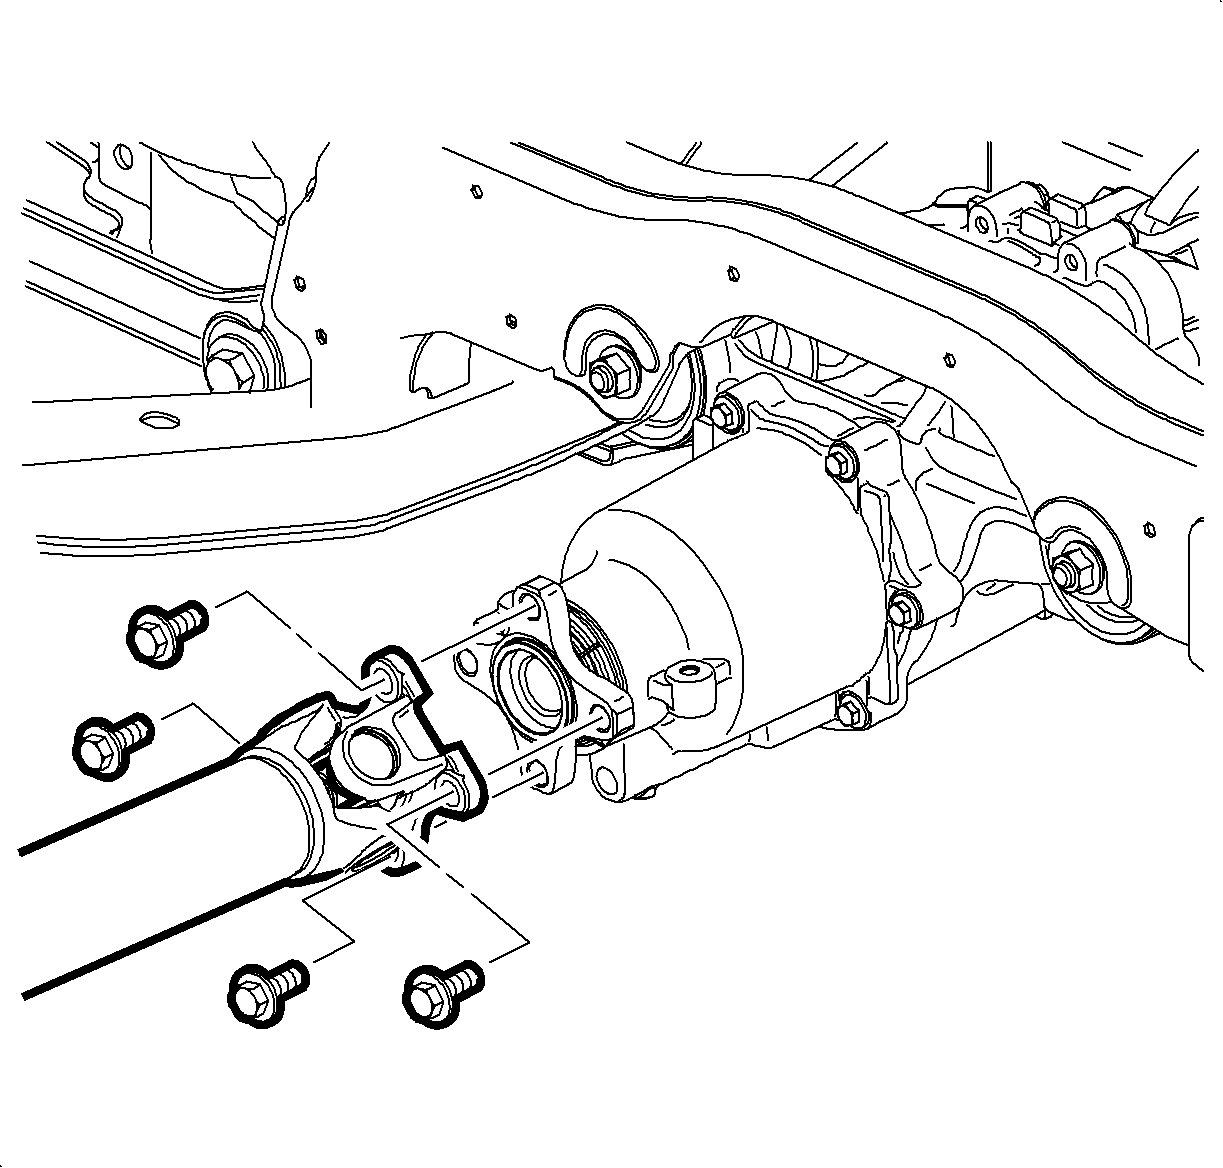
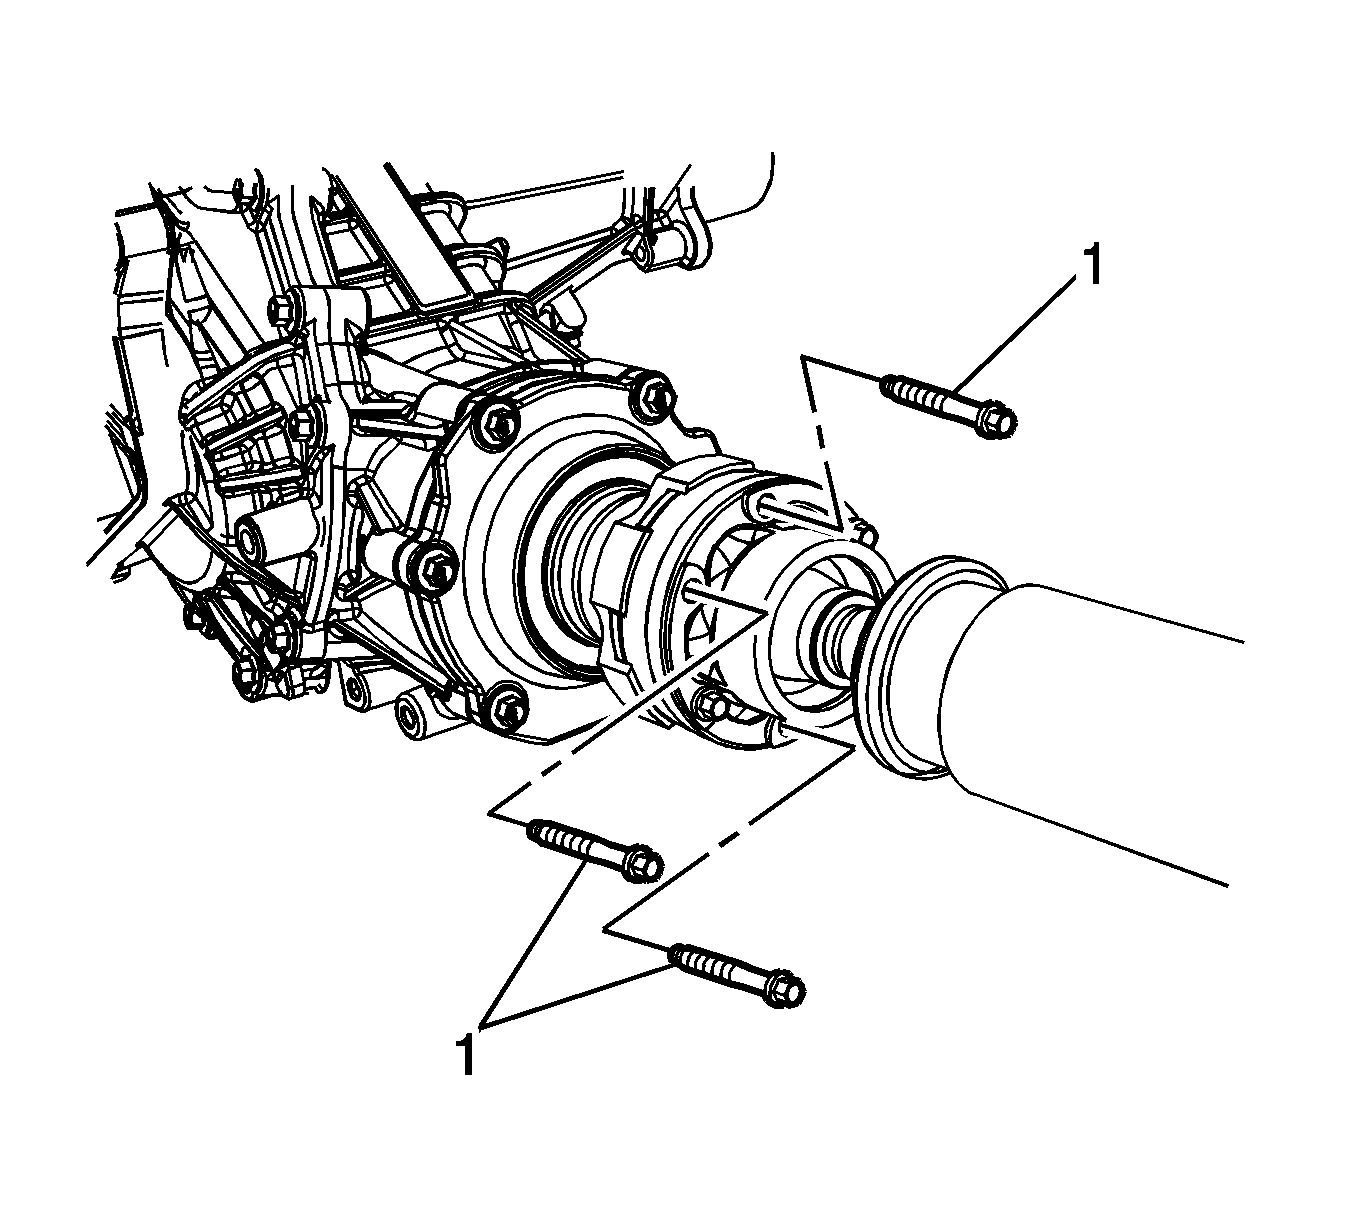
- Remove the mounting bolts and the propeller shaft bolts from the rear differential drive flange.
- Support the propeller shaft at the rear differential.
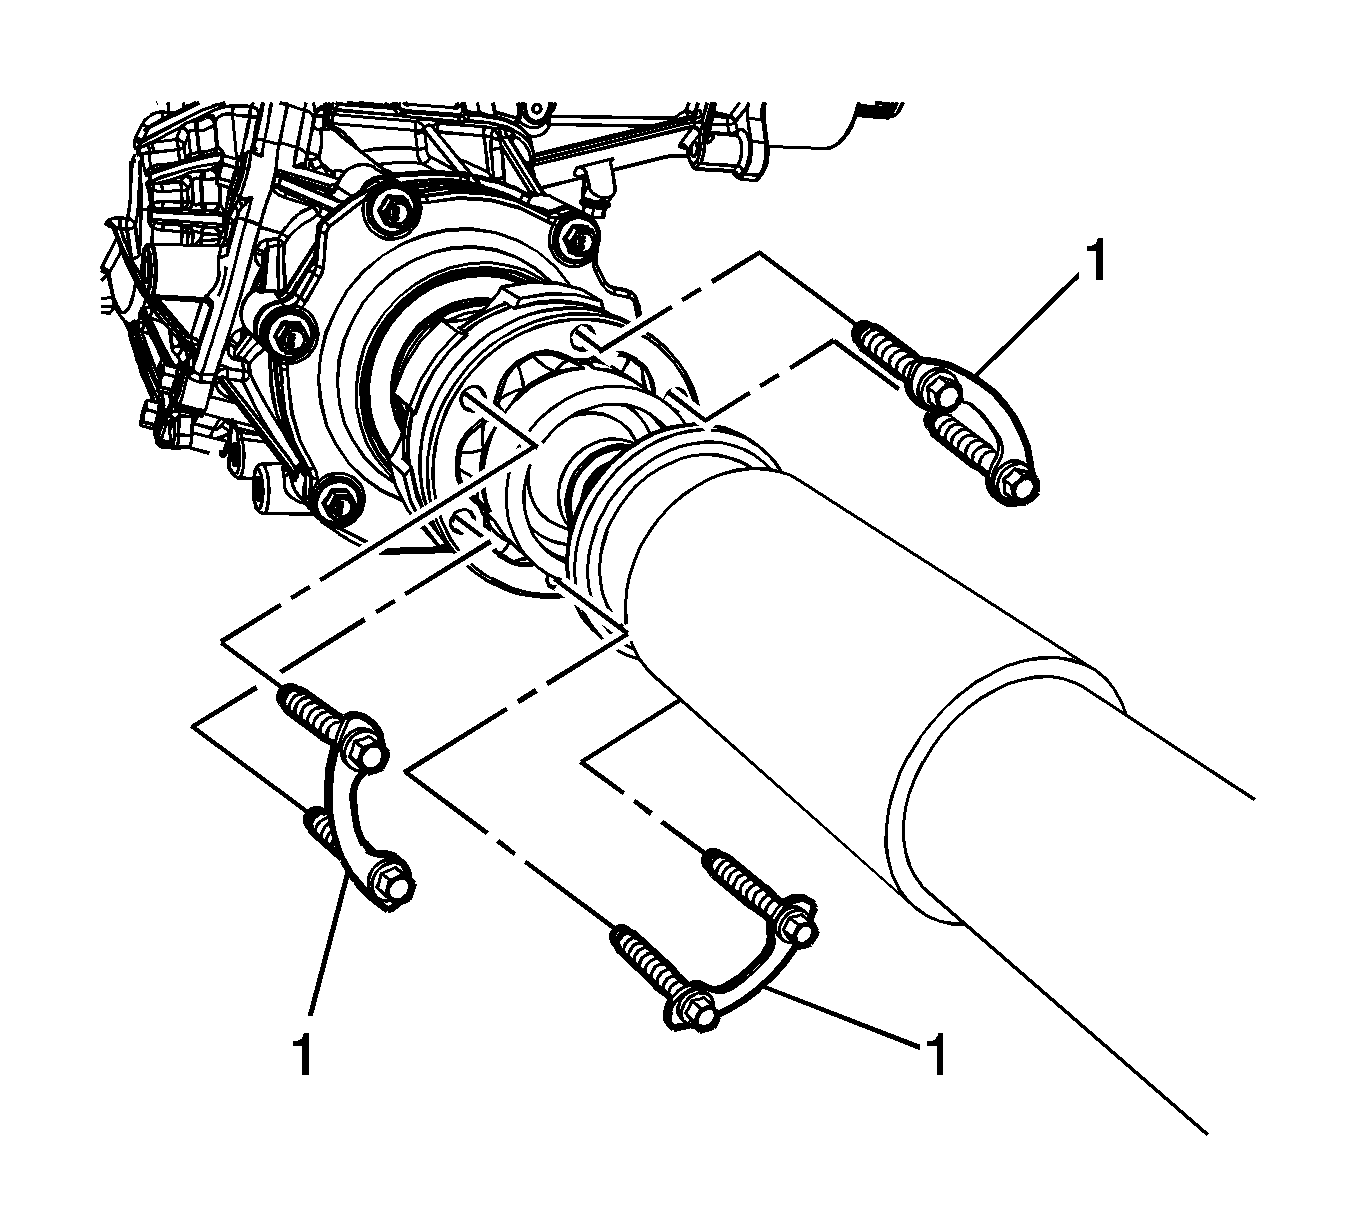
- Remove the propeller shaft bolts and washers (1).
- Remove the propeller shaft (1) from the transfer case flange (2).
- Place a brass drift or punch on the propeller shaft (1) between one of the notches in the transfer case drive flange (2).
- Using a hammer and the brass drift or punch, remove the propeller drive shaft from the transfer case drive flange (2).
- Remove the propeller shaft (1) from the rear differential drive flange (2).
- Support the propeller shaft at the transfer case drive flange.
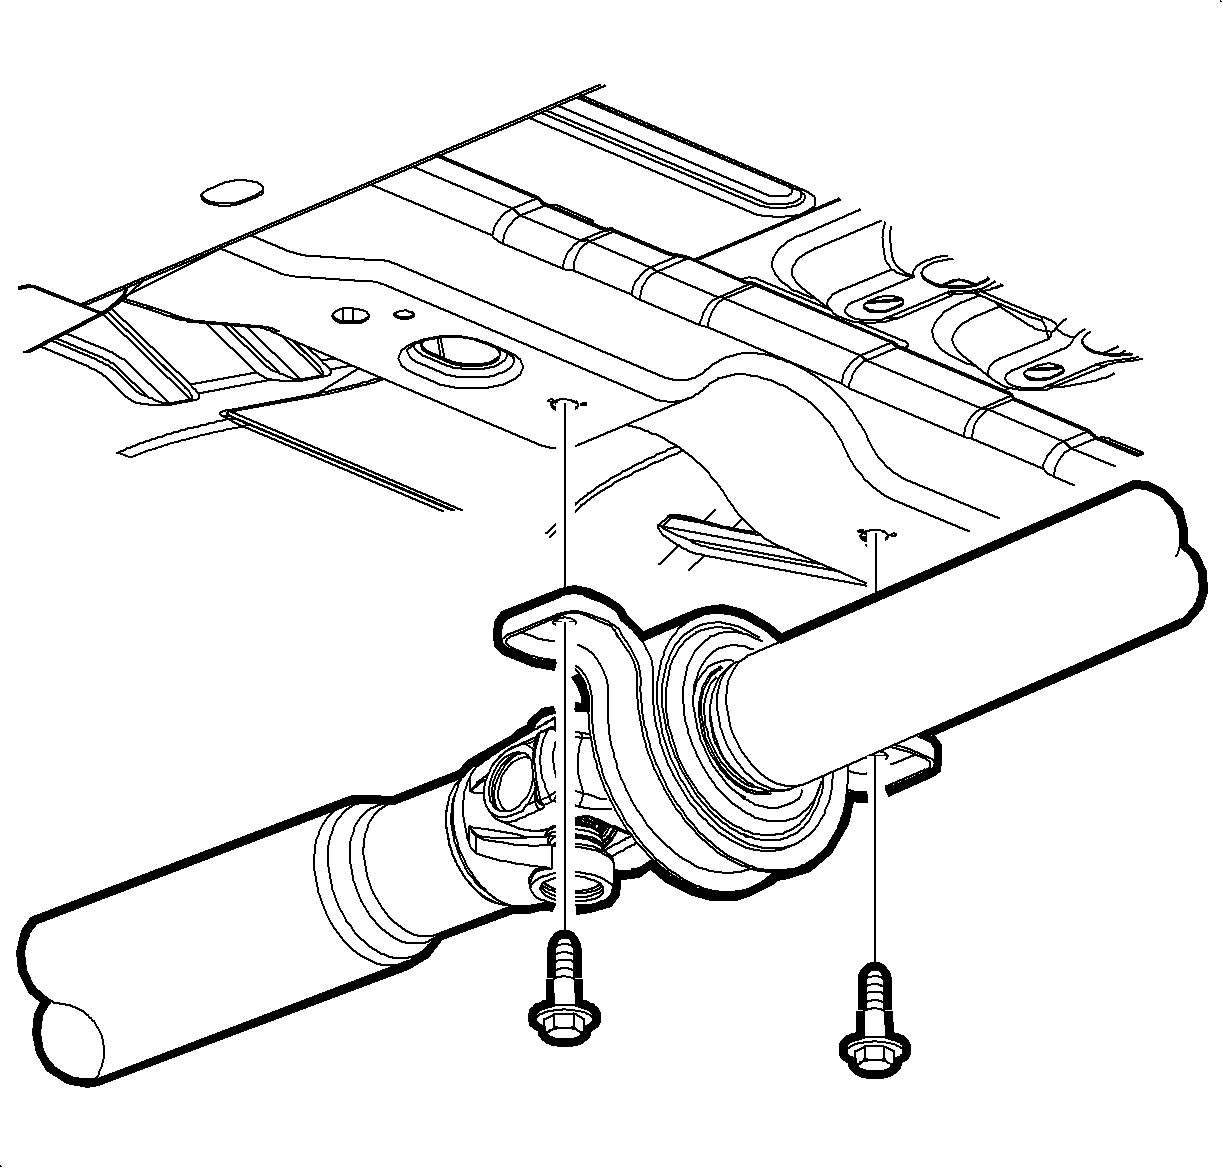
- Remove the center support mounting bolts.
- With the aid of an assistant, remove the propeller shaft from the supports and the vehicle.
Note: If the propeller drive shaft cannot be removed, proceed to step 8. Failure to do so will damage the propeller shaft.
Installation Procedure
Note: Align the paint or scribe reference marks on the transfer case flange to the propeller shaft flange and the rear differential drive flange to ensure minimal driveline system imbalance.
- Clean the mounting bolts for the center bearing, front and rear propeller shaft drive flanges. Apply threadlocker GM P/N 89021297 (Canadian P/N 10953488) to the bolt threads.
- With the aid of an assistant, position the propeller shaft on the supports.
- Align the reference marks on the front propeller shaft (1) to transfer case flange (2).
- Position the center support bearing on the vehicle.
- Align the reference marks on the rear propeller shaft (1) to the rear differential yoke (2).
- Install the remaining bolts and washers (1) from the propeller shaft to the transfer case flange.
- Tighten the center bearing mounting bolts.
- Install the remaining mounting bolts (1) from the propeller shaft to the rear differential yoke.
- Remove the supports from the vehicle.
- Lower the vehicle.

Note: Install a few of the mounting bolts and washers to hold the propeller shaft in place.

Note: Install the mounting bolt to hold the center bearing in place.

Note: Install a few of the mounting bolts to hold the propeller shaft in place.
Notice: Refer to Fastener Notice in the Preface section.
Tighten
Tighten the bolts to 35 N·m (25 lb ft).
Tighten
Tighten the bolts to 25 N·m (19 lb ft).

Tighten
Tighten the bolts to 50 N·m (37 lb ft).
Removal Procedure
Note: Before removing the propeller shaft from the vehicle, paint or scribe reference marks on the transfer case flange to the propeller shaft flange and the rear differential drive flange to ensure minimal driveline system imbalance.
- Raise and support the vehicle. Refer to Lifting and Jacking the Vehicle.
- Mark the relationship of the front propeller shaft (2) to the transfer case drive flange (1).
- Mark the relationship of the rear propeller shaft (1) to the rear differential yoke (2).
- Remove the mounting bolts and the propeller shaft bolts from the rear differential drive flange.
- Support the propeller shaft at the rear differential.
- Remove the propeller shaft bolts and washers (1).
- Remove the propeller shaft (1) from the transfer case flange (2).
- Place a brass drift or punch on the propeller shaft (1) between one of the notches in the transfer case drive flange (2).
- Using a hammer and the brass drift or punch, remove the propeller drive shaft from the transfer case drive flange (2).
- Remove the propeller shaft (1) from the rear differential drive flange (2).
- Support the propeller shaft at the transfer case drive flange.
- Remove the center support mounting bolts.
- With the aid of an assistant, remove the propeller shaft from the supports and the vehicle.


Note: If the propeller drive shaft cannot be removed, proceed to step 8. Failure to do so will damage the propeller shaft.


Installation Procedure
Note: Align the paint or scribe reference marks on the transfer case flange to the propeller shaft flange and the rear differential drive flange to ensure minimal driveline system imbalance.
- Clean the mounting bolts for the center bearing, front and rear propeller shaft drive flanges. Refer to Adhesives, Fluids, Lubricants, and Sealers.
- With the aid of an assistant, position the propeller shaft on the supports.
- Align the reference marks on the front propeller shaft (2) to transfer case flange (1).
- Position the center support bearing on the vehicle.
- Align the reference marks on the rear propeller shaft (1) to the rear differential yoke (2).
- Install the remaining bolts and washers (1) from the propeller shaft to the transfer case flange and tighten to 35 N·m (25 lb ft).
- Tighten the center bearing mounting bolts to 25 N·m (19 lb ft).
- Install the remaining mounting bolts (1) from the propeller shaft to the rear differential yoke and tighten to 50 N·m (37 lb ft).
- Remove the supports from the vehicle.
- Lower the vehicle.

Note: Install a few of the mounting bolts and washers to hold the propeller shaft in place.

Note: Install the mounting bolt to hold the center bearing in place.

Note: Install a few of the mounting bolts to hold the propeller shaft in place.
Caution: Refer to Fastener Caution in the Preface section.


