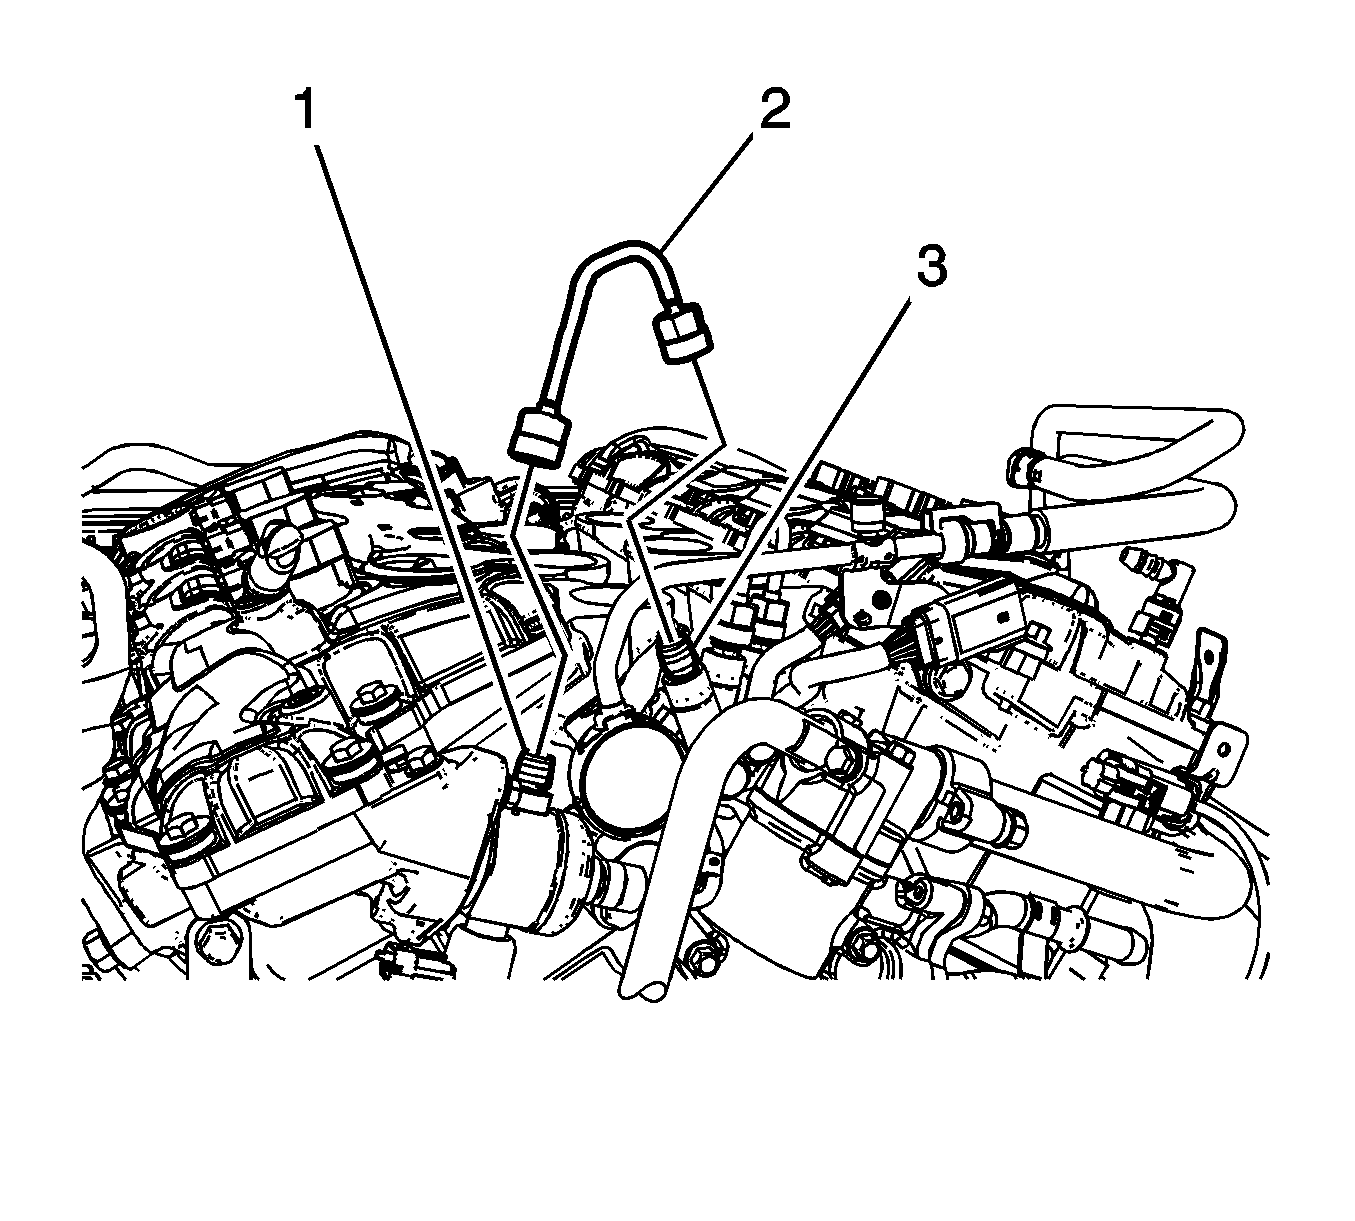
Removal Procedure
- Remove the drive motor generator power inverter module. Refer to
Drive Motor Generator Power Inverter Module Removal and Installation.
- Remove the high pressure pump shield. Refer to
Fuel Pipe Shield Replacement.
- Relieve fuel system pressure. Refer to
Fuel Pressure Relief.

- Remove the foam insulator from the pipes.
- Loosen the high pressure pipe fitting to the high pressure fuel pump (1).
- Loosen the high pressure pipe fitting to the left fuel rail (3).
- Remove the high pressure fuel pipe (2) from the vehicle. Discard the pipe.
Installation Procedure
- Ensure that the high pressure fuel pipe, fuel rail fitting and fuel pump fitting are clean and dry prior to assembly.

- Position the high pressure fuel pipe (2) to the high pressure fuel pump fitting (1) and left fuel rail (3). hand tighten the fitting.
Caution: Refer to Fastener Caution in the Preface section.
- Tighten the high pressure fuel pipe fitting.
| 3.1. | Tighten the fitting a first pass to
16 N·m (12 lb ft). |
| 3.2. | Tighten the fitting a final pass to
32 N·m (24 lb ft). |
Note: If a fuel leak accrues at the high pressure fuel pump or the fuel rail, that component will need to be replaced.
- Inspect for leaks using the following procedure:
| 4.1. | Turn ON the ignition, with the engine OFF for 2 seconds. |
| 4.2. | Turn OFF the ignition, for 10 seconds. |
| 4.3. | Turn ON the ignition, with the engine OFF. |
| 4.4. | Inspect for fuel leaks. |
- Install the low side fuel pressure service port cap.
- Install the fuel tank cap.
- Install the high pressure pump shield. Refer to
Fuel Pipe Shield Replacement.
- Install the drive motor generator power inverter module. Refer to
Drive Motor Generator Power Inverter Module Removal and Installation.


