For 1990-2009 cars only
Removal Procedure
- Remove the air cleaner assembly. Refer to Air Cleaner Assembly Replacement .
- Support the engine with a hydraulic floor jack.
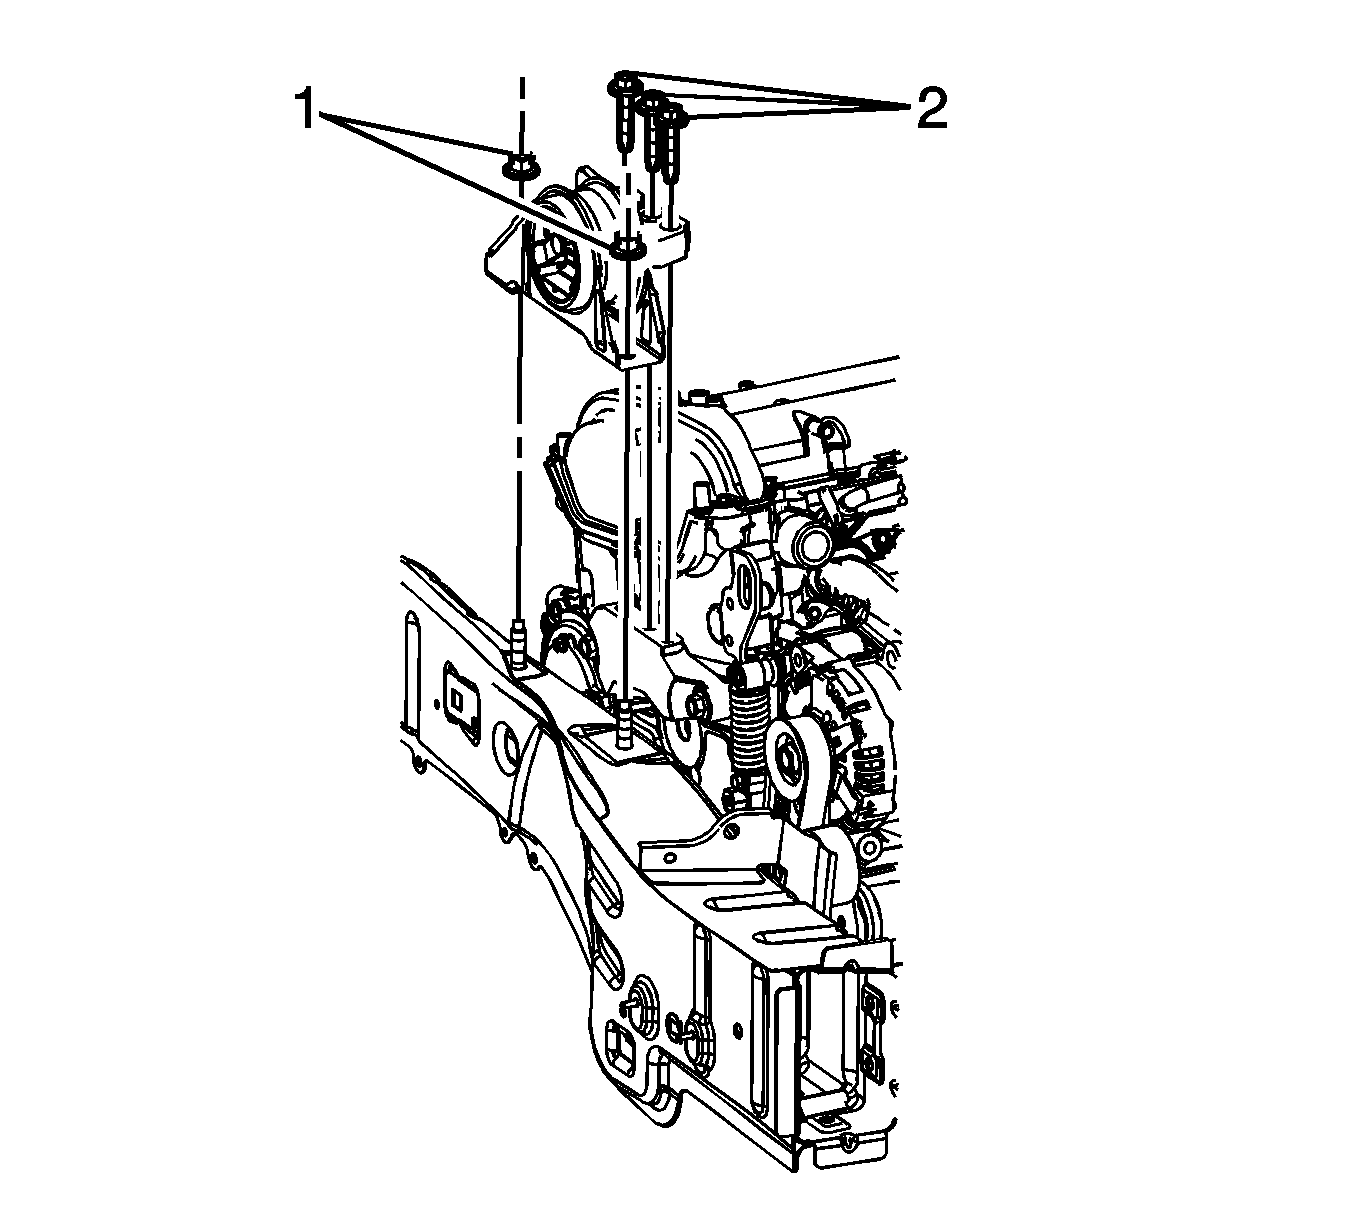
- Remove the engine mount to bracket bolts (2).
- Remove the engine mount to side rail nuts (1).
- Remove the engine mount from the engine compartment.

Use a piece of wood between the floor jack and the oil pan.
Installation Procedure
- Place the engine mount onto the side rail studs.
- Install the engine mount to side rail nuts (1).
- Install the engine mount to bracket bolts (2).
- Tighten the engine mount to bracket bolts in the following sequence:
- Remove the hydraulic floor jack from under the oil pan.
- Install the air cleaner assembly. Refer to Air Cleaner Assembly Replacement .

Notice: Refer to Fastener Notice in the Preface section.
Tighten
Tighten the nuts to 85 N·m (63 lb ft).
Important: The engine mount to bracket bolts must be hand started. Do not pry the engine mount to align the holes.
| • | Middle |
| • | Rear |
| • | Front |
Tighten
Tighten the bolts to 50 N·m (37 lb ft).
Removal Procedure
- Remove the air cleaner assembly. Refer to Air Cleaner Assembly Replacement.
- Support the engine with a hydraulic floor jack.
- Remove the engine mount to bracket bolts (2).
- Remove the engine mount to side rail nuts (1).
- Remove the engine mount from the engine compartment.

Use a piece of wood between the floor jack and the oil pan.
Installation Procedure
- Place the engine mount onto the side rail studs.
- Install the engine mount to side rail nuts (1) and tighten to 85 N·m (63 lb ft).
- Install the engine mount to bracket bolts (2).
- Tighten the engine mount to bracket bolts in the following sequence:
- Remove the hydraulic floor jack from under the oil pan.
- Install the air cleaner assembly. Refer to Air Cleaner Assembly Replacement.

Caution: Refer to Fastener Caution in the Preface section.
Note: The engine mount to bracket bolts must be hand started. Do not pry the engine mount to align the holes.
| • | Middle |
| • | Rear |
| • | Front |
| Tighten the bolts to 50 N·m (37 lb ft). |
