For 1990-2009 cars only
Crankshaft Balancer Replacement LAT
Tools Required
| • | J 38122-A Harmonic Balancer Holder |
| • | J 45059 Angle Meter |
Removal Procedure
- Remove the drive belt. Refer to Drive Belt Replacement .
- Remove the engine splash shield.
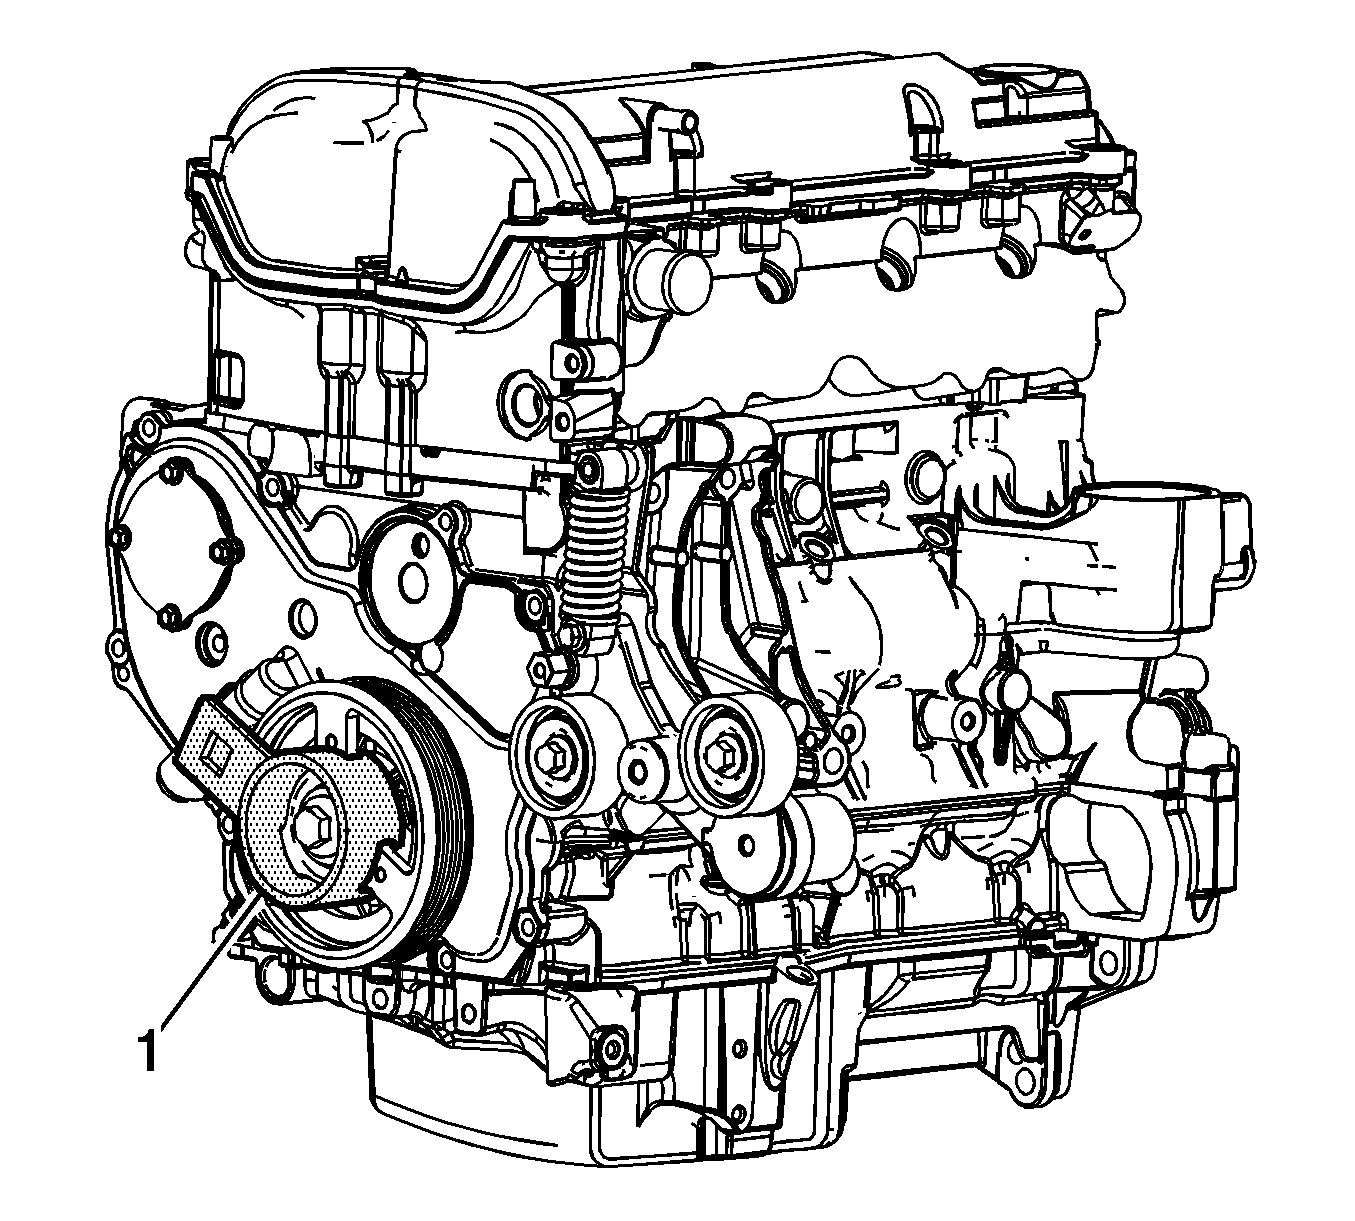
- Install the J 38122-A (1), and a breaker bar to the balancer in order to prevent the balancer from rotating when loosening the balancer bolt.
- Remove the J 38122-A (1) and breaker bar.
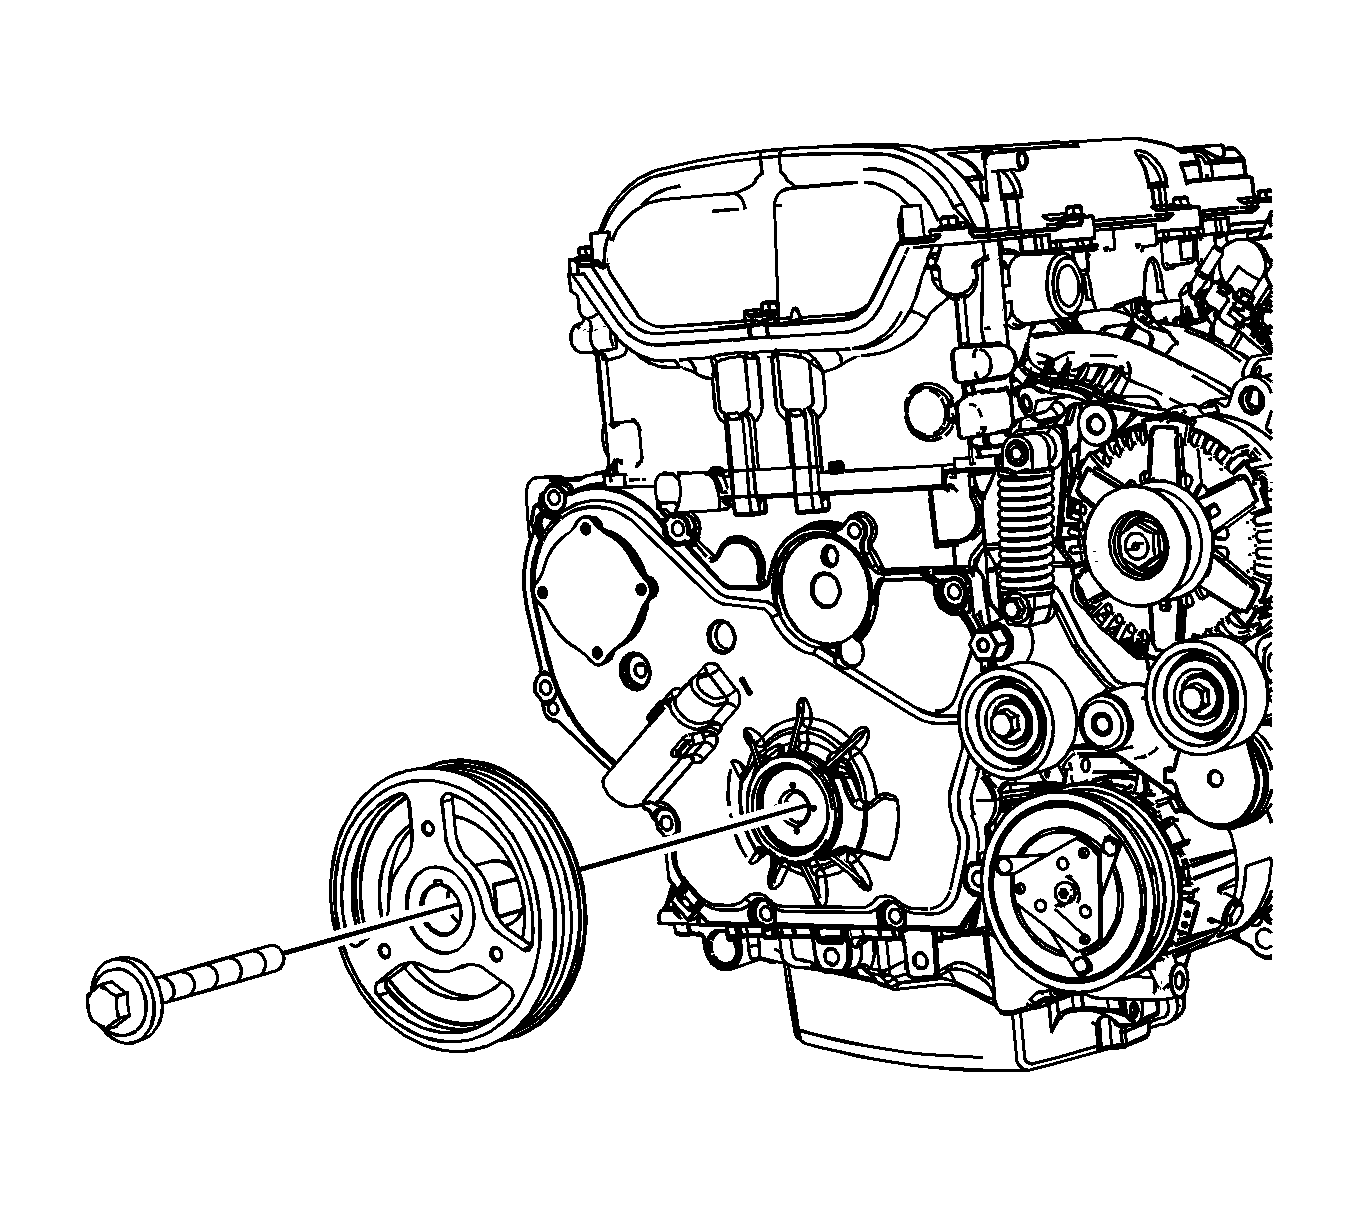
- Remove and discard the crankshaft balancer bolt.
- Remove the crankshaft balancer.


Installation Procedure
- Position the crankshaft balancer.
- Install a NEW crankshaft balancer bolt.
- Install the J 38122-A (1), and a breaker bar to the balancer in order to prevent the balancer from rotating while tightening the bolt.
- Tighten the crankshaft balancer bolt.
- Install the engine splash shield.
- Install the drive belt. Refer to Drive Belt Replacement .


Notice: Refer to Fastener Notice in the Preface section.
Tighten
Tighten the bolt to 100 N·m (74 lb ft) plus an additional 125 degrees using the
J 45059 .
Crankshaft Balancer Replacement LE5
Tools Required
| • | J 38122-A Harmonic Balancer Holder |
| • | J 45059 Angle Meter |
Removal Procedure
- Remove the drive belt. Refer to Drive Belt Replacement .
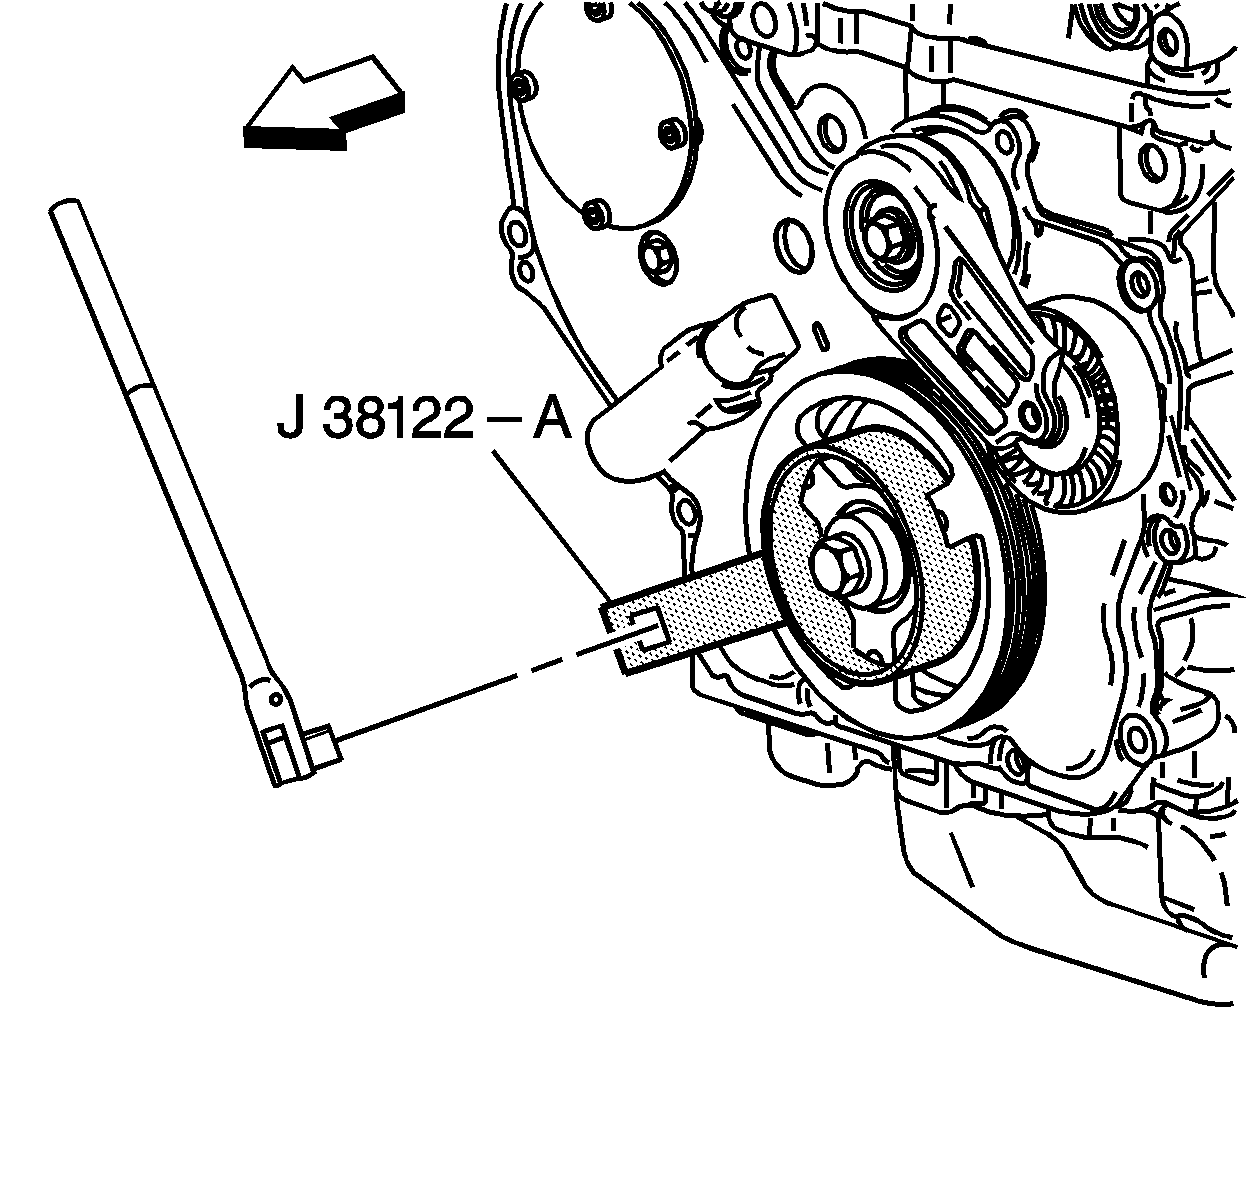
- Use J 38122-A to prevent the crankshaft from rotating while loosening the crankshaft balancer bolt.
- Remove and discard the crankshaft balancer bolt.
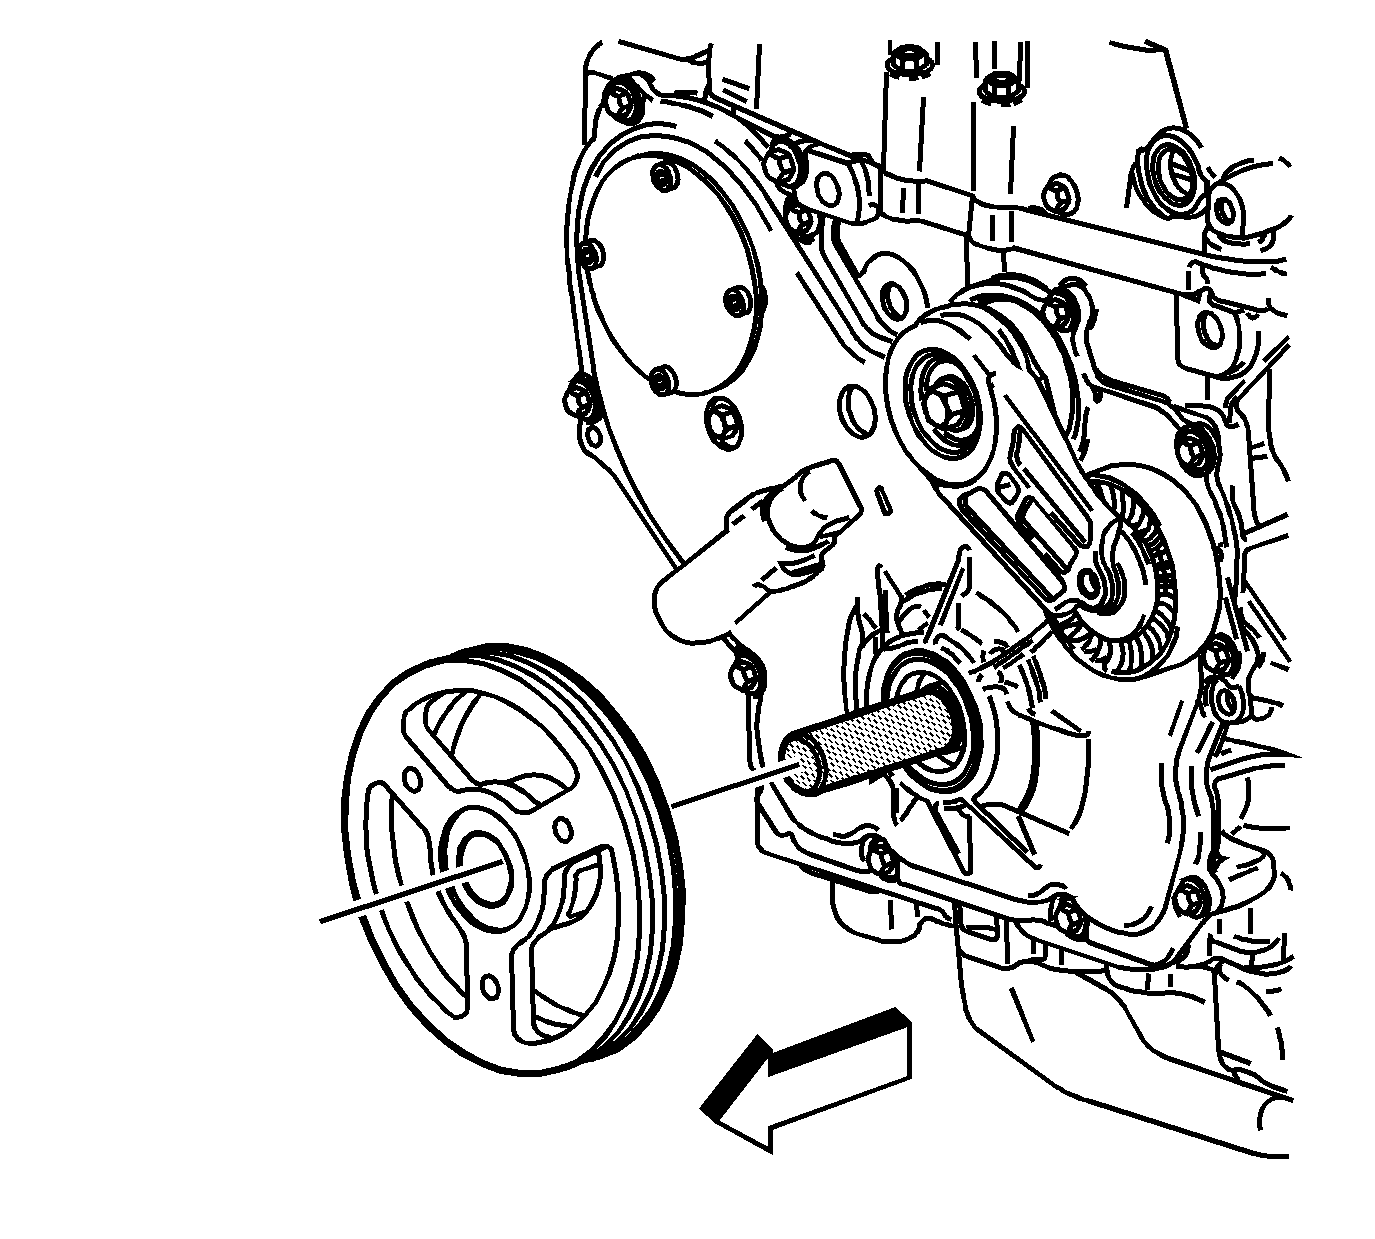
- Remove the crankshaft balancer.


Installation Procedure
- Position the crankshaft balancer.
- Install a NEW crankshaft balancer bolt.
- Use the J 38122-A to hold the crankshaft balancer in order to prevent the balancer from rotating while tightening the bolt.
- Tighten the crankshaft balancer bolt.
- Install the drive belt. Refer to Drive Belt Replacement .


Notice: Refer to Fastener Notice in the Preface section.
Tighten
Tighten the bolt to 100 N·m (74 lb ft) plus an additional 125 degrees using the
J 45059
.
Crankshaft Balancer Replacement LE5
Special Tools
| • | J 38122-A Harmonic Balancer Holder |
| • | J 45059 Angle Meter |
Removal Procedure
- Remove the drive belt. Refer to Drive Belt Replacement.
- Use J 38122-A to prevent the crankshaft from rotating while loosening the crankshaft balancer bolt.
- Remove and discard the crankshaft balancer bolt.
- Remove the crankshaft balancer.


Installation Procedure
- Position the crankshaft balancer.
- Install a NEW crankshaft balancer bolt.
- Use the J 38122-A to hold the crankshaft balancer in order to prevent the balancer from rotating while tightening the bolt.
- Tighten the crankshaft balancer bolt to 100 N·m (74 lb ft) plus an additional 125 degrees using the J 45059 .
- Install the drive belt. Refer to Drive Belt Replacement.


Caution: Refer to Fastener Caution in the Preface section.
Crankshaft Balancer Replacement LAT
Special Tools
| • | J 38122-A Harmonic Balancer Holder |
| • | J 45059 Angle Meter |
Removal Procedure
- Remove the drive belt. Refer to Drive Belt Replacement.
- Remove the engine splash shield.
- Install the J 38122-A (1), and a breaker bar to the balancer in order to prevent the balancer from rotating when loosening the balancer bolt.
- Remove the J 38122-A (1) and breaker bar.
- Remove and discard the crankshaft balancer bolt.
- Remove the crankshaft balancer.


Installation Procedure
- Position the crankshaft balancer.
- Install a NEW crankshaft balancer bolt.
- Install the J 38122-A (1), and a breaker bar to the balancer in order to prevent the balancer from rotating while tightening the bolt.
- Tighten the crankshaft balancer bolt. Tighten the bolt to 100 N·m (74 lb ft) plus an additional 125 degrees using the J 45059 .
- Install the engine splash shield.
- Install the drive belt. Refer to Drive Belt Replacement.


Caution: Refer to Fastener Caution in the Preface section.
