For 1990-2009 cars only
Tools Required
J 35910 Drive Axle Seal Clamp Pliers
Disassembly Procedure
- Remove the wheel drive shaft from the vehicle. Refer to Front Wheel Drive Shaft Replacement .
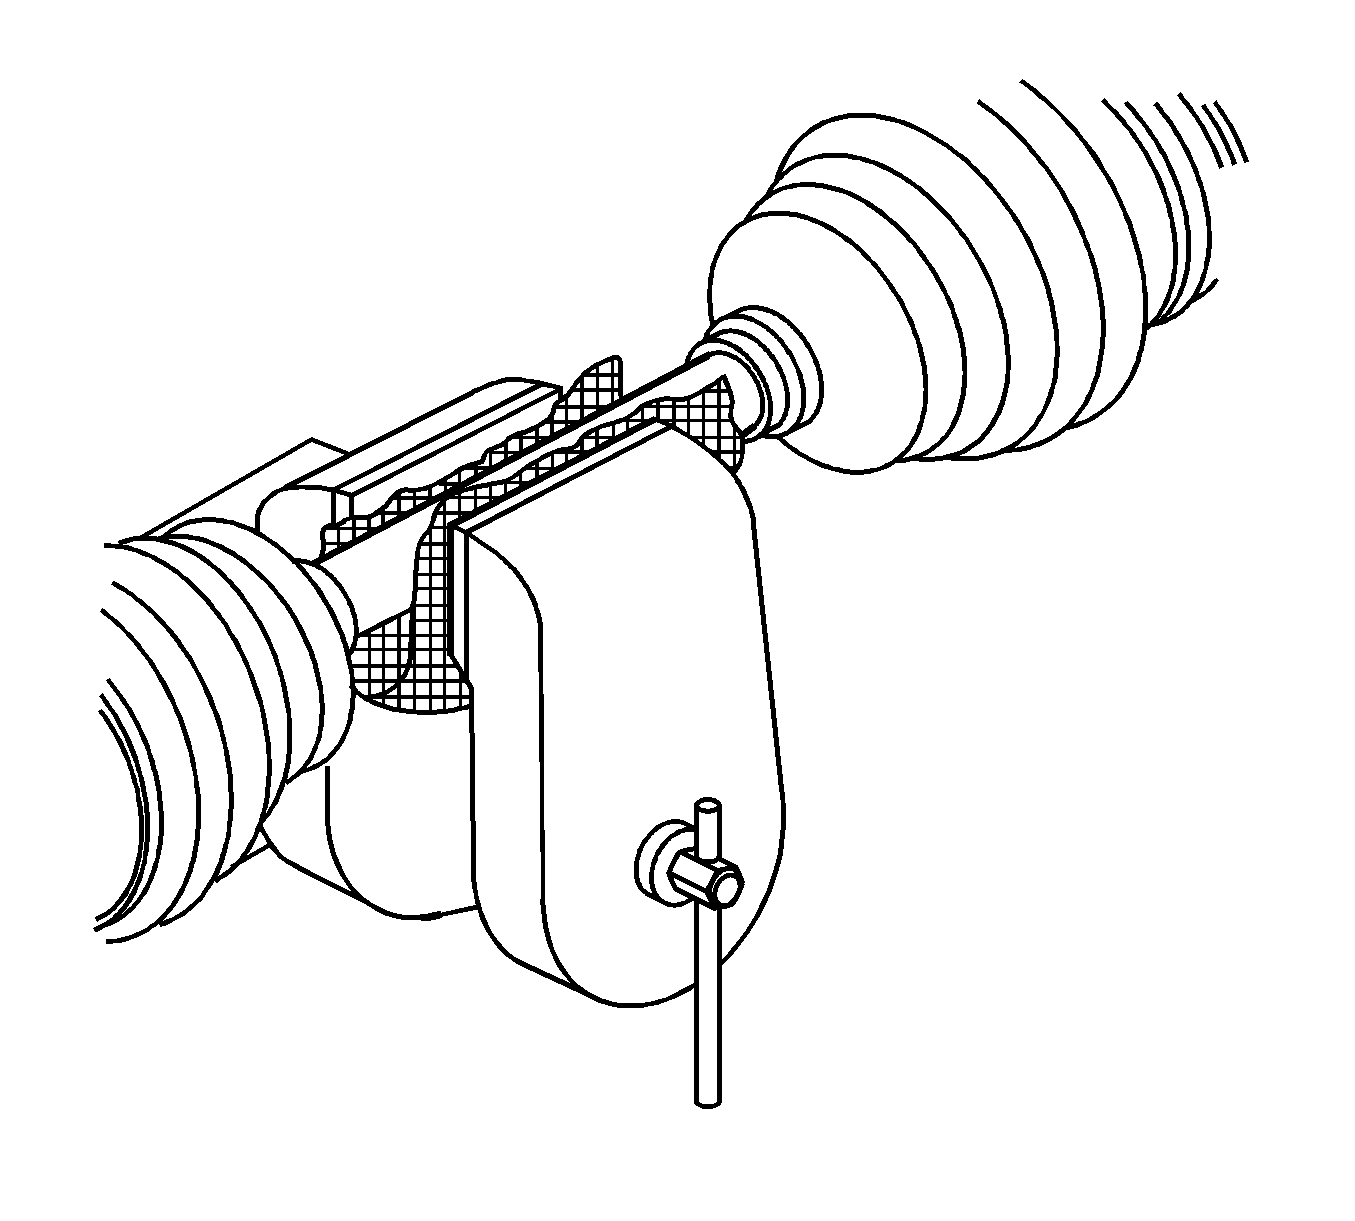
- Position wheel drive shaft bar in a soft jawed vise and clamp securely.
- Using side cutters, remove and discard the small seal clamp.
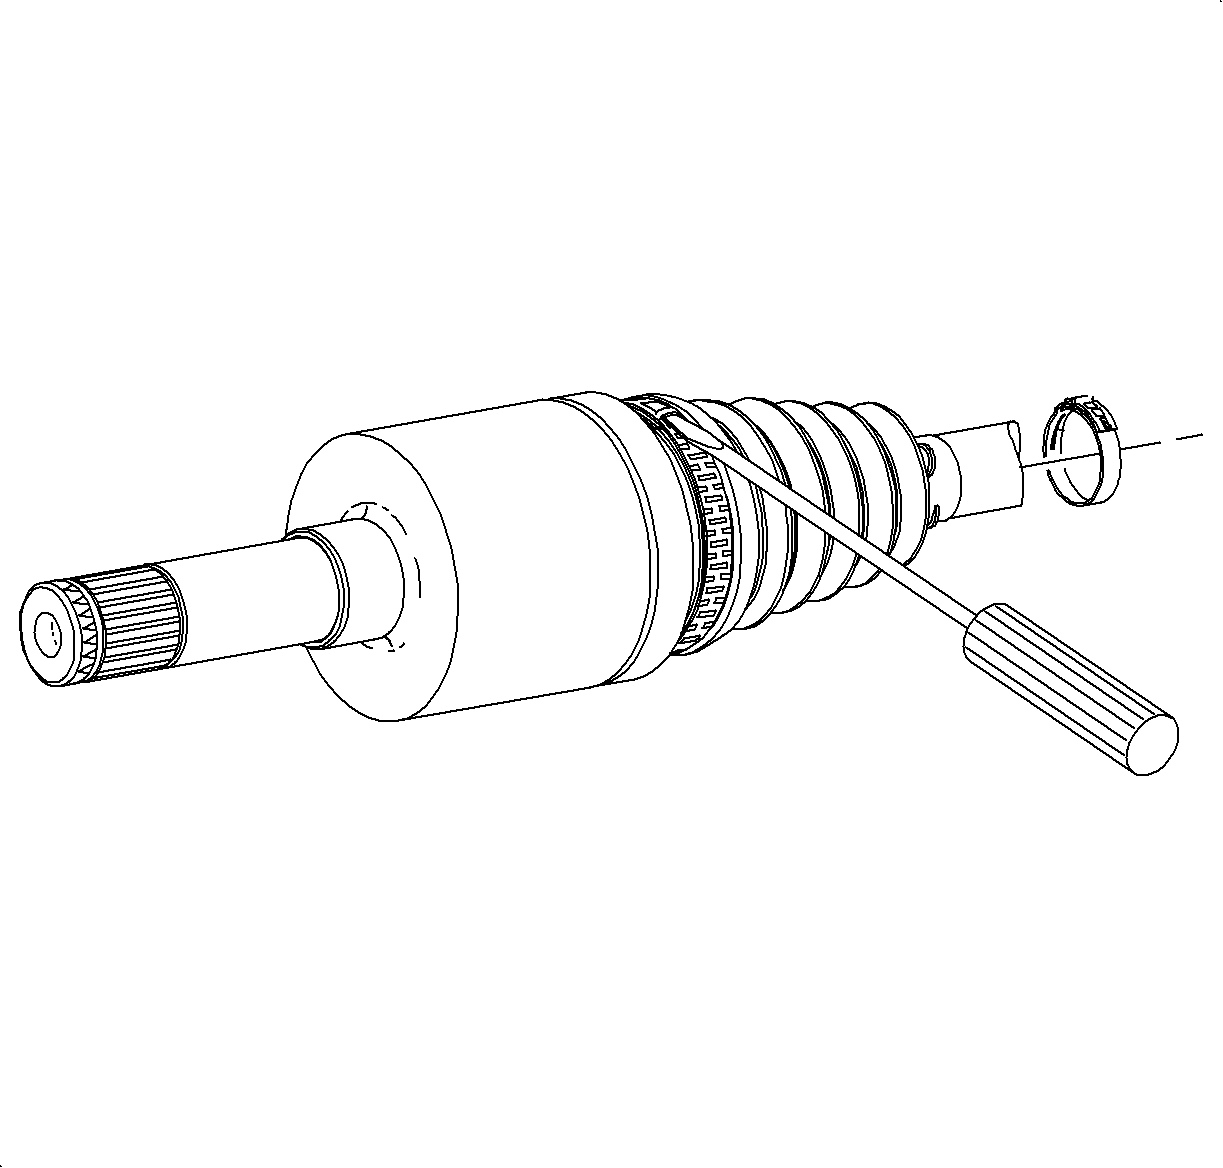
- Remove large seal retaining clamp using a flat-bladed tool and discard the clamp.
- Separate the seal from the tripot housing at the large diameter and slide the seal away from the joint along the axle shaft.
- Wipe the excess grease from the face of the tripot spider and the inside of the tripot housing.
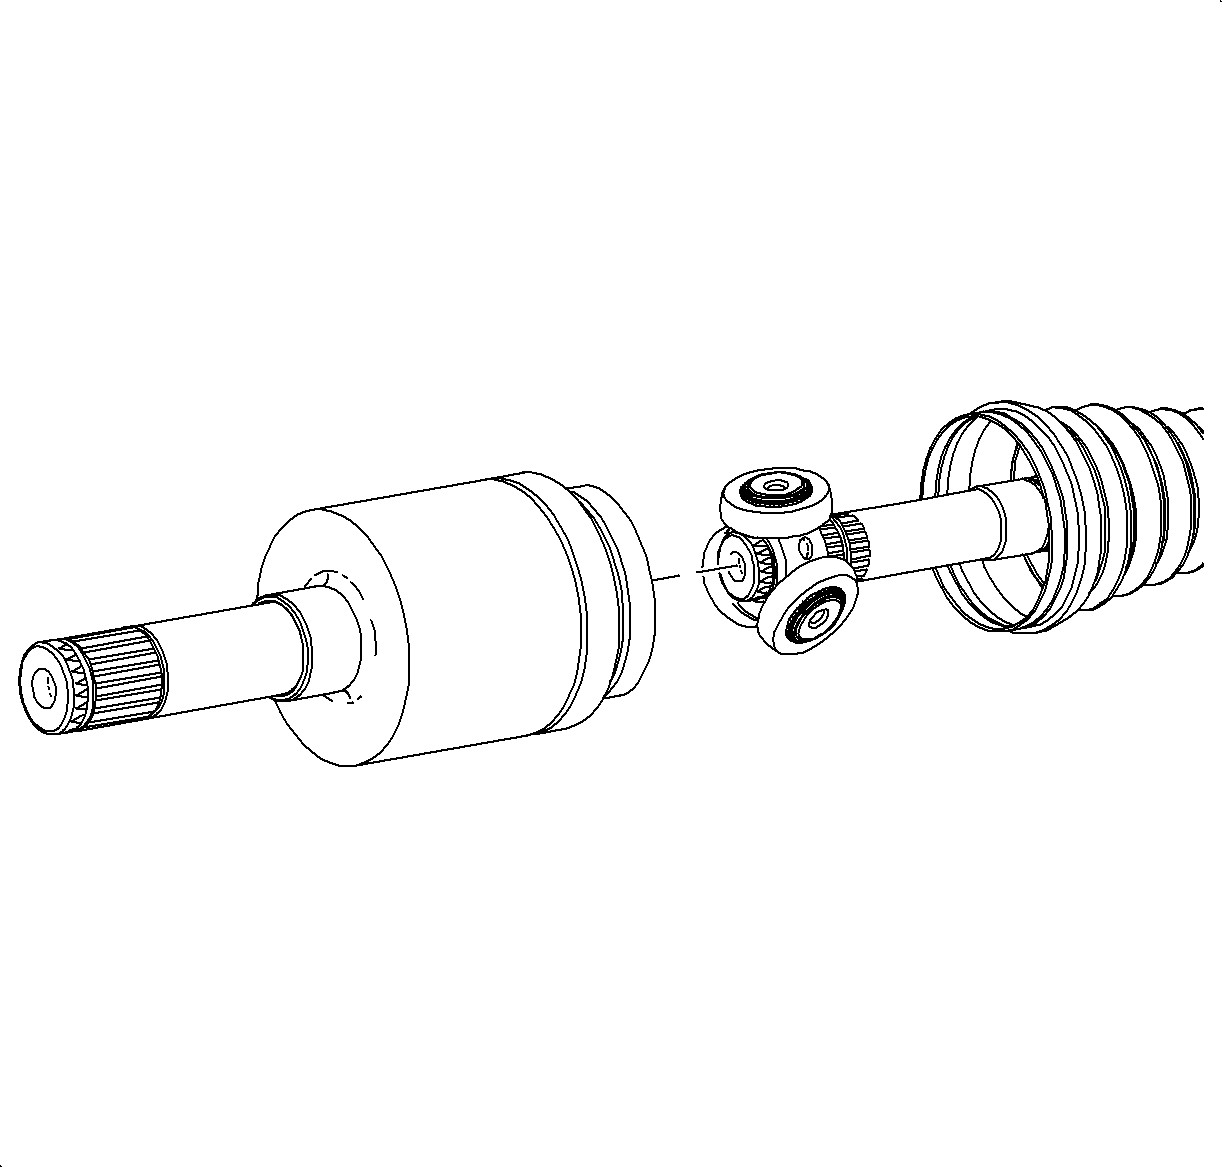
- Remove the tripot housing from the spider and shaft.
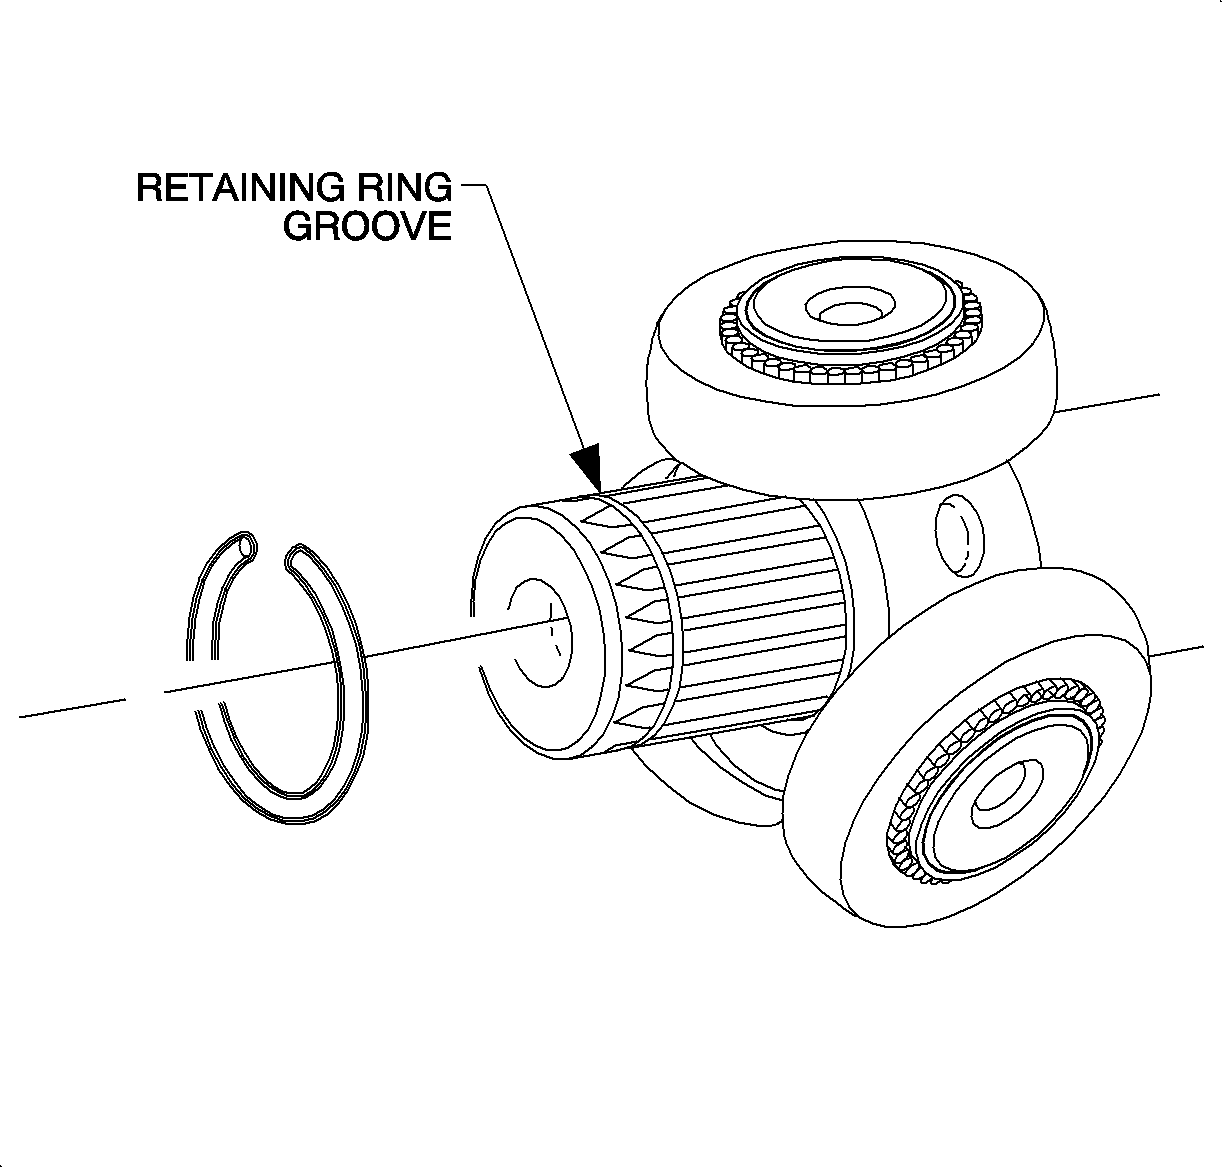
- Remove the retaining ring from the groove on the wheel drive shaft bar and remove the spider assembly.
- Remove the seal from the wheel drive shaft bar.
- Thoroughly clean all parts with a suitable solvent, removing all traces of grease and contaminants.
- Dry all parts with compressed air.
- Inspect the tripot joint components for unusual wear, cracks, and other damage. Replace any damaged components.
Assembly Procedure
- Install the small seal clamp to the seal. Do not crimp the clamp.
- Slide the inner seal onto the wheel drive shaft bar and locate the lip of the seal groove on the wheel drive shaft bar.
- Using the J 35910 , crimp the small seal clamp.
- Measure the clamp gap width.
- Install the tripot spider assembly to the wheel drive shaft bar, until seated against shoulder.
- Install the retaining ring in the groove of the wheel drive shaft bar with suitable pliers.
- Place approximately half of the grease in the kit to the seal and place the remainder in the tripot housing.
- Install the large clamp over the large diameter of the seal.
- Install the tripot housing to the tripot spider assembly on the wheel drive shaft bar.
- Slide the large diameter of the seal over the outside of the tripot housing and position the lip of the seal in the housing groove.
- Place the large seal retaining clamp around the seal and close using J 35910 .
- Inspect the gap dimension on the clamp ear. Continue tightening until the gap dimension is reached.
- Rotate the housing in a circular motion to distribute the grease in the tripot joint.
- Install the wheel drive shaft in the vehicle. Refer to Front Wheel Drive Shaft Replacement .
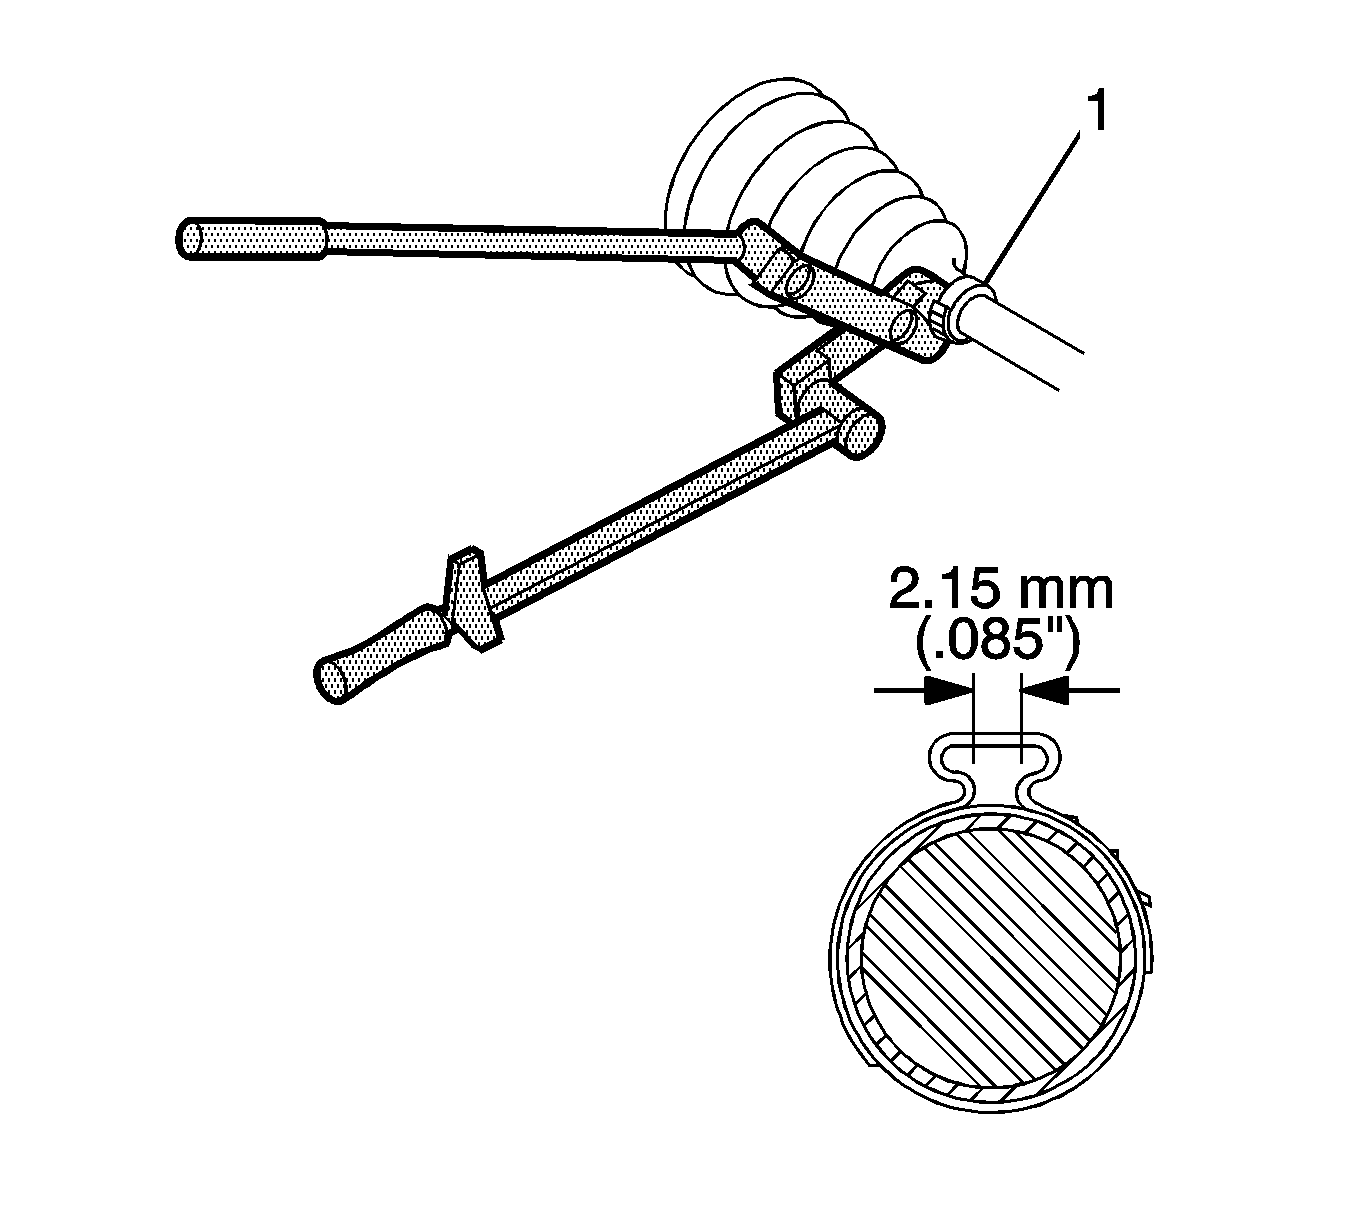
Important: Ensure the seal clamp is positioned correctly in the seal groove.
Specification
Clamp gap width should not exceed 2.15 mm (0.085 in).

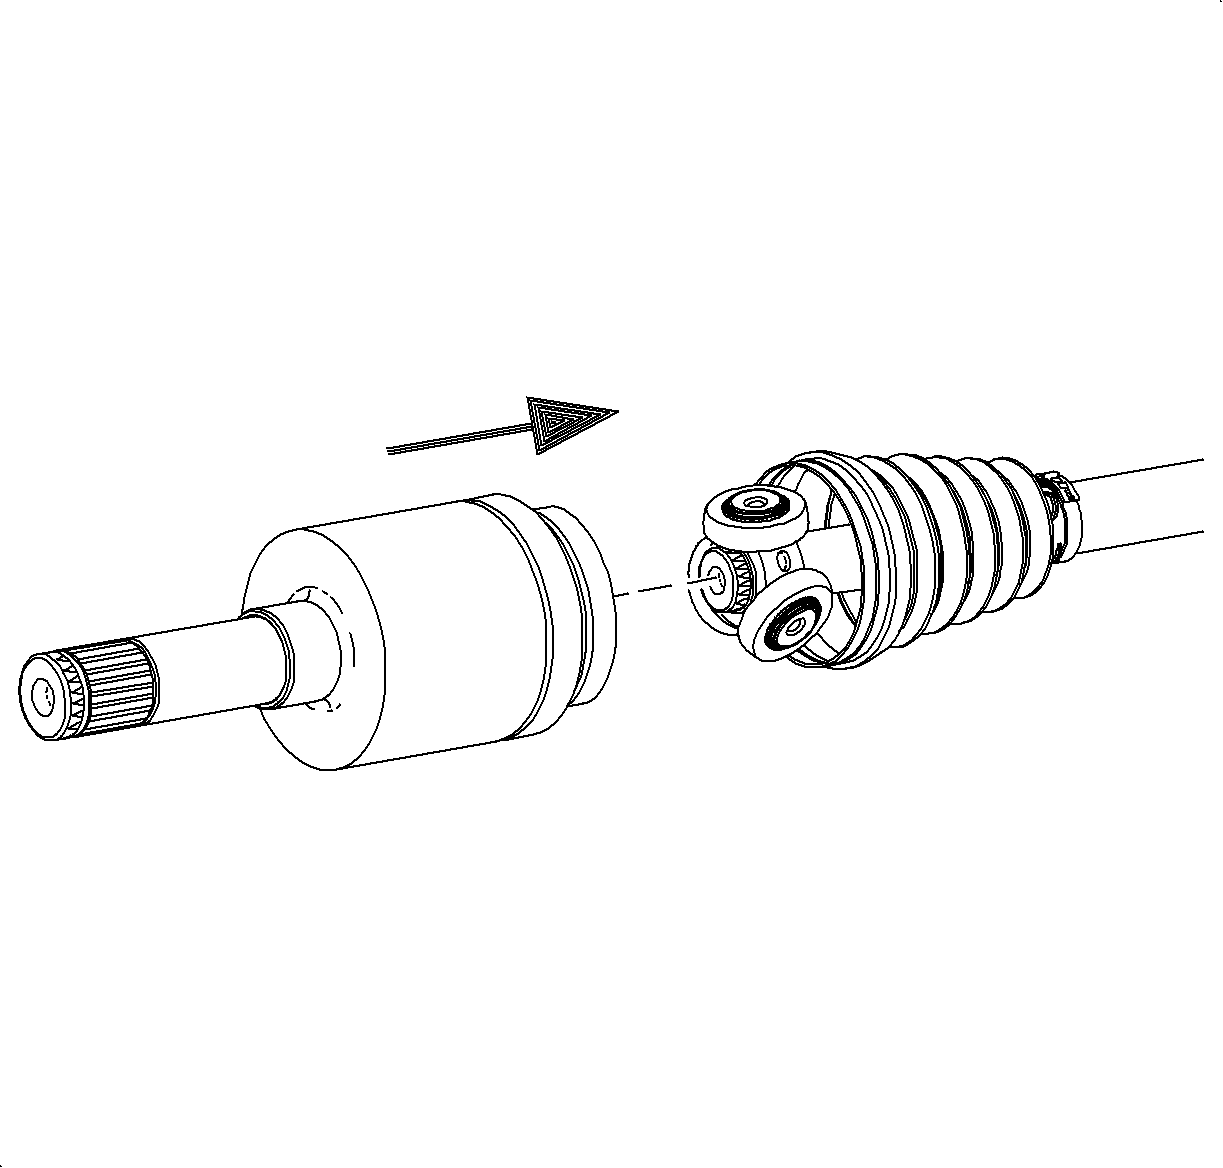
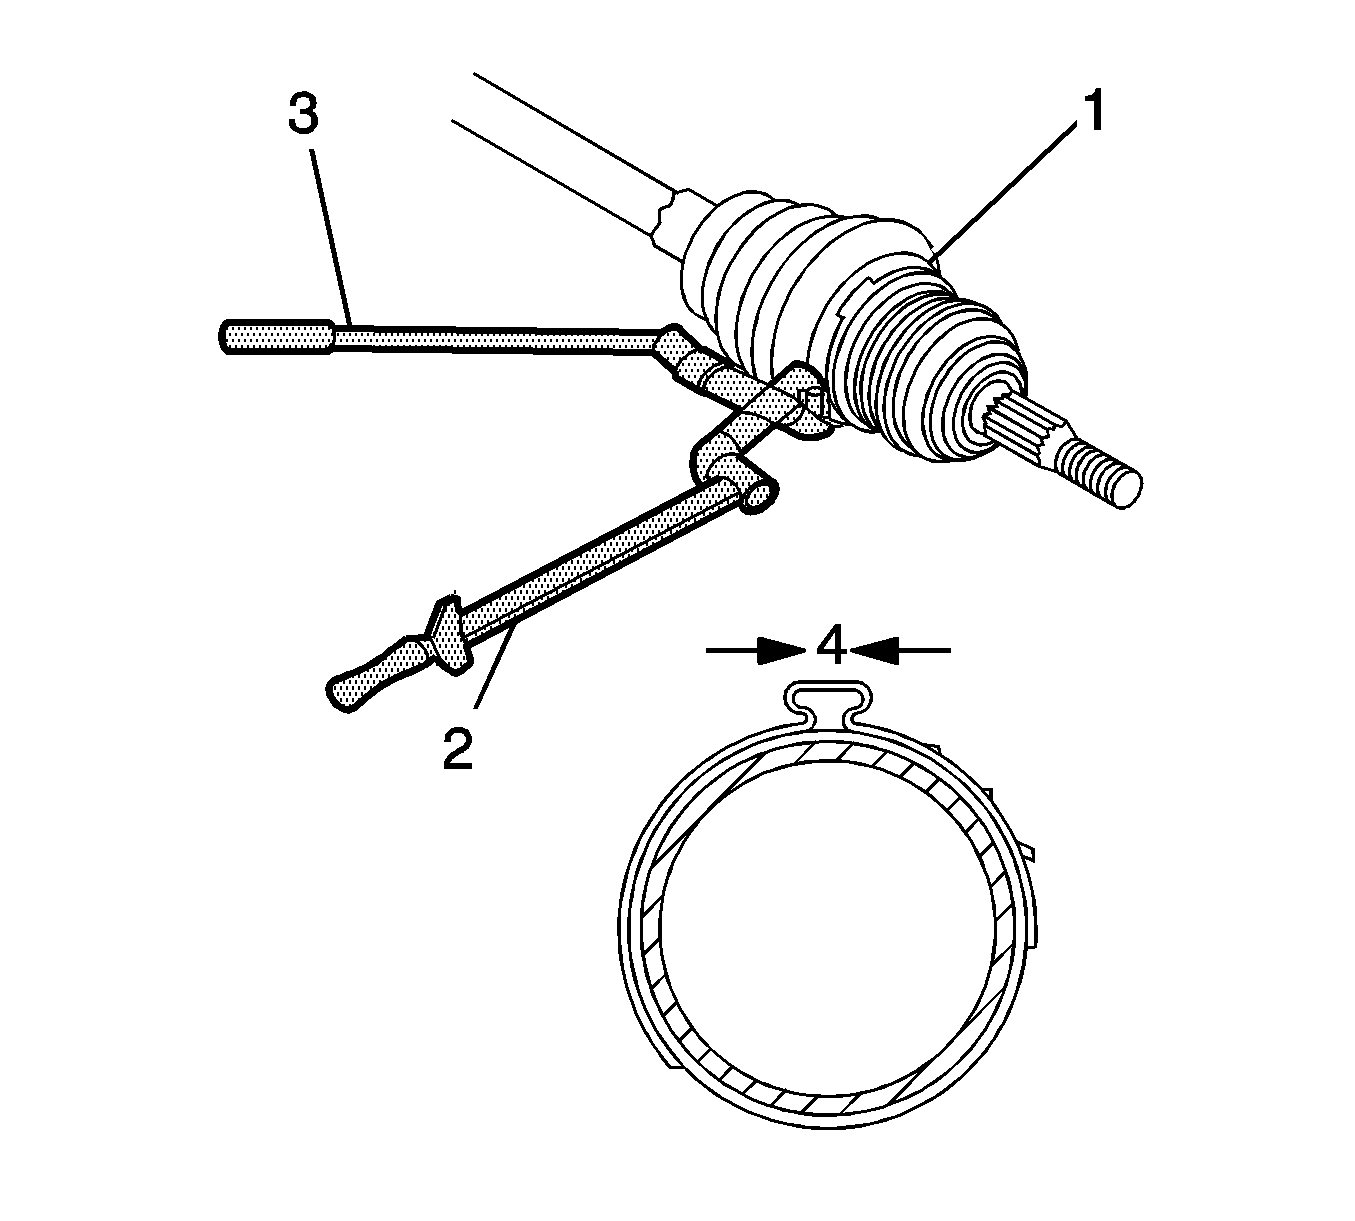
Specification
Dimension equals 1.9 mm (5/64 in).
Special Required
J 35910 Drive Axle Seal Clamp Pliers
Disassembly Procedure
- Position wheel drive shaft bar in a soft jawed vise and clamp securely.
- Using side cutters, remove and discard the small seal clamp.
- Remove large seal retaining clamp using a flat-bladed tool and discard the clamp.
- Separate the seal from the tripot housing at the large diameter and slide the seal away from the joint along the axle shaft.
- Wipe the excess grease from the face of the tripot spider and the inside of the tripot housing.
- Remove the tripot housing from the spider and shaft.
- Remove the retaining ring from the groove on the wheel drive shaft bar and remove the spider assembly.
- Remove the seal from the wheel drive shaft bar.
- Thoroughly clean all parts with a suitable solvent, removing all traces of grease and contaminants.
- Dry all parts with compressed air.
- Inspect the tripot joint components for unusual wear, cracks, and other damage. Replace any damaged components.


Assembly Procedure
- Install the small seal clamp (1) to the seal. Do not crimp the clamp.
- Slide the inner seal onto the wheel drive shaft bar and locate the lip of the seal groove on the wheel drive shaft bar.
- Using the J 35910 , crimp the small seal clamp.
- Measure the clamp gap width.
- Install the tripot spider assembly to the wheel drive shaft bar, until seated against shoulder.
- Install the retaining ring in the groove of the wheel drive shaft bar with suitable pliers.
- Place approximately half of the grease in the kit to the seal and place the remainder in the tripot housing.
- Install the large clamp over the large diameter of the seal.
- Install the tripot housing to the tripot spider assembly on the wheel drive shaft bar.
- Slide the large diameter of the seal over the outside of the tripot housing and position the lip of the seal in the housing groove.
- Place the large seal retaining clamp (1) around the seal and close using J 35910 (2-3).
- Inspect the gap dimension on the clamp ear (a). Continue tightening until the gap dimension is reached.
- Rotate the housing in a circular motion to distribute the grease in the tripot joint.
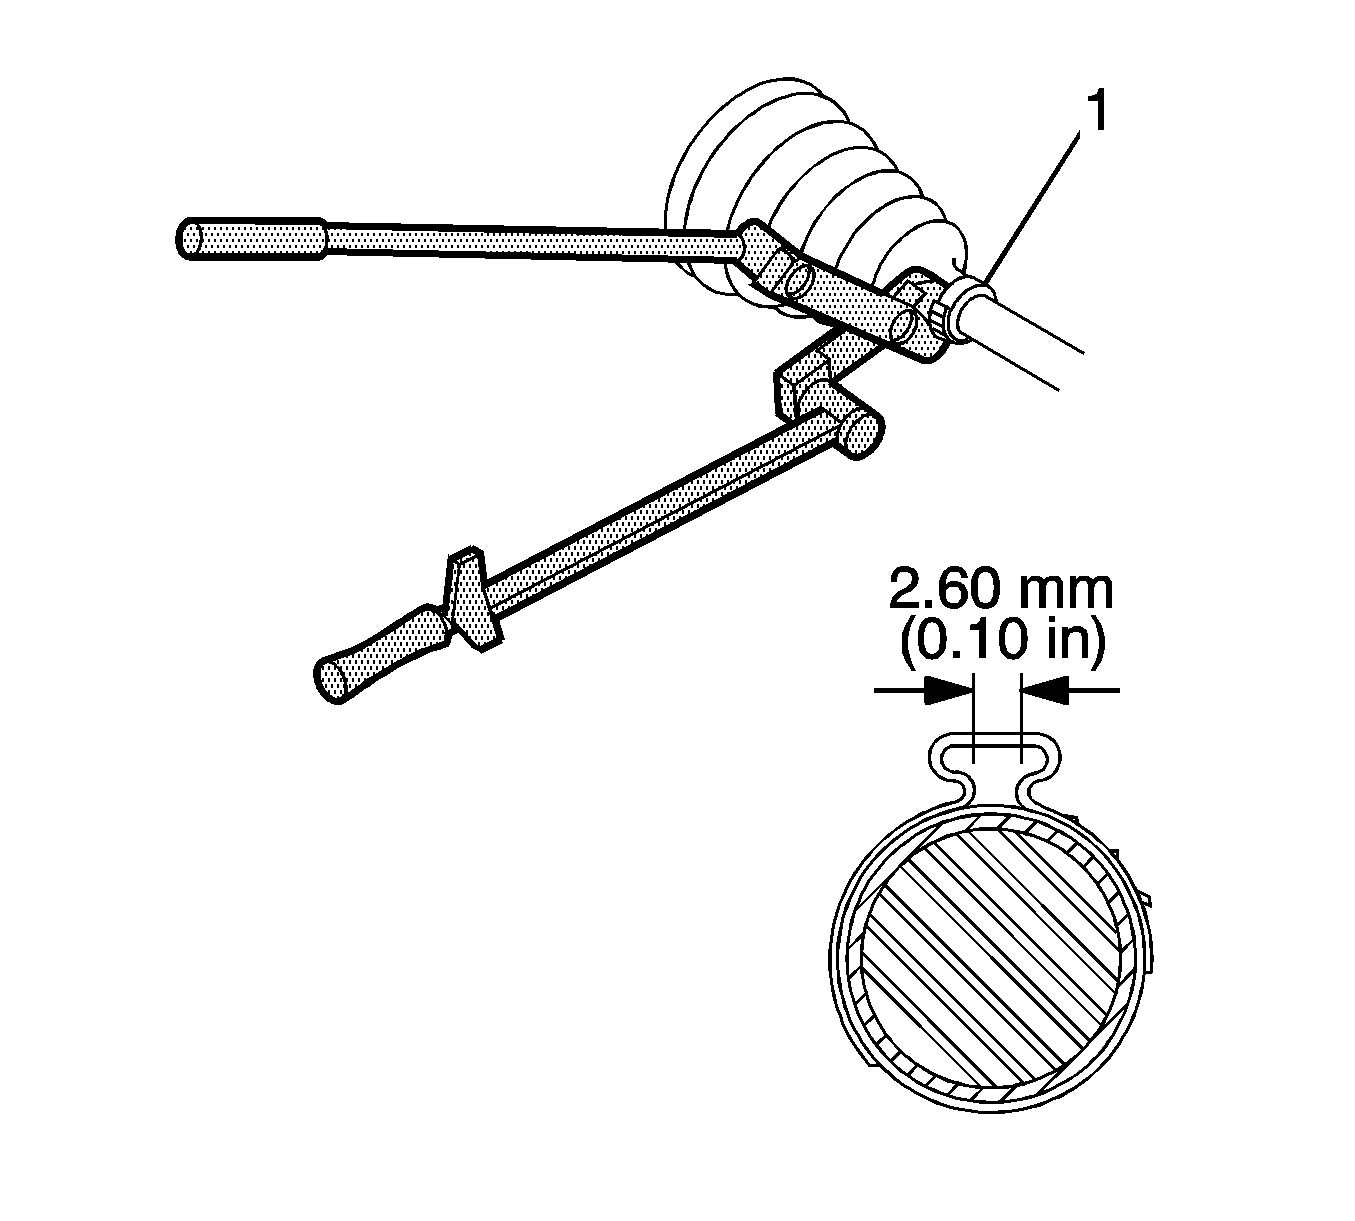
Important: Ensure the seal clamp is positioned correctly in the seal groove.
Specification
Clamp gap width should not exceed 2.15 mm (0.085 in).


Specification
Dimension equals 1.9 mm (0.075 in).
