Removal Procedure
- Raise and support the vehicle. Refer to Lifting and Jacking the Vehicle .
- Place the drain pan under the transaxle oil pan.
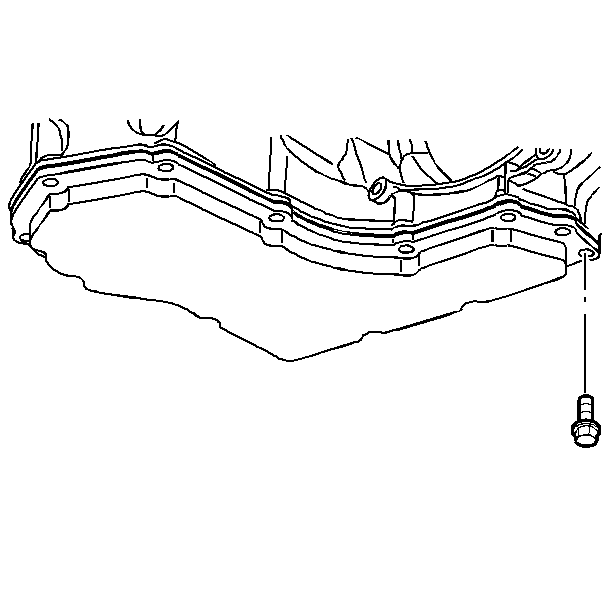
- Remove the oil pan bolts from only the front and the sides.
- Loosen the rear oil pan bolts about 4 turns.
- Lightly tap the oil pan with a rubber mallet or pry in order to allow the fluid to drain.
- Remove the remaining oil pan bolts.
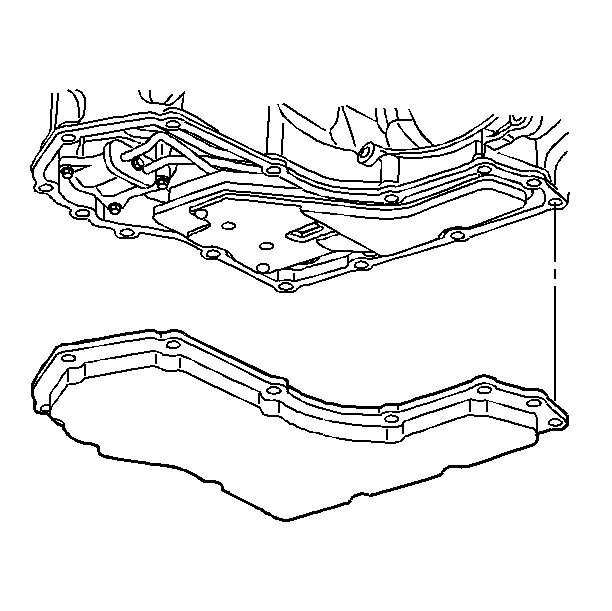
- Remove the oil pan.
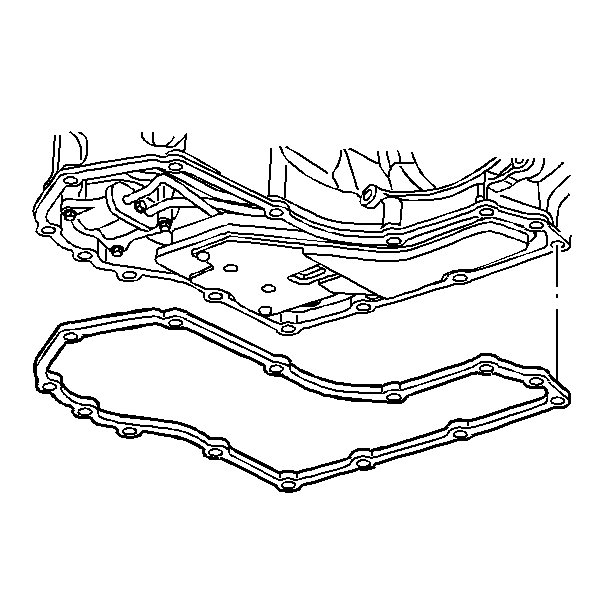
- Remove the oil pan gasket.

Notice: When removing the oil pan bolts, be careful not to damage the oil pan sealing surfaces. Such damage may result in oil leaks in this area.


Installation Procedure
- Clean and inspect the oil pan for dents or damage. Dry the oil pan before installation.
- Install the oil pan gasket. Use a new gasket if the sealing ribs are damaged.
- Install the oil pan. Replace the bottom pan, if damaged.
- Install the oil pan attaching bolts.
- Lower the vehicle.
- Fill the transmission.
- Inspect the transmission fluid level. Refer to Transmission Fluid Check
- Inspect the oil pan gasket for leaks.
- Using a scan tool, prime the Transmission Auxiliary Pump, if equipped with 2.4L (LAT).


Notice: Refer to Fastener Notice in the Preface section.

Tighten
Tighten the bolts to 12 N·m (106 lb in).
Notice: Transmission Auxiliary Pump Priming must be performed after any service procedure is performed on the transmission that involves the draining of and refill of transmission fluid. Failure to perform the Transmission Auxiliary Pump Priming will result in damage to the auxiliary pump and possible damage to the transmission.
Removal Procedure
- Raise and support the vehicle. Refer to Lifting and Jacking the Vehicle.
- Place the drain pan under the transaxle oil pan.
- Remove the oil pan bolts from only the front and the sides.
- Loosen the rear oil pan bolts about 4 turns.
- Lightly tap the oil pan with a rubber mallet or pry in order to allow the fluid to drain.
- Remove the remaining oil pan bolts.
- Remove the oil pan.
- Remove the oil pan gasket.

Caution: When removing the oil pan bolts, be careful not to damage the oil pan sealing surfaces. Such damage may result in oil leaks in this area.


Installation Procedure
- Clean and inspect the oil pan for dents or damage. Dry the oil pan before installation.
- Install the oil pan gasket. Use a new gasket if the sealing ribs are damaged.
- Install the oil pan. Replace the bottom pan, if damaged.
- Install the oil pan attaching bolts and tighten to 12 N·m (106 lb in).
- Lower the vehicle.
- Fill the transmission.
- Inspect the transmission fluid level. Refer to Transmission Fluid Check
- Inspect the oil pan gasket for leaks.
- Using a scan tool, prime the Transmission Auxiliary Pump, if equipped with 2.4L (LAT).


Caution: Refer to Fastener Caution in the Preface section.

Caution: Transmission Auxiliary Pump Priming must be performed after any service procedure is performed on the transmission that involves the draining of and refill of transmission fluid. Failure to perform the Transmission Auxiliary Pump Priming will result in damage to the auxiliary pump and possible damage to the transmission.
