For 1990-2009 cars only
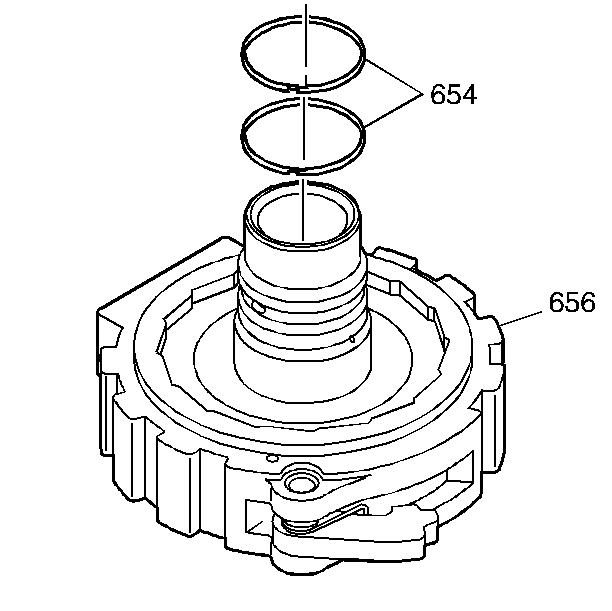
- Assemble two new seals (654) on the forward clutch support (656).
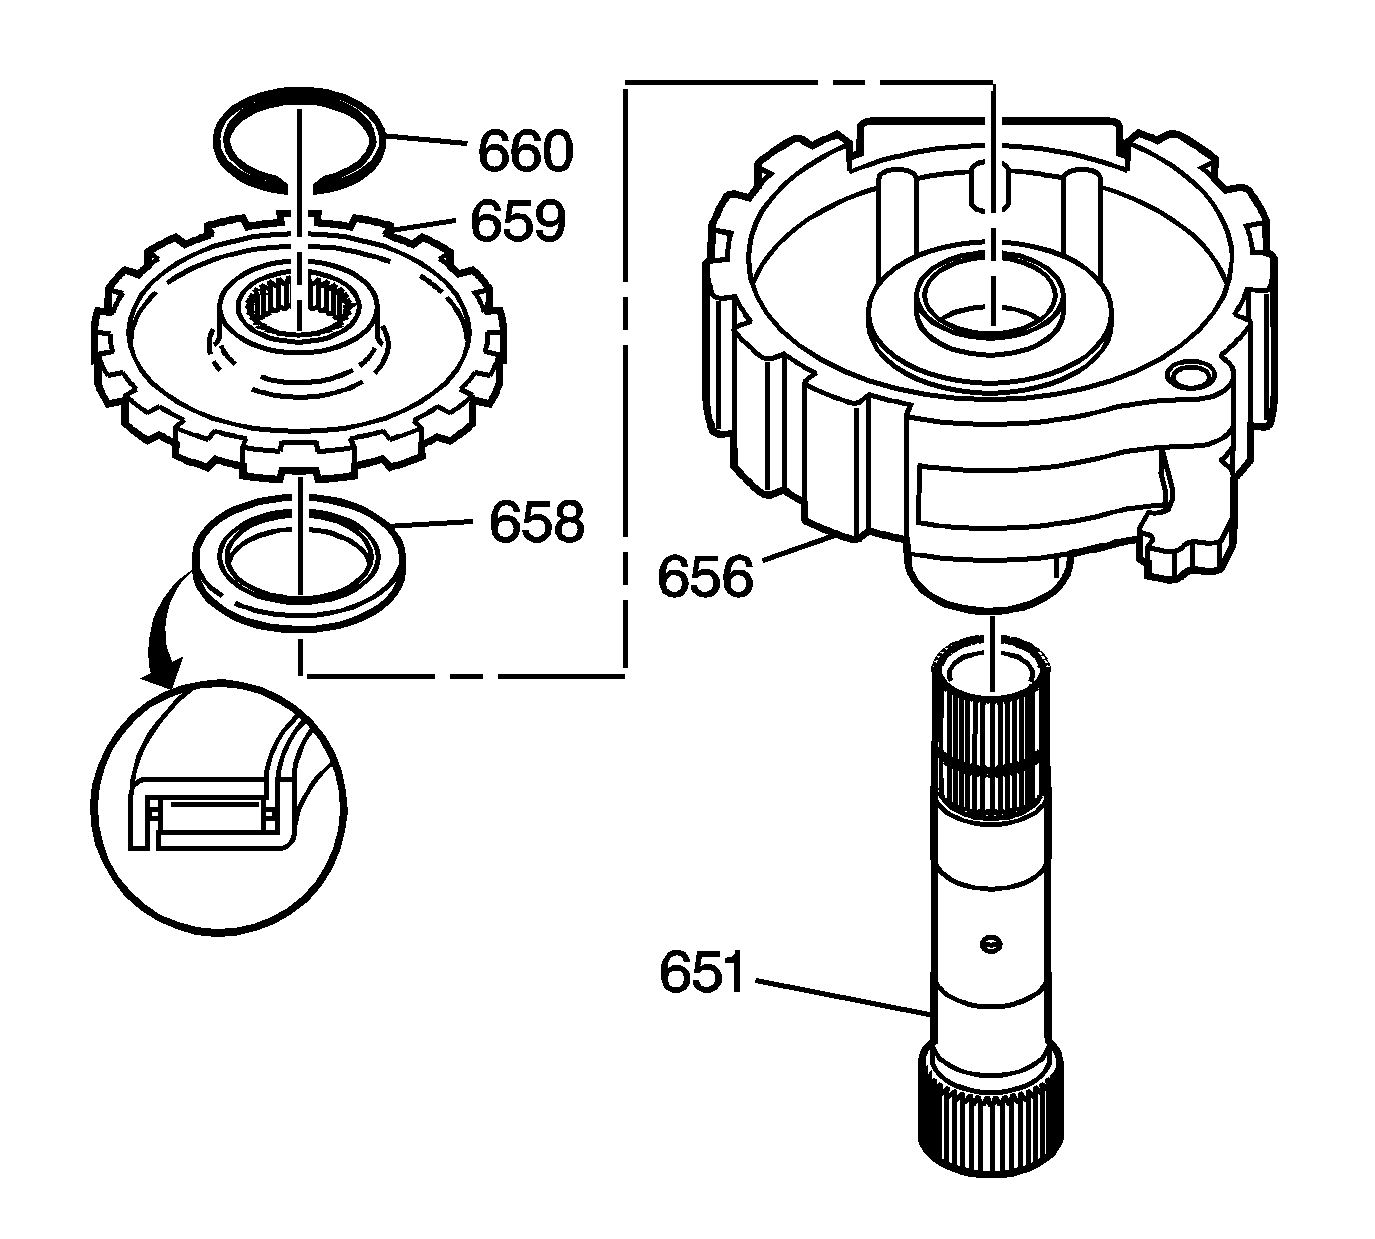
- Assemble the forward clutch support (656) onto the final drive sun gear shaft (651).
- Assemble the roller bearing (658) onto the forward clutch support (656).
- Assemble the parking pawl gear (659) onto the final drive sun gear shaft (651) with the raised inner boss facing up, so that the parking pawl properly engages the teeth on the parking pawl gear.
- Assemble the snap ring (660) to the final drive sun gear shaft (651) in order to retain the parking pawl gear (659).
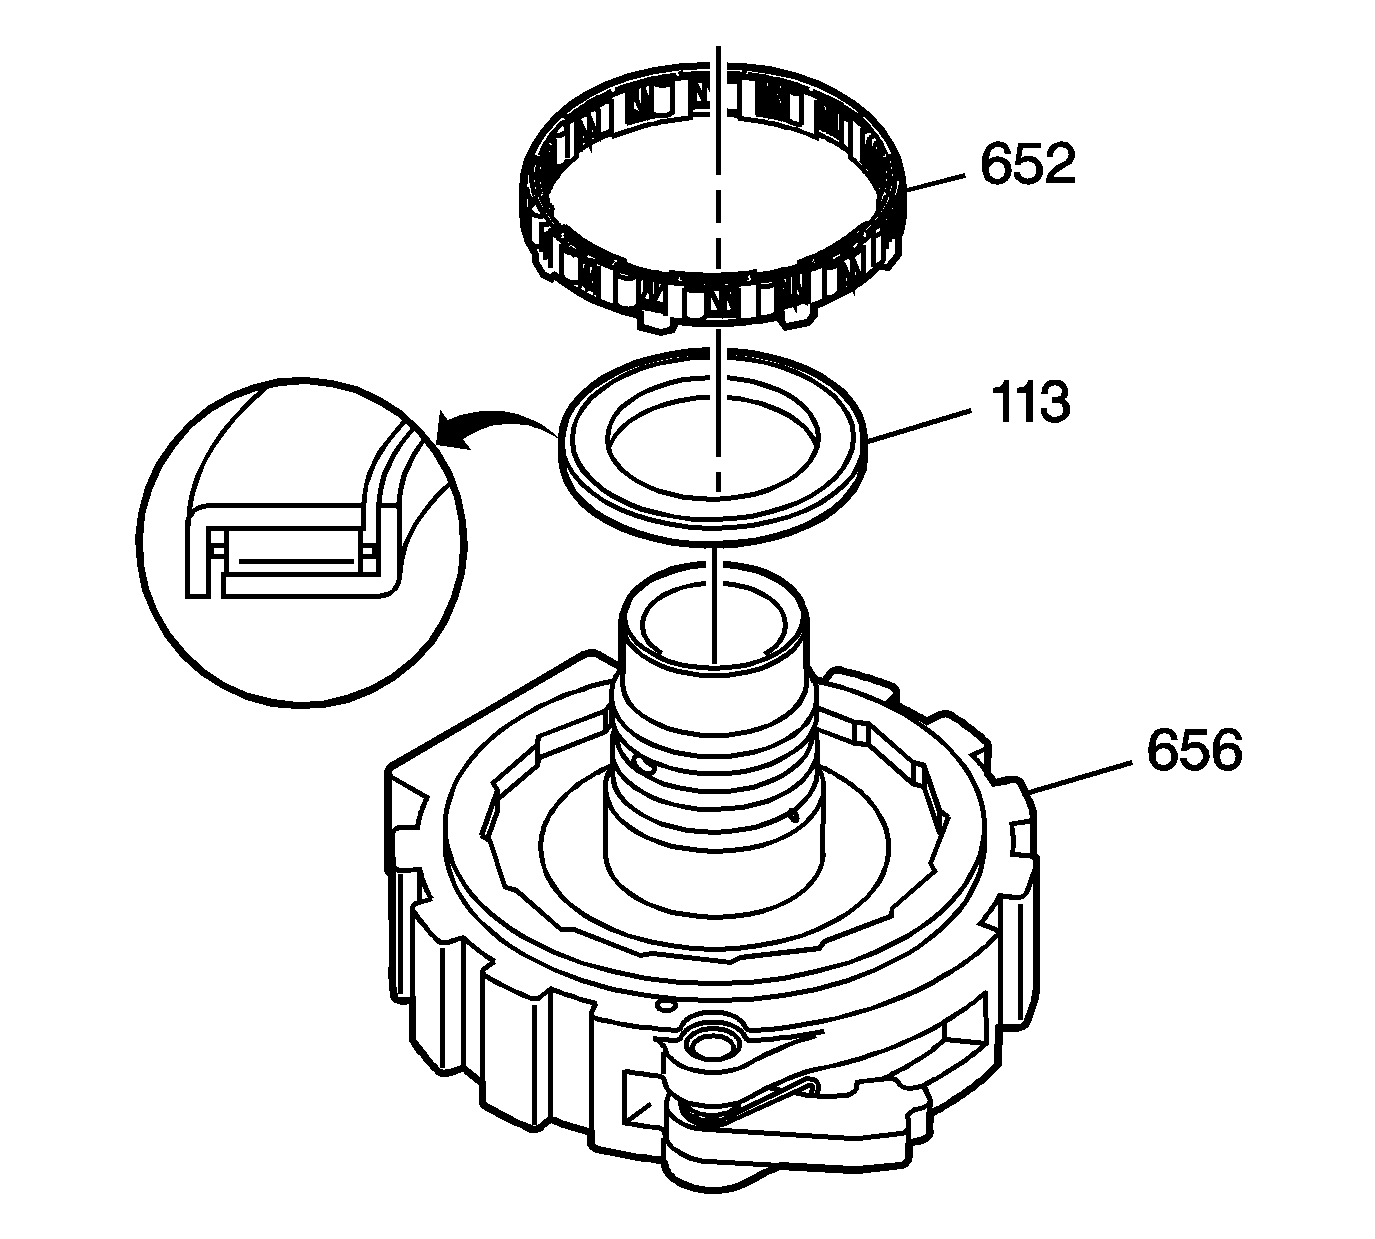
- Assemble the lo roller clutch assembly (652) onto the forward clutch support (656). The larger tabs on the cage must face down into the forward clutch support (656). Rotate the cage slightly counterclockwise in order to lock the tabs into the grooves in the forward clutch support (656).
- Assemble the thrust bearing (113) onto the forward clutch support (656).


Important: The space between the parking pawl gear (659) and the snap ring (660) is approximately 3 mm (0.12 in).

- Assemble two new seals (654) on the forward clutch support (656).
- Assemble the forward clutch support (656) onto the final drive sun gear shaft (651).
- Assemble the roller bearing (658) onto the forward clutch support (656).
- Assemble the parking pawl gear (659) onto the final drive sun gear shaft (651) with the raised inner boss facing up, so that the parking pawl properly engages the teeth on the parking pawl gear.
- Assemble the snap ring (660) to the final drive sun gear shaft (651) in order to retain the parking pawl gear (659).
- Assemble the lo roller clutch assembly (652) onto the forward clutch support (656). The larger tabs on the cage must face down into the forward clutch support (656). Rotate the cage slightly counterclockwise in order to lock the tabs into the grooves in the forward clutch support (656).
- Assemble the thrust bearing (113) onto the forward clutch support (656).


Note: The space between the parking pawl gear (659) and the snap ring (660) is approximately 3 mm (0.12 in).

