GM Service Manual Online
For 1990-2009 cars only
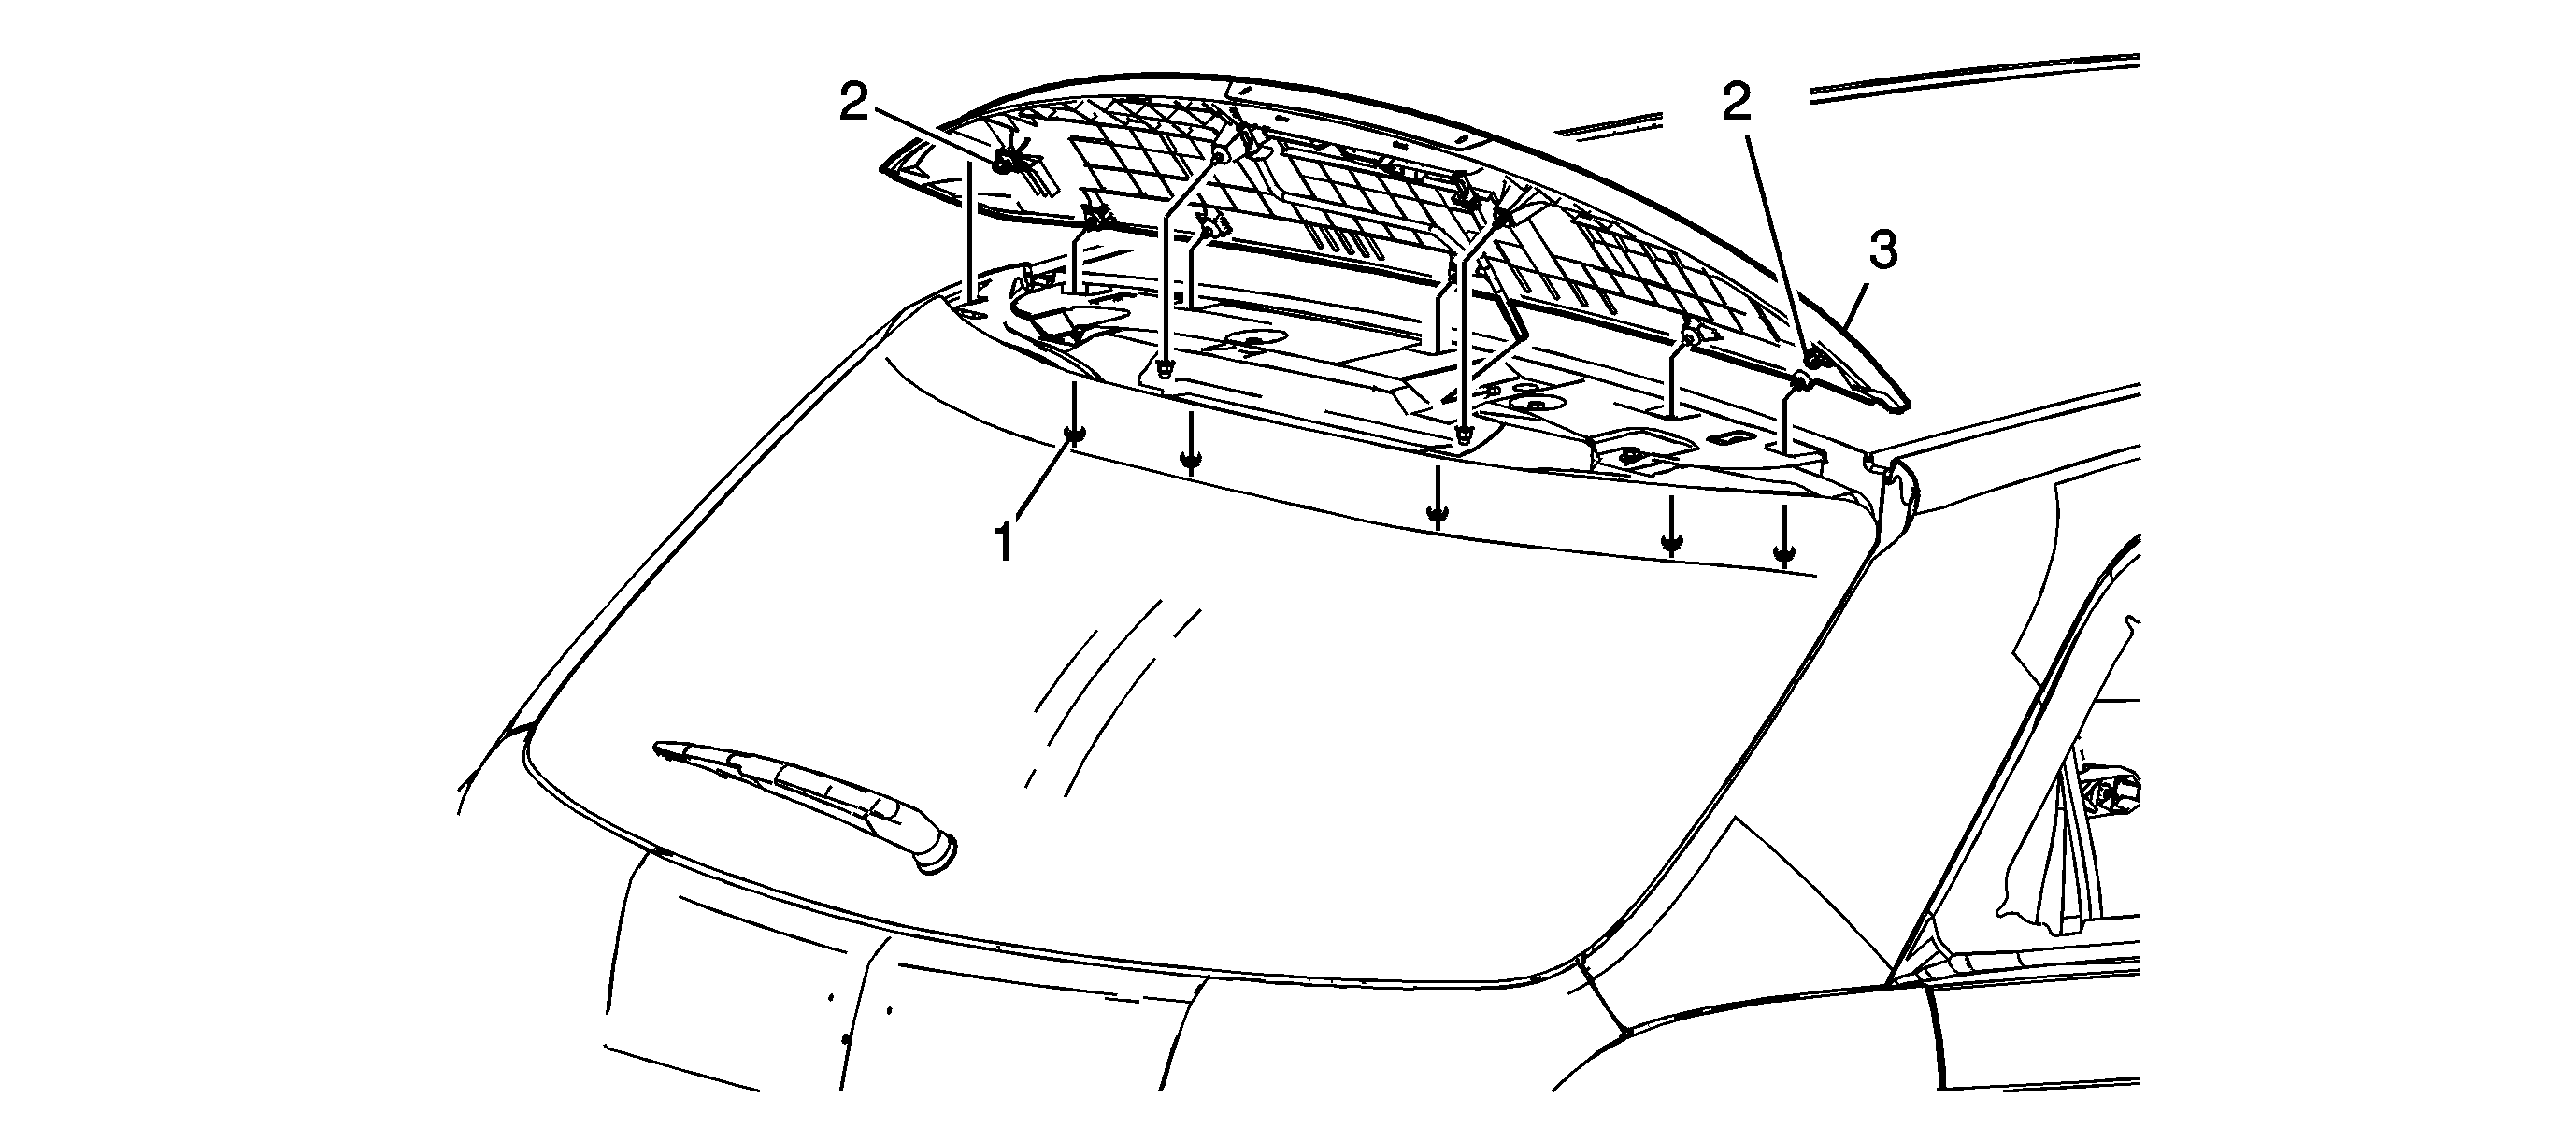
Object Number: 1875794  Size: SF

Callout

Component Name

Preliminary Procedure

  1. Open and support the rear liftgate assembly.
  2. Remove the liftgate window garnish molding. Refer to Liftgate Garnish Molding Replacement .

1

Spoiler Nut (Qty: 7)

Notice: Refer to Fastener Notice in the Preface section.

Tighten
4 N·m (35 lb in)

2

Button Nose Clip (Qty: 2)

3

Rear Spoiler

Procedure

  1. Release the button clips from the upper outer liftgate panel.
  2. Close the rear liftgate in order to remove the spoiler assembly.
  3. Disconnect the rear washer hose.
  4. Disconnect the electrical connector for the rear high mounted stop lamp.
  5. Remove the rear center high mounted stop lamp. Refer to High Mount Stop Lamp Replacement and transfer.
  6. Ensure all the foam gaskets are in place on the button clips and retainer bolts prior to re-assembly of the spoiler onto the liftgate panel.

Object Number: 1875794  Size: SF

Callout

Component Name

Preliminary Procedures

  1. Open and support the rear liftgate assembly.
  2. Remove the liftgate window garnish molding. Refer to Liftgate Garnish Molding Replacement.

1

Spoiler Nut (Qty: 7)

Caution: Refer to Fastener Caution in the Preface section.

Tighten
4 N·m (35 lb in)

2

Button Nose Clip (Qty: 2)

3

Rear Spoiler

Procedure

  1. Release the button clips from the upper outer liftgate panel.
  2. Close the rear liftgate in order to remove the spoiler assembly.
  3. Disconnect the rear washer hose.
  4. Disconnect the electrical connector for the rear high mounted stop lamp.
  5. Remove the rear center high mounted stop lamp. Refer to High Mount Stop Lamp Replacement and transfer.
  6. Ensure all the foam gaskets are in place on the button clips and retainer bolts prior to re-assembly of the spoiler onto the liftgate panel.