For 1990-2009 cars only
Battery Positive Cable Replacement HP7
Removal Procedure
- Disconnect the negative battery cable. Refer to Battery Negative Cable Disconnection and Connection.
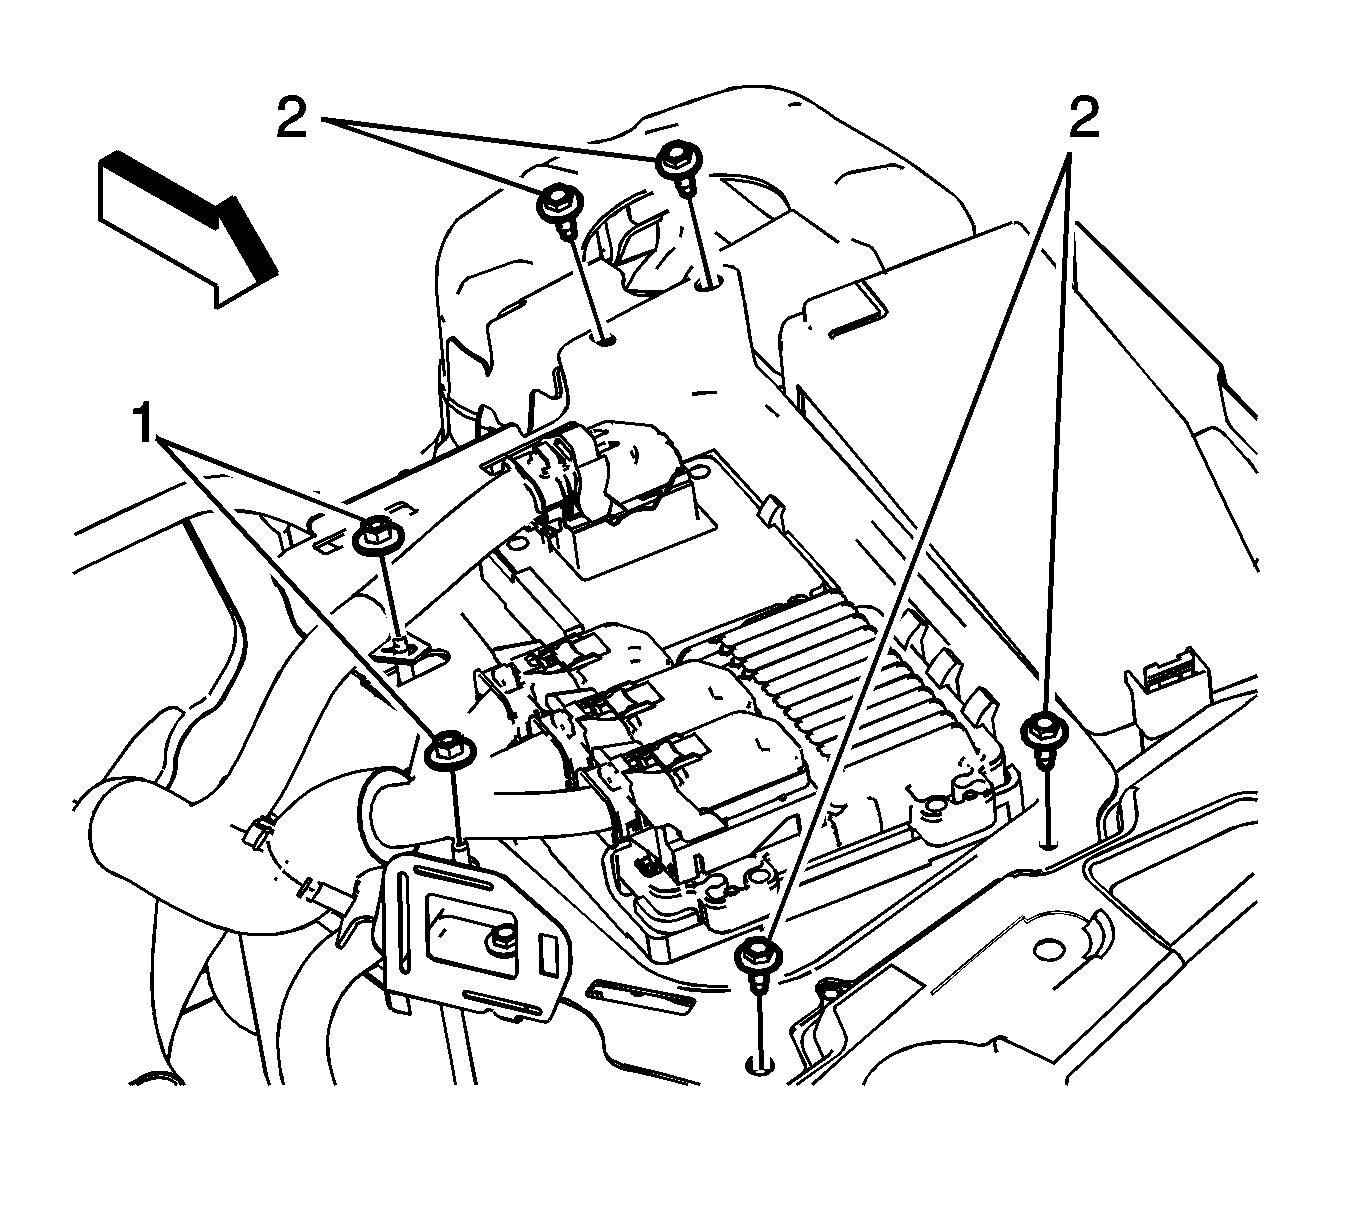
- Remove the electronic control module bracket retaining nuts (1) and bolts (2).
- Disconnect the positive battery junction block assembly from the bracket.
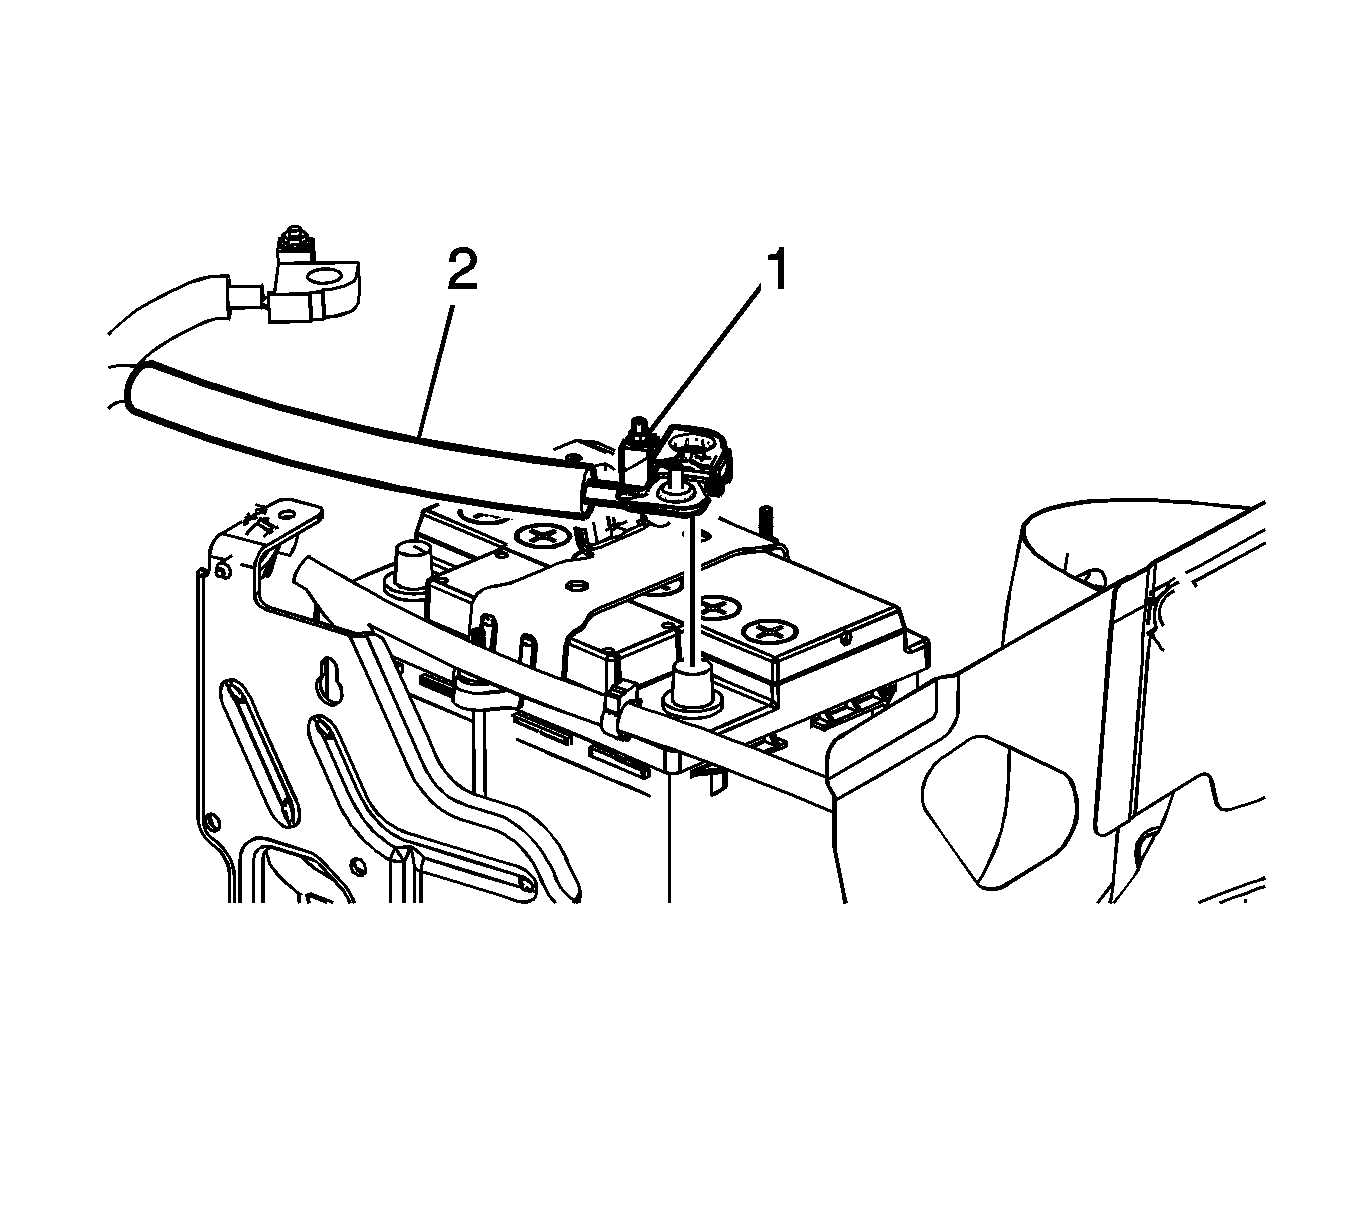
- Loosen the positive battery cable terminal nut (1) and secure the battery positive cable (2) out of the way.
- Remove the generator control module cover. Refer to Generator Control Module Cover Replacement
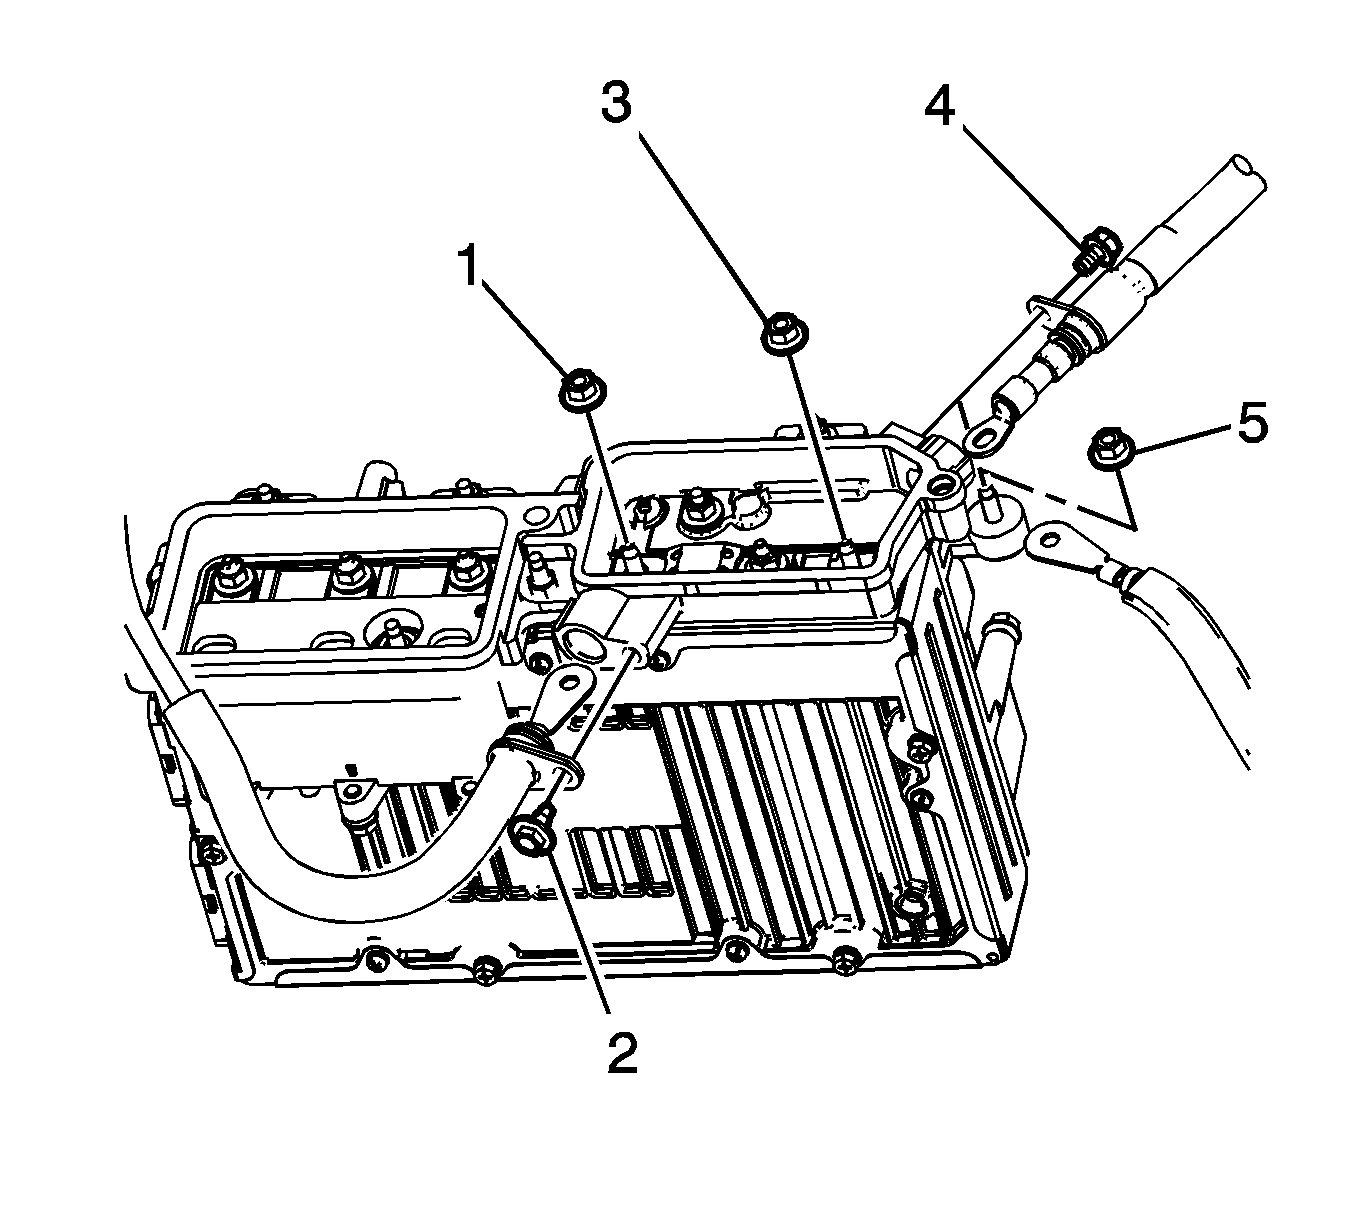
- Remove the following components from the generator control module.
- Remove the fusible link cable from the generator control module.
- Raise and support the vehicle. Refer to Lifting and Jacking the Vehicle.
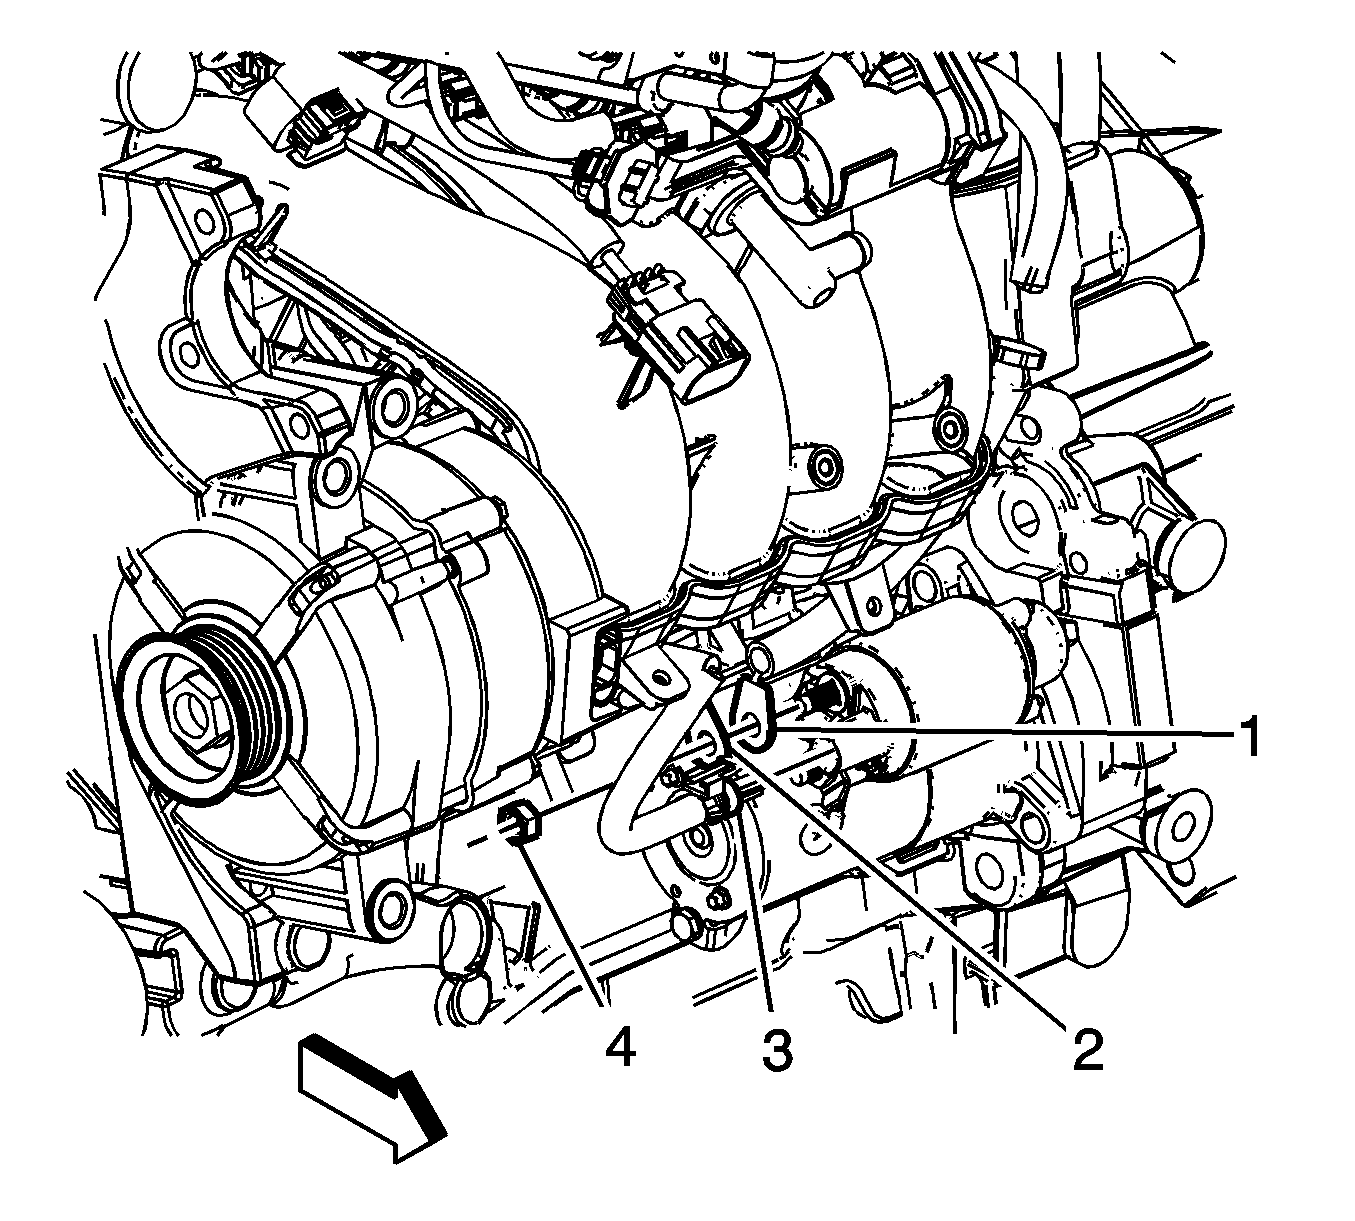
- Disconnect the positive cable (1) from the starter.
- Remove the positive battery cable from the vehicle.


| • | Fusible link nut (1) |
| • | Fusible link bolt (2) |

Installation Procedure
- Install the positive battery cable to the vehicle and position accordingly.
- Install the positive battery cable (1) to the starter solenoid BAT stud and tighten to 15 N·m (11 lb ft).
- Lower the vehicle.
- Position the fusible link cable to the generator control module.
- Install the following components to the generator control module.
- Install the generator control module cover. Refer to Generator Control Module Cover Replacement.
- Install the positive battery cable to the battery and tighten to 5 N·m (45 lb in).
- Install the electronic control module bracket retaining nuts (1) and bolts (2) and tighten to 10 N·m (89 lb in).
- Connect the positive battery junction block assembly to the bracket.
- Connect the negative battery cable. Refer to Battery Negative Cable Disconnection and Connection.
Important: Route the positive battery cable the same way as originally installed.
Caution: Refer to Fastener Caution in the Preface section.


| • | Fusible link nut (1) and tighten to 10 N·m (89 lb in). |
| • | Fusible link bolt (2) and tighten to 10 N·m (89 lb in). |


