Tools Required
J 41235 Second Roller Clutch Installer
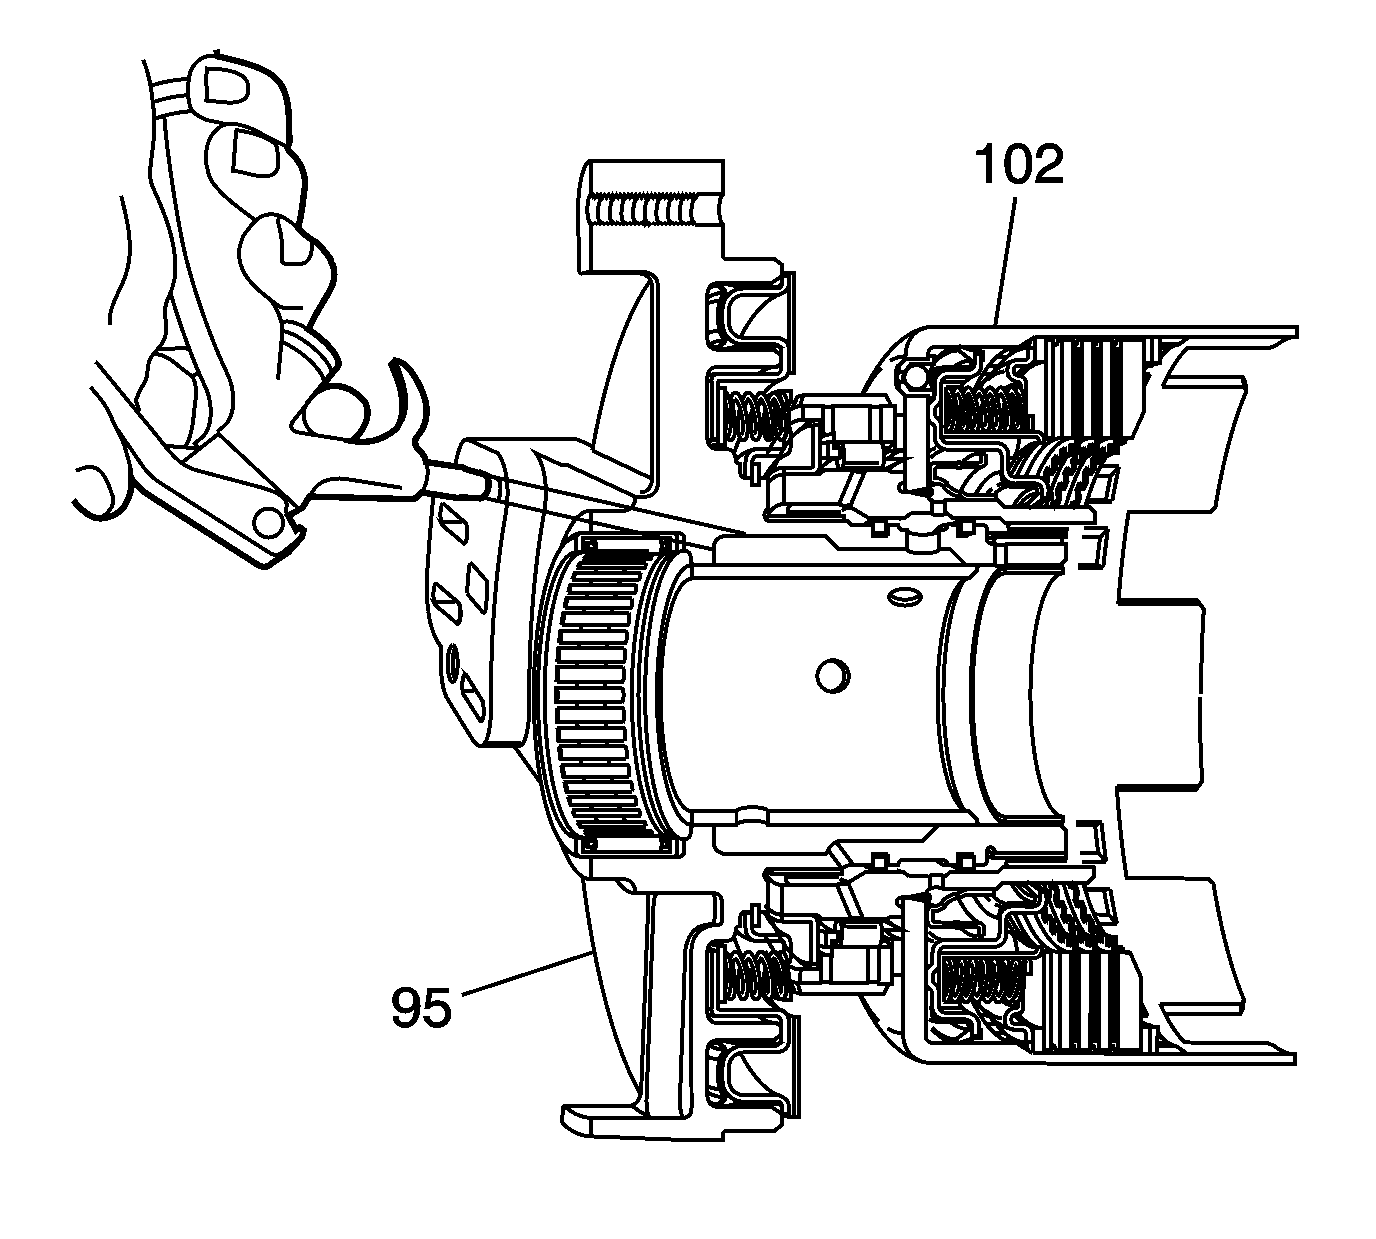
- Install the driven sprocket support (95) into the reverse input clutch assembly (102).
- Air check the reverse clutch at the passage indicated, in order to verify the proper operation of the seals and clutch assembly.
- Remove the driven sprocket support after air check has been performed.
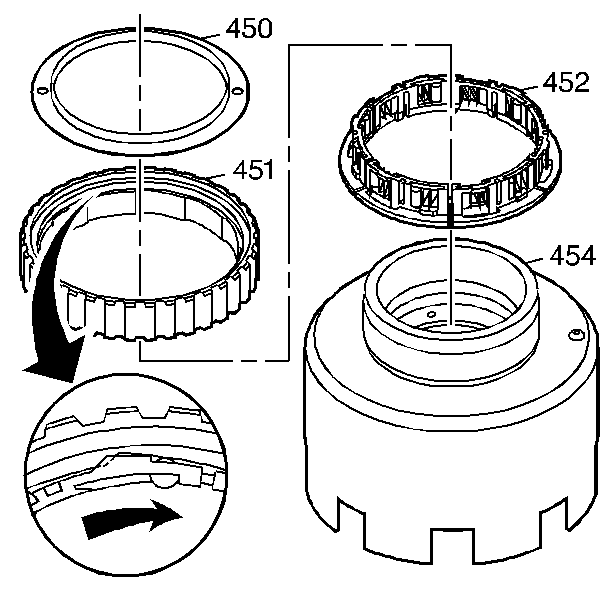
- Assemble the 2nd roller clutch assembly (452) into the roller clutch cam (451).
- While rotating the roller clutch in order to properly engage the rollers, assemble the 2nd roller clutch onto the reverse clutch housing (454).
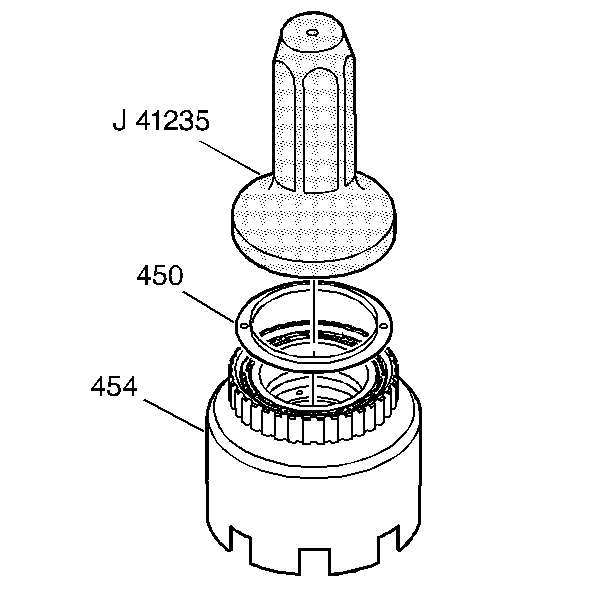
- Assemble a new 2nd roller clutch retainer (450) onto the 2nd roller clutch assembly. Use the J 41235 in order to press the retainer and roller clutch assembly into place on the reverse clutch housing and roller clutch inner race.
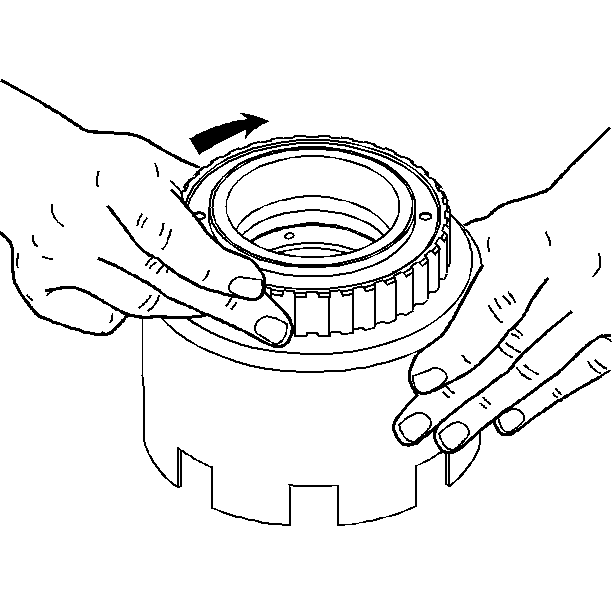
- Hold the reverse clutch housing, and ensure that the roller clutch cam rotates clockwise only.

Important: Temporary installation of the driven sprocket support is necessary in order to perform the air check.

Important: When installing the 2nd roller clutch assembly onto the reverse clutch housing, the flat side of the roller clutch cam faces down toward the housing (454).

Important: The J 41235 will press the roller clutch assembly to a specified depth. If you install the 2nd roller too far down onto the inner race, the roller clutch may not operate properly.

Special Tools
J 41235 Second Roller Clutch Installer
For equivalent regional tools, refer to Special Tools.
- Install the driven sprocket support (95) into the reverse input clutch assembly (102).
- Air check the reverse clutch at the passage indicated, in order to verify the proper operation of the seals and clutch assembly.
- Remove the driven sprocket support after air check has been performed.
- Assemble the 2nd roller clutch assembly (452) into the roller clutch cam (451).
- While rotating the roller clutch in order to properly engage the rollers, assemble the 2nd roller clutch onto the reverse clutch housing (454).
- Assemble a new 2nd roller clutch retainer (450) onto the 2nd roller clutch assembly. Use the J 41235 installer in order to press the retainer and roller clutch assembly into place on the reverse clutch housing and roller clutch inner race.
- Hold the reverse clutch housing, and ensure that the roller clutch cam rotates clockwise only.

Note: Temporary installation of the driven sprocket support is necessary in order to perform the air check.

Note: When installing the 2nd roller clutch assembly onto the reverse clutch housing, the flat side of the roller clutch cam faces down toward the housing (454).

Note: The J 41235 installer will press the roller clutch assembly to a specified depth. If you install the 2nd roller too far down onto the inner race, the roller clutch may not operate properly.

