For 1990-2009 cars only
Special Tools
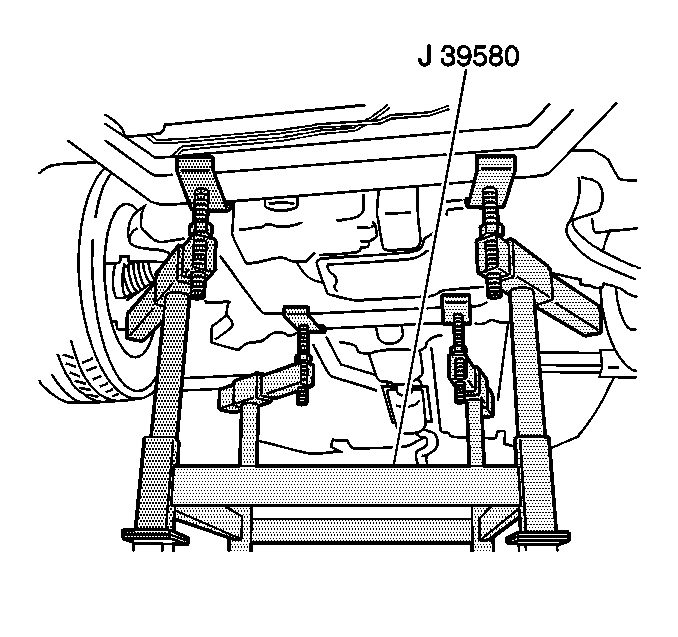
J 39580 Engine Support Table
Removal Procedure
- Disable the hybrid high voltage system. Refer to High Voltage Disabling
- Disconnect the 12 volt battery negative cable. Refer to Battery Negative Cable Disconnection and Connection
- Remove the front compartment sight shield. Refer to Front Compartment Sight Shields Replacement.
- Remove the fuel injector sight shield. Refer to Fuel Injector Sight Shield Replacement
- Drain the coolant from the generator control module. Refer Generator Control Module Cooling System Draining and Filling
- Remove the power inverter module. Refer to Drive Motor Generator Power Inverter Module Removal and Installation
- Remove the engine control module. Refer to Engine Control Module Replacement
- Disconnect the air conditioning evaporator outlet hose. Refer to Evaporator Outlet Hose Replacement
- Disconnect the air conditioning discharge hose from the condenser. Refer to Discharge Hose Replacement
- Disconnect the air conditioning suction hose. Refer to Suction Hose Replacement
- Disconnect the air conditioning liquid line from the condenser. Refer to Liquid Line Replacement
- Disconnect the fuel lines from the engine. Refer to Fuel Hose/Pipes Replacement - Chassis
- Disconnect the heater hoses from the engine. Refer to Heater Inlet Hose Replacement and Heater Outlet Hose Replacement
- Disconnect all necessary engine electrical connectors. Refer to Harness Routing Views
- Remove the left and right powertrain mount bolts.
- Raise and support the vehicle. Refer to Lifting and Jacking the Vehicle.
- Drain the engine oil.
- Remove the front tire and wheel assemblies. Refer to Tire and Wheel Removal and Installation.
- Remove the front brake disc calipers from the caliper mounting bracket, then suspend the calipers with mechanics wire or equivalent. DO Not disconnect the brake hoses.
- Remove the engine splash shields. Refer to Engine Splash Shield Replacement.
- Remove the air deflector from the frame. Refer to Front Bumper Fascia Air Deflector Replacement.
- Remove the front catalytic converters. Refer to Catalytic Converter Replacement - Left Side.
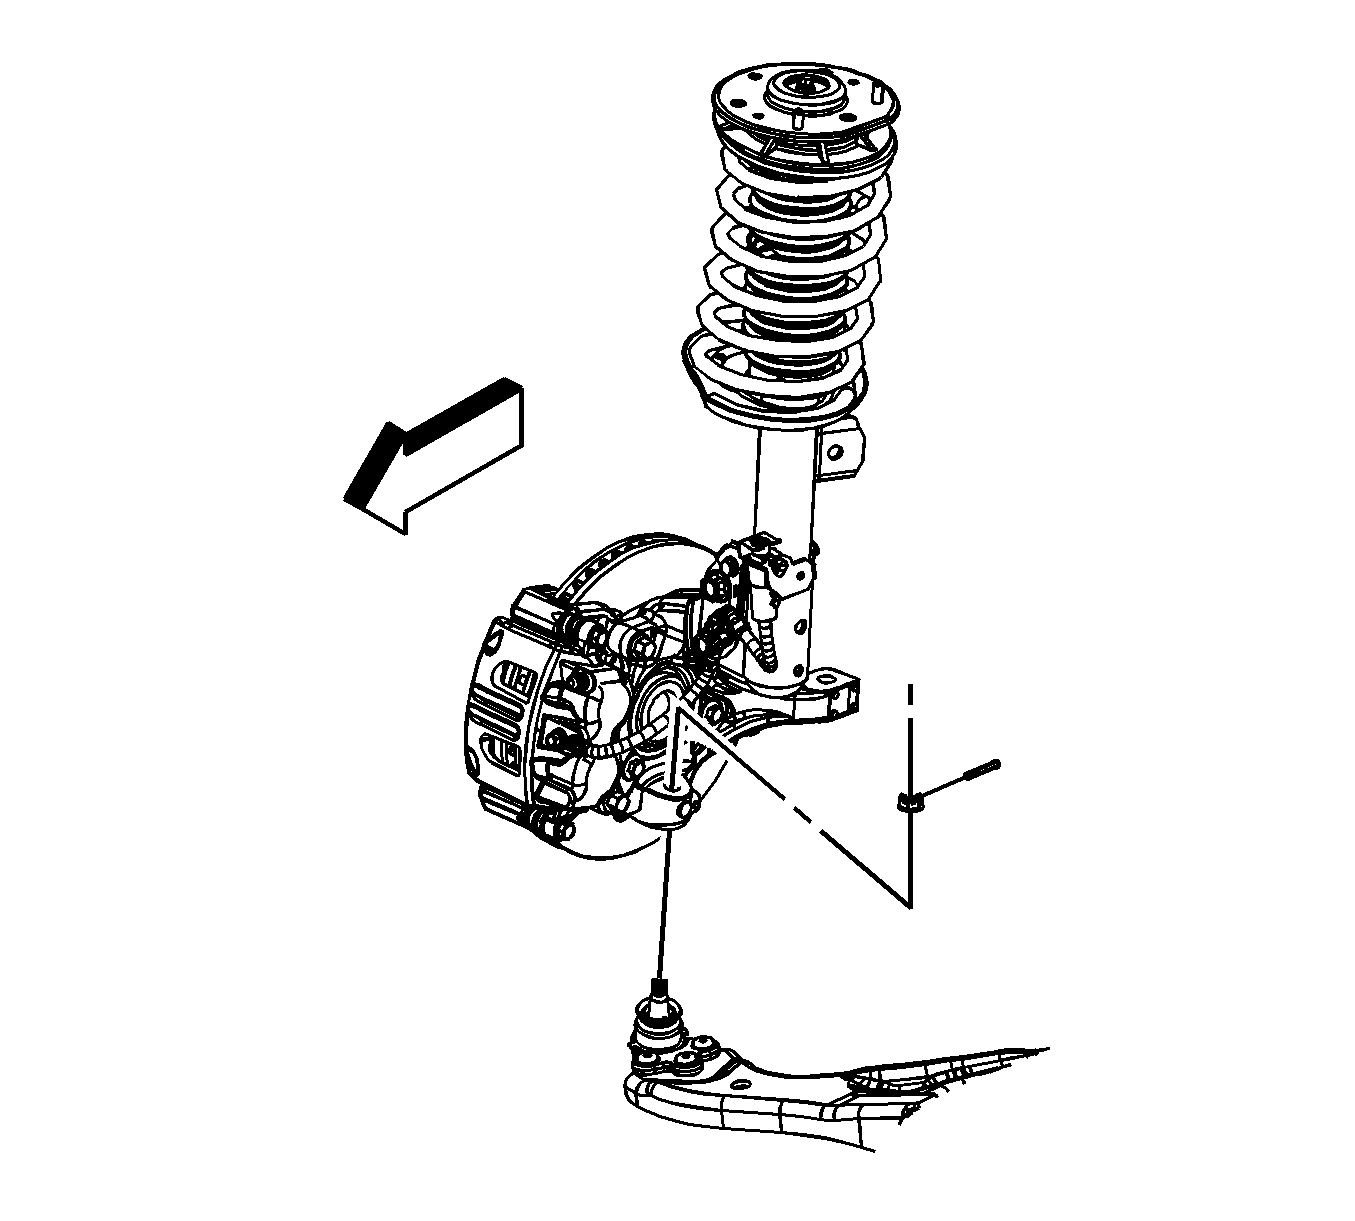
- Remove the strut to steering knuckle retaining bolts.
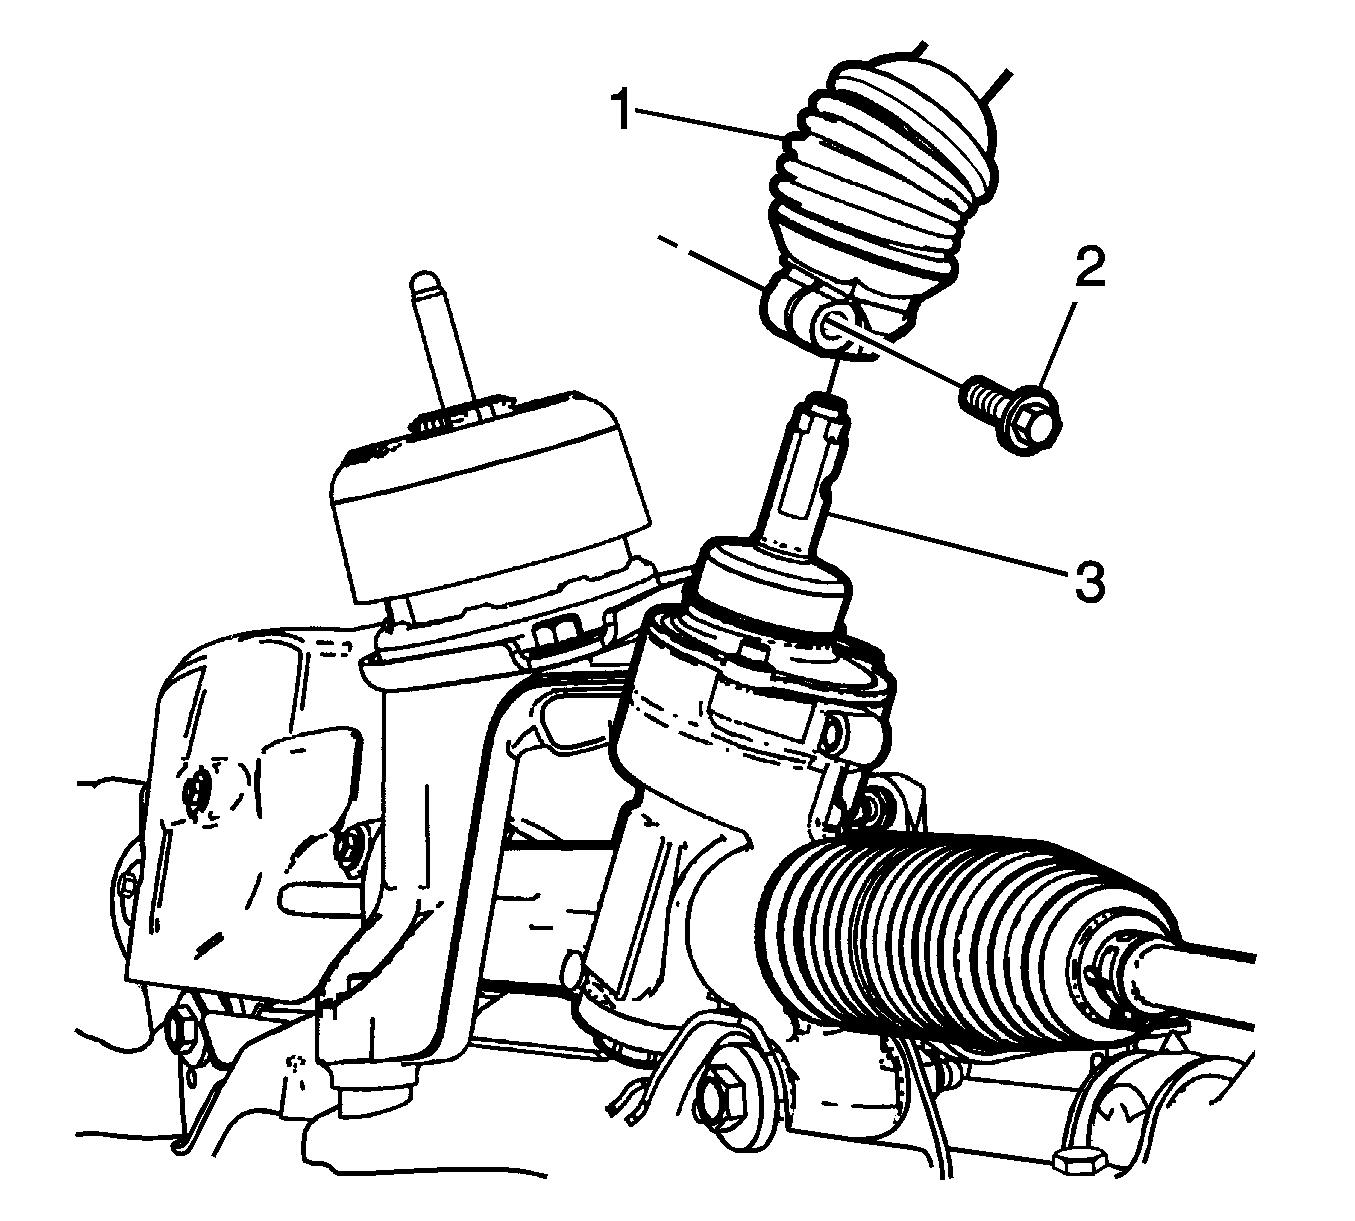
- Disconnect the steering shaft coupling (1) from the steering gear. Refer to Steering Shaft Coupling Replacement.
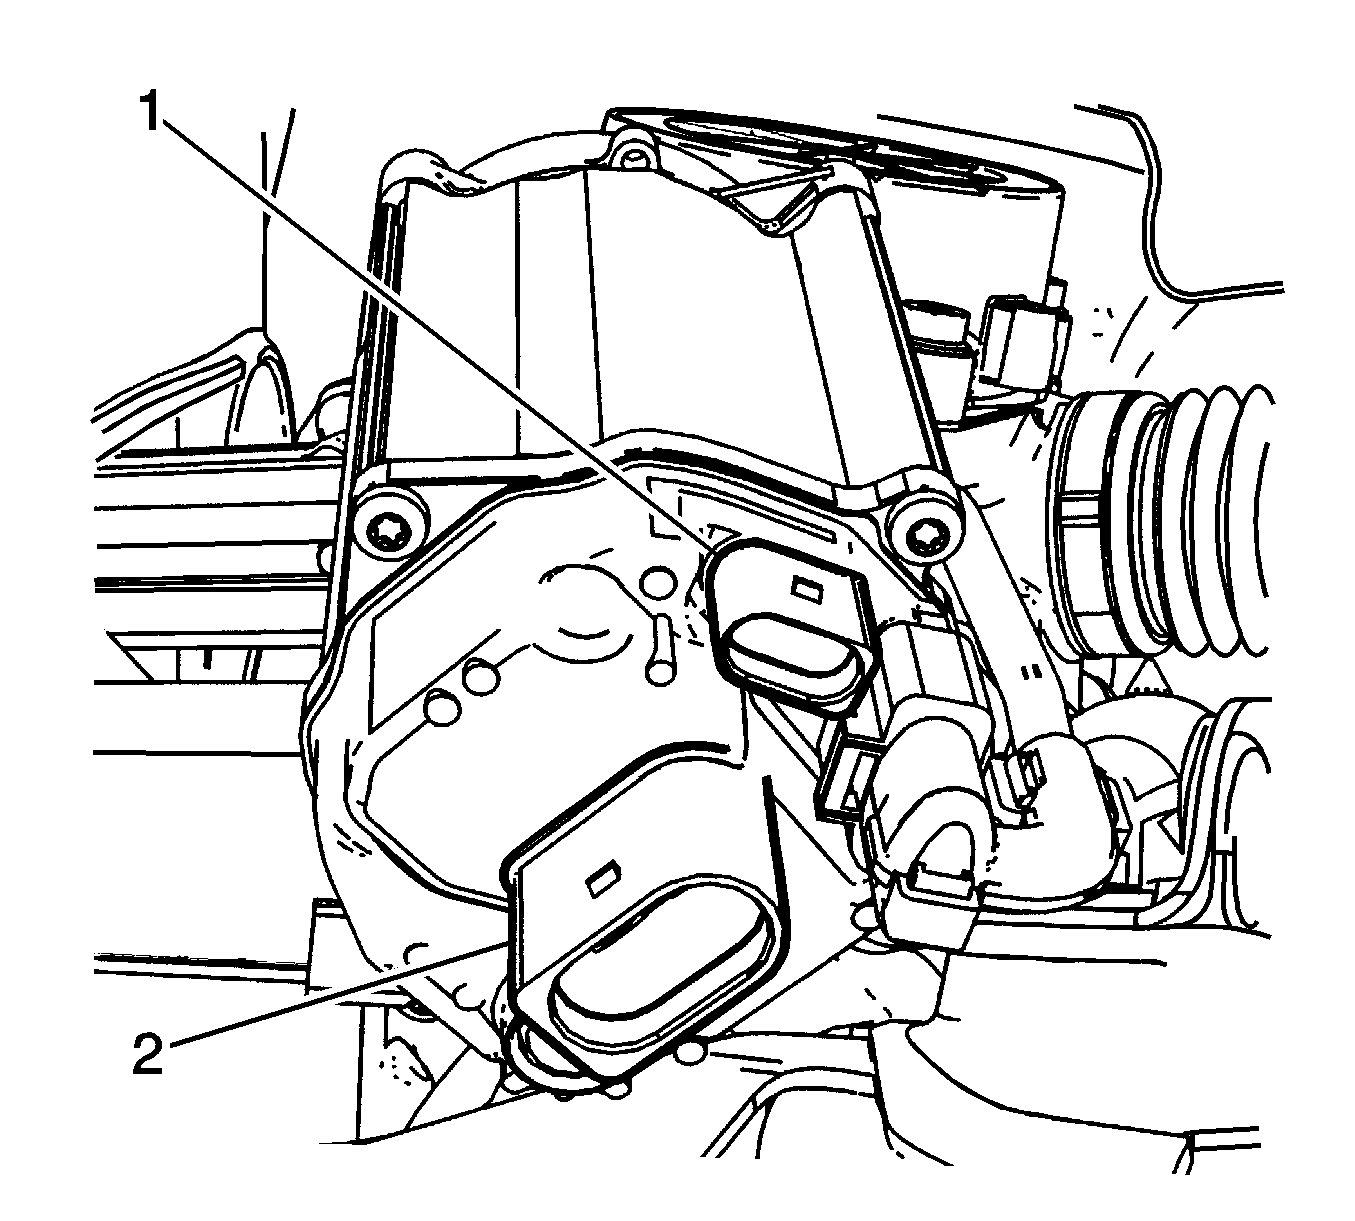
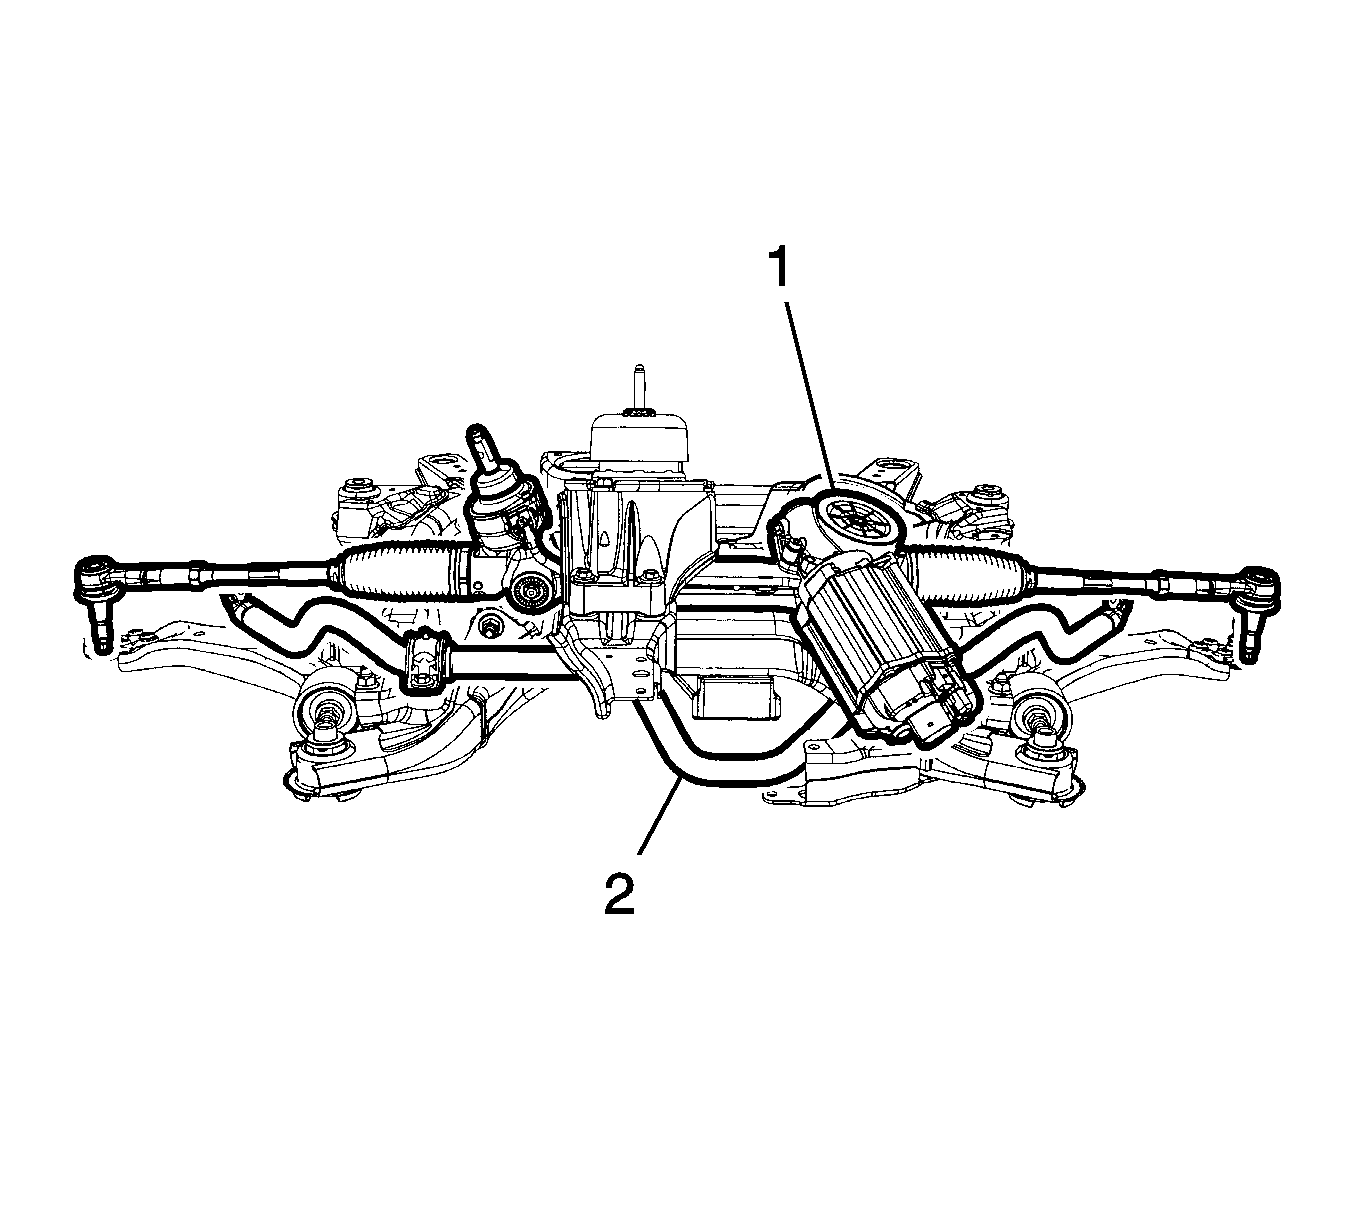
- Disconnect the electrical connectors (1, 2) from the Electronic Power Steering rack motor.
- Disconnect the out tie rod ends from the steering knuckle. Refer to Steering Linkage Outer Tie Rod Replacement
- Disconnect the stabilizer links from the stabilizer bar. Refer to Stabilizer Shaft Link Replacement
- Remove the steering gear electric motor ground strap from the underbody.
- Remove the four bolts that attach the electric brake control module (EBCM) (1) to the frame.
- Lower the vehicle until the frame contacts the J 39580 .
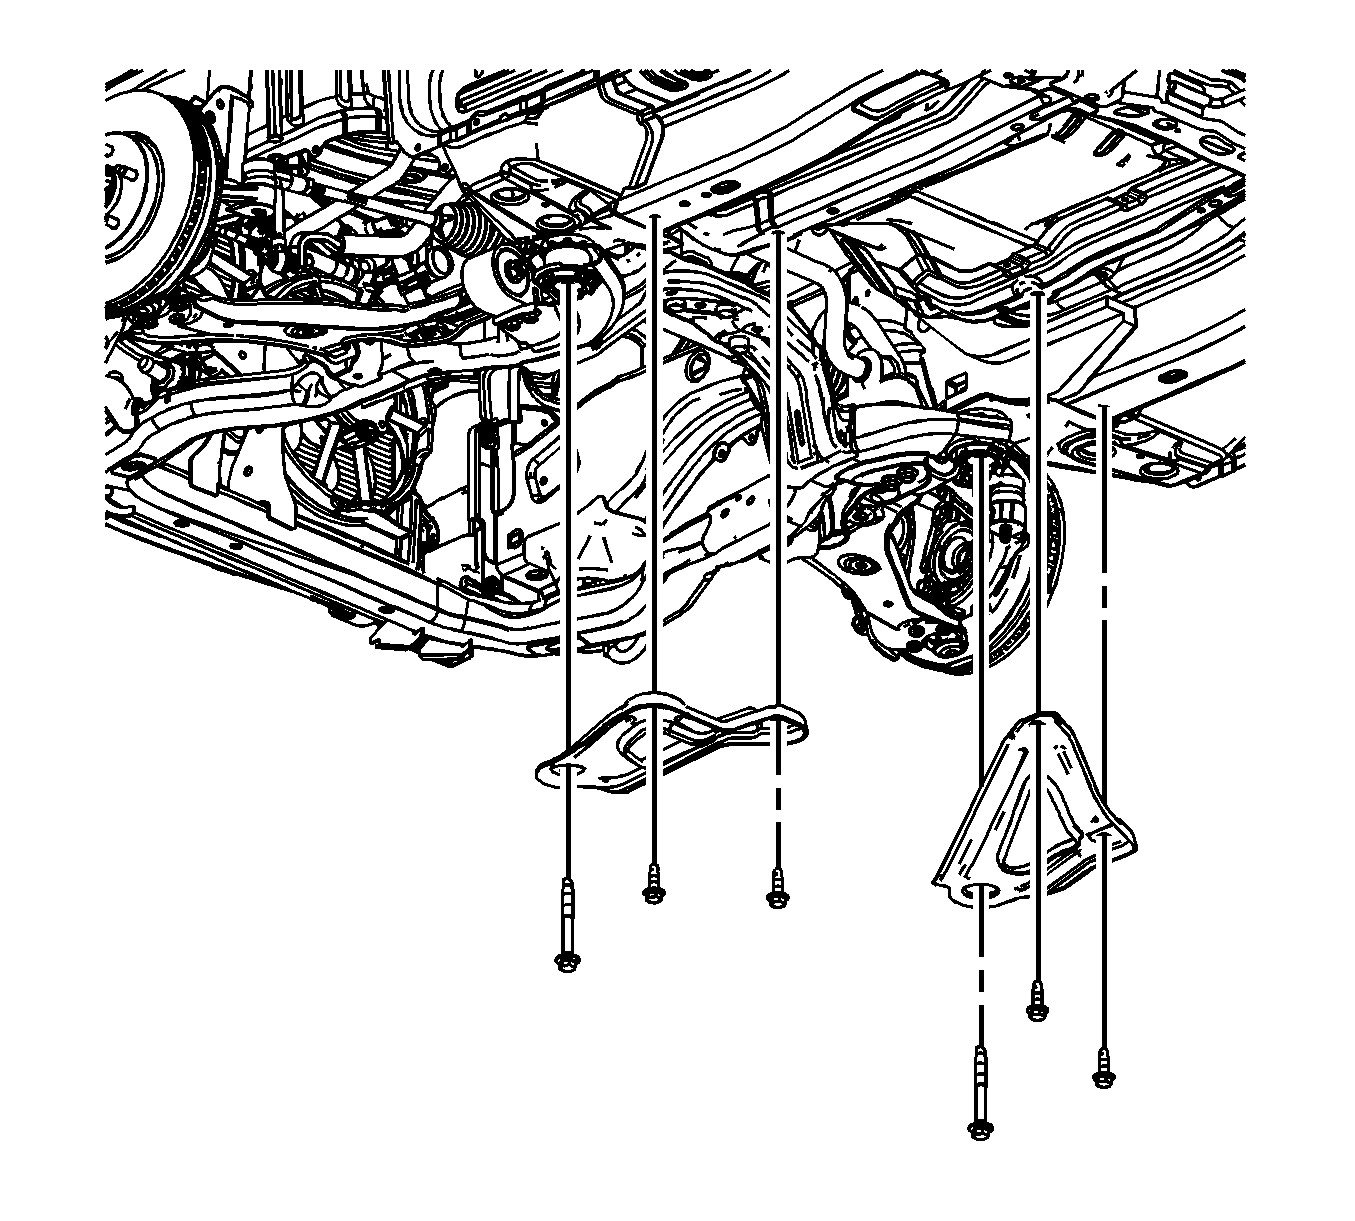
- Remove the frame reinforcements. Refer to Drivetrain and Front Suspension Frame Reinforcement Replacement.
- Remove the front frame retaining bolts.
- Raise the vehicle off of the frame with the radiator, condenser, engine, transaxle, electronic power steering rack (1) and stabilizer bar still attached the frame.
- Remove the front wheel drive shafts. Refer to Front Wheel Drive Shaft Replacement
- Disconnect the coolant hoses and pipes from the radiator and condenser assembly.
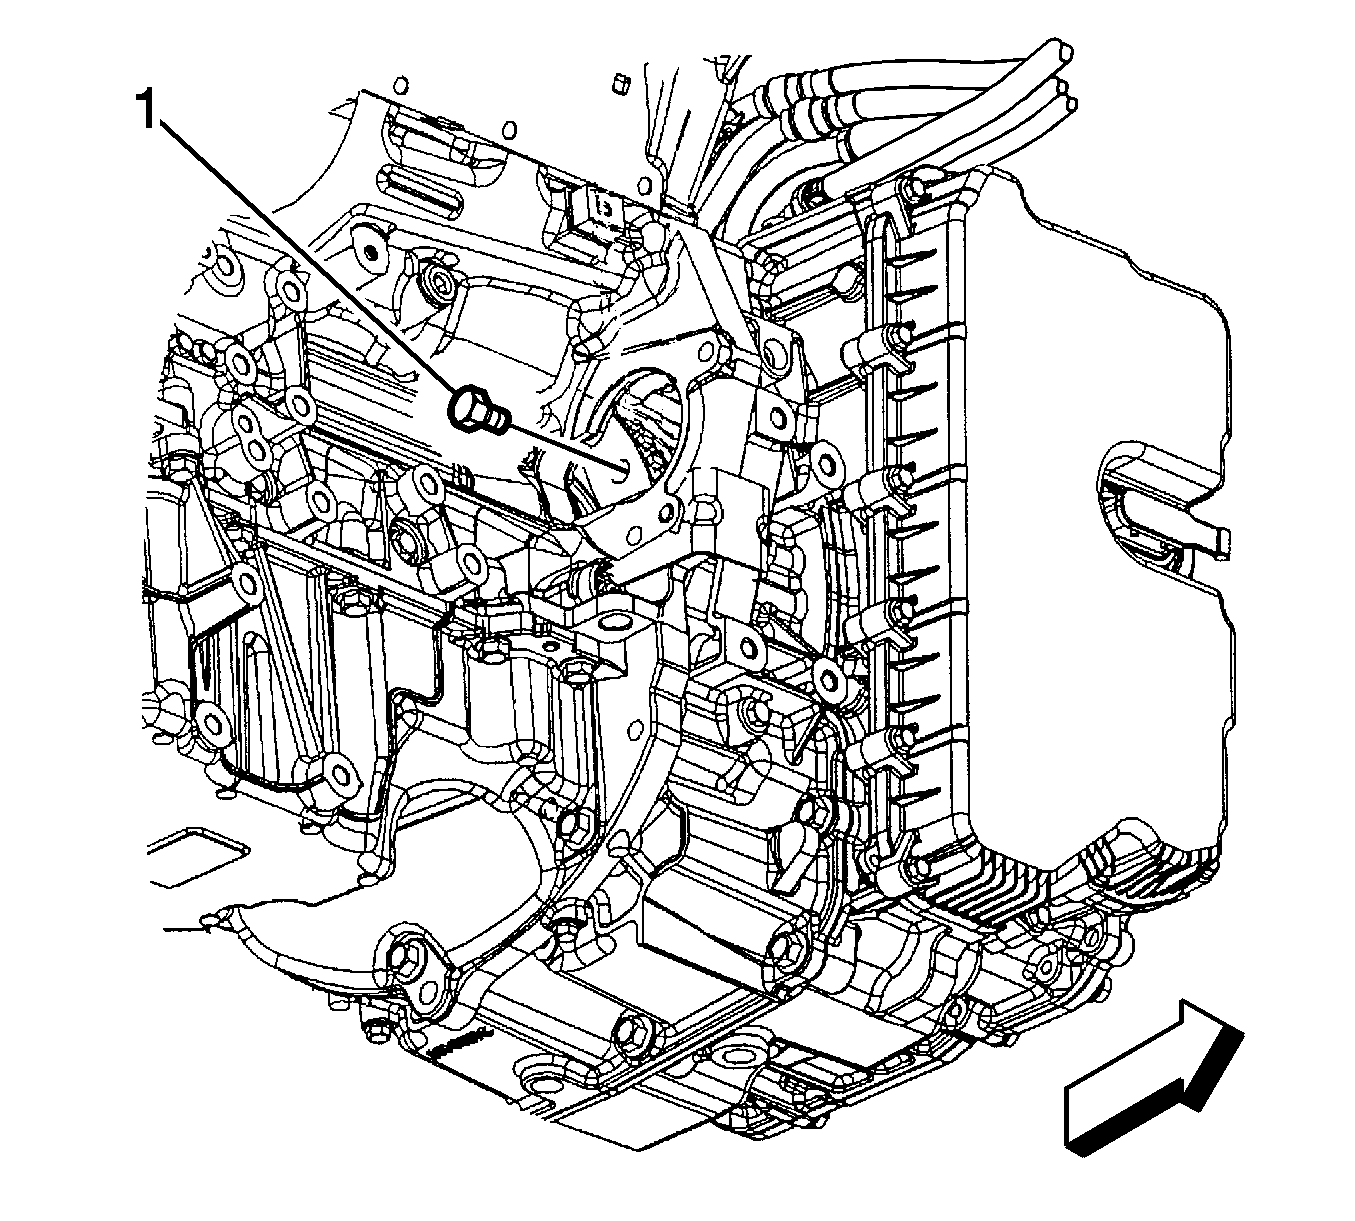
- Remove the torque converter access shield, then remove the four torque converter bolts (1).
- Using the engine removal brackets, slightly raise and support the engine assembly.
- Remove the eight transaxle to engine retaining bolts (1).
- Remove the engine from the transaxle assembly.
- Remove the transaxle front and rear mount retaining nuts.
- Install the transaxle holding fixture. Refer to Holding Fixture Installation
- Remove the transaxle from the frame.
Danger: Always perform the High Voltage Disabling procedure prior to servicing any High Voltage component or connection. Personal Protection Equipment (PPE) and proper procedures must be followed.
The High Voltage Disabling procedure will perform the following tasks:| • | Identify how to disable high voltage. |
| • | Identify how to test for the presence of high voltage. |
| • | Identify condition under which high voltage is always present and personal protection equipment (PPE) and proper procedures must be followed. |
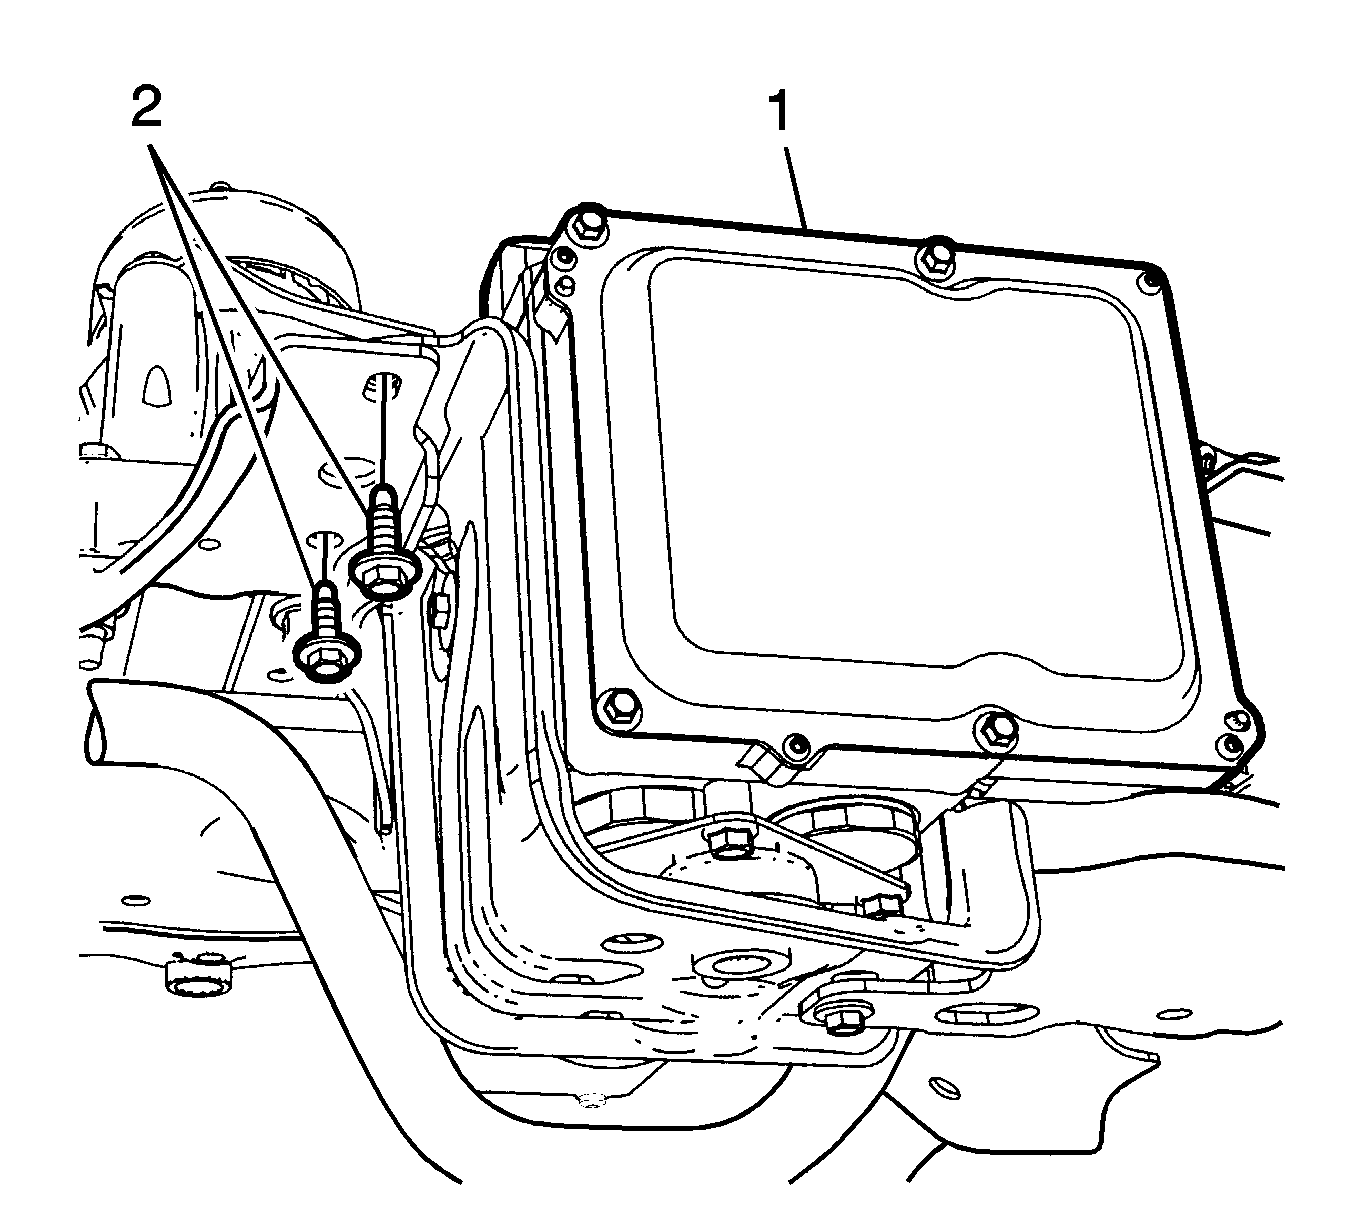
Note: Support the EBCM with mechanics wire to the vehicle underbody.
Note: Rotate the engine clockwise only to access the bolts.
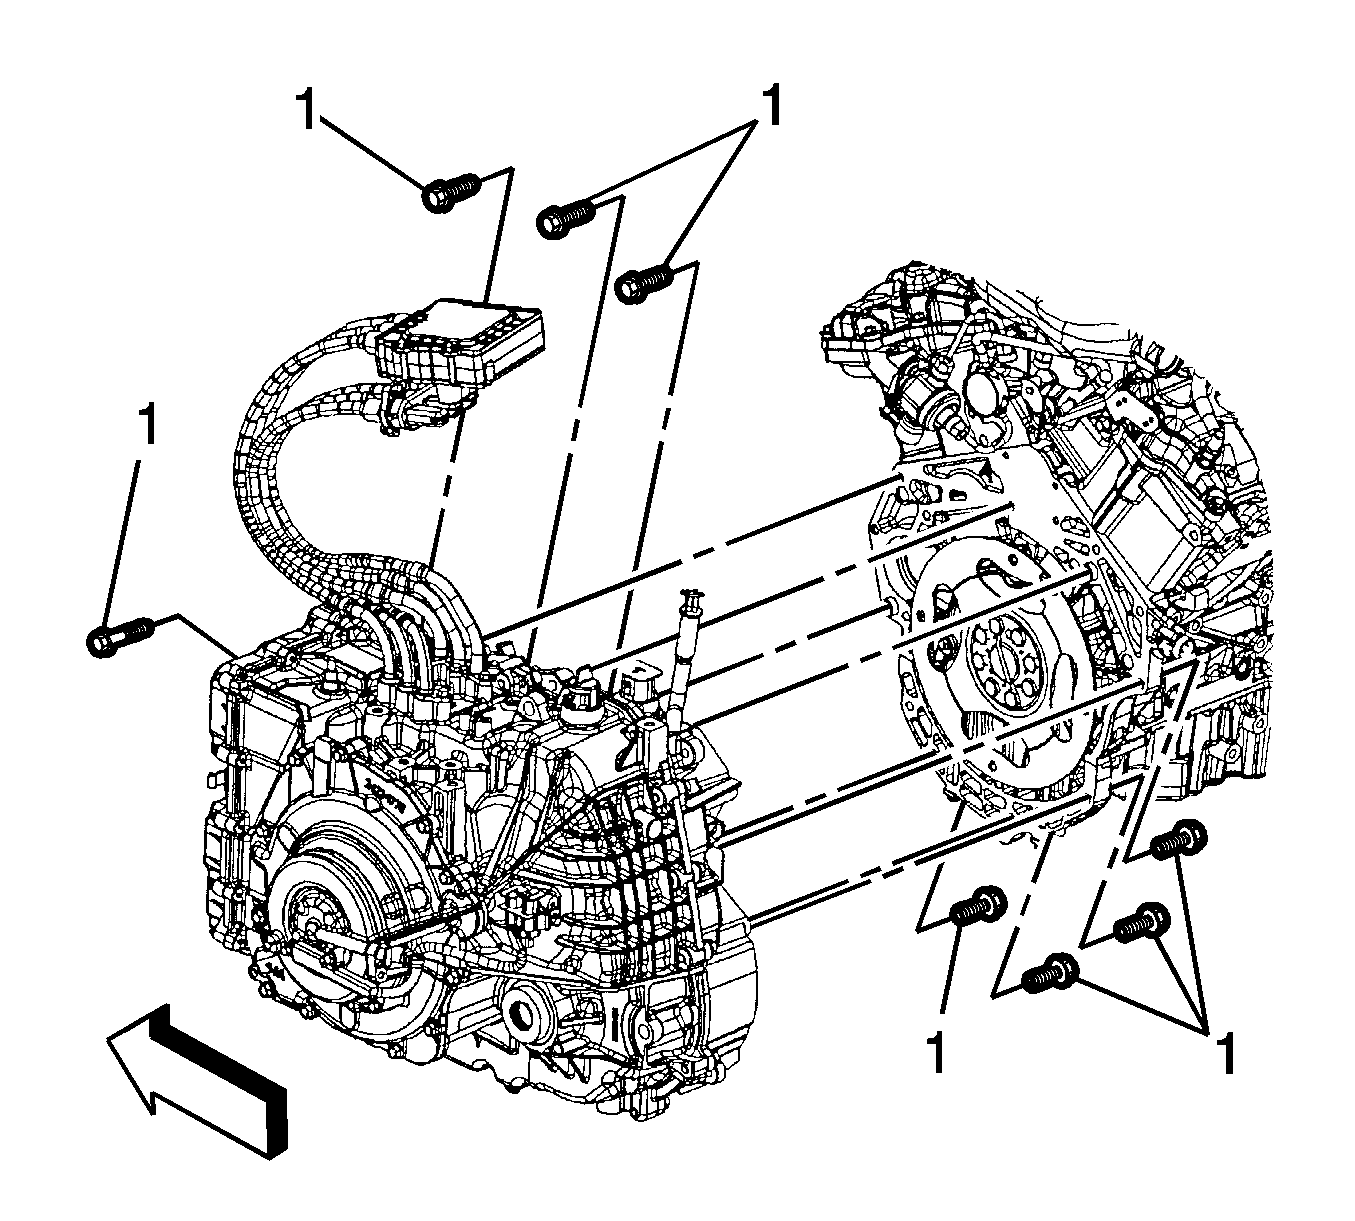
Installation Procedure
- Install the engine to the transaxle assembly.
- Remove the transaxle holding fixture.
- Install the eight transaxle to engine retaining bolts (1), then tighten the bolts to 80 N·m (60 lb ft)
- Align a slot in flexplate to a hole in the torque converter.
- Install the four torque converter bolts (1), then tighten 62 N·m (46 lb ft)
- Install the torque converter access shield.
- Install the engine and transaxle to the frame.
- Tighten the transaxle front and rear mount retaining nuts to 100 N·m (74 lb ft)
- Connect the coolant hoses and pipes to the radiator and condenser assembly.
- Install the front wheel drive shafts. Refer to Front Wheel Drive Shaft Replacement
- Lower the vehicle on to the frame.
- Install the front frame bolts, then tighten the bolts to 155 N·m (114 lb ft).
- Install the frame reinforcements. Refer to Drivetrain and Front Suspension Frame Reinforcement Replacement.
- Raise the vehicle off of the J 39580 .
- Install the steering shaft coupling (1) to the steering gear. Refer to Steering Shaft Coupling Replacement.
- Install the four EBCM bolts, then tighten the bolts to 40 N·m (30 lb ft)
- Connect the two electric power steering rack electrical connectors (1,2).
- Install the steering gear electric motor ground strap to the underbody.
- Install the lower ball joints to the steering knuckles. Refer to Lower Control Arm Replacement.
- Connect both left and right stabilizer links. Refer to Stabilizer Shaft Insulator Replacement.
- Connect the outer tie rod ends to the steering knuckle. Refer to Steering Linkage Outer Tie Rod Replacement
- Install the strut to steering knuckle retaining bolts, then tighten the bolts to 180 N·m (133 lb ft)
- Install the front brake disc calipers to the caliper mounting bracket, then tighten the bolts to 27 N·m (20 lb ft)
- Install the front catalytic converters. Refer to Catalytic Converter Replacement - Left Side and Catalytic Converter Replacement - Right Side.
- Connect the fuel lines to the engine. Refer to Fuel Hose/Pipes Replacement - Chassis
- Connect the heater hoses to the engine. Refer to Heater Inlet Hose Replacement and Heater Outlet Hose Replacement
- Connect all necessary engine electrical connectors. Refer to Harness Routing Views
- Connect the air conditioning evaporator outlet hose. Refer to Evaporator Outlet Hose Replacement
- Connect the air conditioning discharge hose to the condenser. Refer to Discharge Hose Replacement
- Connect the air conditioning suction hose. Refer to Suction Hose Replacement
- Connect the air conditioning liquid line to the condenser. Refer to Liquid Line Replacement
- Install the engine control module. Refer to Engine Control Module Replacement
- Install the power inverter module. Refer to Drive Motor Generator Power Inverter Module Removal and Installation
- Install the air deflector to the frame. Refer to Front Bumper Fascia Air Deflector Replacement.
- Install the engine splash shields. Refer to Engine Splash Shield Replacement.
- Install the tire and wheel assemblies. Refer to Tire and Wheel Removal and Installation.
- Install the front compartment sight shield. Refer to Front Compartment Sight Shields Replacement.
- Fill the coolant reservoir for the generator control module. Refer Generator Control Module Cooling System Draining and Filling
- Fill the engine with oil. Refer to Fluid and Lubricant Recommendations
- Install the fuel injector sight shield. Refer to Fuel Injector Sight Shield Replacement
- Enable the hybrid high voltage system. Refer to High Voltage Enabling
- Connect the 12 volt battery negative cable. Refer to Battery Negative Cable Disconnection and Connection
- Check the wheel alignment. Refer to Wheel Alignment Measurement.
Notice: Refer to Fastener Caution in the Preface section.

Note: Rotate the engine clockwise only to access the bolts.

Note: Front and rear mounts are to be torqued after the powertrain is fully seated on the mounts. This will eliminate any twist in the rubber element induced to not preloading the mount before applying torque.


