AC HOSE/PIPE BREAKS AT BACK OF COMPRESSOR - REVISED TORQUE

Model and Year: 1985 CAVALIER WITH 2.0L ENGINE
TO: ALL CHEVROLET DEALERS
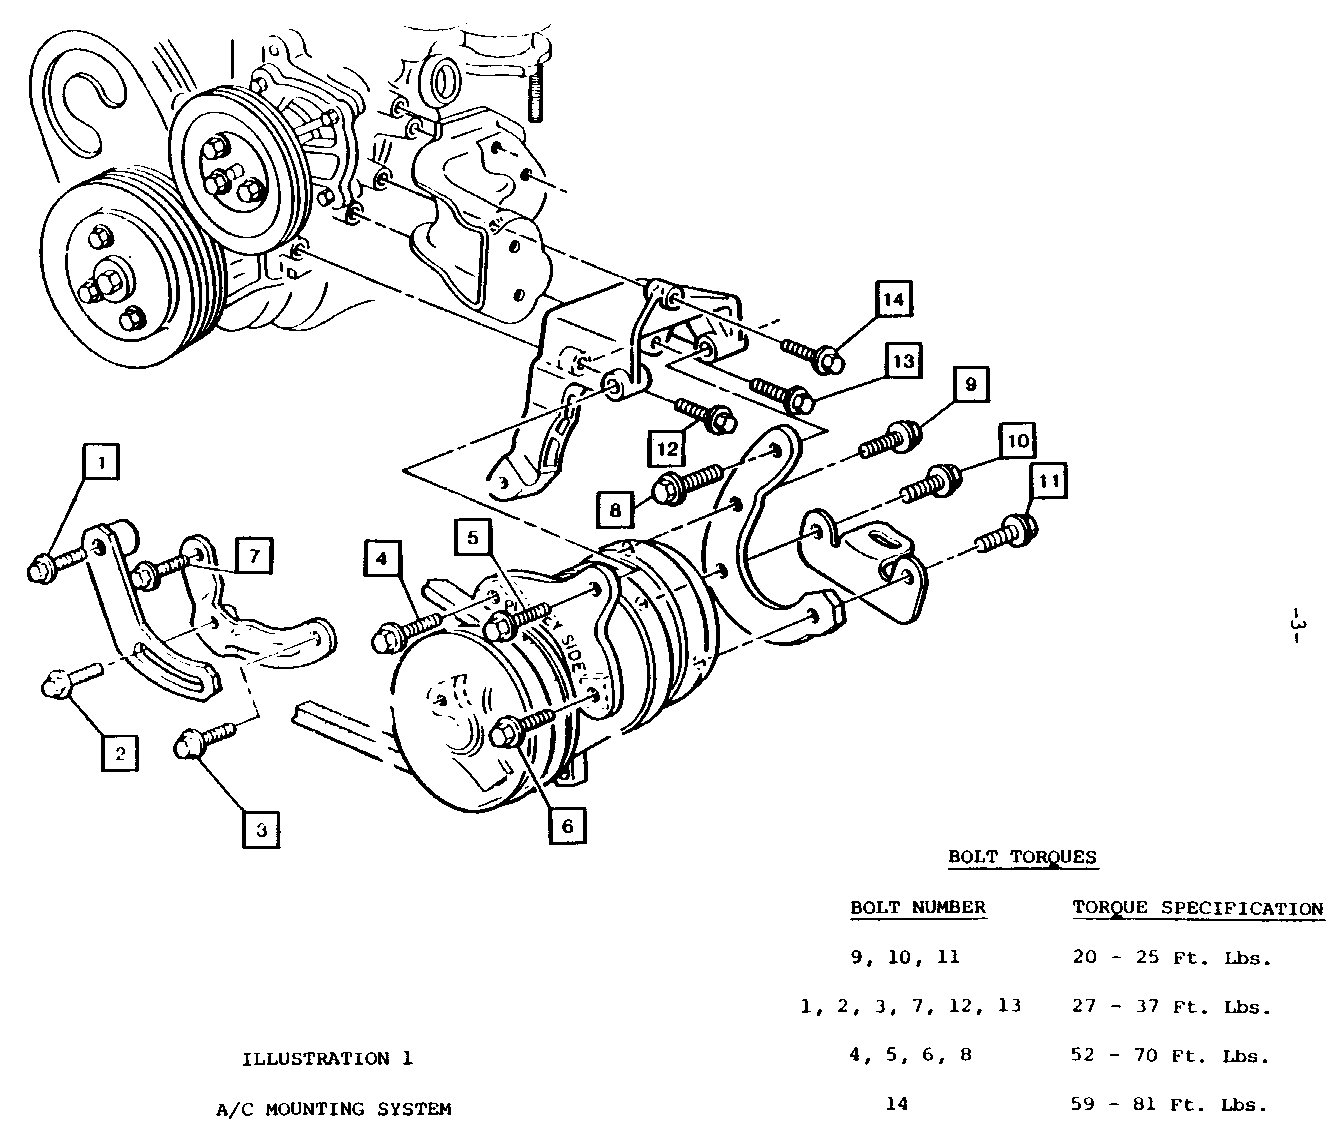
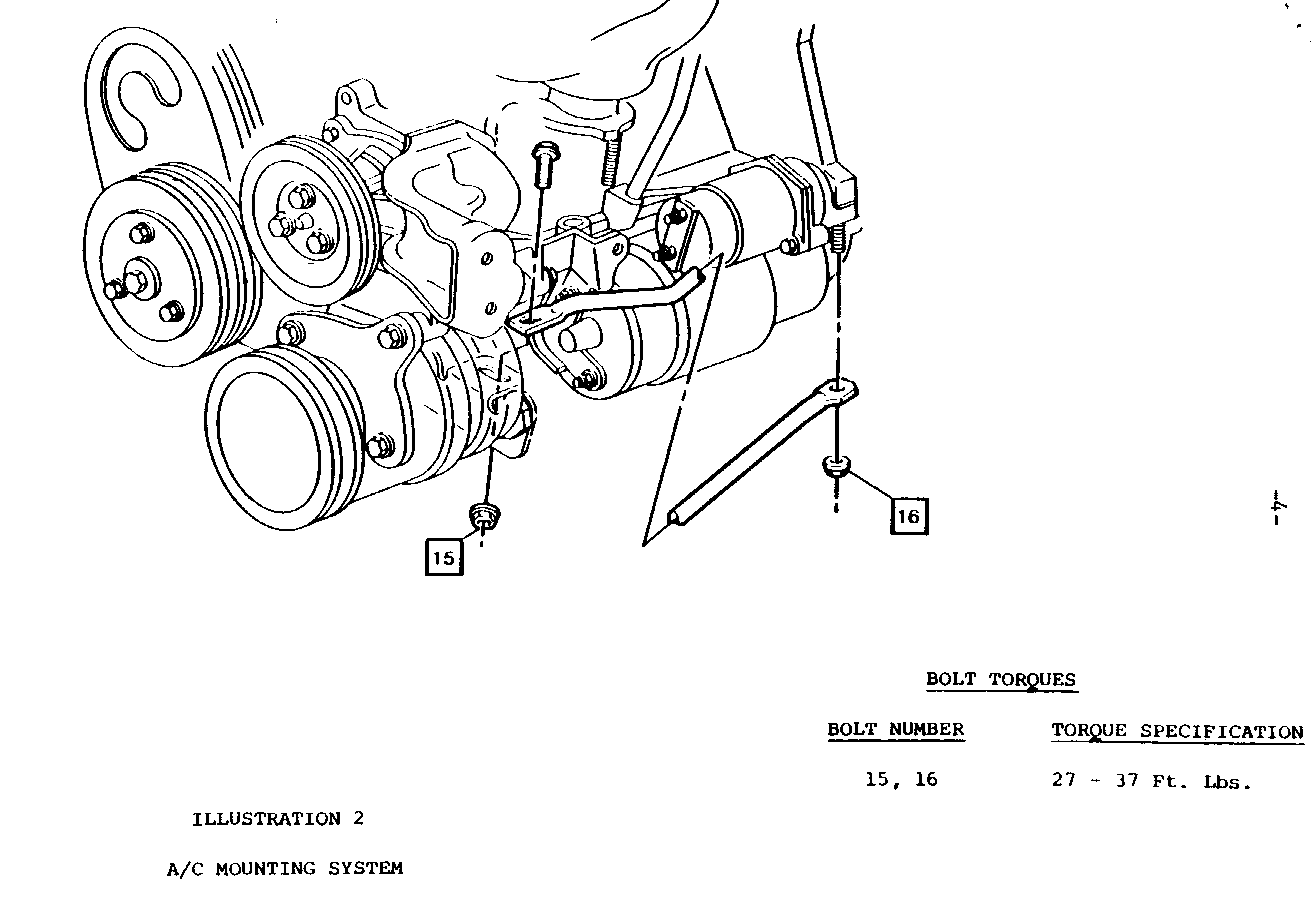
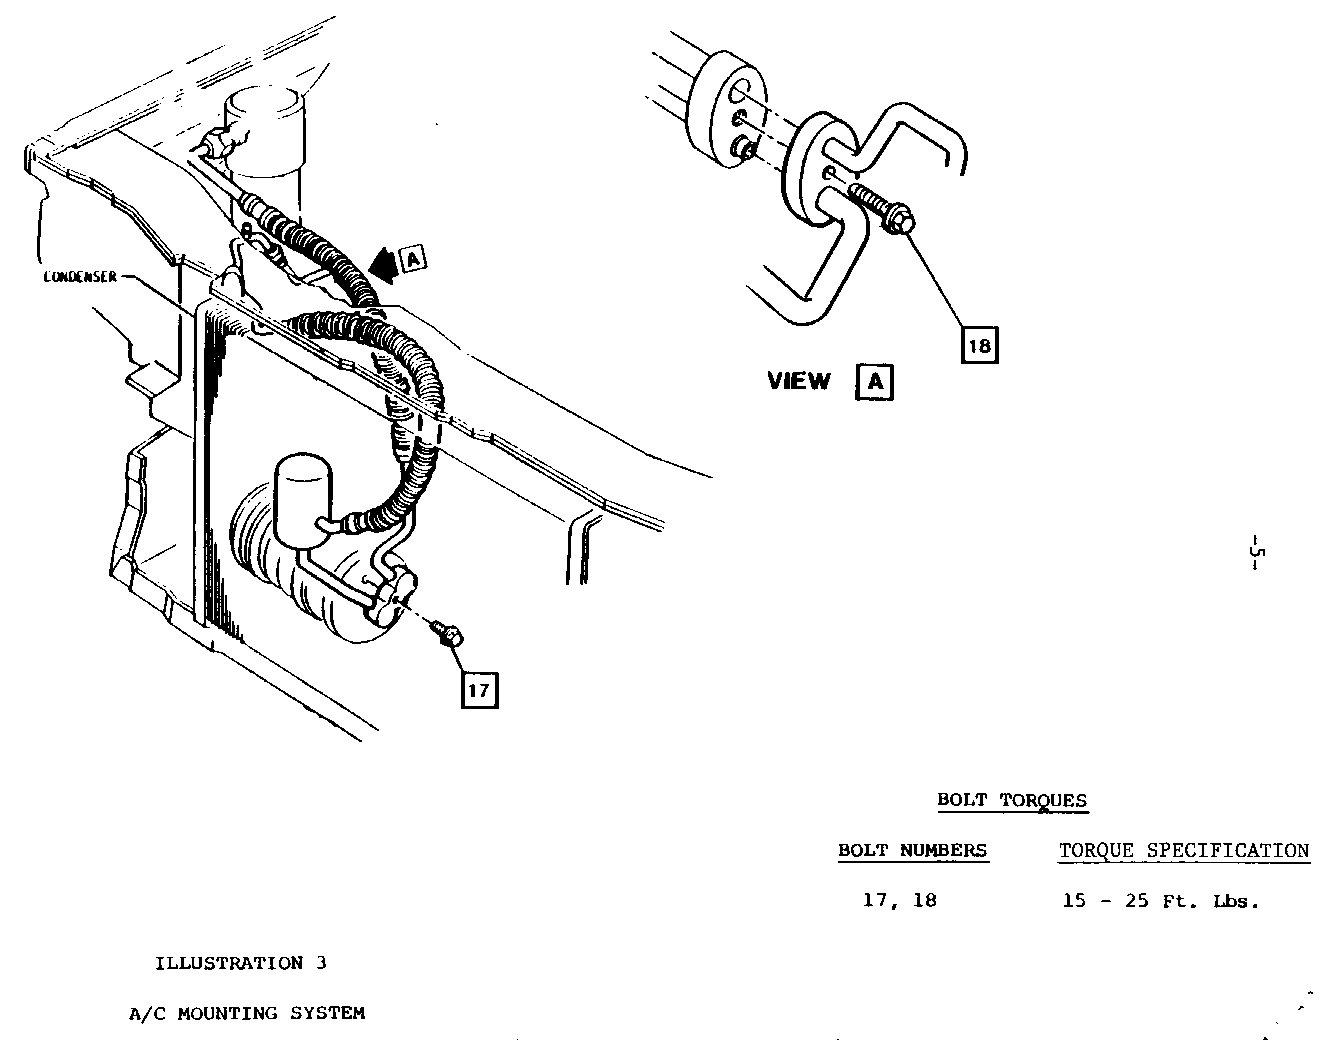
This bulletin gives service procedures for torquing the eighteen (18) A/C mounting bolts when replacing (A) a discharge line or (B) compressor. Some subject vehicles may experience a broken A/C discharge pipe at the compressor, caused by under torqued compressor mounting system bolts. PROPER TORQUE IS CRITICAL. USE TORQUE WRENCH WHEN PERFORMING SERVICE PROCEDURE.
(A). Service Procedure For Replacing Discharge Line & Torque Sequence
If system has been discharged and open to the atmosphere for an extended period, follow nomal shop procedures for proper cleaning and recharge.
1. Disconnect negative battery cable.
2. Evacuate refrigerant gas.
3. Disconnect discharge line at condenser block, accumulator, and pressure valve. Move ends to manifold area to facilitate removal from bottom of vehicle.
4. Raise vehicle on hoist.
5. Remove right front wheel.
6. Disconnect right front of wheelhouse inner liner and fold back over brake rotor.
7. Torque bolts 3, 4, and 6 to specifications, see illustration 1-3.
8. Loosen adjusting arm brace bolts (1 & 2) and remove slot bolt (2). Torque bolt 7 to specifications.
9. Loosen the exhaust pipe at the manifold.
10. Remove A/C to starter brace.
11. Tie exhaust system away from compressor.
12. Torque bolts 9, 10, and 11 to specifications
13. Remove Compressor block fitting.
14. Remove A/C compressor attaching bolts 5 and 8. Lay compressor aside to gain access to upper compressor mounting bracket. Secure compressor.
15. Remove discharge line from bottom of vehicle.
16. Torque bolts 12, 13 and 14 to specification.
17. Insert new discharge line from bottom of vehicle. Lubricate O-ring with refrigerant oil.
18. Install upper attaching bolts 5 and 8. Don't tighten.
19. Attach compressor block fitting. Torque bolt 17 to specification.
20. Install adjustment arm bolt 2, tension belt. Torque bolts 1, 2, 5, and 8 to specification.
21. Install exhaust pipe to manifold. Do not tighten.
22. Install A/C to starter brace. Torque bolts 15 and 16 to specification.
23. Tighten exhaust bolts.
24. Install wheelhouse inner liner.
25. Install right front wheel.
26. Lower vehicle.
27. Install discharge line. Torque bolt 18 to specification.
28. Evacuate A/C system.
29. Refill refrigerant gas.
30. Install battery cable.
(B) Service Procedure For Replacing Compressor and Torquing
1. Follow shop manual procedures for removal and replacement of compressor.
2. Torque the eighteen (18) mounting bolts to the specifications on pages 1-3.
Labor Operation Labor Number Time ------ ---- Replace discharge line/adjust torque. T1152 1.1 Hours
Replace compressor/adjust torque. Use applicable labor operation. To evacuate and recharge A/C system. .5 Hours


General Motors bulletins are intended for use by professional technicians, not a "do-it-yourselfer". They are written to inform those technicians of conditions that may occur on some vehicles, or to provide information that could assist in the proper service of a vehicle. Properly trained technicians have the equipment, tools, safety instructions and know-how to do a job properly and safely. If a condition is described, do not assume that the bulletin applies to your vehicle, or that your vehicle will have that condition. See a General Motors dealer servicing your brand of General Motors vehicle for information on whether your vehicle may benefit from the information.
