For 1990-2009 cars only
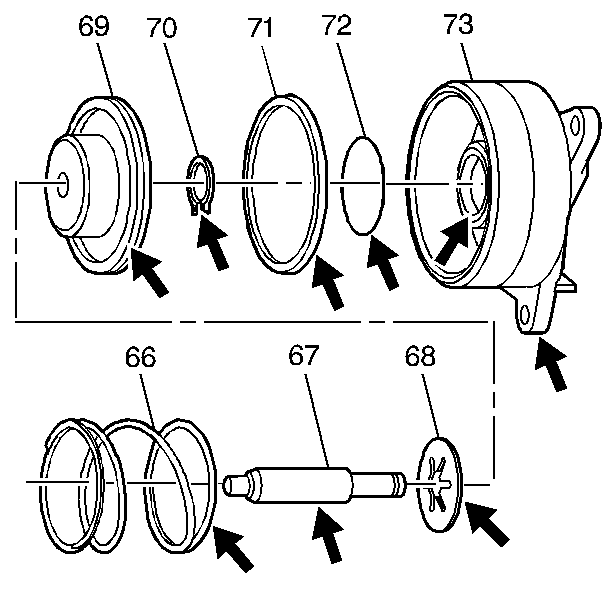
- Remove the piston pin assembly (67-70) from the servo cover (73).
- Remove the snap ring (70) from the servo pin (67).
- Remove the piston (69) and the servo cushion springs (68) from the servo pin (67).
- Remove the outer (71) servo piston seal from the cover (73).
- Remove the inner (72) servo piston seal from the cover (73).
- Discard the servo piston seals (71 and 72).
- Inspect all the components for damage.
- Inspect the fluid feed holes for the proper opening.
- Inspect the bolt hole threads for debris or stripping.
- Inspect the seal grooves for damage.
- Clean and dry each component.
- Assemble the servo cushion springs (68) and servo piston (69) onto the servo pin (67).
- Install the snap ring onto the servo pin (67) in order to retain the servo cushion springs (68) and the servo piston (69).
- Assemble the new seals (71, 72) onto the servo piston (69) and the servo cover (73).
- Assemble the servo piston assembly (67-70) into the servo cover (73). Lubricate the piston seals with transmission fluid in order to aid in assembly.
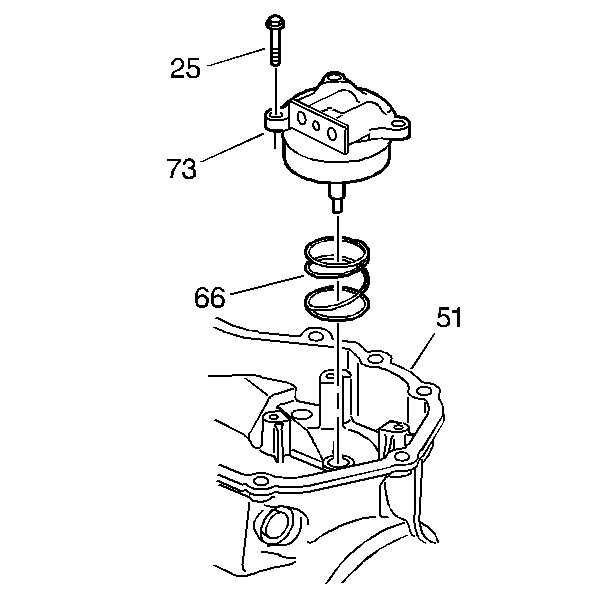
- Install the servo return spring (66) onto the transmission case (51).
- Install the servo cover and piston assembly over the servo return spring (66).
- Install the three servo cover bolts (25). Hand start and then tighten the bolts to 12 N·m (9 lb ft).


