Caution: Handle the piston carefully. Worn piston rings are sharp
and may cause bodily injury.
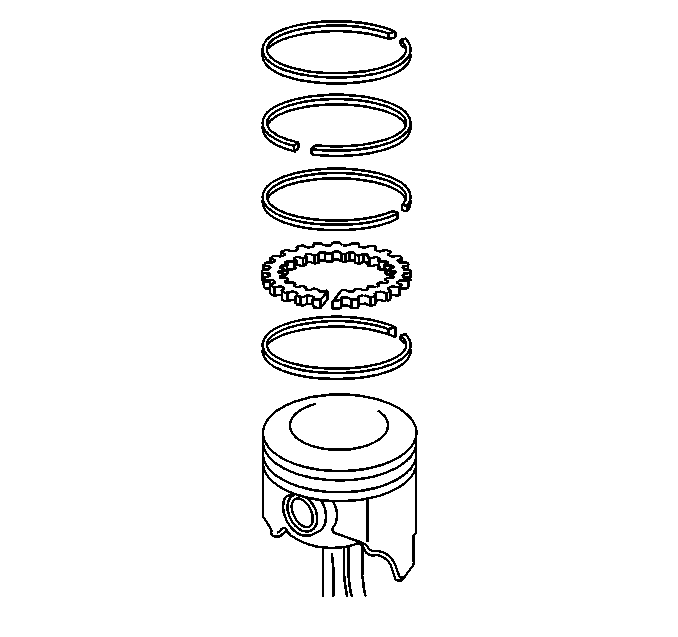
- Disassemble the piston rings. Use a suitable
tool in order to expand the rings. The piston rings must not be reused.
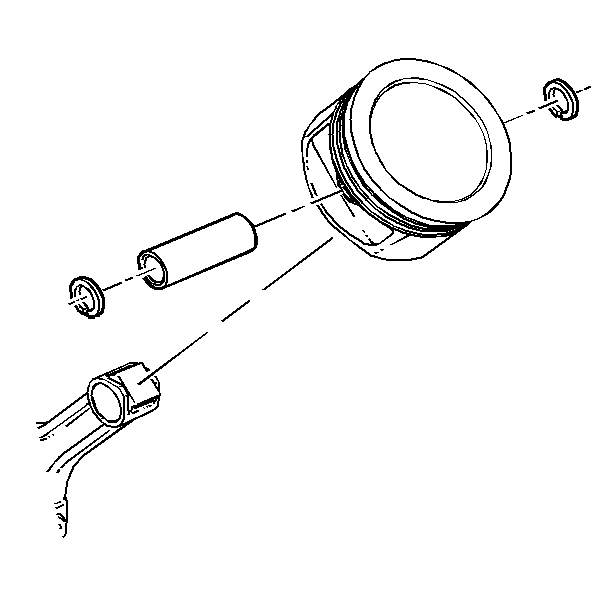
Important: Two retainers hold the piston pins in place. No special tools are required
to remove or install the retainers or the piston pins. If the retainers are
not damaged, reuse the retainers. Ensure that the piston pin is not damaged.
- Disassemble the piston pin retaining clips.
- Disassemble the piston pin.
Important: Install the piston onto the connecting rod in either direction.
- Assemble the connecting rod and the piston.
Notice: Install the piston pin retainers correctly in the retaining groove during
assembly in order to avoid engine damage.
- Use the following procedure in order to assemble the piston pin and
the retainer:
| 5.1. | Coat the piston pin with oil. |
| 5.2. | Install one side of one piston pin retainer into the retaining
groove. Rotate the retainer until it is fully seated in the groove. |
| 5.3. | Install the connecting rod and the piston pin. |
Push the piston pin until it bottoms in the previously installed retainer.
| 5.4. | Install the second piston pin retainer. |
| 5.5. | Ensure that the piston moves freely. |
Notice: Use a piston ring expander to install the piston rings. The rings may
be damaged if expanded more than necessary.
- Install the following components of the
oil control ring assembly (bottom ring):
| 6.2. | The lower oil control ring |
| 6.3. | The upper control ring |
- Install the lower compression ring (second ring). Place the manufacturer's
mark facing up.
- Install the upper compression ring (top ring).
