Tools Required
| • | J 8062 Valve
Spring Compressor |
Disassembly Procedure
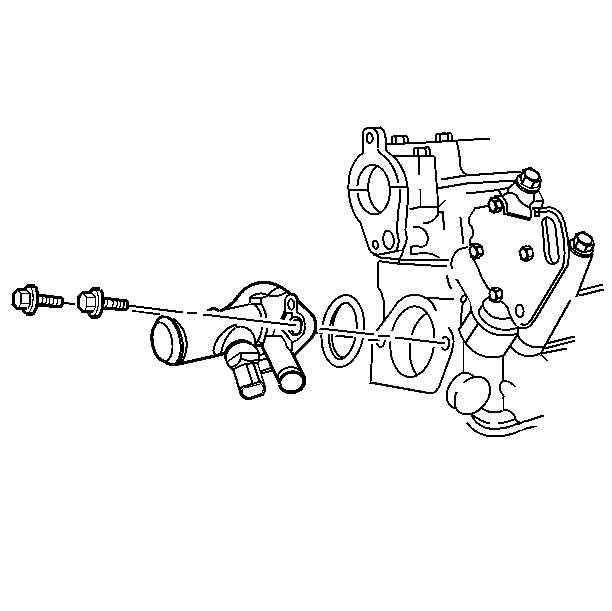
- Remove the coolant outlet.
- Remove valve train components.
Important: Ensure that the valve train components are kept together and identified
in order for proper re-installation in their original position.
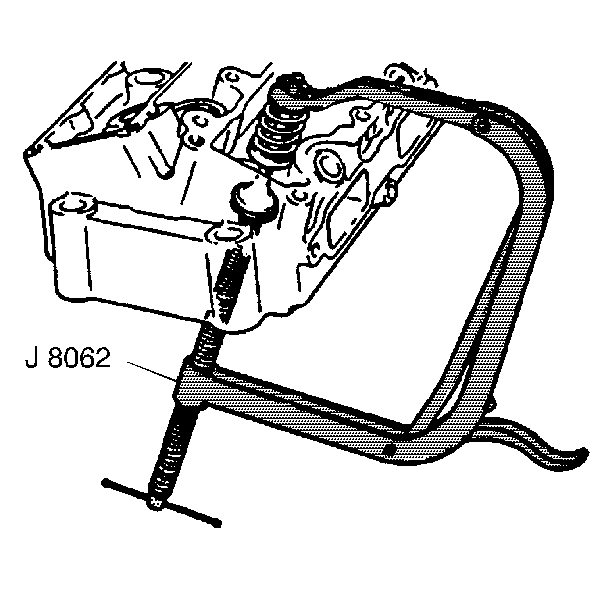
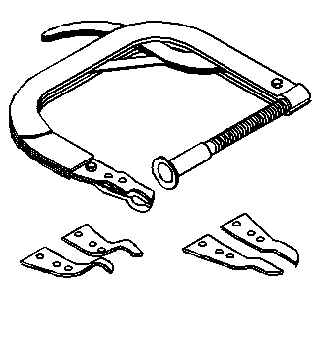
- Compress the valve spring. Use the J 8062
.
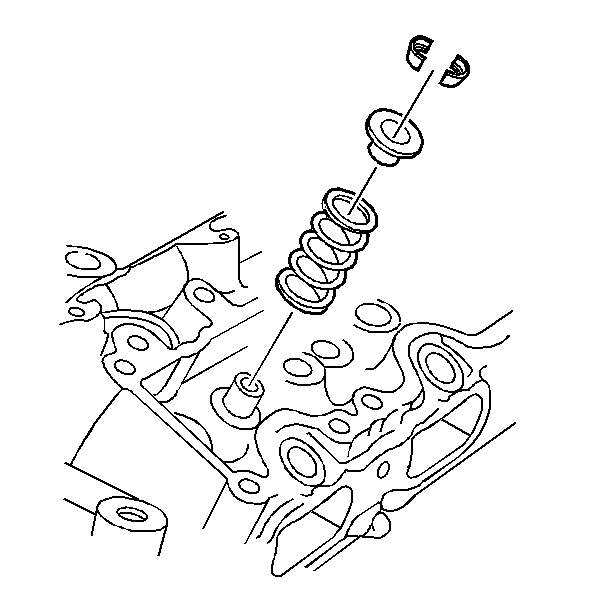
- Remove the valve keys.
- Slowly release the J 8062
from the valve spring assembly.
- Remove the retainer.
- Remove the spring.
- Remove the spring seat (exhaust only) or valve rotator (intake
only).
Notice: Do not damage the valve guide. Remove any burrs that have formed at
the key groove by chamfering the valve stem with an oil stone or a file.
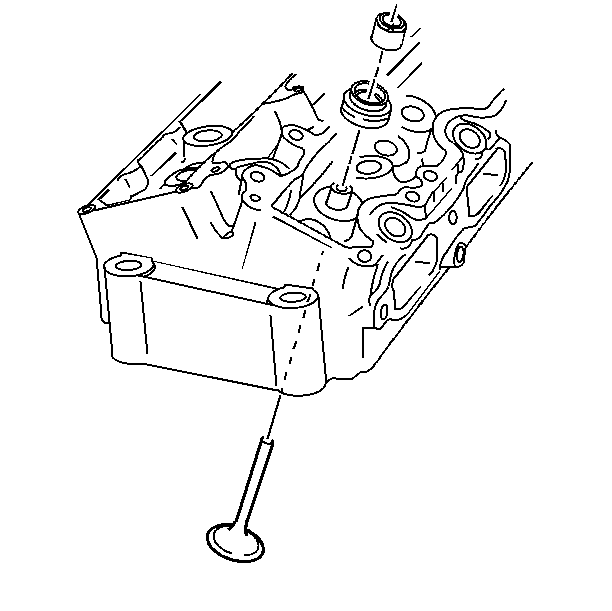
- Remove the valve seal. Use the J 36017
.
- Remove the rotator with intake only.
- Remove the valve.
Valve Cleaning and Inspection Procedure
Important: Do not scratch the valve stem with the wire brush.
- Clean the valves of carbon, oil and varnish. Carbon can be removed with
a wire brush, varnish can be removed by soaking in Parts Immersion Solvent
GM P/N 12345368 or equivalent.
- Clean the valve guides.
- Inspect the valve stem for wear. The valve stem end may be reconditioned
by grinding.
- Follow the grinder manufacturer's instructions. Ensure the new
surface is perpendicular to the valve stem.
- Inspect the valve keeper groove chipping or wear. Replace the
valve if chipped or worn.
- Inspect the valve face for burning or cracking. If pieces are
broken off, inspect the corresponding piston and cylinder head area for damage.
- Inspect the valve stem for burrs and scratches. Burrs and minor
scratches may be removed with an oil stone.
- Inspect the valve stem for straightness and the valve head for
bending or distortion. Use V blocks. Bent or distorted valves must be replaced.
- Clean the deposits from the valve face. Inspect the valve face
for grooving.
- Replace the valve if the face is grooved. Valve faces cannot be
machined. If worn, or damaged, the valves must be replaced.
- The valves may be lightly lapped to the valve seats.
Cylinder Head and Gasket Surface Cleaning and Inspection Procedure
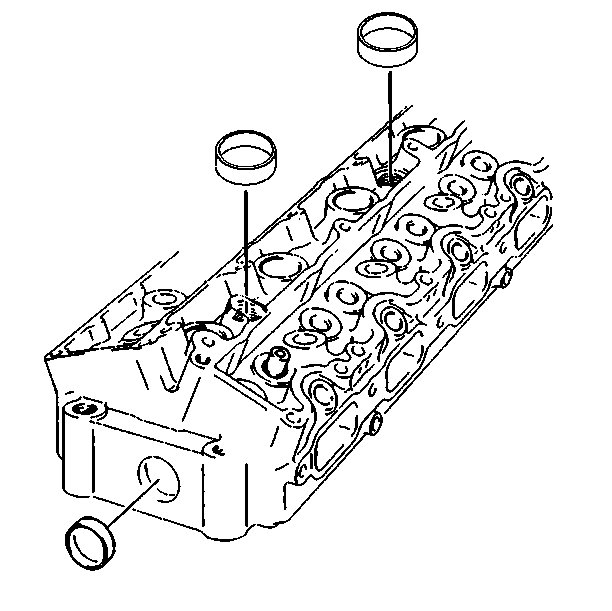
- Use the following procedure to remove the cylinder head cup plugs:
| 1.1. | Obtain a suitable self-threading screw. |
| 1.2. | Drill a hole in the plug. |
| 1.3. | Install the self-threading screw. |
| 1.4. | Pry out the plug and discard it. |
| 1.5. | Remove the spark plugs. |
- Inspect the cylinder head gasket and mating surfaces for leaks,
corrosion and blow-by. If the gasket has failed, use the following faults
to determine the cause:
| 2.1. | Improper installation |
| 2.2. | Loose or warped cylinder head |
| 2.3. | Missing, off location or not fully seated dowel pins |
| 2.4. | Corrosion stamps in the seal area around the coolant passages |
| 2.5. | Chips in the cylinder head bolt holes |
| 2.6. | Bolt holes in the cylinder block not drilled or tapped deep enough |
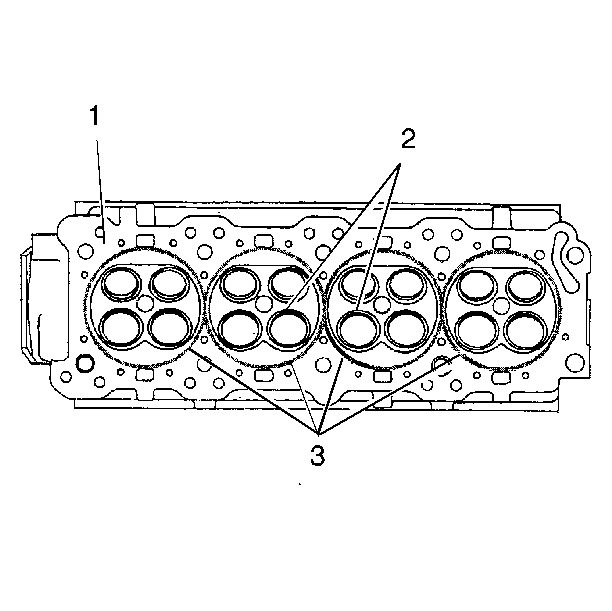
- Inspect the cylinder head gasket surface.
| • | Cylinder head may be reused if corrosion is found only outside
a 4 mm (0.375 in) band around each combustion chamber (1). |
| • | Replace the cylinder head if the area between the valve seats
is cracked (2). |
| • | Replace the cylinder head if corrosion has been found inside
a 4 mm (0.375 in) band around each combustion chamber (3). |
- Clean the cylinder head bolts.
Important: Do not use a wire brush on any gasket sealing surface.
- Clean the cylinder head. Remove all varnish, soot and carbon to the
bare metal.
- Clean the valve guides.
- Clean the threaded holes. Use a nylon bristle brush.
- Clean the remains of the sealer from the plug holes.
- Inspect the cylinder head bolts for damaged threads or stretching
and damaged heads caused by improper use of tools.
- Replace all suspect bolts.
- Inspect the cylinder head for cracks. Check between the valve
seats and in the exhaust ports.
Important: Do not attempt to weld the cylinder head, replace it.
- Inspect the cylinder head deck for corrosion, sand inclusions and blow
holes.
- Inspect the cylinder head deck, the intake and exhaust manifold mating
surfaces for flatness. These surfaces may be reconditioned by parallel grinding.
- Use the following steps to determine the amount of reconditioning
needed:
| • | If the warpage is less than 0.076 mm (0.003 in),
reuse the cylinder head but do not resurface. |
| • | If the warpage is between 0.076 mm (0.003 in) and
0.25 mm (0.010 in), resurface the cylinder head before reusing. |
| • | If the warpage is over 0.25 mm (0.010 in), discard
the cylinder head. |
- Inspect all the threaded holes for damage. Threads may be reconditioned
with thread inserts.
- Inspect the sealing surfaces.
- Inspect the cylinder head plugs.
Important: Because the valve guide serves to support and center the valve grinder,
it is essential that the valve guide is cleaned properly. If the valve guide
requires reaming, this must be done first.
- Inspect the valve seats for excessive wear and burned spots. Valve seats
may be reconditioned by grinding. If grinding results in the new seat being
too wide it may be narrowed by using a 20 degree or 70 degree
stone. The 20 degree stone will lower the seat and the 70 degree
stone will raise the seat.
Assembly Procedure
- Install the new cylinder head plug. Coat the plugs with Head Gasket
Sealer GM P/N 1050026 or equivalent.
Notice: In order to avoid damage, install the spark plugs after the cylinder
head has been installed on the engine.
- Install the valve mechanism.
- Install the valve spring retainers.
- Install the coolant outlet.
Tighten
Tighten the bolts to 26 N·m (19 lb ft). Refer
to
Notice: Use the correct fastener in the correct location. Replacement fasteners
must be the correct part number for that application. Fasteners requiring
replacement or fasteners requiring the use of thread locking compound or sealant
are identified in the service procedure. Do not use paints, lubricants, or
corrosion inhibitors on fasteners or fastener joint surfaces unless specified.
These coatings affect fastener torque and joint clamping force and may damage
the fastener. Use the correct tightening sequence and specifications when
installing fasteners in order to avoid damage to parts and systems.
in
General Information.
Notice: Clean the valve guides before reaming. Packing of chips or carbon may
result in the reamer jamming into the valve guide or broken reamer flutes.
- Use the following steps to measure the valve guide clearance:
| 5.1. | With a hole gauge, measure the valve guide I.D. With a micrometer
measure the valve stem. Compare the valve guide I.D. and the valve stem measurements.
Refer to engine specifications for allowable clearance. |
| 5.2. | The valve guides may be reamed oversize and an oversized valve
may be installed. Do not knurl the valve guides. |
- Inspect the valve springs. Refer to engine specifications for
the tolerances.
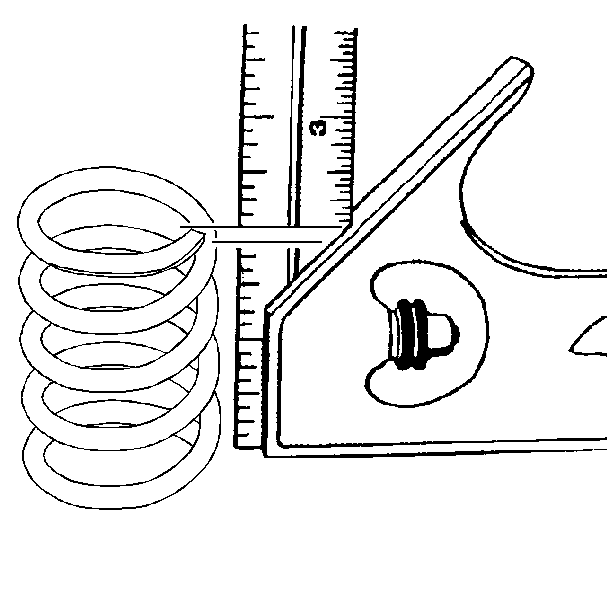
- Look for the following conditions when inspecting the valve springs:
| • | Spring tension using J 9666
. |
- Inspect the valve spring seating surface of the valve rotators
and spring seats for wear or gouging. Replace as required.
- Assemble the valves.
- Use the following steps to measure valve runout:
| 10.1. | Apply a dab of Prussian blue on the entire valve face. Seat the
valve but do not rotate it. The Prussian blue traces transferred to the valve
seat are an indication of concentricity of the valve seat. |
| 10.2. | Clean all traces of Prussian blue. |
| 10.3. | Apply a dab of Prussian blue on the valve seat and repeat the
check. The traces of Prussian blue transferred to the valveface indicate valve
face concentricity. |
| 10.4. | Recondition the valve seat or replace the valves, if required. |
- Install the rotator.
- Install the new valve seal. Fully seat the seals on the valve
guides.
- Install the spring seat (exhaust only) or valve rotator (intake only).
- Install the spring.
- Install the retainer.
- Compress the valve spring. Use the J 8062
.
- Install the valve keys.
- Slowly release the J 8062
from the valve/spring assembly.
- Inspect for proper valve key seating.
