Removal Procedure
- Remove the valve rocker arm cover. Refer to Valve Rocker Arm Cover Replacement .
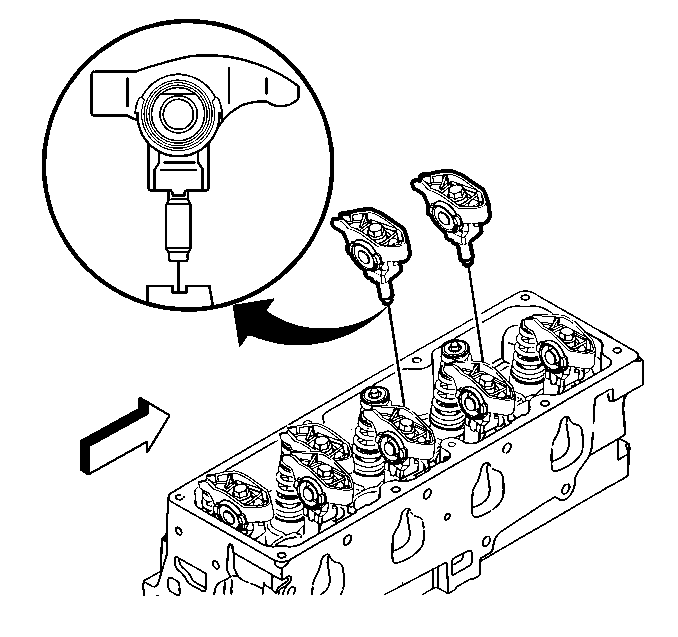
- Remove the rocker arm bolt.
- Remove the rocker arm.
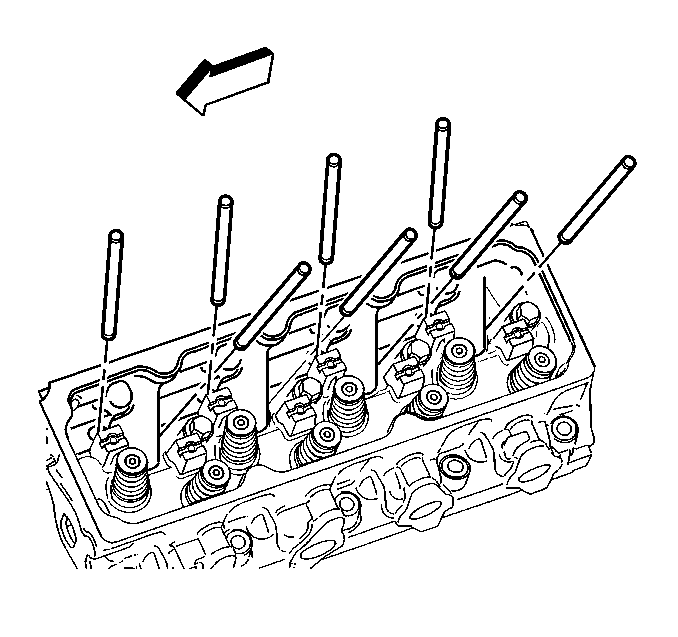
- Remove the pushrod.
Important: Place the components in a rack in order of disassembly so they can be reinstalled at the same location and with the same mating surface as when removed.
Installation Procedure
- Install the pushrods, making sure that they seat in the lifters.
- Install the rocker arms.
- Apply Dri-Slide Moly lubricant GM P/N 1052948 (Canadian P/N 992926) or equivalent to the threads of the bolts.
- Install the rocker arm bolts.
- Install the valve rocker arm cover. Refer to Valve Rocker Arm Cover Replacement .
Important: Whenever new rocker arms and/or rocker arm balls are being installed, coat the bearing surfaces of the rocker arms and the rocker arm balls with camshaft assembly lube GM P/N 1052365 or equivalent.
Notice: Use the correct fastener in the correct location. Replacement fasteners must be the correct part number for that application. Fasteners requiring replacement or fasteners requiring the use of thread locking compound or sealant are identified in the service procedure. Do not use paints, lubricants, or corrosion inhibitors on fasteners or fastener joint surfaces unless specified. These coatings affect fastener torque and joint clamping force and may damage the fastener. Use the correct tightening sequence and specifications when installing fasteners in order to avoid damage to parts and systems.
Tighten
Tighten the nuts to 30 N·m (22 lb ft).
