For 1990-2009 cars only
Tools Required
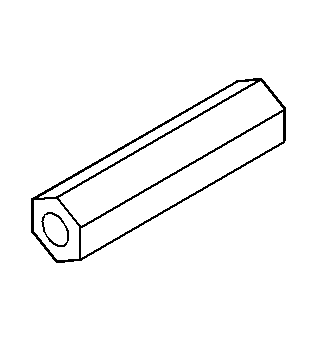
| • | J 21474-18 3/8 Inch Nut |
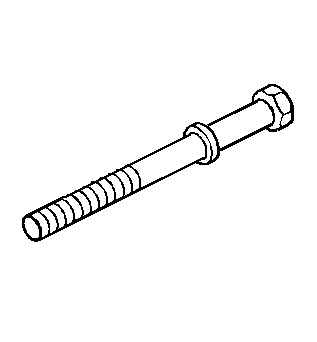
| • | J 21474-19 3/8 Inch Bolt |
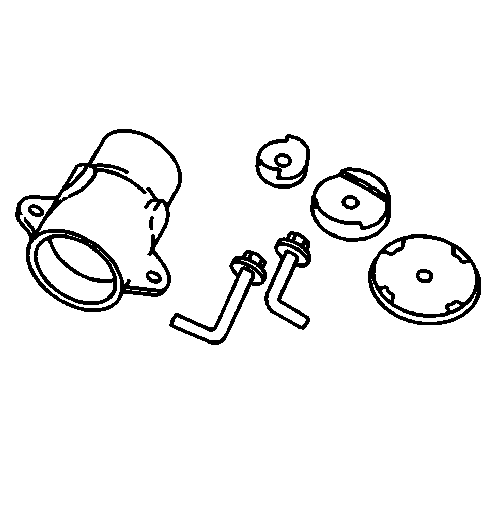
| • | J 29376-A Rear Control Arm Bushing Service Set |
| • | J 29376-95 Rear Control Arm Bushing Adapter |
Removal Procedure
- Raise and support the vehicle. Refer to Lifting and Jacking the Vehicle in General Information.
- Remove the tire and wheel assemblies. Refer to Tire and Wheel Removal and Installation in Tires and Wheels.
- Disconnect the brake hoses from the axle. Refer to Rear Brake Hose Replacement in Hydraulic Brakes.
- Remove the wheel speed sensor harness from the retainers on the axle.
- Remove the following components from the control arm:
- Rotate the control arm downward in order to gain access to the bushings.
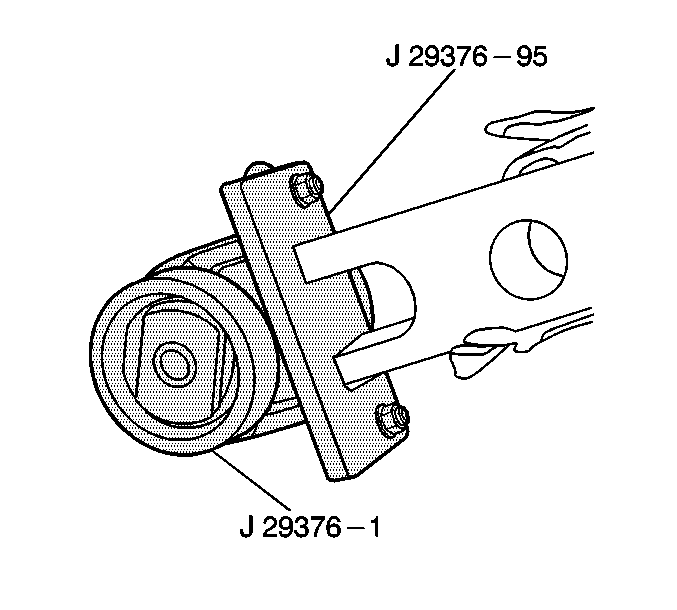
- Install the J 29376-95 on the rear control arm.
- Install the coupling from theJ 29376-A to the J 29376-95 on the rear control arm.
- Assemble the following bushing removal tools as shown:
- Tighten the J 21474-19 until the bushing is removed from the control arm.
- Disassemble the bushing removal tools.
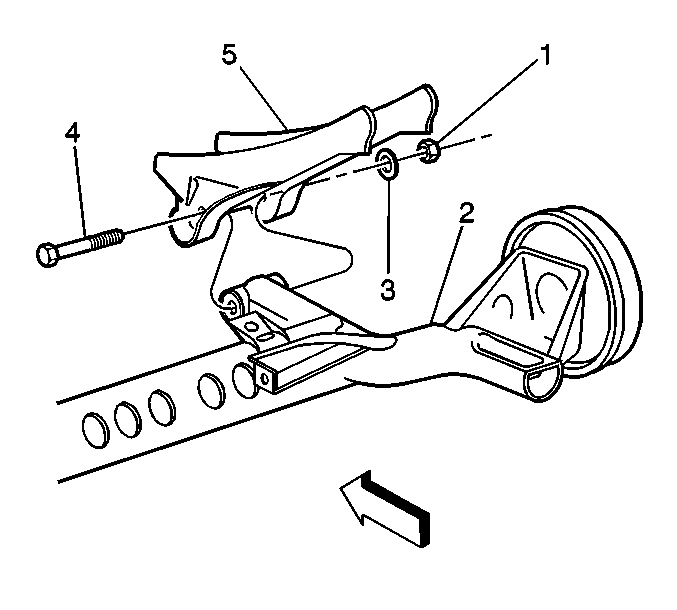
| • | The bolts (4) |
| • | The washers (3) |
| • | The nuts (1) |
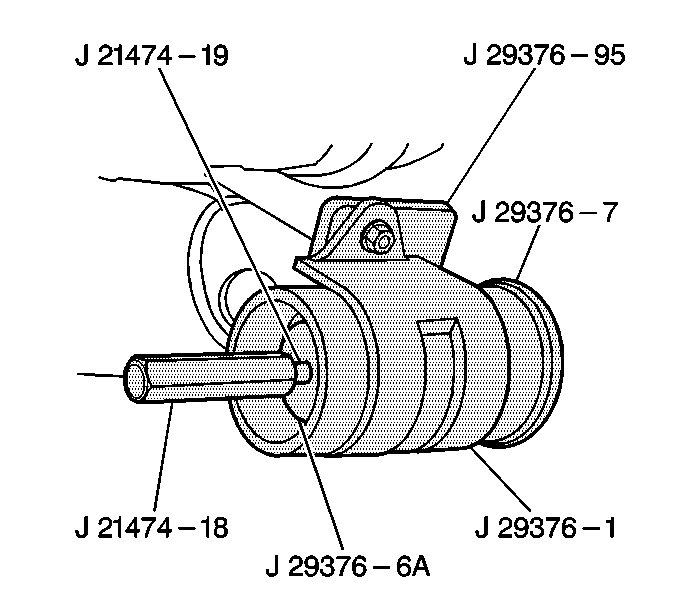
| 9.1. | J 21474-19 |
| 9.2. | The remover from the J 29376-A |
| 9.3. | The pressure plate from the J 29376-A |
| 9.4. | J 21474-18 |
Installation Procedure
- Coat the outside case of the bushing with a light coat of grease prior to installation.
- Insert the bushing into the control arm.
- Assemble the following bushing installation tools as shown:
- Tighten the J 21474-19 until the bushing is completely seated in the control arm.
- Disassemble the bushing installation tools.
- Install the following components:
- Hand tighten the nuts.
- Install the wheel speed sensor harness to the rear axle.
- Connect the brake hoses to the rear axle. Refer to Rear Brake Hose Replacement in Hydraulic Brakes.
- Install the tire and wheel assemblies. Refer to Tire and Wheel Removal and Installation in Tires and Wheels.
- Lower the vehicle.
- Tighten the control arm nuts.
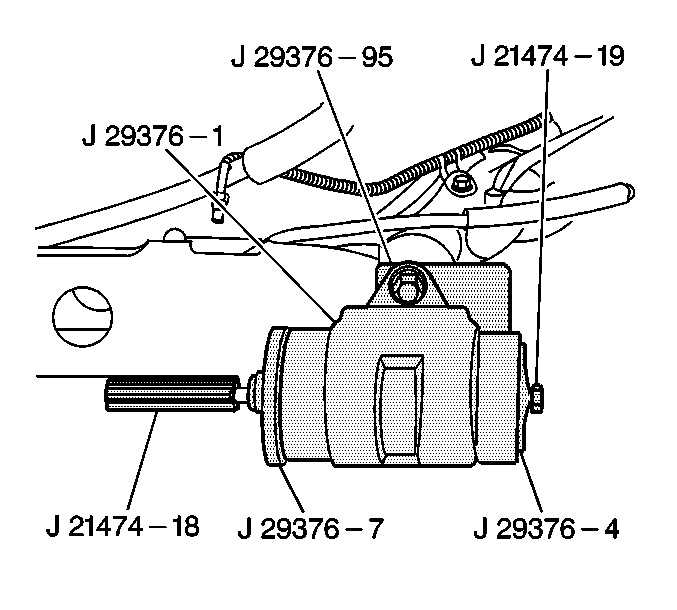
| 3.1. | J 21474-19 |
| 3.2. | The pressure plate from the J 29376-A |
| 3.3. | The installer from the J 29376-A |
| 3.4. | J 21474-18 |
| • | The bolts (4) |
| • | The nuts (1) |
| • | The washers (3) |
Notice: Refer to Fastener Notice in the Preface section.
Tighten
Tighten the control arm nuts to 60 N·m (44 lb ft)
plus 120 degrees.
