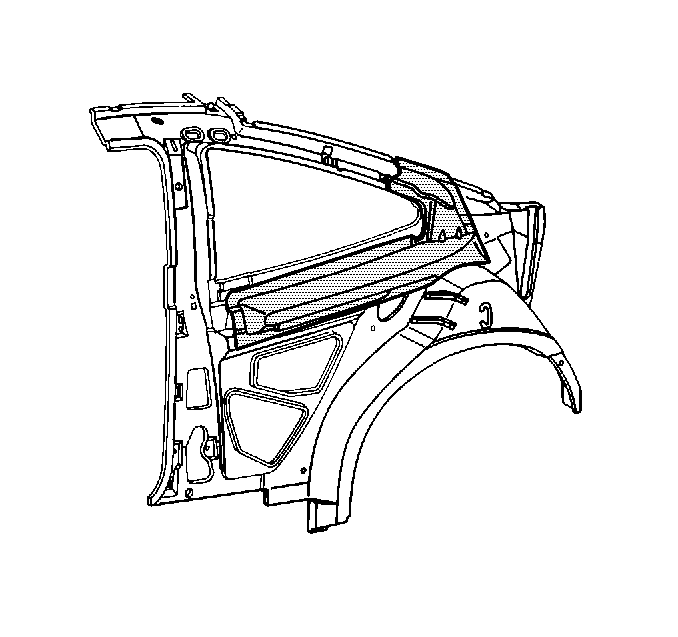
Service Part Preparation Procedure

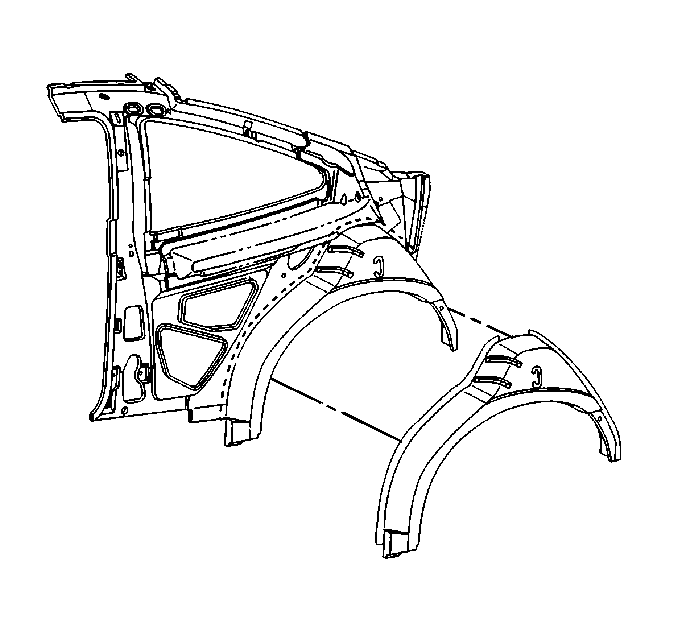
Important: When damage to the rest of the panel is minimal, repair the outer rear
wheelhouse by sectioning. Coupe models have a beltline reinforcement. This
creates unique service concerns. Templates have been developed in order
to ensure proper wheelhouse sectioning on coupes.
Before you remove the damaged section of the panel from the vehicle,
prepare the service assembly for the following reasons:
| • | In order to become familiar with the procedure. |
| • | In order to know exactly where to cut the damaged panel for a
better fit of the new section. |
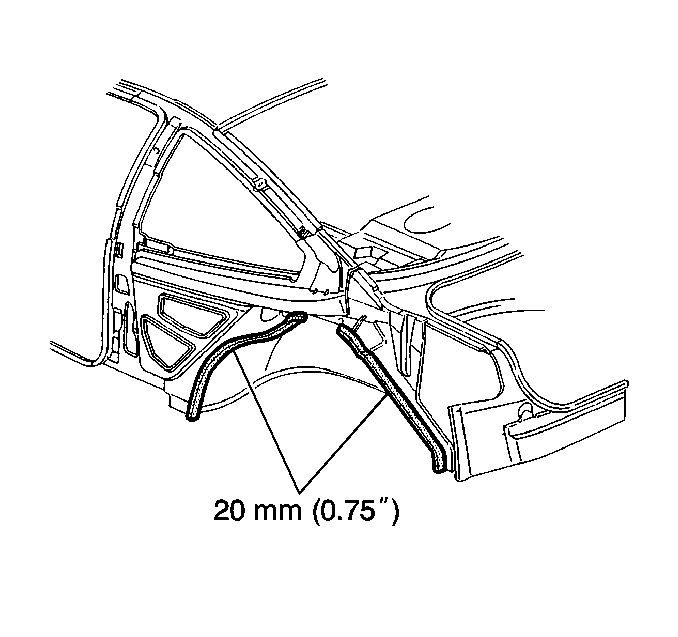
Apply a strip of masking tape that is 20 mm
(¾ in) along the vertical surface of the wheelhouse radius to
form a welding flange.
- For coupe models, align the appropriate template over the gauge
holes according to the template instructions.

- Cut along the top edge
of the tape and at the radius of the wheelhouse, as indicated on the template.
- Remove the excess portion of the wheelhouse
For sedan models, cut along the top edge of the tape.
- Remove the excess portion of the wheelhouse.
Removal Procedure
- Remove all the related panels and the components.
- Visually inspect the damage.
- Remove the following components as necessary:
| • | The anti-corrosion materials |
- Drill out the factory welds at the forward lower portion of the
wheelhouse at the rocker panel.
- For coupe models, drill out the 4 factory welds along the
outboard edge of the beltline reinforcement.
- Apply a strip of 20 mm (¾ in) masking tape
along the horizontal surface of the wheelhouse radius.

- Cut along the outboard
side of the masking tape in order to create a tab for the weld flange on the
new wheelhouse section.
- For coupe models, cut the portion of the wheelhouse under the
beltline reinforcement from inside the wheelhouse.
- Connect the 2 cut lines on either side of the reinforcement.
- Remove the damaged section of the wheelhouse.
Installation Procedure
- Temporarily install the wheelhouse service part to ensure a proper
fit.
- For coupe models, fit the forward lower portion
- Slide the weld flange over the tab on the original section and
under the beltline reinforcement.

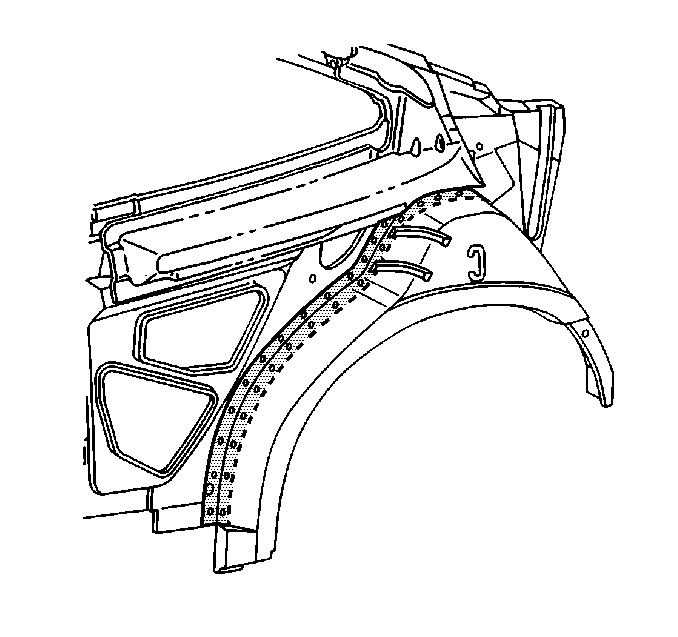
- Mark plug weld holes every
40 mm (1 ½ in) along the weld flange on the service
part.
- Alternate the plug weld holes between the vertical and the horizontal
surfaces in order to ensure uniform strength.
- Remove the service part.
- Drill 8 mm (5/16 in) along the weld flange on the
service part.
- Prepare the mating surfaces.
- Position the service part.
- Randomly MIG plug weld previously drilled holes. Do not warp or
distort the metal.
- Measure frequently using the body dimensions in order to ensure
a proper fit.
- Plug weld the factory welds at the forward lower portion of the
wheelhouse at the rocker panel.
- For coupe models, plug weld the 4 factory welds along the
outboard edge of the beltline reinforcement.
Important: Prior to refinishing, refer to GM 4901MD-99 Refinish Manual for
recommended products. Do not combine paint systems. Refer to paint manufacturer's
recommendations.
- Prime with a two-part catalyzed primer.
- Apply the following as necessary:
| • | The anti-corrosion materials |
- Install all the related panels and the components.


