DISTRESSED SECOND CLUTCH 440-T4/4T60 DIAGNOSIS

Model and Year: 1984-90 A CAR AND 1990 W CAR WITH 440-T4/4T60 AUTOMATIC TRANSMISSION
Second clutch diagnosis tips - all 1984-90 Hydra-matic 4T60 (THM440-T4) transaxles.
A worn or damaged second clutch in a Hydra-matic 4T60 transaxle may exhibit one of the following conditions.
1. Slips or shudders during 1-2 shift.
2. Slips in second gear.
3. No second gear.
When diagnosing a transaxle for one of the above conditions, the following items should be checked first.
1. Test drive the vehicle to verify the condition.
2. Verify proper fluid level.
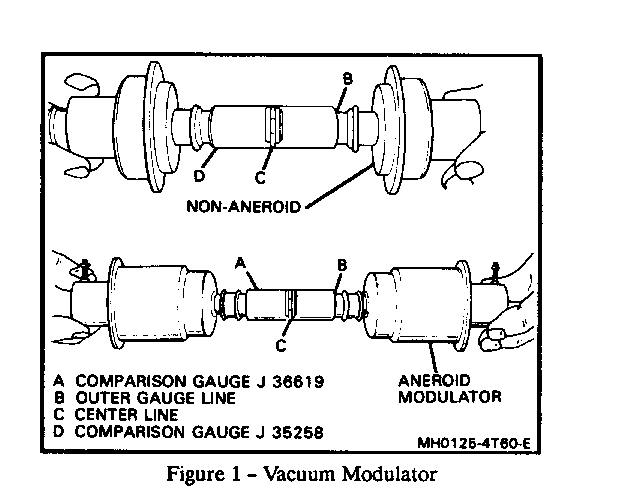
3. Verify proper transmission line pressure according to the chassis service manual procedure. Check minimum pressure by applying 18" of vacuum to the vacuum modulator (use a hand vacuum pump). Check maximum line pressure with no vacuum applied to the vacuum modulator (vacuum line disconnected). Check both minimum and maximum at 1250 RPM in each range. If there is no boost in pressure with zero vacuum, check for an inoperative vacuum modulator or modulator valve. A ruptured aneroid bellows in a vacuum modulator will result in no boost in pressure with zero vacuum applied.
Note: Do not measure maximum pressure by pulling out on the T.V. cable. 1987 and later models will give you a boosted pressure at full T.V. which is not the same as the maximum pressure reading with zero vacuum. Using the T.V. cable can give you a false maximum pressure reading and will not reveal an inoperative vacuum modulator.
4. Use a vacuum gage on the vacuum line at the vacuum modulator end to verify full engine vacuum is available at the vacuum modulator. The vacuum should register immediately as the engine is started and should respond quickly to engine load changes. When you flash the throttle from idle, the vacuum gage should drop instantly and recover as soon as the engine returns to idle. If the response is slow, check for a restriction in the vacuum line. This restriction can trap vacuum in the modulator on acceleration and cause a slip during shifts because of low boost pressures.
Remember that 1990 "W" models with 3.1L engines have a .031" orifice in the modulator end of the line. Do not enlarge or remove this orifice.
Knowing the results of the above checks will help determine the causes of a damaged second clutch once you get inside the transaxle. The second clutch is applied and carrying torque in 2nd, 3rd and 4th gear. Therefore, if fluid level or pressure is low or if the pressure does not boost when the engine is loaded, the 2nd clutch will be one of the first to slip and eventually wear or burn.
Once inside the transaxle there are several items to look for when diagnosing a damaged 2nd clutch:
1. Mispositioned 2nd clutch snap ring.
2. Split, cut or rolled 2nd clutch piston seals or damaged piston.
3. 2nd clutch housing leaking through cracks in the housing or welds.
4. Fluid leaks through 2nd clutch housing check ball or its retainer.
5. Check for deformed or damaged piston return springs in the apply ring and return spring assembly. If these springs are weak, they can allow the 2nd clutch plates to drag while the 2nd clutch is released in 1st and reverse. This can result in premature wear of the 2nd clutch plates.
Note: The piston return springs are easy to overlook but can definitely be a cause of repeat failure of the 2nd clutch.
1984-1986 - driven sprocket support cast iron seals worn or broken. Check for grooves being cut into the inside diameter of the 2nd clutch drum. If so, replace the second clutch drum and install a driven sprocket support with the later style support using Vespel ring seals.
1987-1990 - driven sprocket support Vespel ring seals cracked or broken. Check for damaged or mispositioned four lobe support seals under the Vespel rings.
6. Check the 2nd clutch apply passage which is between the driven sprocket support and bushing. Look for the bushing being out of position or worn. If either condition is found, the driven sprocket support should be replaced. Blow air through the passage to check for restrictions or foreign material. If full apply pressure cannot get through to the clutch it will slip and wear.
7. Check for a leak at the sealing surface where the driven sprocket support contacts the channel plate.

General Motors bulletins are intended for use by professional technicians, not a "do-it-yourselfer". They are written to inform those technicians of conditions that may occur on some vehicles, or to provide information that could assist in the proper service of a vehicle. Properly trained technicians have the equipment, tools, safety instructions and know-how to do a job properly and safely. If a condition is described, do not assume that the bulletin applies to your vehicle, or that your vehicle will have that condition. See a General Motors dealer servicing your brand of General Motors vehicle for information on whether your vehicle may benefit from the information.
